How to Draw an Impossible Square: Easy 10-Step Optical Illusion
Ready to trick the eye? This impossible square tutorial is a fantastic way to introduce young artists to 3D perspective and spatial logic. All you need is a pencil, an eraser, and a steady hand to create this classic geometric paradox.
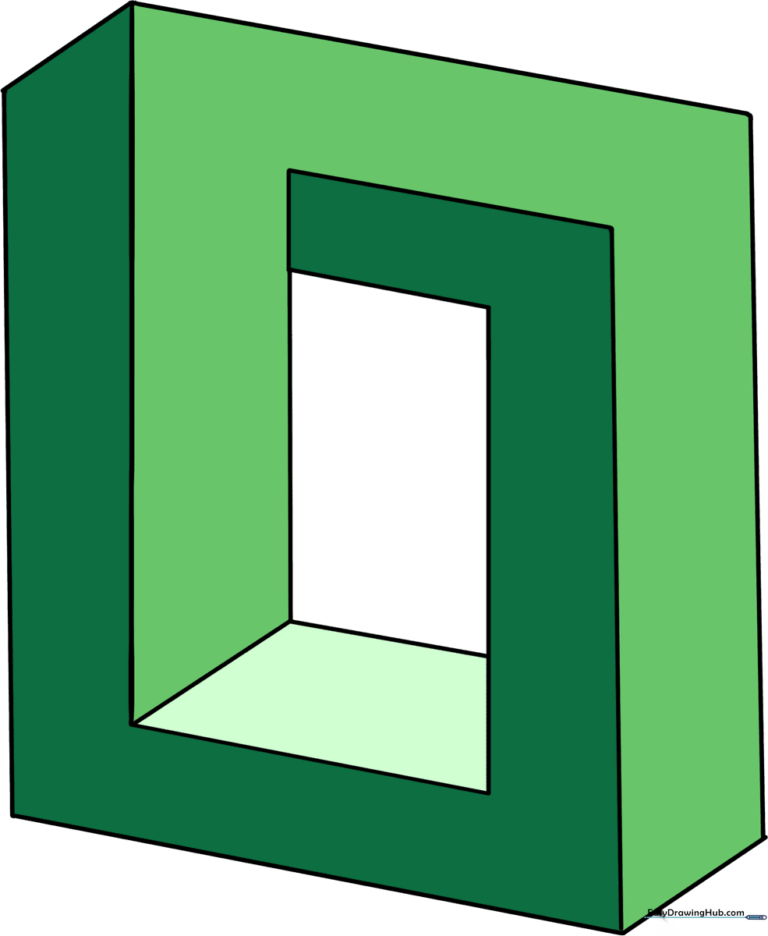
🎯 Final Result
Step-by-Step Instructions
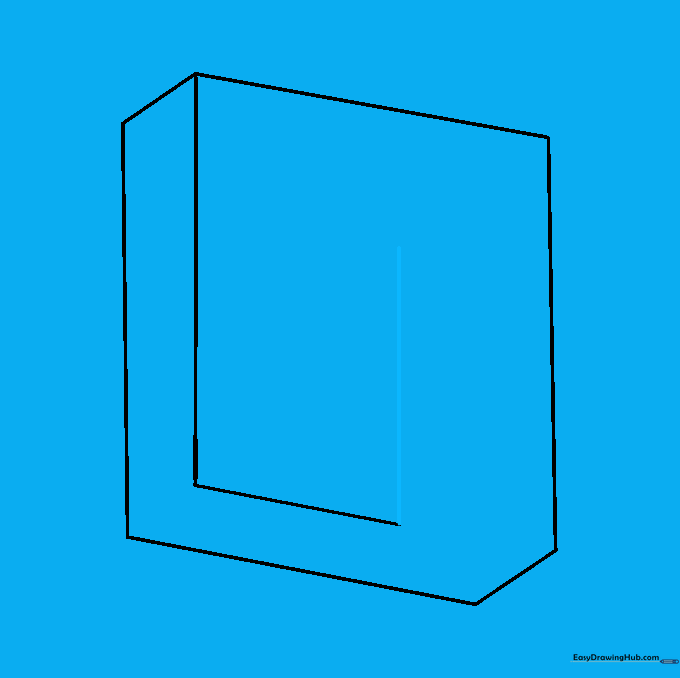
Step 1: Establishing the Base Corner

Draw a vertical line, then add two diagonal lines at the bottom to form a corner. Teacher's Tip: Keep your pencil pressure light here; you'll be overlapping lines later, and you want to be able to clean up your sketch easily.
Step 2: Building the Vertical Frame
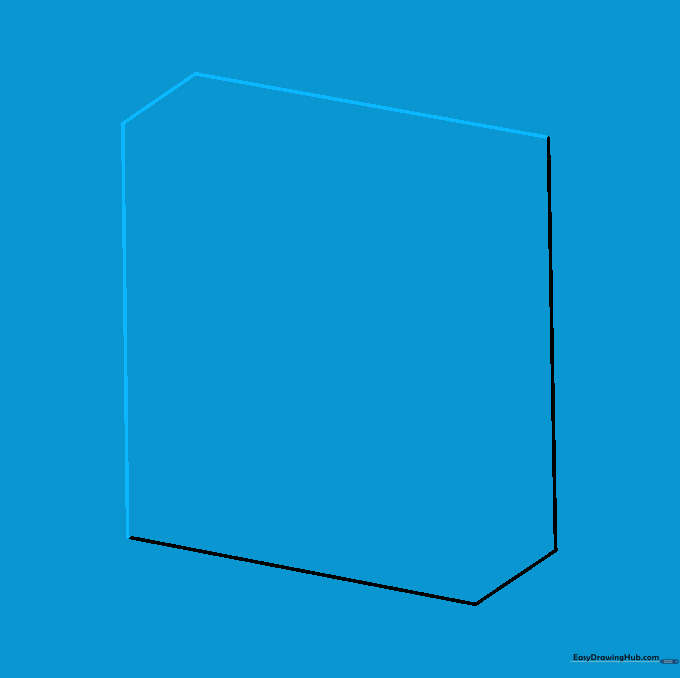
Extend a long vertical line upward from your base, then add a short diagonal and a long connecting line. Tip: Use a ruler if you struggle with straight lines, but try freehand first to build your muscle memory!
Step 3: Defining the Top Corner
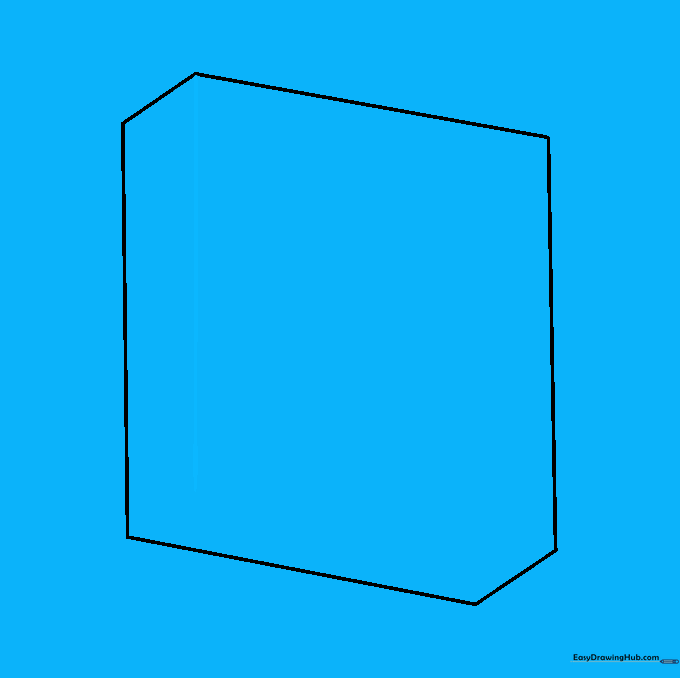
Draw a vertical line downward from the top corner, stopping before it hits the bottom. Tip: Keep this line parallel to your first vertical line to maintain the illusion's perspective.
Step 4: Creating the Bottom Segment
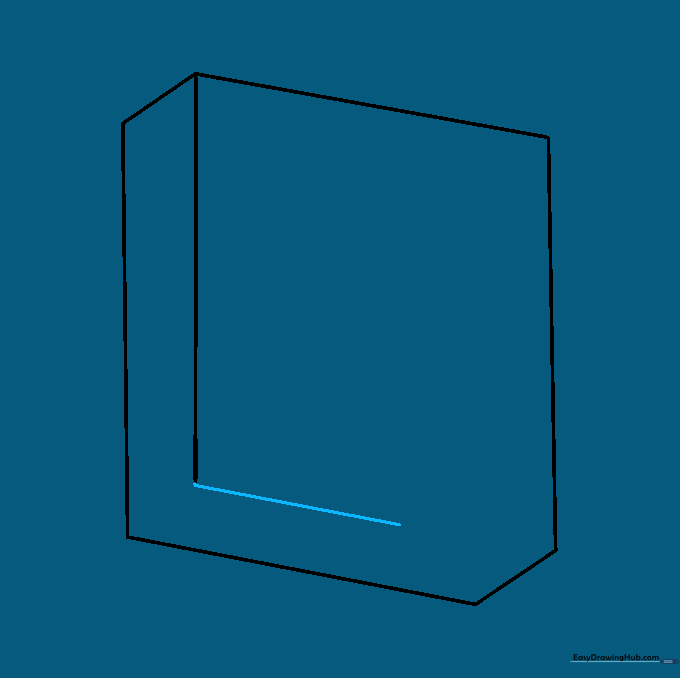
Add a diagonal line parallel to the bottom of the square. Tip: This line acts as the 'floor' of your shape; make sure it aligns perfectly with your previous base lines.
Step 5: Extending the Side
Draw a line upward from the previous segment, keeping it parallel to the side. Tip: Notice the spacing—keeping this gap consistent is the secret to making the square look 'impossible.'
Step 6: Shaping the Top Edge
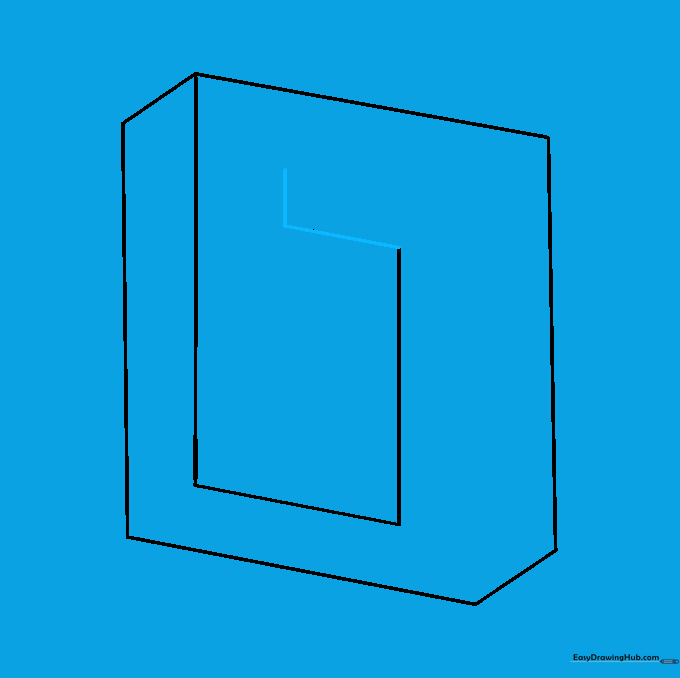
Add a short horizontal line and a small vertical line at the top. Tip: These small segments are crucial for the 'twist' in the illusion, so take your time with these angles.
Step 7: Closing the Loop

Draw a line parallel to the top, then connect it down to the bottom corner. Tip: This is where the shape starts to look like a loop—if it doesn't look right, check that your lines are truly parallel.
Step 8: Detailing the Interior
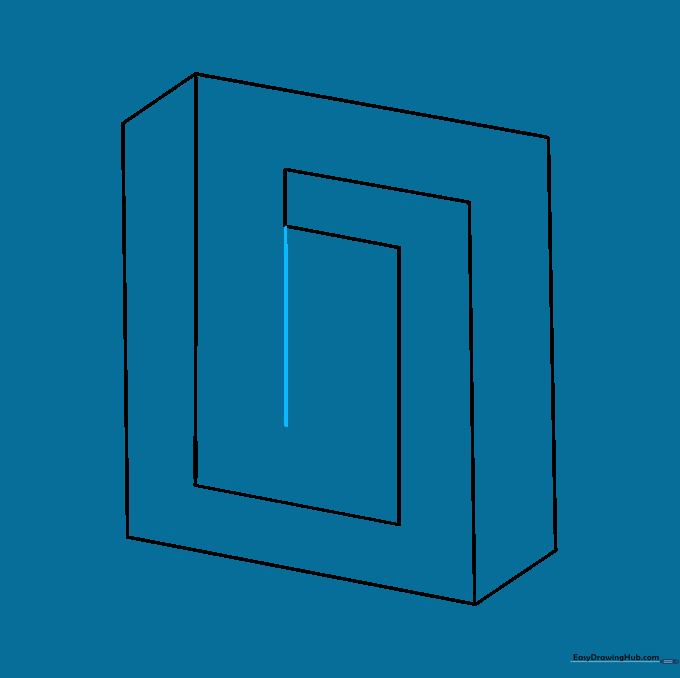
Add a vertical line inside the shape to define the inner corner. Tip: This line creates the depth that makes the square look like it's folding into itself.
Step 9: Finalizing the Geometry

Connect the final interior corners to complete the paradox. Tip: Double-check your connections—the 'impossible' effect relies on these lines meeting exactly at the corners.
Step 10: Adding Color and Contrast
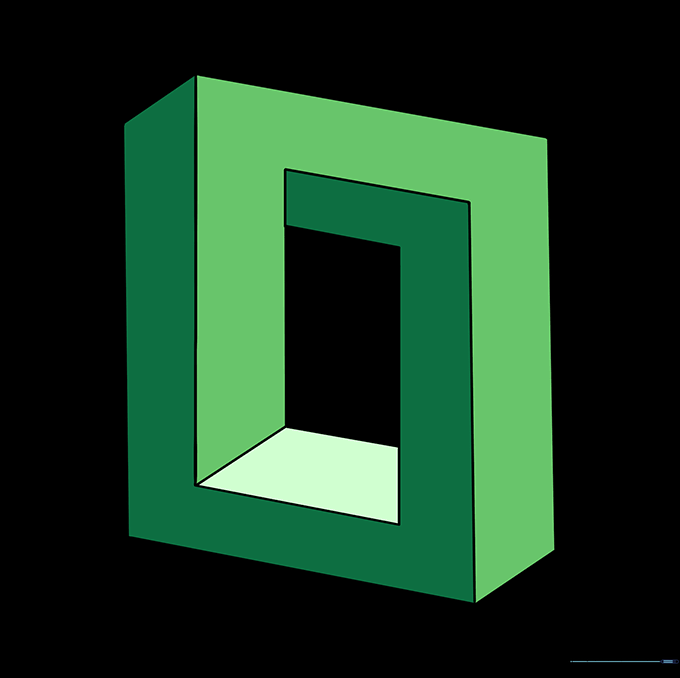
Color your square to make the illusion pop! Tip: Use two different shades of the same color—one for the 'top' surfaces and one for the 'sides'—to emphasize the 3D effect.
More Tutorials


