How to Draw an Ice Skate: Easy 10-Step Guide for Kids
Ready to hit the rink? This tutorial is perfect for young artists ages 5 and up who want to capture the grace of winter sports. You only need a pencil, an eraser, and a piece of paper to get started. Follow along to build confidence in your sketching skills while creating a classic ice skate design.
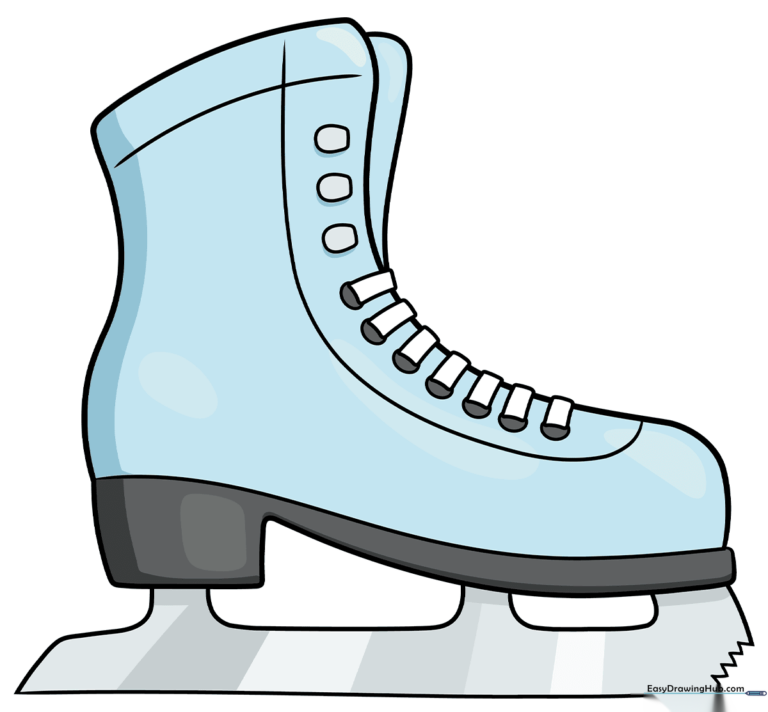
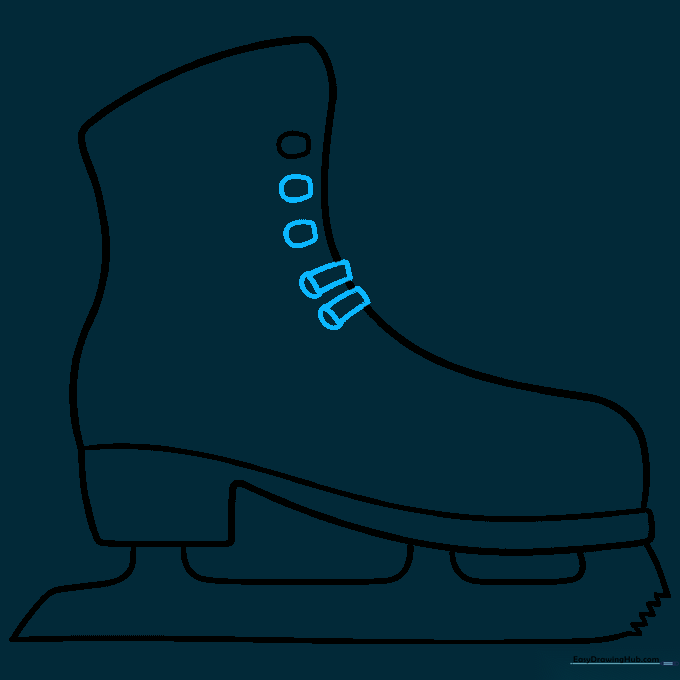
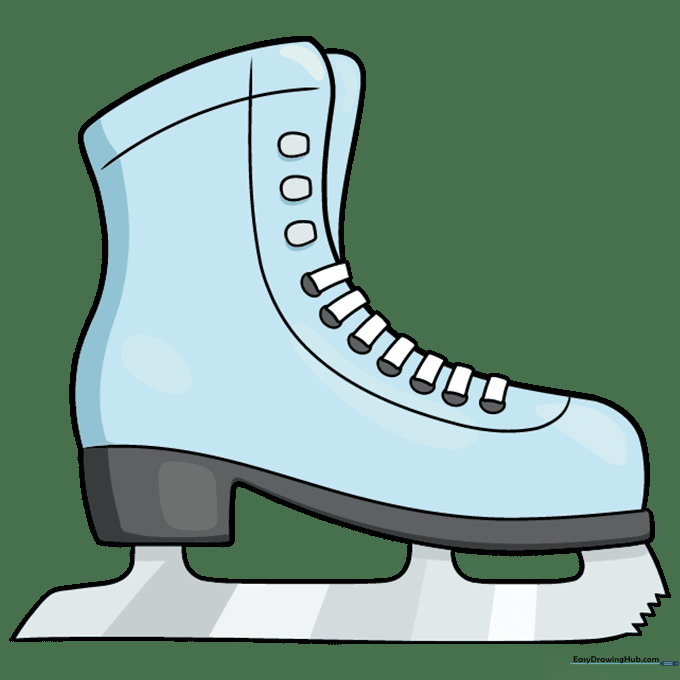
🎯 Final Result
Step-by-Step Instructions
Step 1: Sketching the Upper Boot
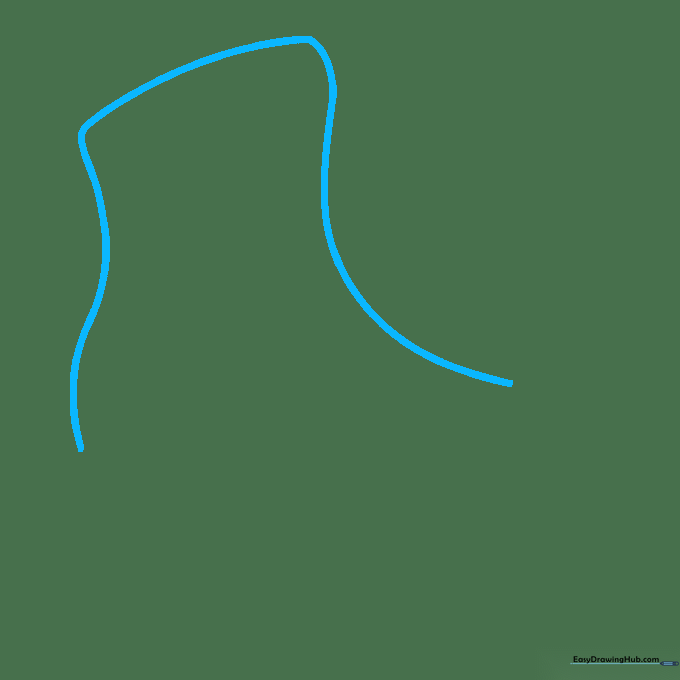
Start by drawing a long, gentle curve to outline the top of the boot. Teacher's Tip: Keep your hand loose and move from your shoulder, not your wrist, to get a smooth, flowing line.
Step 2: Defining the Toe and Heel
Extend the line to form the rounded toe, then draw a long curve back to create the sole. Add a small rectangle at the back for the heel. Tip: Make sure the heel looks sturdy, as it supports the skater's weight!
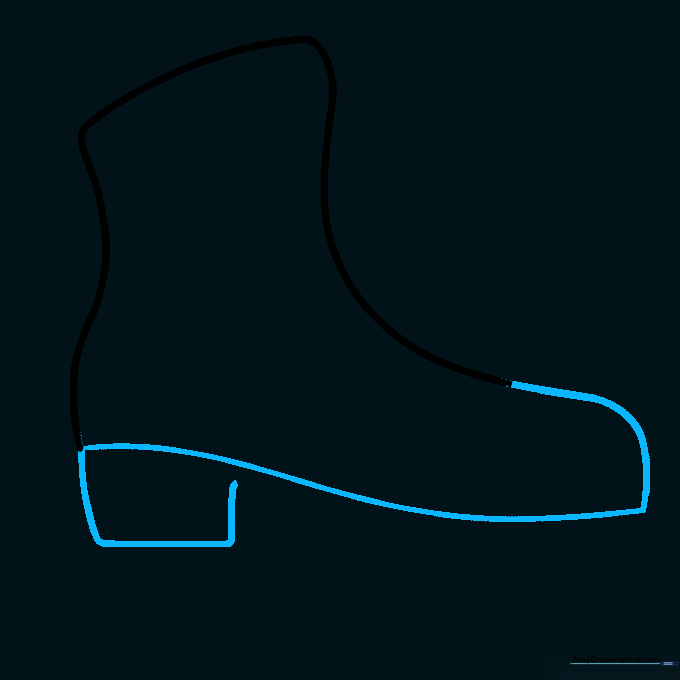
Step 3: Creating the Blade Supports
Connect the heel to the front of the skate. Draw two small rectangles under the sole to act as the blade mounts. Tip: Keep these shapes uniform to help the skate look balanced.
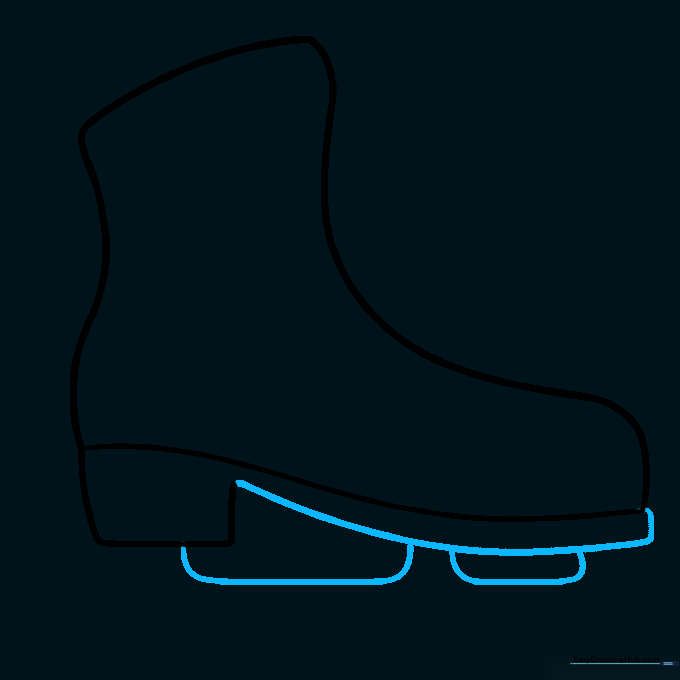
Step 4: Drawing the Blade

Draw a long, smooth curve for the bottom of the blade and a shorter curve for the back. Tip: The blade should look sharp and sleek—don't make it too thick!
Step 5: Adding Blade Detail and Brackets
Erase the front of the blade and add a zigzag line for the toe pick. Then, draw a small circle near the top of the boot for the first lace bracket. Tip: The toe pick is what helps skaters stop, so make it look jagged!
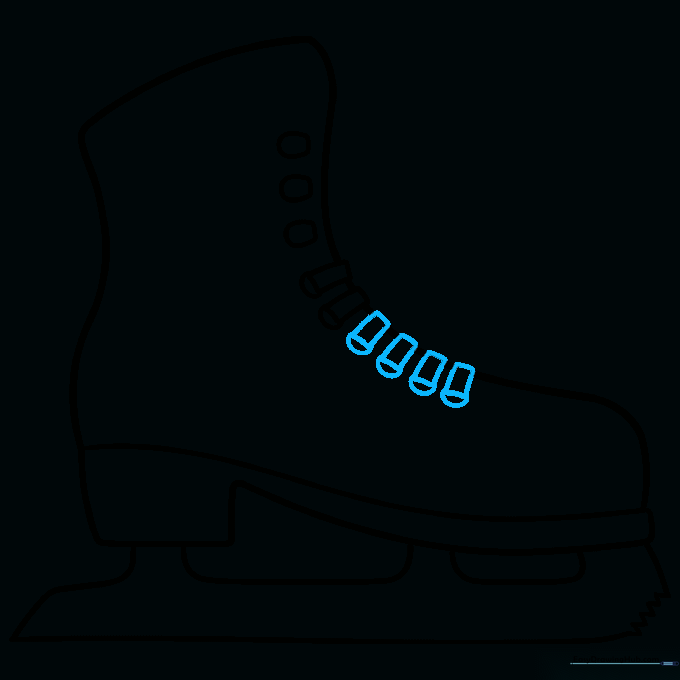
Step 6: Adding More Brackets
Add two more brackets and draw curved rectangles for the lace eyelets. Tip: Keep your spacing even so the laces look symmetrical.
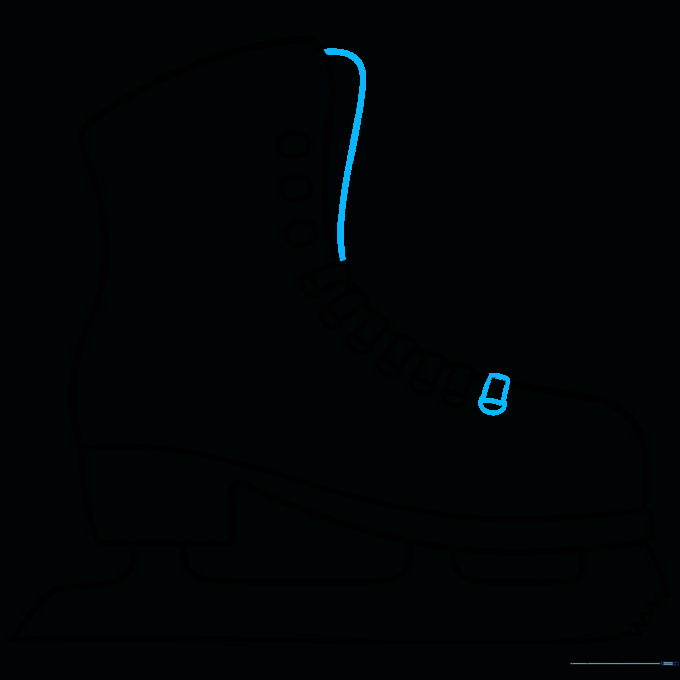
Step 7: Sketching the Laces
Draw four more rectangular lace sections across the top. Add a small half-circle at the end of each to show depth. Tip: Imagine the laces are pulling the boot tight around the foot.
Step 8: Finalizing the Boot Shape
Add one final lace and use a long curved line to close the opposite side of the boot. Tip: This line defines the ankle support, so make it look sturdy.
Step 9: Adding Final Details

Draw a curved line across the top of the boot and another around the laces to add texture. Tip: These small lines make the boot look like it's made of real leather.
Step 10: Bring Your Skate to Life with Color
Your outline is finished! Now, use your favorite colors to shade the boot. Tip: Use a light grey or blue for the blade to make it look like shiny metal.
More Tutorials


