How to Draw an Elephant: Easy 10-Step Guide for Kids
Looking for a fun, creative activity for your little artist? This step-by-step guide is designed for children ages 5 and up to build confidence through drawing. Grab a pencil, an eraser, and a piece of paper to bring this friendly elephant to life in just a few minutes.
🎯 Final Result

Step-by-Step Instructions
Step 1: Sketching the Expressive Eyes

Start by drawing two curved lines for the upper cheeks, then add the eyes above them. Draw an oval inside an oval for each eye and shade the center to create a friendly gaze. Teacher's Tip: Keep your pencil lines light so you can easily erase any mistakes later!
Step 2: Shaping the Trunk

Draw the trunk using two long, curved lines that taper as they move away from the face. Add two small 'finger' shapes at the very tip. Teacher's Tip: Think of the trunk like a gentle 'S' curve—don't worry if it's not perfect, elephants have very wiggly trunks!
Step 3: Adding Tusks and Head Shape
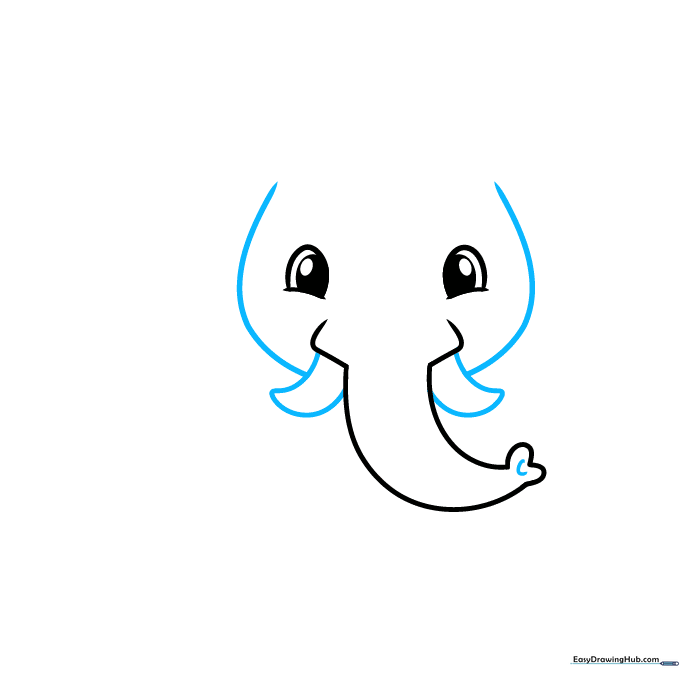
Extend two curved, pointed lines from the base of the trunk to create the tusks. Then, draw a large 'C' shape to connect the head. Add a small nostril near the trunk tip. Teacher's Tip: Make the tusks look sharp by pressing slightly harder with your pencil at the points.
Step 4: Drawing Large Ears
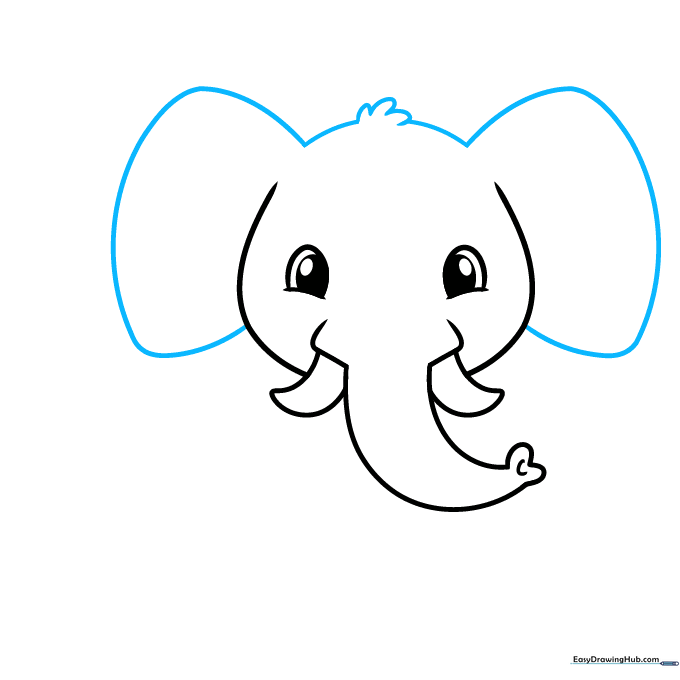
Draw two large, floppy ears on the sides of the head. Connect them at the top with a few 'U' shaped lines to represent a little tuft of hair. Teacher's Tip: Elephants have big ears to help them stay cool—make yours nice and wide!
Step 5: Outlining the Body
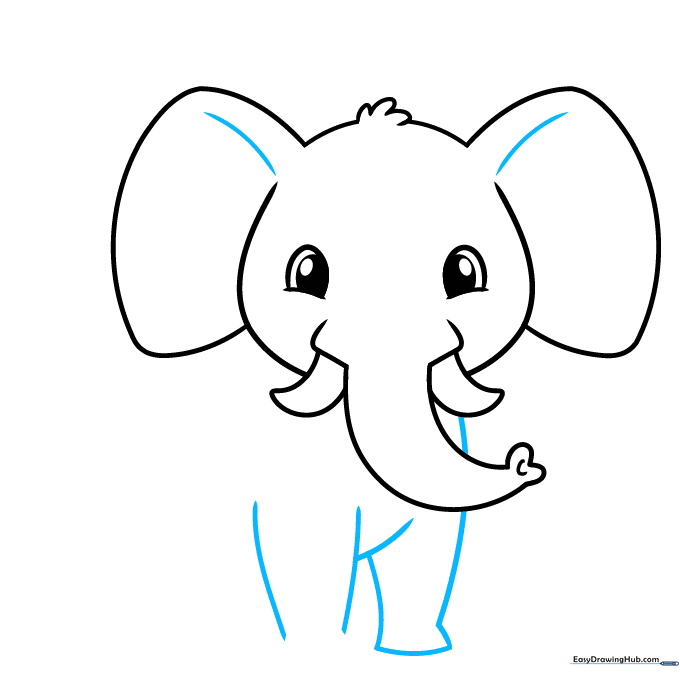
Add contour lines to the ears, then draw the front legs and chest using smooth, curved lines. Teacher's Tip: Keep your lines fluid to make the elephant look friendly and soft rather than stiff.
Step 6: Completing the Torso
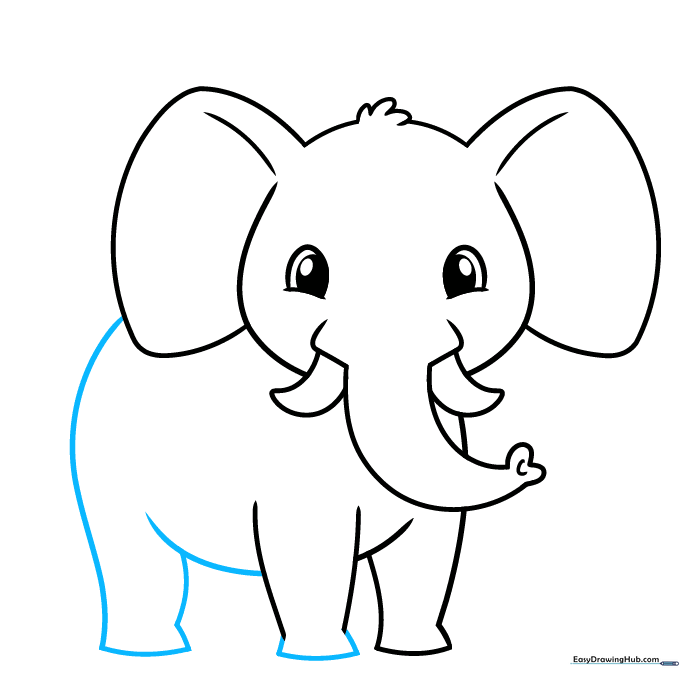
Use overlapping curved lines to draw the belly, the back leg, and the rump. Teacher's Tip: Overlapping lines help create depth, making your elephant look 3D instead of flat.
Step 7: Adding Feet Details
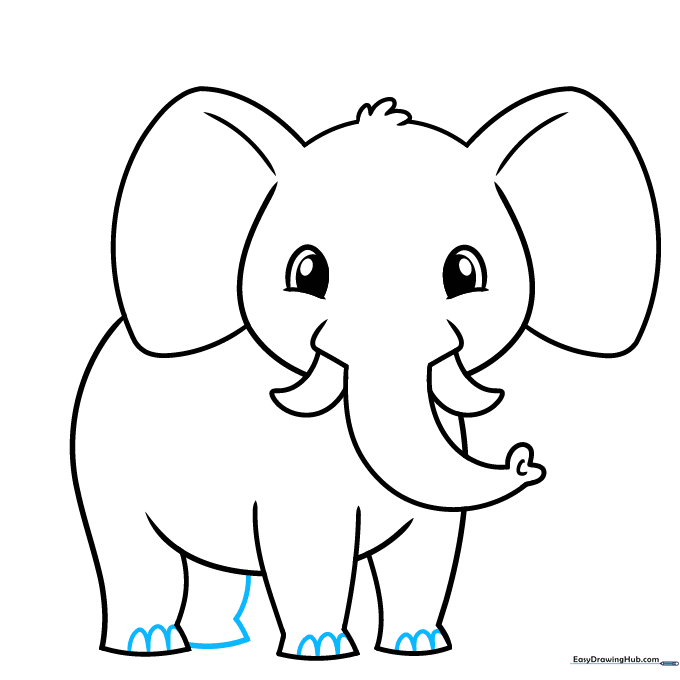
Draw the remaining rear leg and add small 'U' shapes at the bottom of each foot for the toenails. Teacher's Tip: Make sure the toenails are evenly spaced for a tidy look.
Step 8: Drawing the Tail
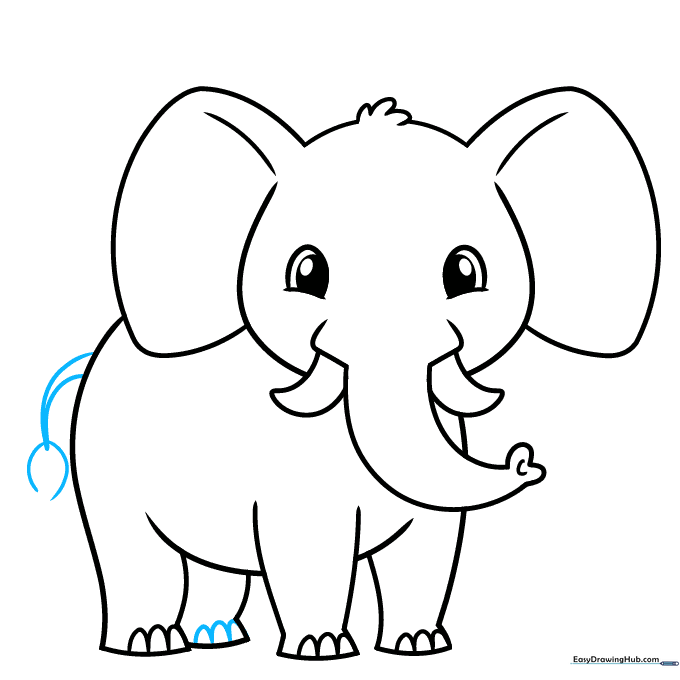
Finish the toenails and draw a tail extending from the rump. Add a little tuft of hair at the end. Teacher's Tip: Keep the tail thin so it looks proportional to the large body.
Step 9: Final Touches
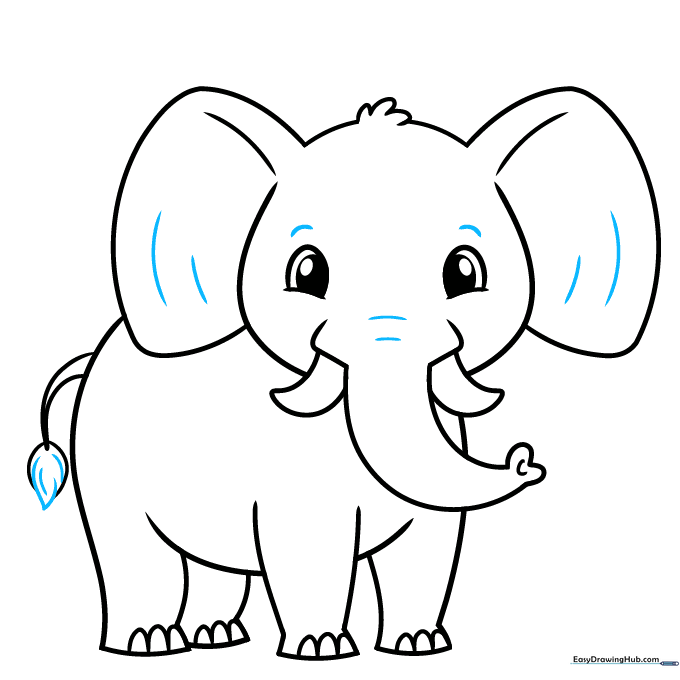
Add final contour lines to the ears, brows, and trunk to give your elephant character. Teacher's Tip: Review your drawing and darken the main outline with a bold pencil or marker.
Step 10: Bring Your Elephant to Life with Color

Your outline is complete! Now, use gray, blue-gray, or even creative colors to fill in your elephant. Teacher's Tip: Try using light pressure for a soft look or heavy pressure for a vibrant, bold cartoon style.
More Tutorials


