How to Draw an Egyptian Cat: Easy 10-Step Guide
Bring ancient history to life with this simple, guided drawing lesson perfect for ages 6 and up. You only need a pencil, eraser, and paper to create your own regal Egyptian cat statue. Follow these steps to practice clean lines and symmetrical shapes while learning about the iconic symbols of the Nile.
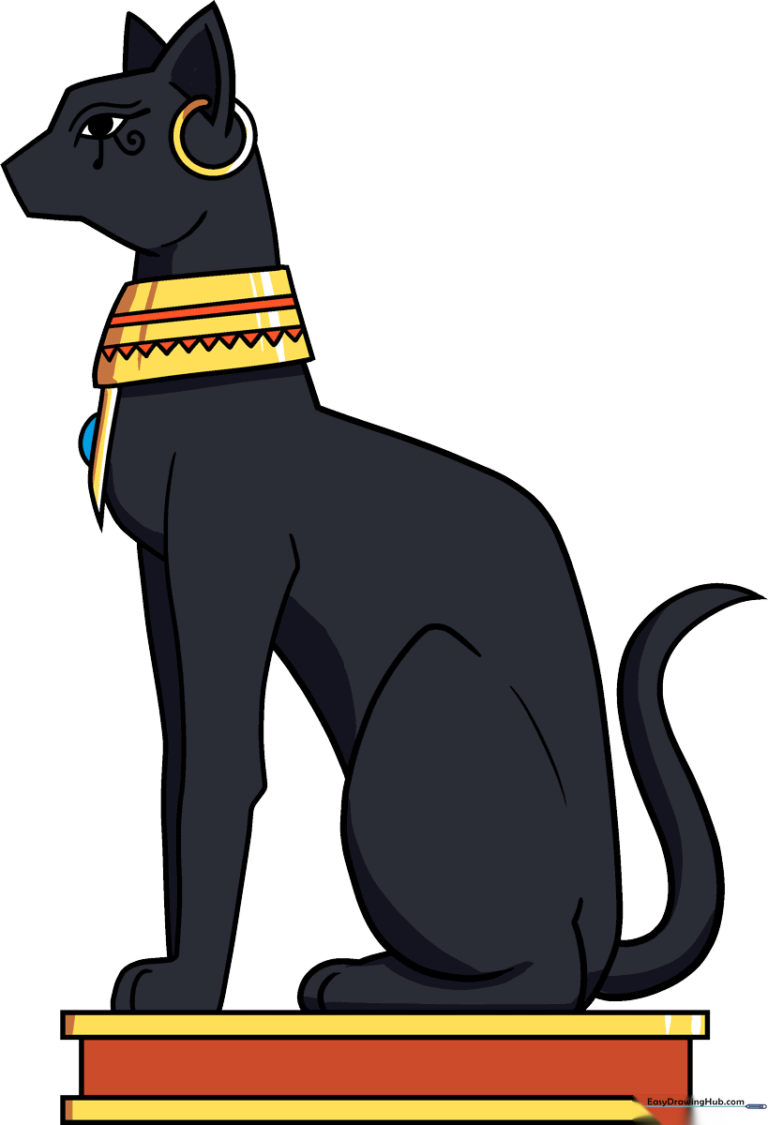
🎯 Final Result
Step-by-Step Instructions
Step 1: Sketching the Profile

Start by sketching the cat’s face in profile. Use gentle, curved lines to define the triangular ear, the brow, and the snout. Teacher's Tip: Keep the lines light and fluid—don't press too hard, as we'll be refining these shapes in the next step.
Step 2: Adding the Eye of Horus

Add the second ear and the iconic 'Eye of Horus' detail. Draw the eye with extended corners and a shaded pupil. Teacher's Tip: The Eye of Horus is a classic Egyptian symbol of protection; take your time to get the decorative lines below the eye just right.
Step 3: Drawing the Ceremonial Collar
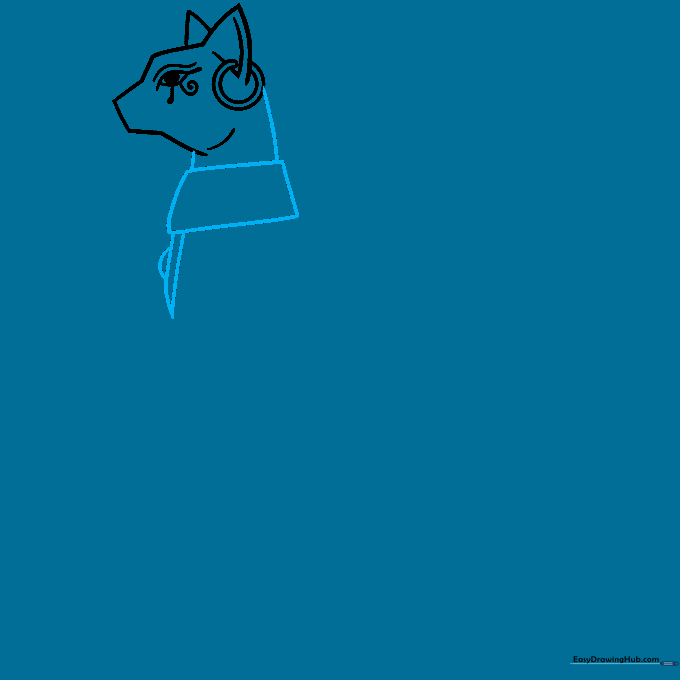
Draw the neck and the ornate collar using trapezoid shapes. Teacher's Tip: Think of the collar as a necklace; keep the shapes uniform to make the cat look like a formal statue.
Step 4: Shaping the Chest and Foreleg
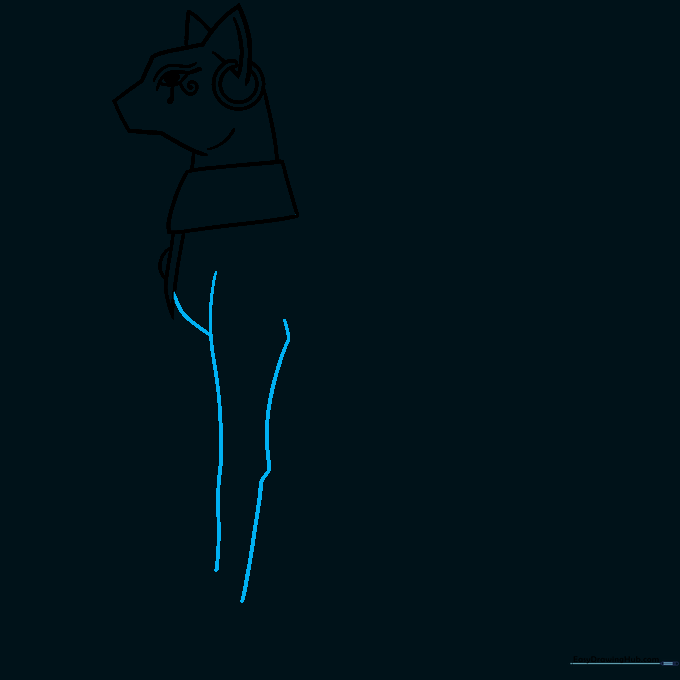
Use smooth, overlapping curves to form the chest and the first front leg. Teacher's Tip: Focus on the shoulder contour to give the cat a sturdy, seated posture.
Step 5: Adding the Second Leg
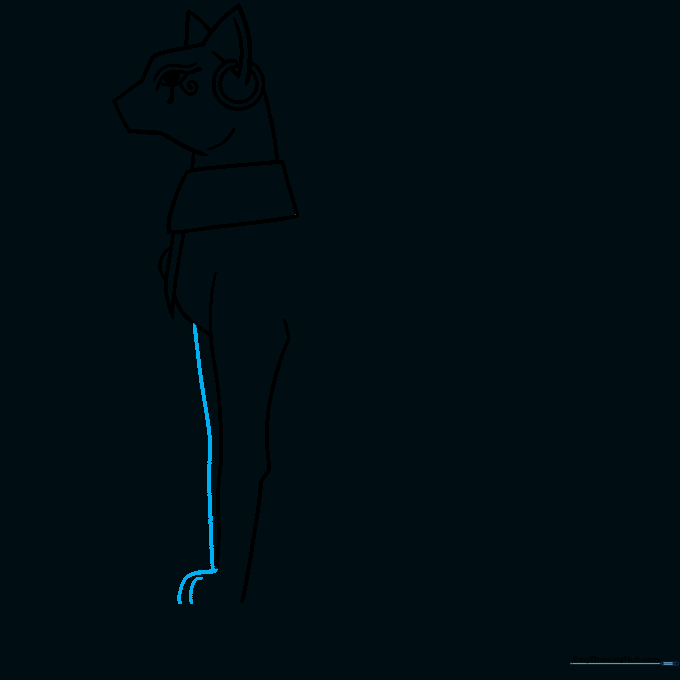
Extend a curved line for the second foreleg and add the paw details. Teacher's Tip: Keep the toes rounded to maintain that stylized, ancient statue look.
Step 6: Drawing the Seated Body
Draw the belly and the folded rear leg. Teacher's Tip: Use short, precise lines to indicate the toes, keeping them consistent with the front paws.
Step 7: Defining the Back

Connect the head to the body with a long, elegant curved line for the back. Teacher's Tip: A smooth, continuous line here helps the cat look regal and poised.
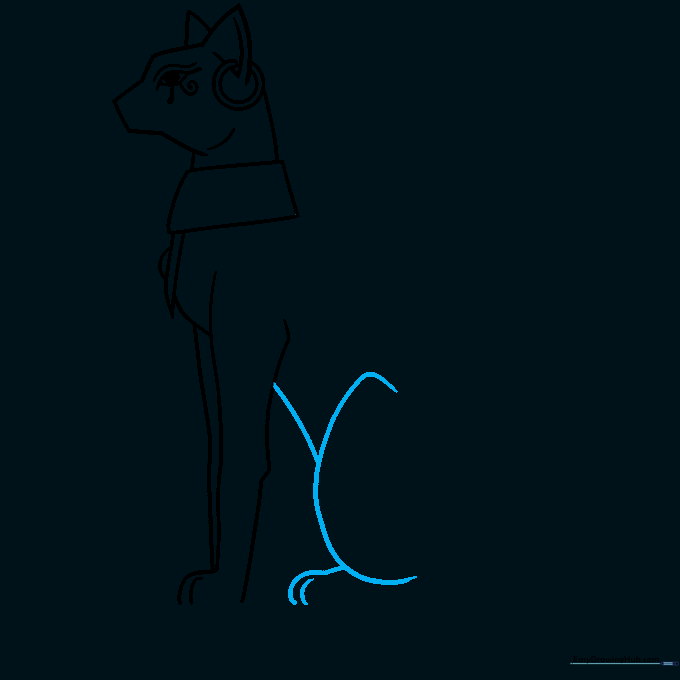
Step 8: Adding the Tail and Collar Details
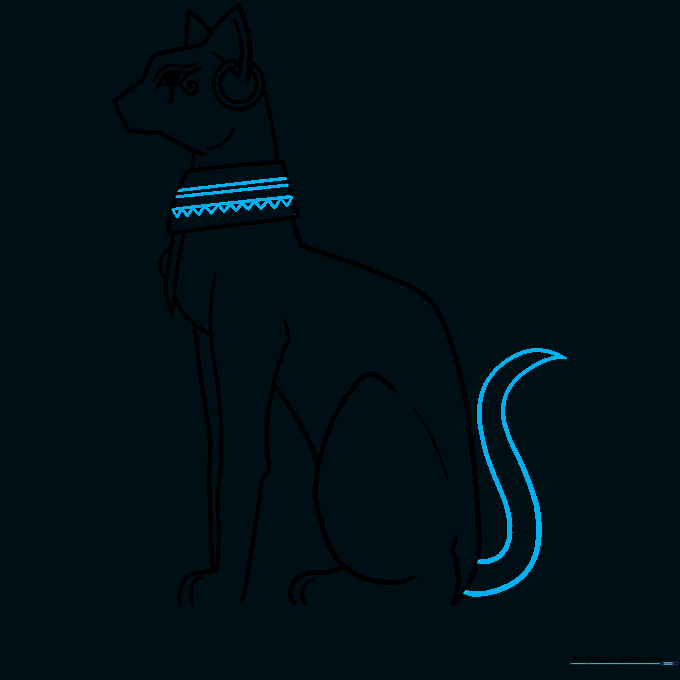
Add final details to the collar and draw the tail using two 'S' shaped lines that meet at a point. Teacher's Tip: Make the tail look sleek and tucked close to the body.
Step 9: Drawing the Pedestal

Place your cat on a pedestal by drawing three stacked rectangles. Teacher's Tip: Use a ruler if you want the base to look perfectly symmetrical and architectural.
Step 10: Coloring Your Masterpiece
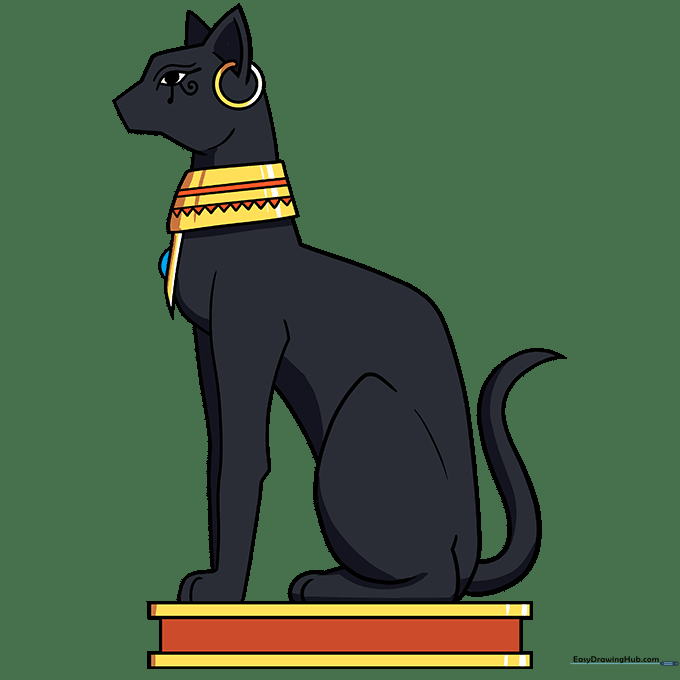
Bring your cat to life with color! We used black for the body and gold for the jewelry. Teacher's Tip: Use a metallic gold marker to make the collar pop against the dark fur.
More Tutorials


