How to Draw a Cute Unicorn Face: Easy 9-Step Guide
Bring a touch of magic to your sketchbook with this beginner-friendly unicorn face tutorial. Designed for artists ages 5 and up, this activity requires only a pencil, paper, and an eraser. Follow along to build confidence in your character design skills while creating a whimsical, mythical friend.
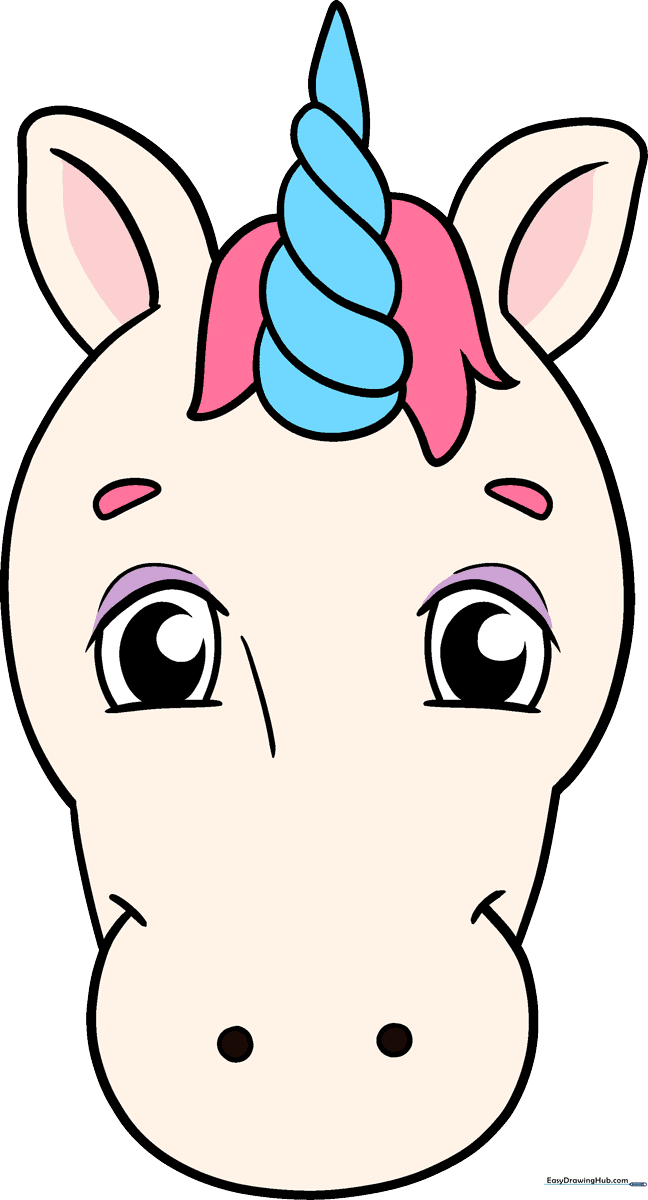
🎯 Final Result
Step-by-Step Instructions
Step 1: Sketching the First Eye

Draw two gentle, curved lines to form the top and bottom eyelids. Tip: Keep the eye shape rounded to give your unicorn a friendly, soft expression.
Step 2: Adding the Second Eye

Repeat the process to draw the second eye, ensuring it is level with the first. Tip: Use your pencil to lightly draw a horizontal guideline across your paper to keep both eyes perfectly aligned.
Step 3: Brows and Facial Contours
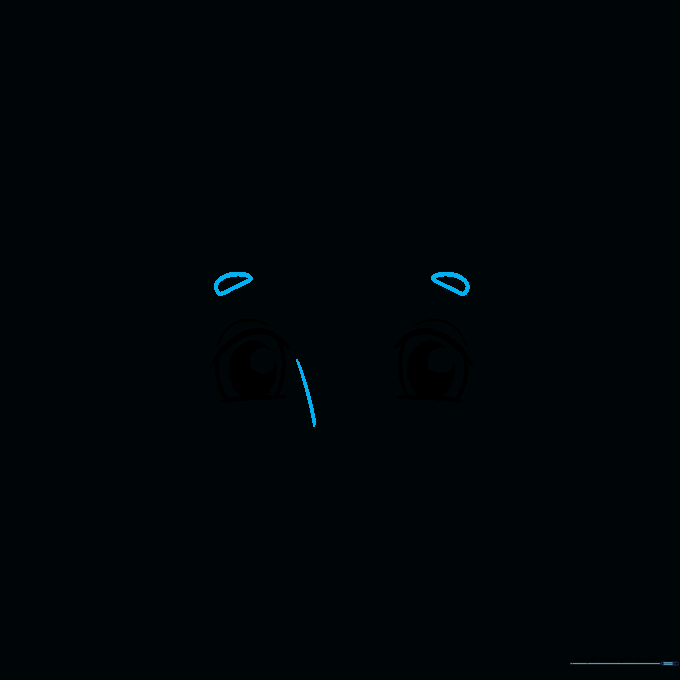
Add a small teardrop shape above each eye for the eyebrows, then draw a soft, curved line between the eyes. Tip: This line acts as the bridge of the nose and helps define the unicorn's snout.
Step 4: Defining the Snout

Draw a large 'U' shape below the eyes to form the muzzle. Tip: Add two small, short lines at the ends of the 'U' to give the snout a realistic, rounded dimension.
Step 5: Shaping the Head and Nostrils
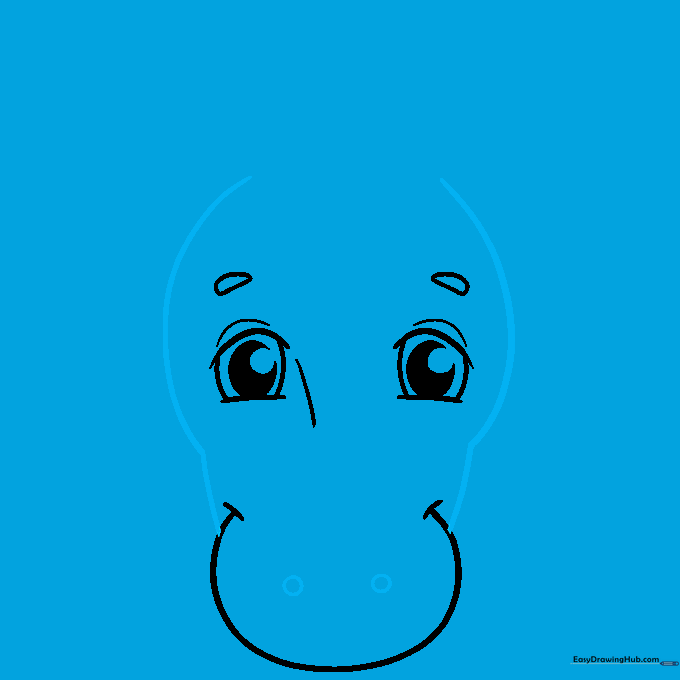
Sketch the sides of the face with long, sweeping curves. Add two small circles on the snout for nostrils. Tip: Keep the nostril circles small to maintain the unicorn's cute, youthful appearance.
Step 6: Drawing the Ears
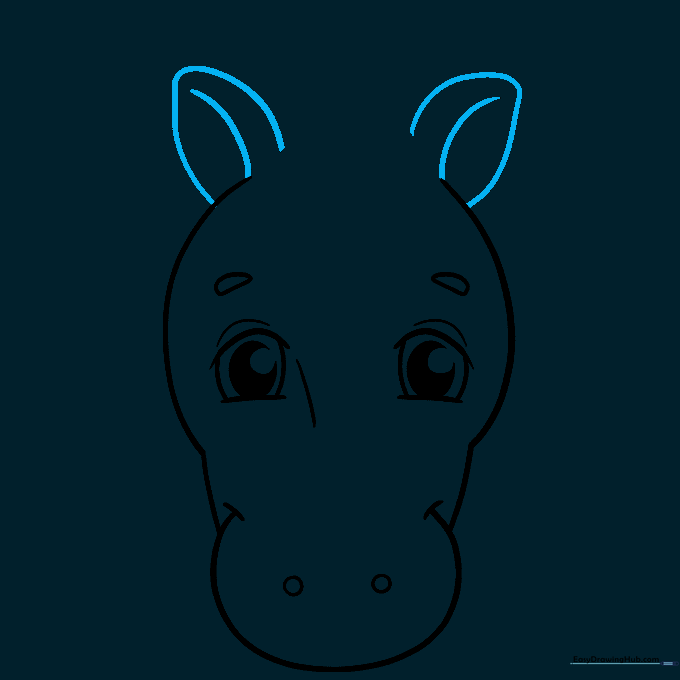
Draw two pointed ears at the top of the head. Add an inner line to each ear to create depth. Tip: Make the ears slightly rounded at the tips to keep the design soft and approachable.
Step 7: Starting the Magical Horn
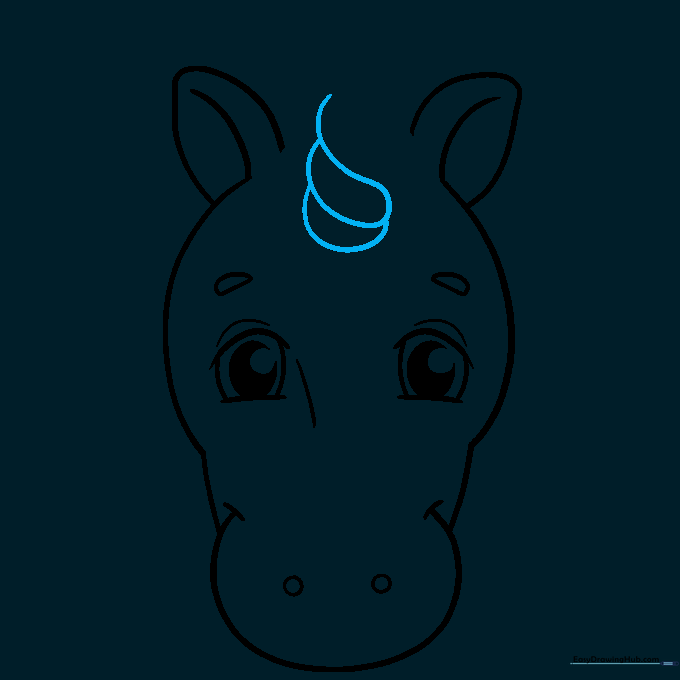
Begin the horn by drawing a series of overlapping curved lines. Tip: Think of this as a spiral staircase; the curves should get slightly narrower as you move toward the top.
Step 8: Finishing the Horn
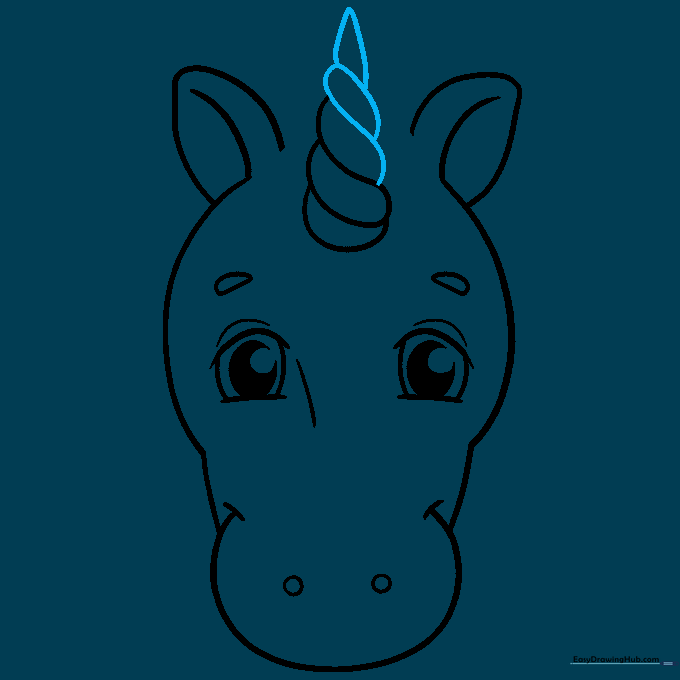
Complete the horn by drawing the final layers and a sharp, pointed tip. Tip: Ensure the lines connect smoothly to the forehead to make the horn look like it's growing naturally from the head.
Step 9: Adding the Mane
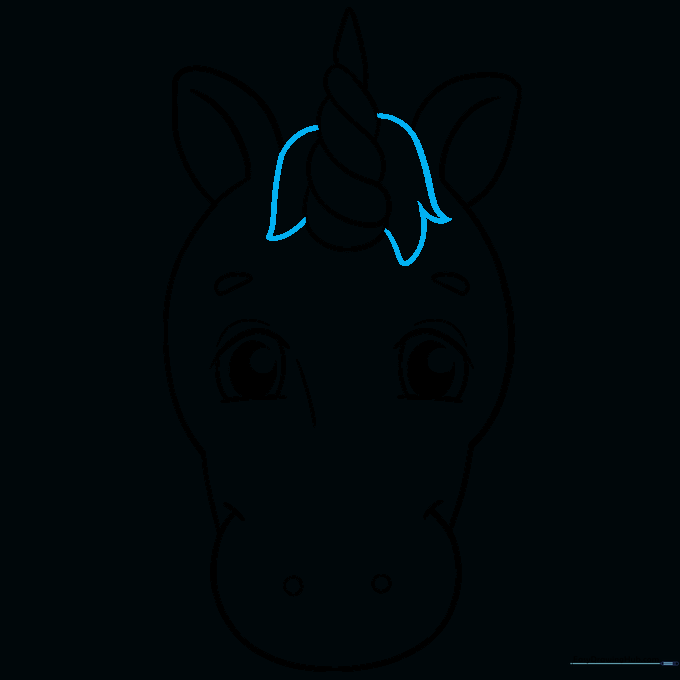
Draw the mane on top of the head using jagged, flowing lines. Tip: Vary the length of your lines to make the hair look bouncy and full of movement.
Step 10: Coloring Your Masterpiece
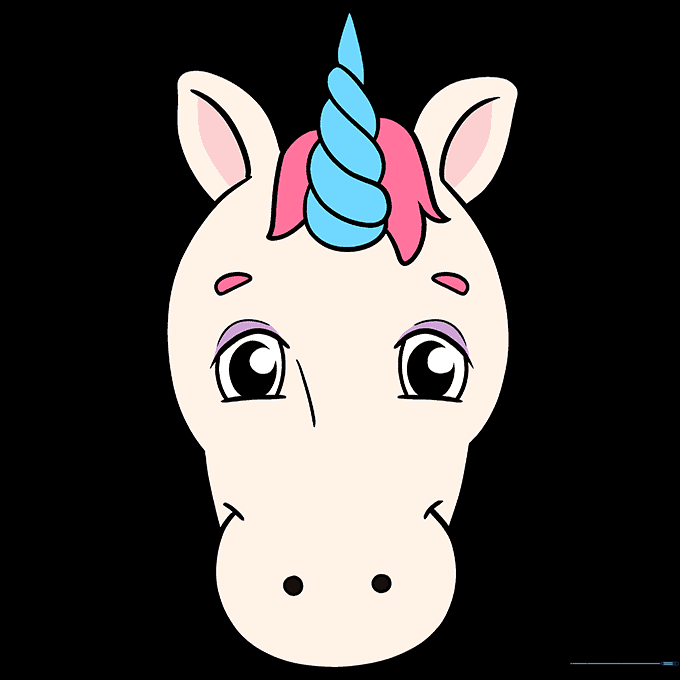
Bring your unicorn to life with color! Use soft pastels for the coat and vibrant, rainbow-inspired shades for the mane and horn. Tip: Try using light pressure with your colored pencils to create a soft, magical glow.
More Tutorials


