How to Draw Super Sonic Face: Easy 9-Step Guide
Ready to bring the legendary Super Sonic to life? This tutorial is designed for young artists and beginners who want to master his iconic, determined expression. Grab a pencil, an eraser, and some paper to get started on this fun, screen-free creative challenge.
🎯 Final Result

Step-by-Step Instructions
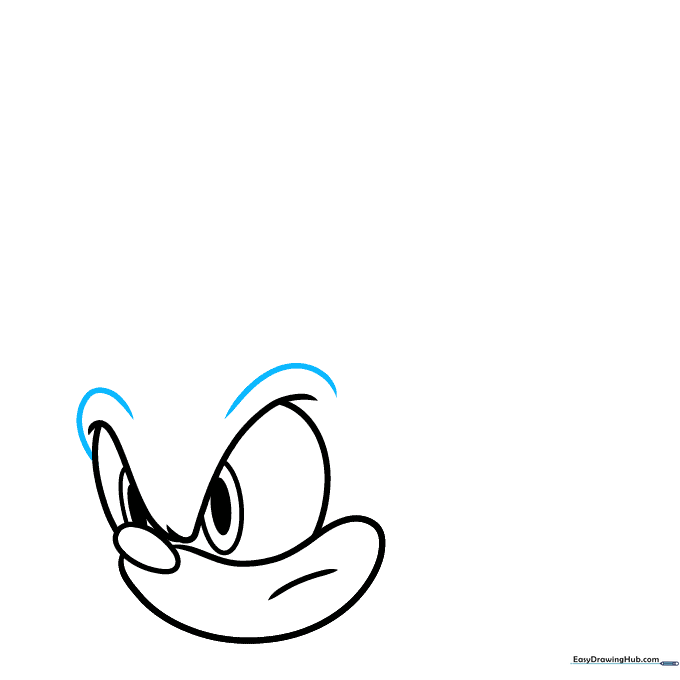
Step 1: Sketching the Nose and Jaw
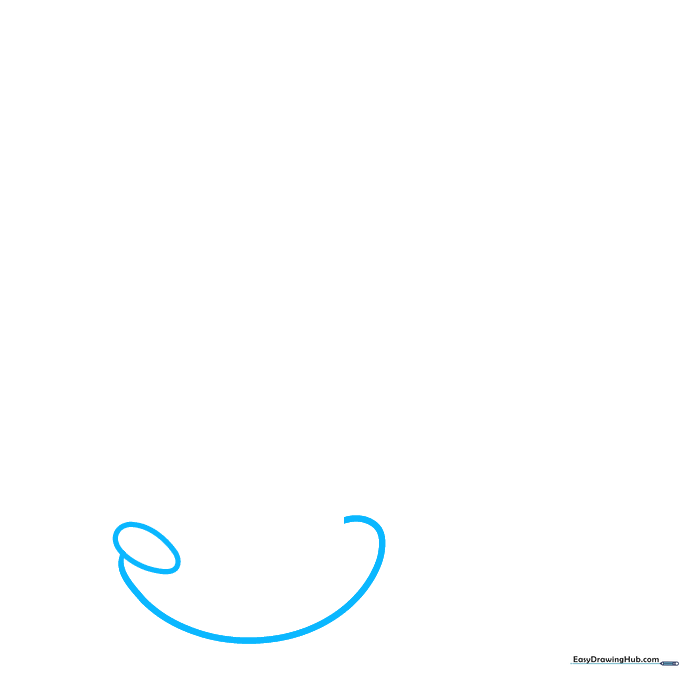
Start by drawing a small oval for the nose. From the base of the nose, extend a long, smooth curved line to outline the jaw. Teacher's Tip: Keep your pencil pressure light so you can easily adjust the shape if needed.
Step 2: Defining the Eye and Scowl
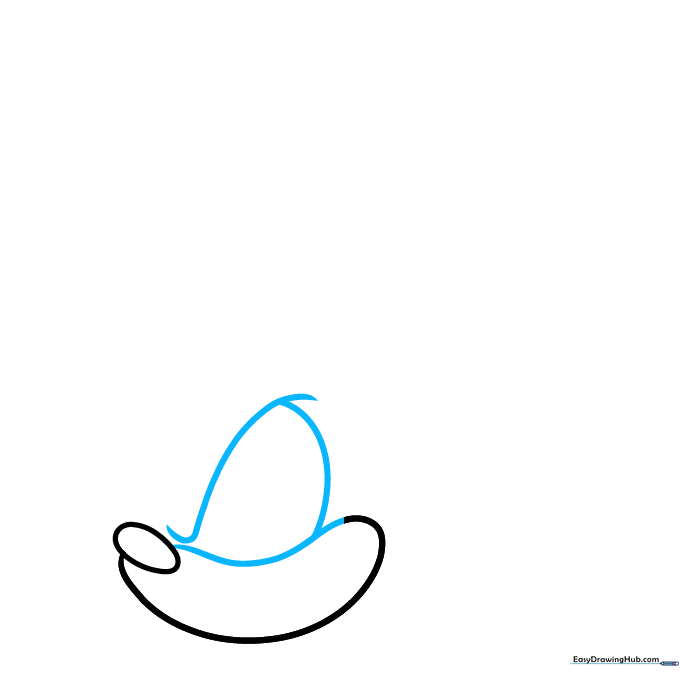
Continue the jawline back toward the nose. Extend a curved line upward to begin the eye socket, then add an overlapping curved line above it to create that classic, intense Super Sonic scowl.
Step 3: Completing the Eye Shapes
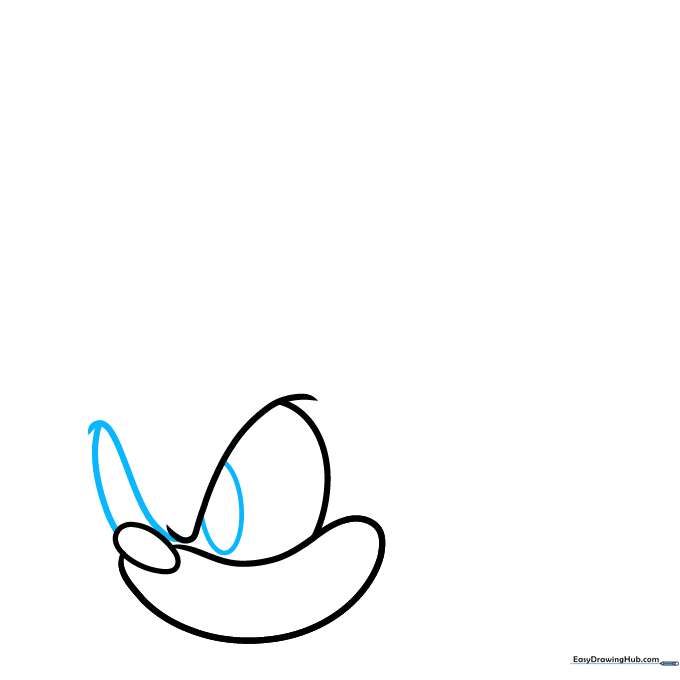
Use two additional overlapping curved lines to outline the second eye. Inside the first eye, draw a partial oval to define the eye's edge. Teacher's Tip: Ensure the eyes look symmetrical to keep the character looking balanced.
Step 4: Pupils and Mouth
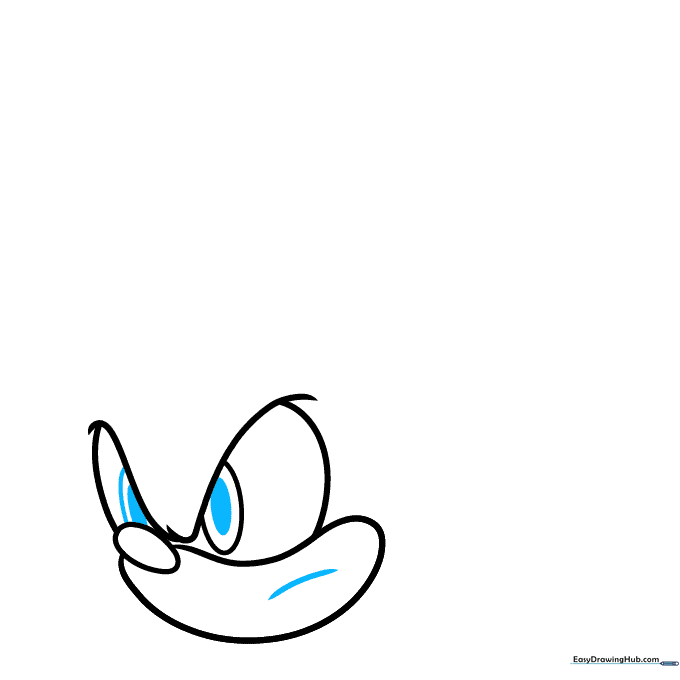
Shade a small oval inside the first eye for the pupil. Repeat this in the second eye, shading the inner portion. Finally, add a curved line below the nose to create a determined, frowning mouth.
Step 5: Defining the Brows
Use bold, curved lines to contour the brows above the eyes. These lines are key to capturing Sonic's energetic and focused personality.
Step 6: Drawing the First Quill
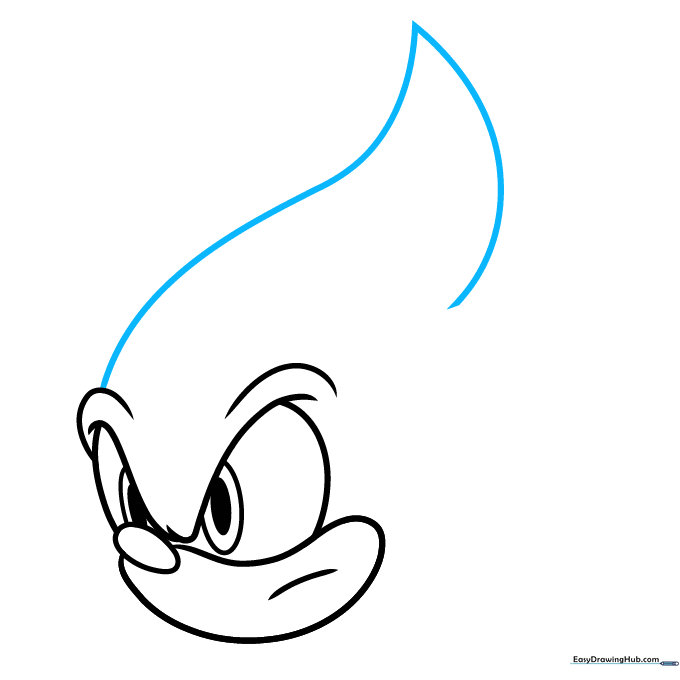
Extend a long, sweeping curved line from the brow. Draw a second line to meet it at a sharp point. This creates the first of Sonic’s signature spikes.
Step 7: Completing the Head Shape

Continue adding spikes by drawing pairs of curved lines that meet at sharp points. Connect the final line to the jaw to enclose the head. Teacher's Tip: Vary the size of the spikes slightly to make the hair look dynamic.
Step 8: Adding Ears
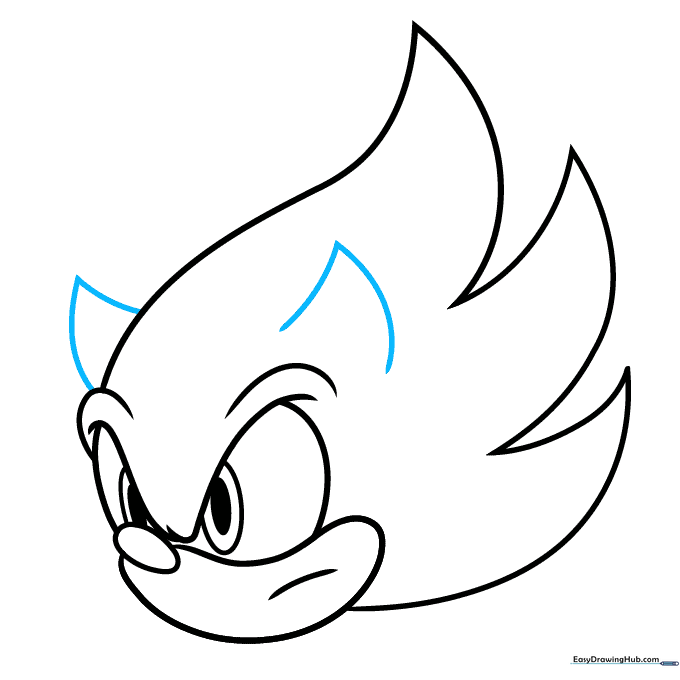
Draw two curved, V-shaped lines on top of the head to form Sonic’s ears. Make sure they are positioned symmetrically between the spikes.
Step 9: Final Details and Coloring
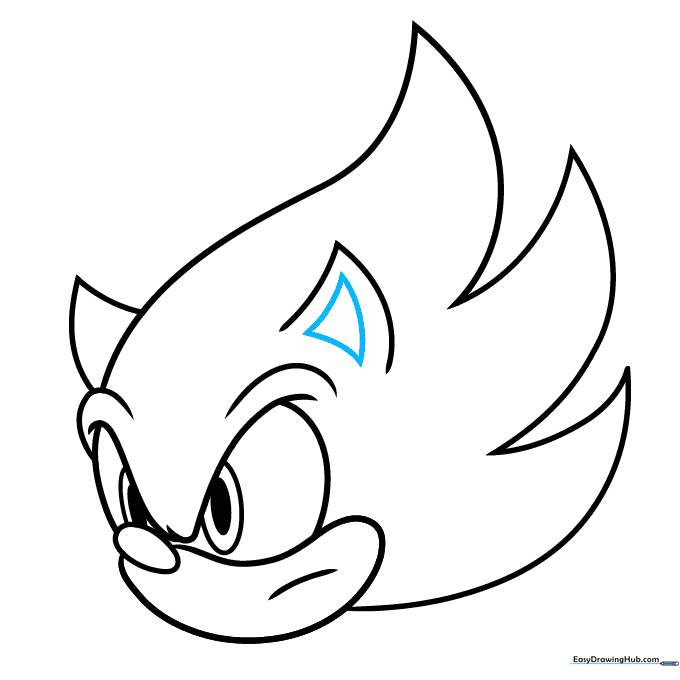
Draw a curved triangle inside the ear to add depth. Now, your outline is complete! Color his fur a bright, vibrant yellow and his eyes a bold red to finish your Super Sonic masterpiece.
Color Your Super Sonic Face
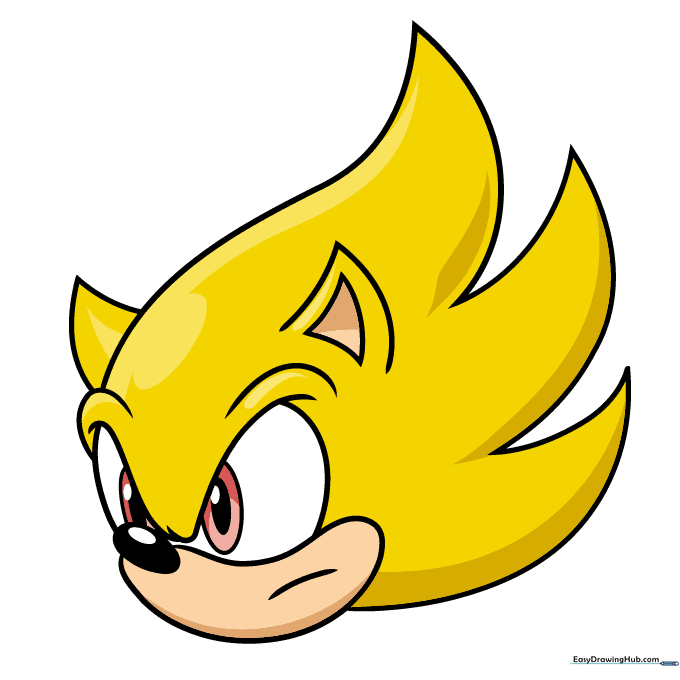
Your easy Super Sonic face outline is now complete. Color his fur yellow and his eyes red.
More Tutorials


