How to Draw a Mountain Landscape Reflection: Easy Step-by-Step
Bring a serene mountain scene to life with this easy-to-follow reflection drawing tutorial. Designed for young artists ages 6 and up, this project uses basic shapes to teach the concept of symmetry and water reflections. Grab your pencil, eraser, and paper to start creating your own peaceful landscape today.
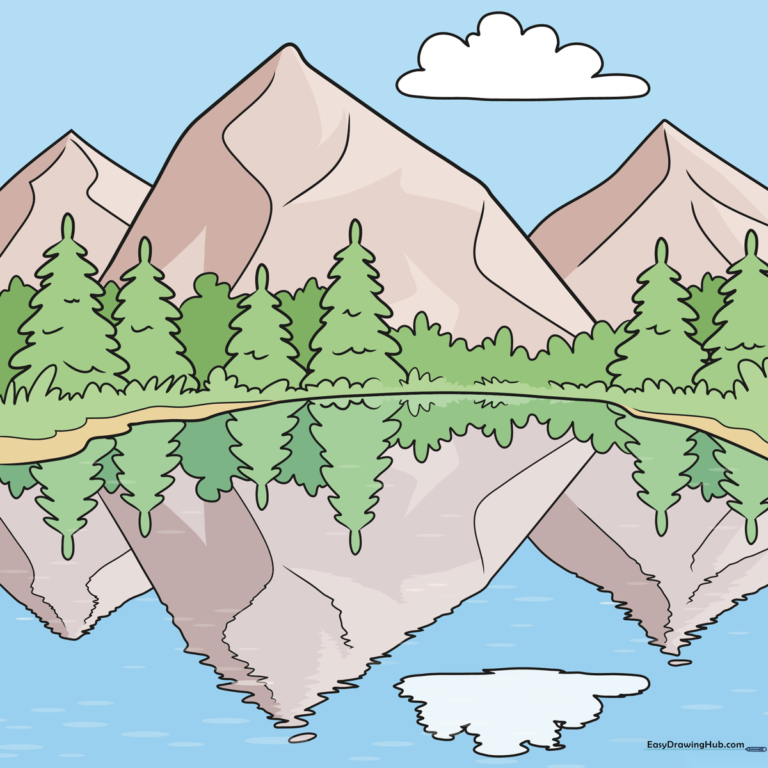
🎯 Final Result
Step-by-Step Instructions
Step 1: Establishing the Shoreline
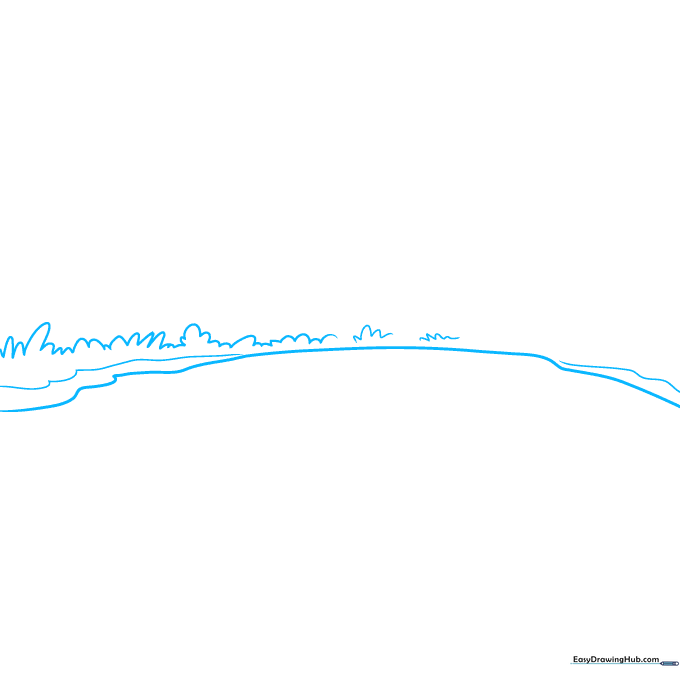
Draw a gentle, wavy horizontal line across the middle of your page to represent the water's edge. Add small, cloud-like loops along the line to create the look of grassy banks. Tip: Keep your pencil pressure light so you can easily adjust the shape later.
Step 2: Drawing the First Trees
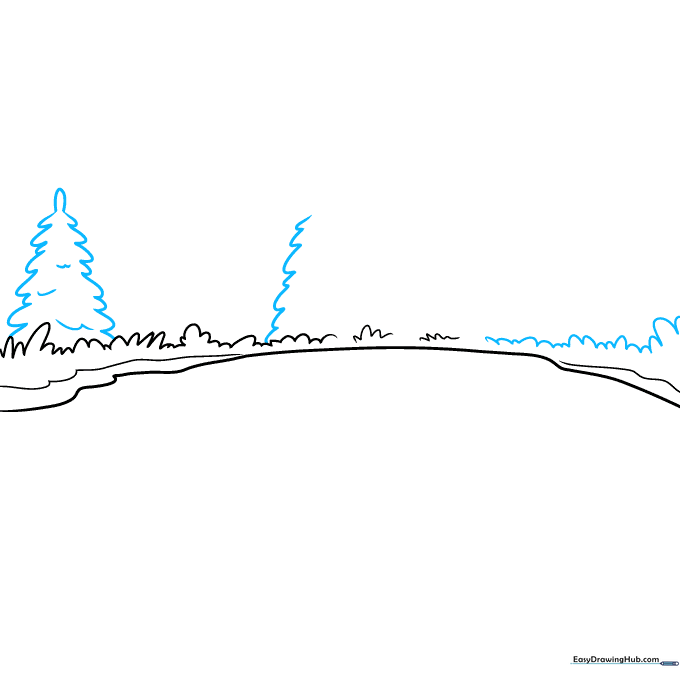
Sketch vertical, rounded loops to form the shape of your first tree. Add a few internal lines to suggest branches. Repeat the grass loops on the opposite side of the lake. Tip: Trees in nature are never perfectly identical, so embrace slightly different loop sizes.
Step 3: Creating a Forest Cluster
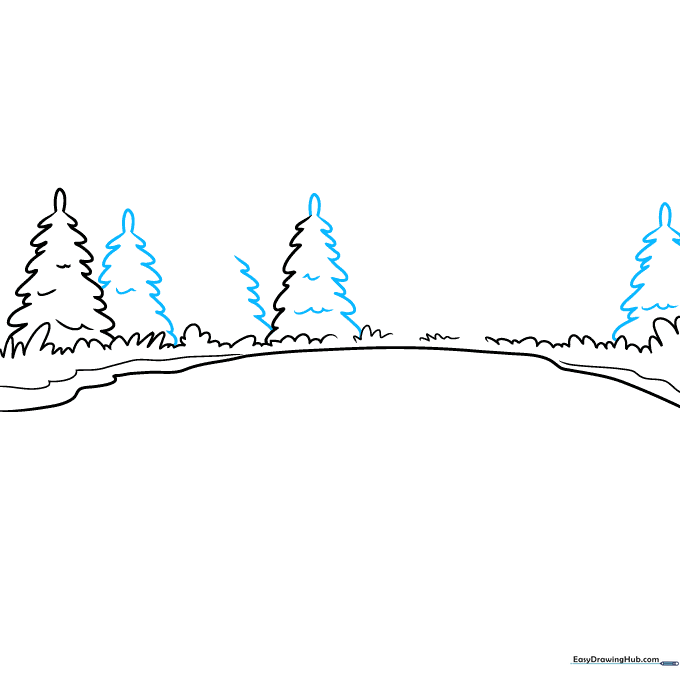
Continue adding more trees by repeating the loop technique. Overlap some of the trees to create depth, making it look like a dense forest. Tip: Vary the height of your trees so the forest looks natural rather than like a straight fence.
Step 4: Filling the Background
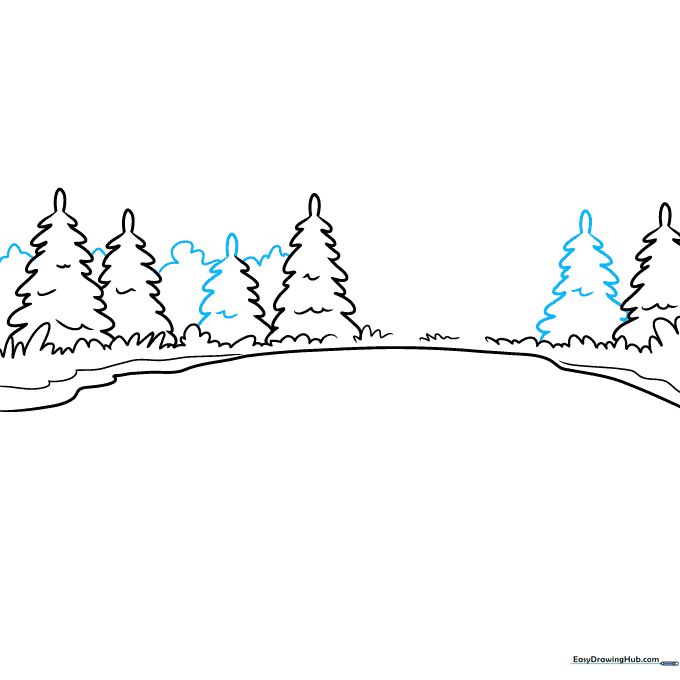
Fill the left side of your background with more tree shapes until the horizon line is mostly hidden. This creates a lush, full landscape. Tip: Don't worry about perfect lines; the 'sketchy' look makes the trees appear more realistic.
Step 5: Sketching the Mountains
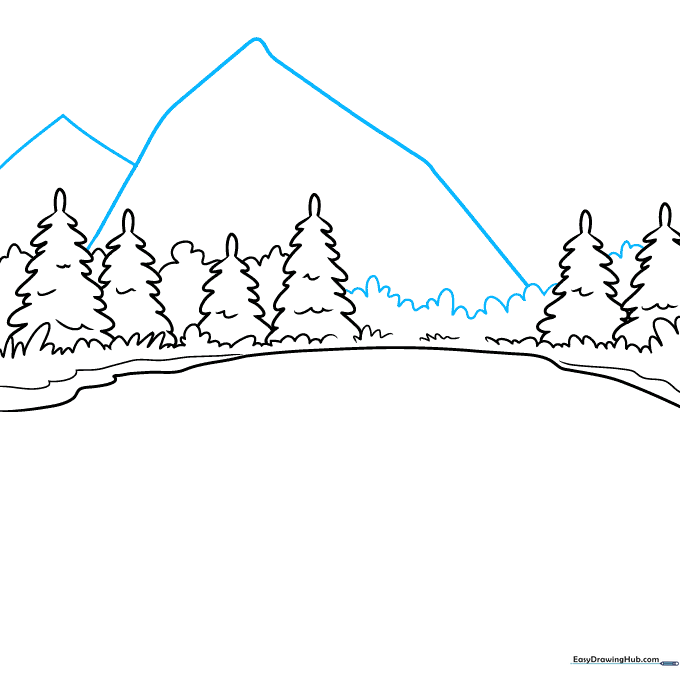
Draw the mountains behind your trees using uneven, jagged lines. Make the central mountain the tallest with a rounded peak. Tip: Use long, sweeping strokes for the mountains to contrast with the small, tight loops of the trees.
Step 6: Adding Clouds and Details
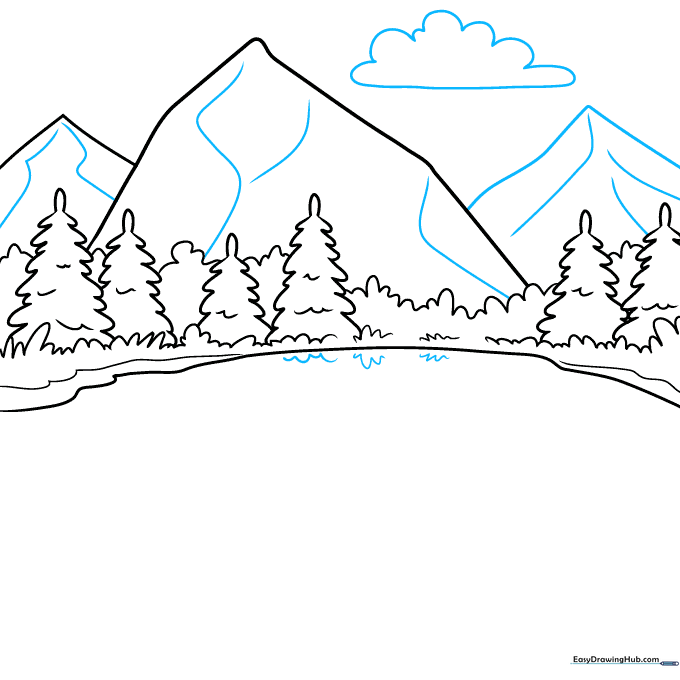
Add a third mountain and sketch light, squiggly lines inside each peak to show rock texture. Draw a fluffy cloud in the sky using rounded loops. Tip: Keep the cloud loops soft and airy to contrast with the sharp mountain edges.
Step 7: Beginning the Reflection
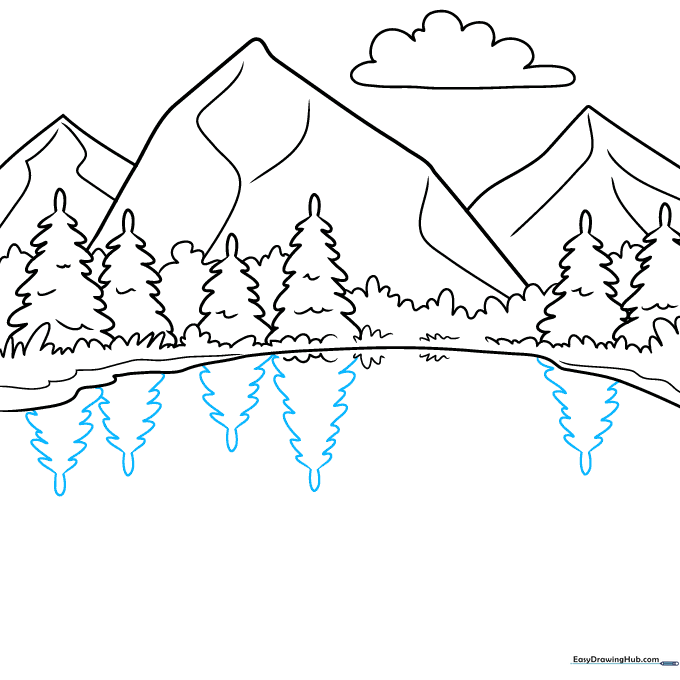
Start the reflection in the water by mirroring the tree shapes below the shoreline. Use similar loop patterns. Tip: Ensure the reflection lines align vertically with the trees above for a realistic effect.
Step 8: Reflecting the Mountains

Continue the reflection process for the mountains. Use 'rushed' or zig-zagged lines instead of straight ones to simulate the rippling effect of water. Tip: The more 'broken' your lines are, the more the water will look like it's moving.
Step 9: Finalizing the Reflection
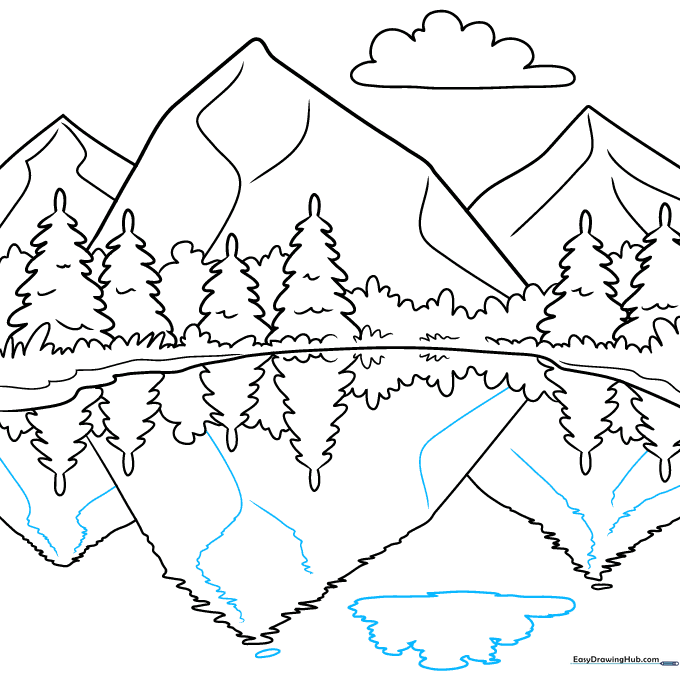
Complete the reflection by adding the cloud and mountain details into the water. Use squiggly, lightning-bolt-like lines to represent the distorted reflection of the mountain peaks. Tip: Keep these lines light so they don't overpower the main landscape.
Step 10: Adding Color
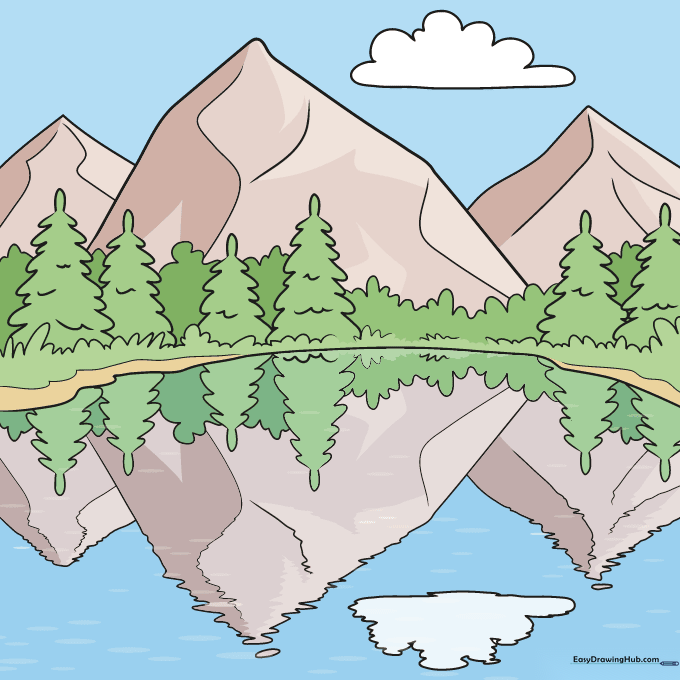
Outline your drawing with a black pen for a clean look. Use brown for mountains, blue for the sky, and green for the trees. Tip: Use slightly muted or darker shades for the reflection in the water to make it look deeper and more realistic.
More Tutorials


