How to Draw a Realistic Lion: Easy 10-Step Guide
Bring the king of the jungle to life with this approachable, realistic lion tutorial designed for young artists and beginners. You will only need a pencil, an eraser, and a sheet of paper to get started. By focusing on simple shapes and textures, you will build confidence in your sketching skills while creating a majestic portrait.
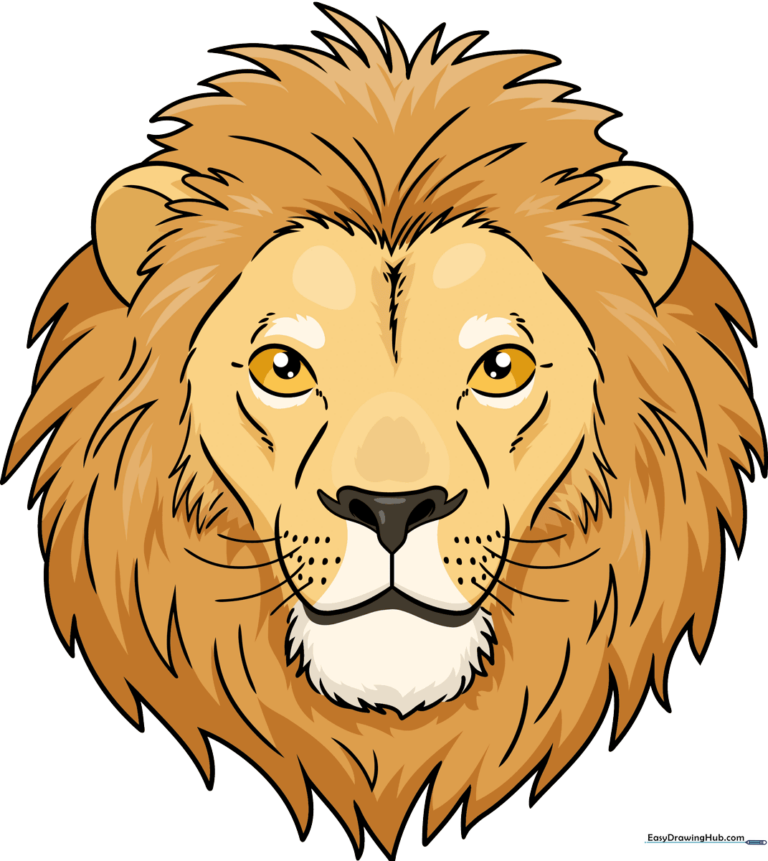
🎯 Final Result
Step-by-Step Instructions
Step 1: Sketching the Expressive Eyes
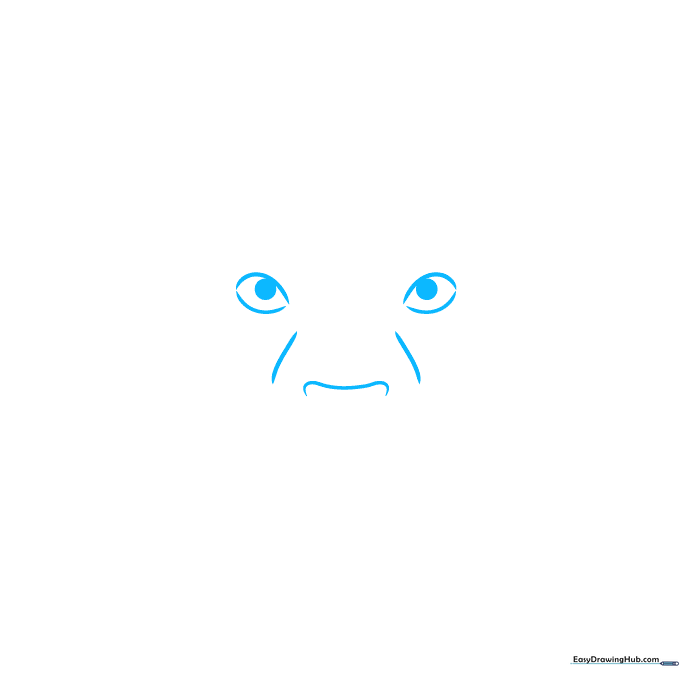
Start by drawing the lion's eyes using two gentle, curved lines that don't quite touch at the corners. Add a small, shaded circle inside each for the pupil. Tip: Keep your pencil pressure light here so you can easily adjust the shape if needed.
Step 2: Defining the Nose and Muzzle
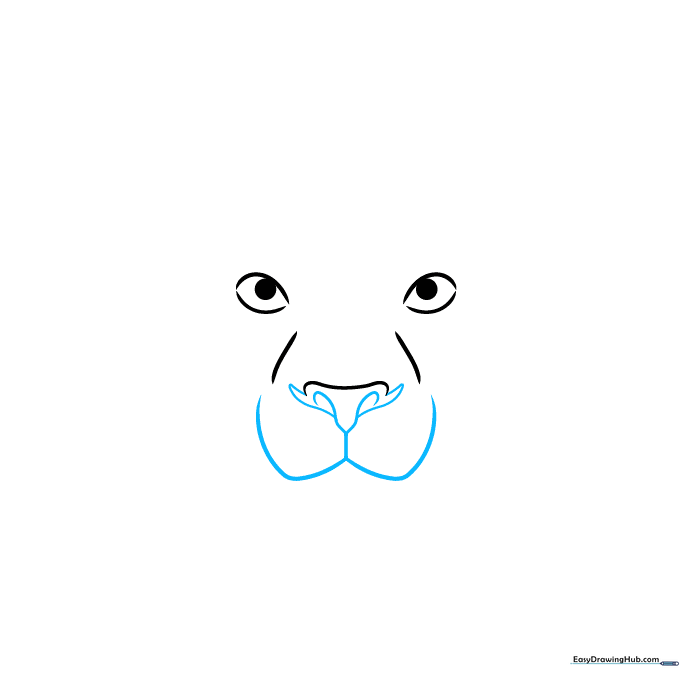
Draw the nose pad using two curved lines, then add the nostrils. Below the nose, sketch a 'W' shaped line to form the top of the mouth. Tip: Think of the nose as a soft triangle to keep the proportions balanced.
Step 3: Outlining the Jaw and Mane
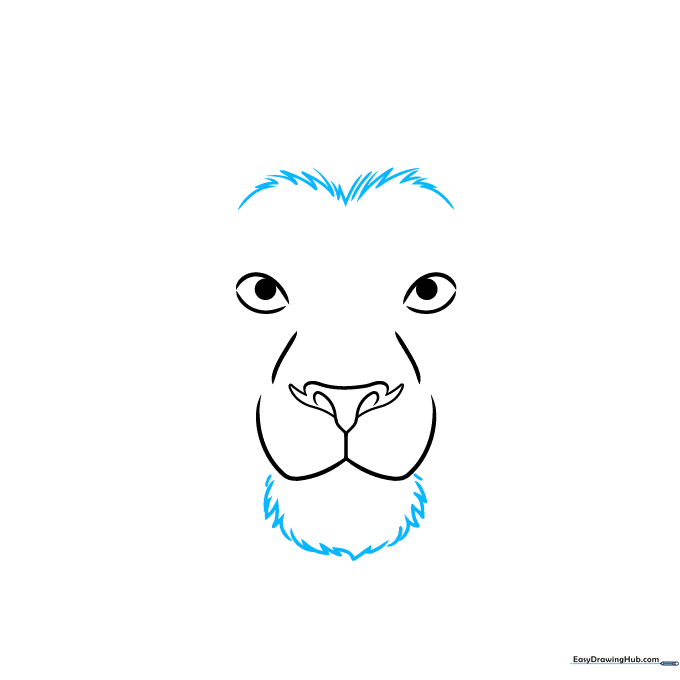
Use short, jagged lines to enclose the jawline below the mouth. Add a few more jagged strokes near the forehead to start the mane. Tip: Use quick, flicking motions with your pencil to make the lines look like natural fur.
Step 4: Shaping the Face
Sketch the sides of the face using disconnected curved lines. Continue adding short, jagged strokes below the ear area to build out the mane. Tip: Don't worry about making the lines perfect; fur is naturally messy and uneven!
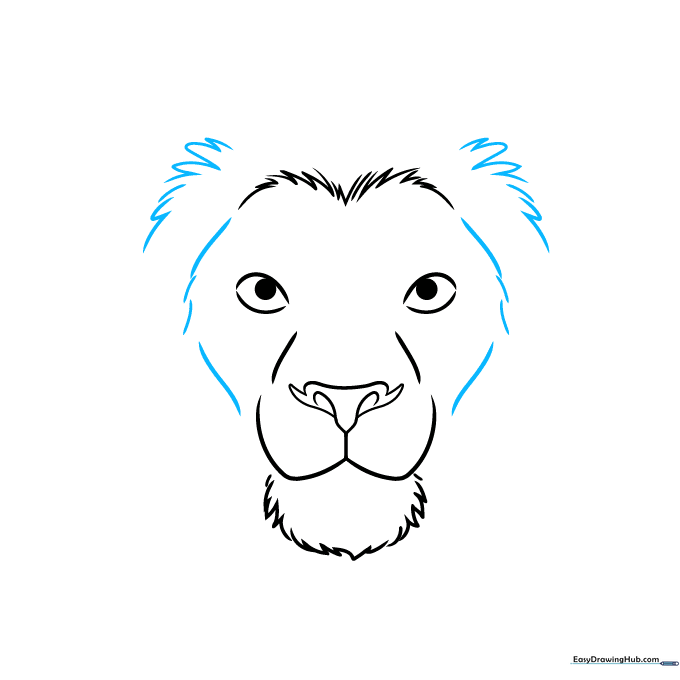
Step 5: Adding Ears and Mane Volume
Draw two 'C' shaped lines for the ears, then contour them with smaller curves. Continue building the top of the mane with more jagged, overlapping lines. Tip: Place the ears slightly to the side of the head to give the lion a realistic look.
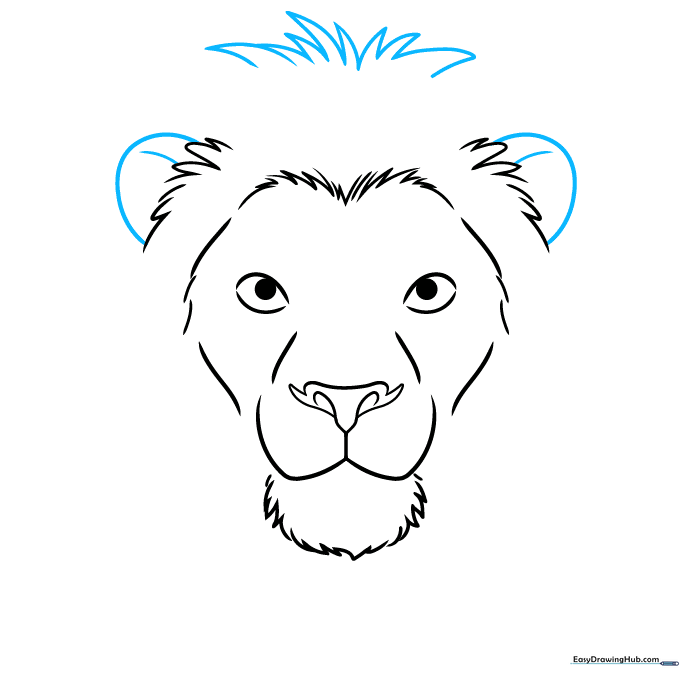
Step 6: Expanding the Mane
Keep building the mane by drawing pairs of curved lines that meet at sharp points. This creates the illusion of thick, flowing fur. Tip: Vary the length of your lines to make the mane look more natural and less uniform.
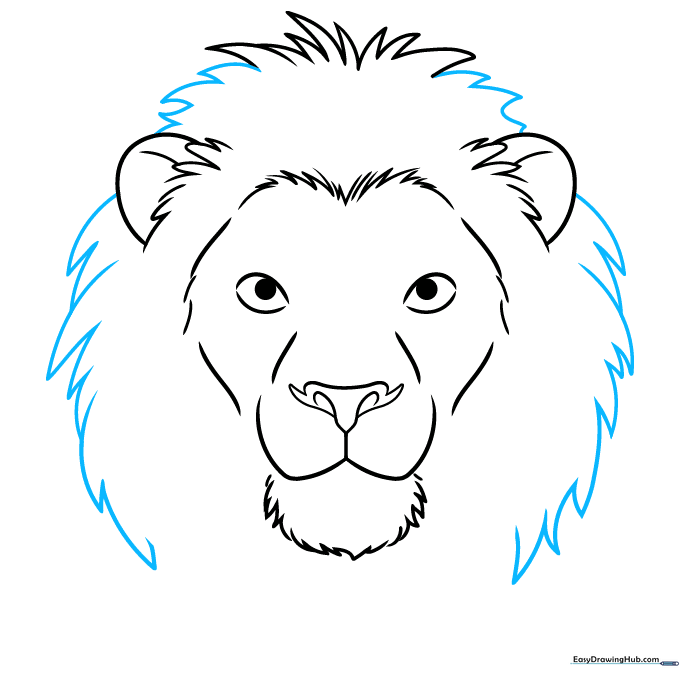
Step 7: Refining the Features
Finish the bottom of the mane with jagged lines. Add small contour lines above the eyes to give the lion a focused expression. Tip: Adding these small details helps define the lion's facial structure.
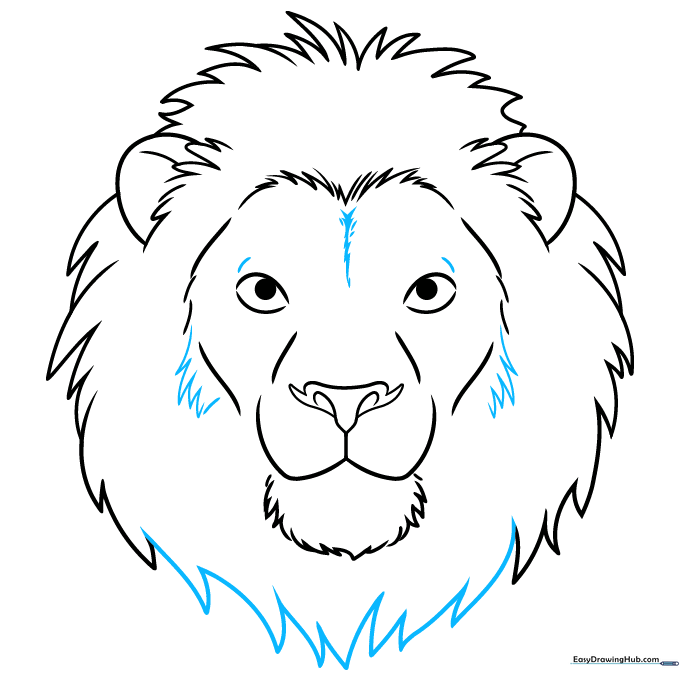
Step 8: Adding Whiskers and Texture
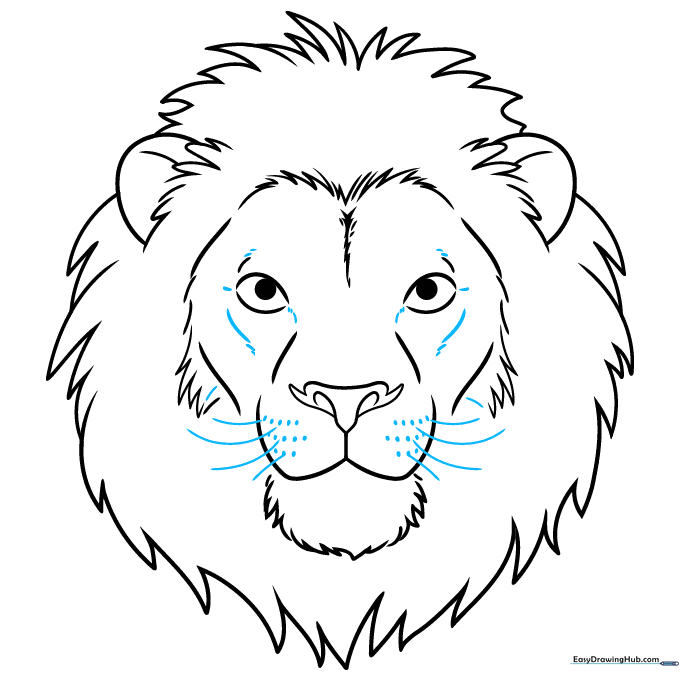
Add contour lines around the eyes. Draw three rows of small dots on the muzzle, and extend long, thin lines outward for whiskers. Tip: Use a sharp pencil for the whiskers to make them look delicate.
Step 9: Final Mane Texturing
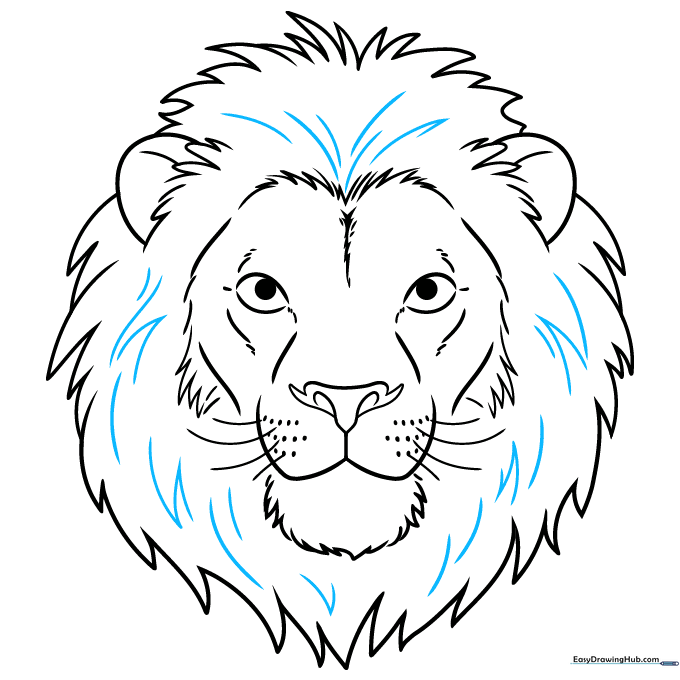
Add final details to the mane by drawing more pairs of curved lines that meet at points. This adds depth and makes the fur look thick and lush. Tip: Focus on the areas near the ears and neck for the most impact.
Step 10: Bringing Your Lion to Life with Color
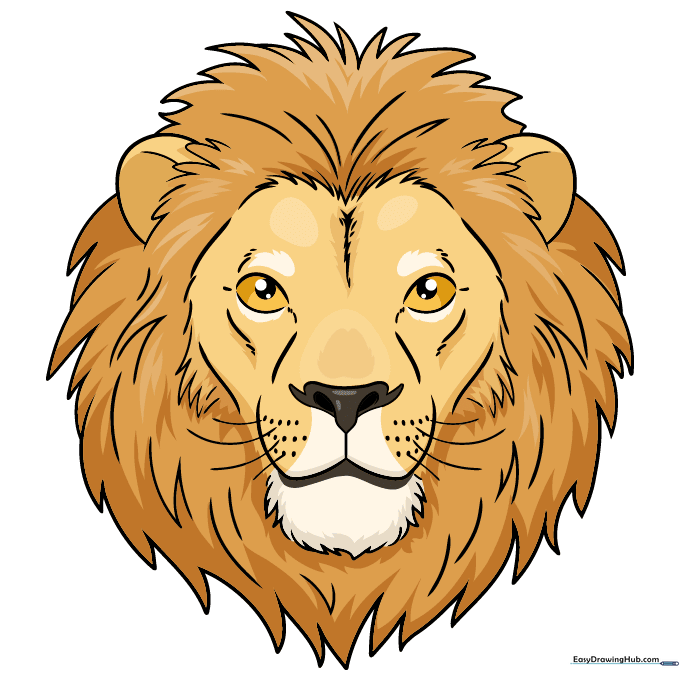
Your outline is complete! Use shades of tan, gold, and brown to color your lion. You can add darker tones to the mane for contrast. Tip: Try using light, circular motions with your colored pencils to create a soft, realistic fur texture.
More Tutorials


