How to Draw a Monkey: Easy 9-Step Guide for Kids
This guided drawing lesson is perfect for children ages 5 and up looking to master basic character shapes. All you need is a pencil, an eraser, and a piece of paper to bring this playful monkey to life. Follow along to develop your sketching confidence and hand-eye coordination.
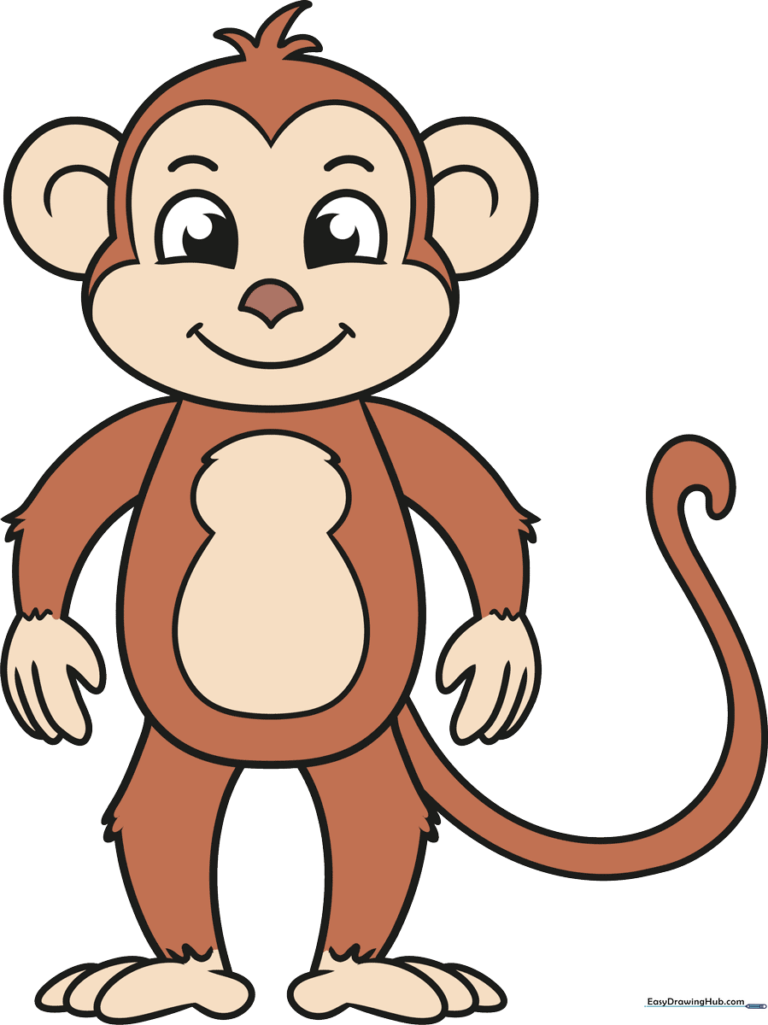
🎯 Final Result
Step-by-Step Instructions
Sketching the Head and Fur

Start by sketching the rounded cheeks and the sides of the face. At the very top, add a small tuft of fur using two curved lines that meet at a point. Teacher's Tip: Keep your pencil pressure light so you can easily erase any stray marks later.
Adding the Ears

Draw a 'C' shaped line on each side of the head to create the ears. Add a smaller curved line inside each one for detail. Teacher's Tip: Try to make the ears symmetrical to give your monkey a balanced, friendly look.
Defining the Face and Body

Outline the inner face area with curved lines around the cheeks and eyes. Then, extend a long, smooth curved line downward and loop it back to form the body. Teacher's Tip: Use one continuous motion for the body to keep the lines looking smooth.
Drawing the Tummy Patch

Draw a peanut-shaped oval inside the body for the tummy. Add a little texture at the top with small, sharp curved lines. Teacher's Tip: This patch is a great place to use a lighter color later, so keep the lines clean.
Adding the Tail

Extend a long, curved line from the side of the body and loop it back to create a prehensile tail. Teacher's Tip: Make the tail look flexible by varying the curve—monkeys use their tails for balance!
Drawing the Eyes and Brows

Outline the eyes, then add a smaller circle inside for the pupil. Shade the pupil dark. Add a curved line above each eye for the eyebrows. Teacher's Tip: Eyebrows help give your monkey personality—try angling them to make your monkey look surprised or happy!
Adding the Nose and Smile

Draw a small triangle for the nose and a wide 'U' shape for the mouth. Add tiny lines at the corners of the mouth. Teacher's Tip: A wide smile makes the monkey look friendly and approachable.
Drawing the Arms
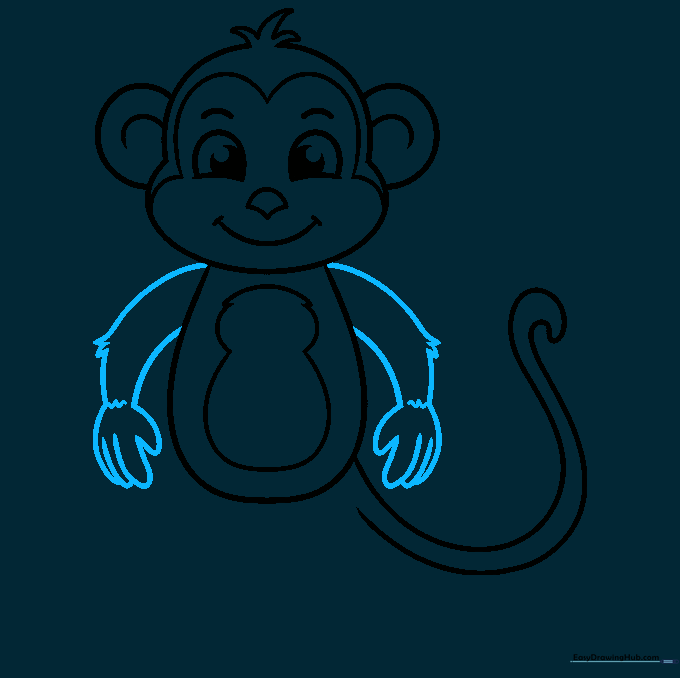
Sketch the arms using curved lines, adding little tufts of fur at the elbows. Use overlapping lines to create the fingers. Teacher's Tip: Don't worry if the fingers look tricky; just focus on making them look like small, rounded shapes.
Finalizing the Legs
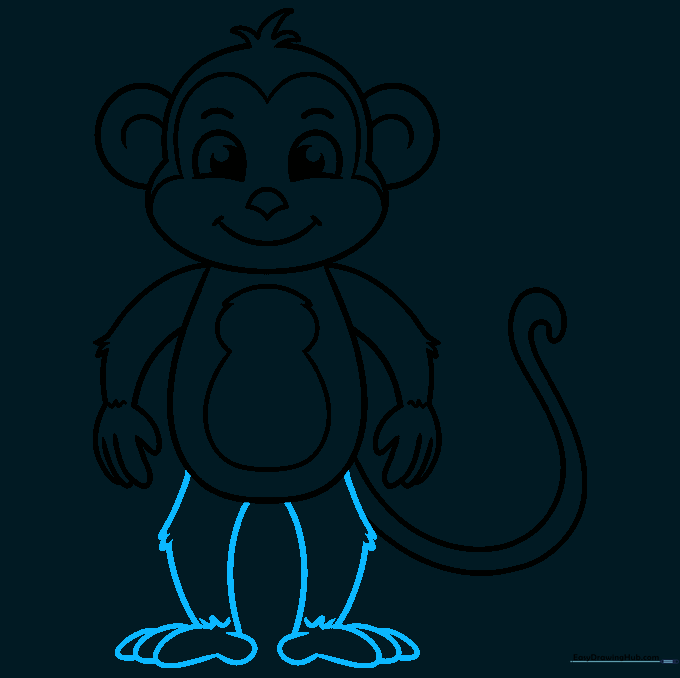
Finish your monkey by drawing the legs with fur tufts at the knees and simple toes at the bottom. Teacher's Tip: Add a small zigzag line at the ankles to represent the fur texture.
Adding Color

Bring your monkey to life with color! Use browns for the fur and tan for the face and tummy. Teacher's Tip: Experiment with different colors—maybe try a pink face for a snow monkey or vibrant colors for a fantasy monkey!
More Tutorials


