How to Draw Lisa Simpson: Easy Step-by-Step Guide
Perfect for young artists ages 5 and up, this tutorial breaks down drawing Lisa Simpson into simple, manageable shapes. You only need a pencil, an eraser, and some paper to bring this iconic character to life. Follow along to build confidence in your sketching skills while creating a fun, recognizable cartoon portrait.
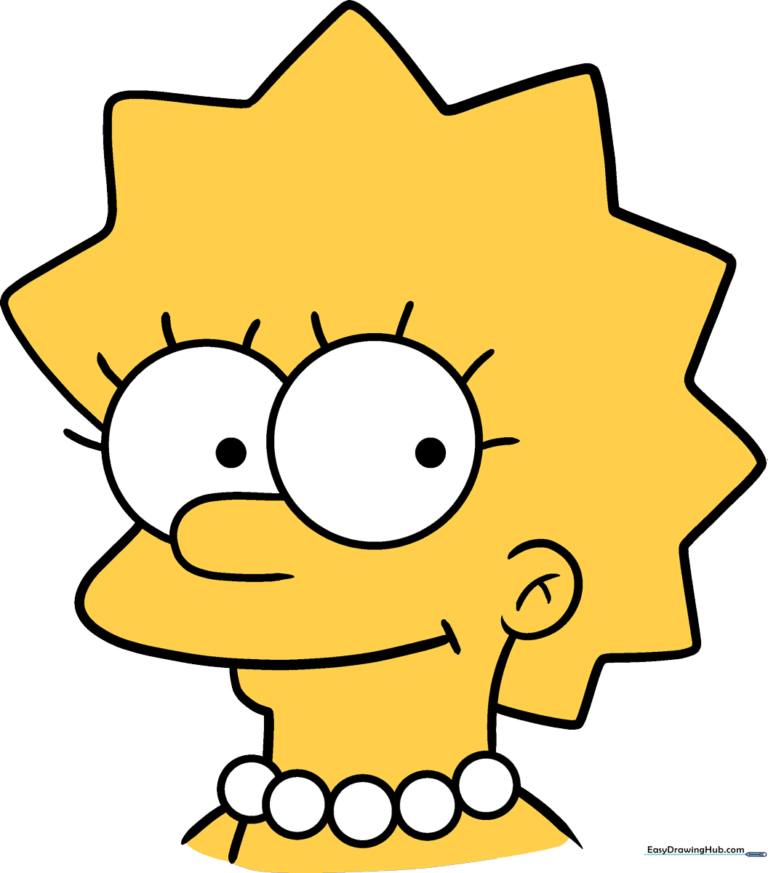
🎯 Final Result
Step-by-Step Instructions
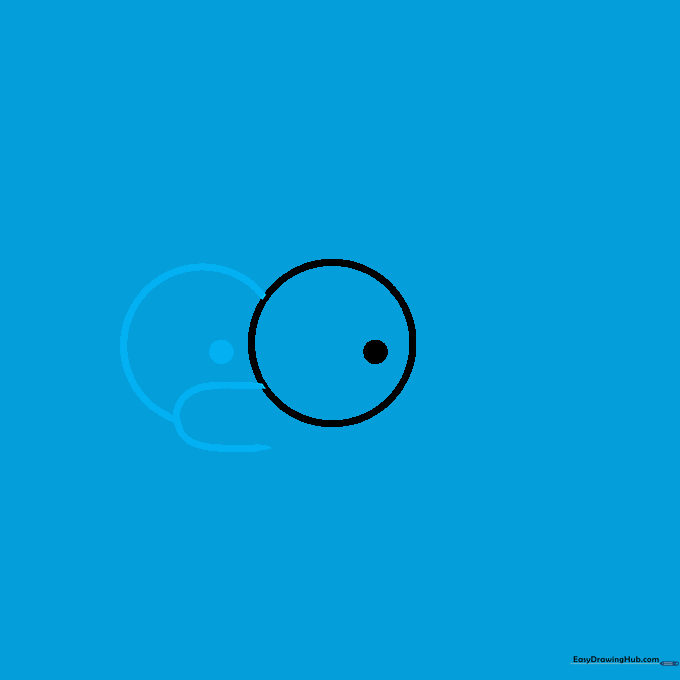
Step 1: Sketching the Base Eye

Draw a medium-sized circle for the eye. Inside, add a smaller, shaded circle for the pupil. Teacher's Tip: Keep your pencil lines light and loose so they are easy to erase if you need to adjust the placement later.
Step 2: Adding the Nose and Second Eye
Extend a curved line from the side of the first eye to form the nose, then loop it back to create the second eye. Add a pupil inside the second eye. Teacher's Tip: Try to keep both eyes the same size to give Lisa a balanced, friendly look.
Step 3: Drawing Eyelashes
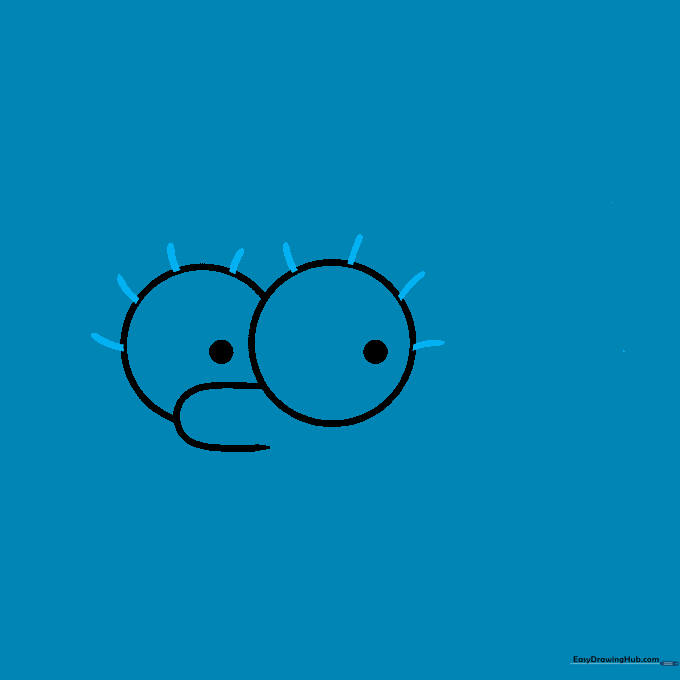
Add short, straight lines to the top and sides of each eye for her signature lashes. Teacher's Tip: Use quick, flicking motions with your pencil to make the lashes look sharp and clean.
Step 4: Sketching the Mouth and Chin
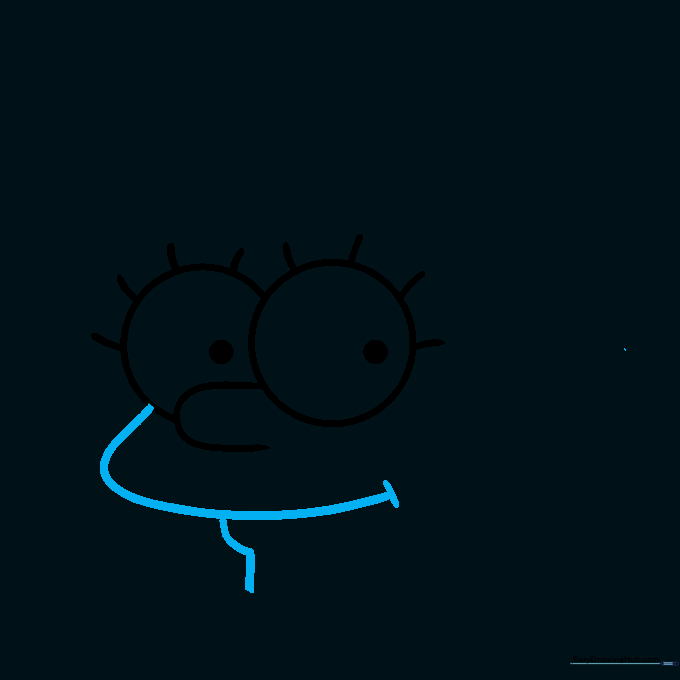
Draw a long, sweeping curve below the eyes to form her smile, adding a small dash at the corner. Below that, draw a soft curve for the chin and neck. Teacher's Tip: Keep the mouth line smooth to capture Lisa's happy expression.
Step 5: Adding the Pearl Necklace

Draw a series of small, overlapping circles around the neck area. Add two short lines for the shoulders. Teacher's Tip: Imagine you are drawing a string of beads; keep the circles uniform in size for a tidy look.
Step 6: Drawing the Ear
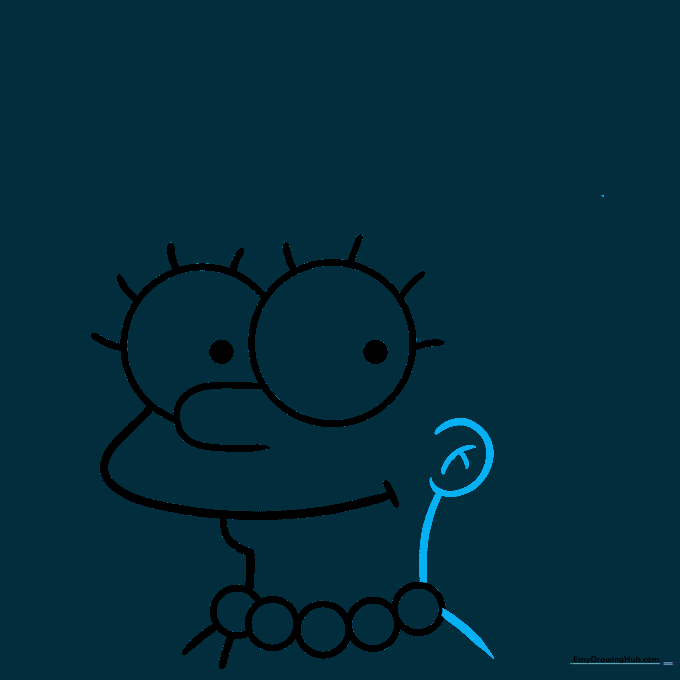
Extend the shoulder lines and add a 'C' shaped curve on the side of the head for the ear. Add a few small lines inside for detail. Teacher's Tip: Place the ear level with the eyes for correct facial proportions.
Step 7: Starting the Spiky Hair
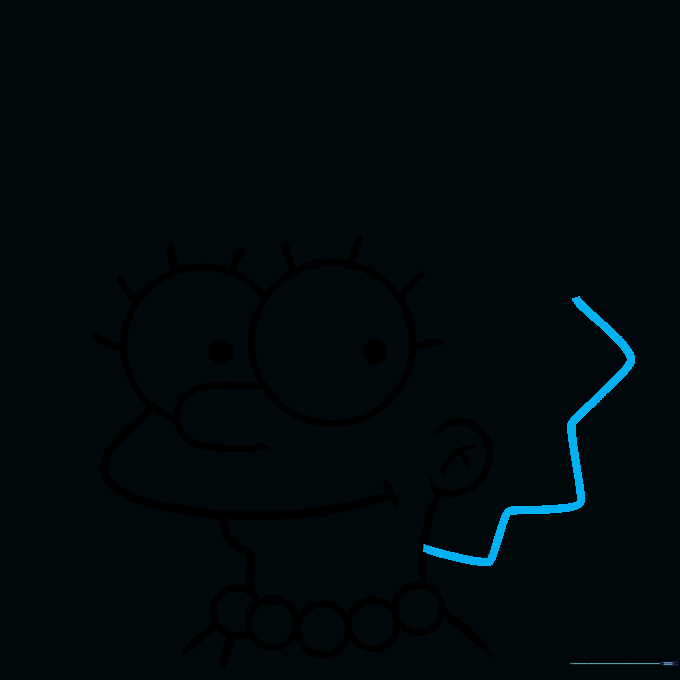
Use zig-zagging triangle shapes to draw the back of Lisa's hair. Teacher's Tip: Don't worry about making the spikes perfect; the character's hair is naturally uneven and fun!
Step 8: Adding Top Hair Spikes
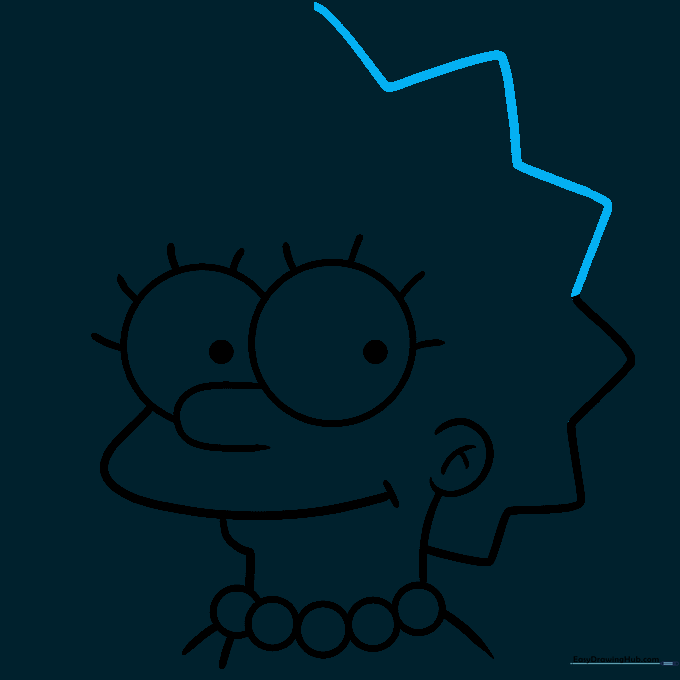
Continue adding the triangle-shaped spikes across the top of her head. Teacher's Tip: Keep the spikes pointing outward to give her hair that signature volume.
Step 9: Completing the Hair Outline
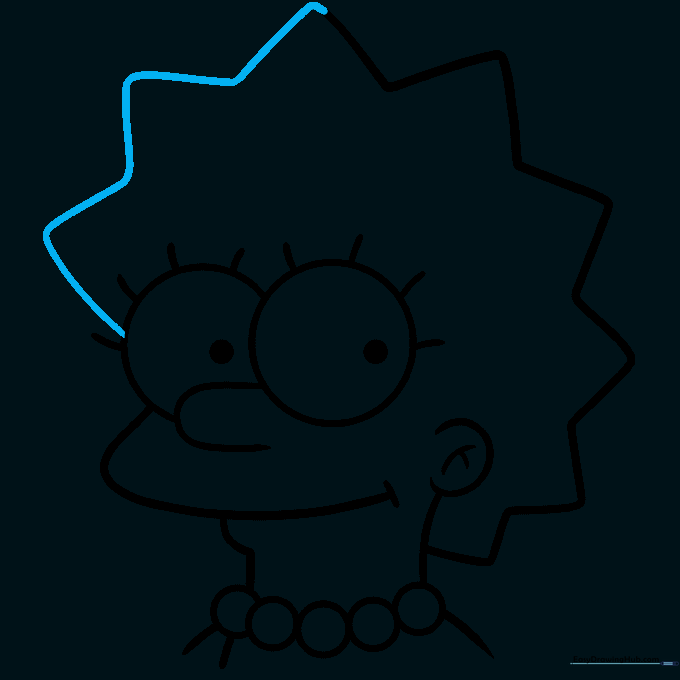
Finish the hair by connecting the spikes to the front of the face, fully enclosing the head shape. Teacher's Tip: Once the outline is done, go over your lines with a darker pencil or marker to make them pop.
Step 10: Adding Color

Bring your drawing to life with color! Use bright yellow for her skin and hair, and keep the necklace white. Teacher's Tip: Use light, circular coloring motions to avoid streaks and keep the colors vibrant.
More Tutorials


