How to Draw a Landscape in 1-Point Perspective: Easy Guide
Introduce young artists to the magic of depth with this one-point perspective landscape. Perfect for ages 7+, this screen-free activity requires only paper, a pencil, and a ruler to transform a flat page into a 3D world. Follow along to build foundational spatial skills while creating a charming countryside scene.
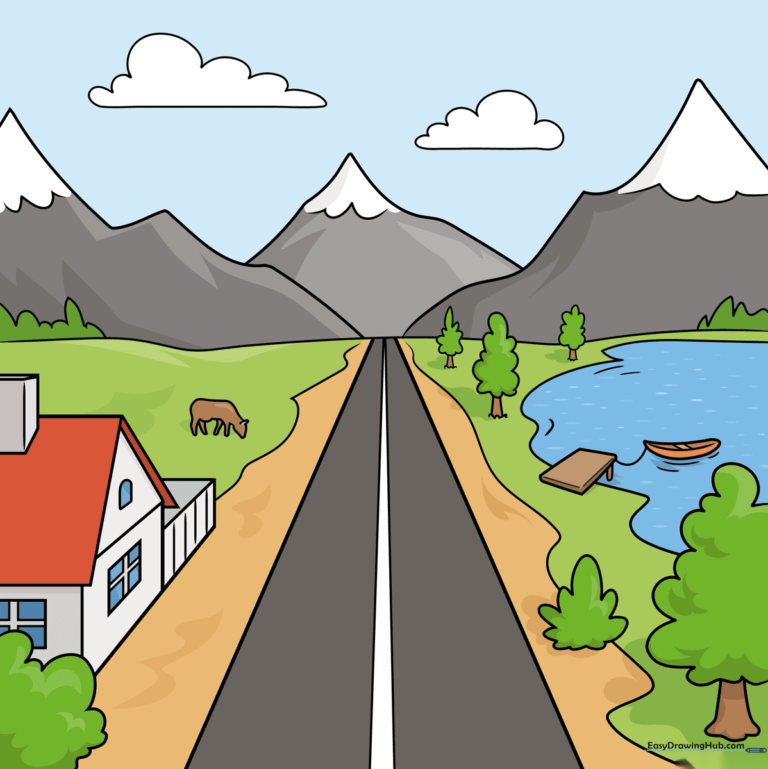
🎯 Final Result
Step-by-Step Instructions
Step 1: Setting the Vanishing Point
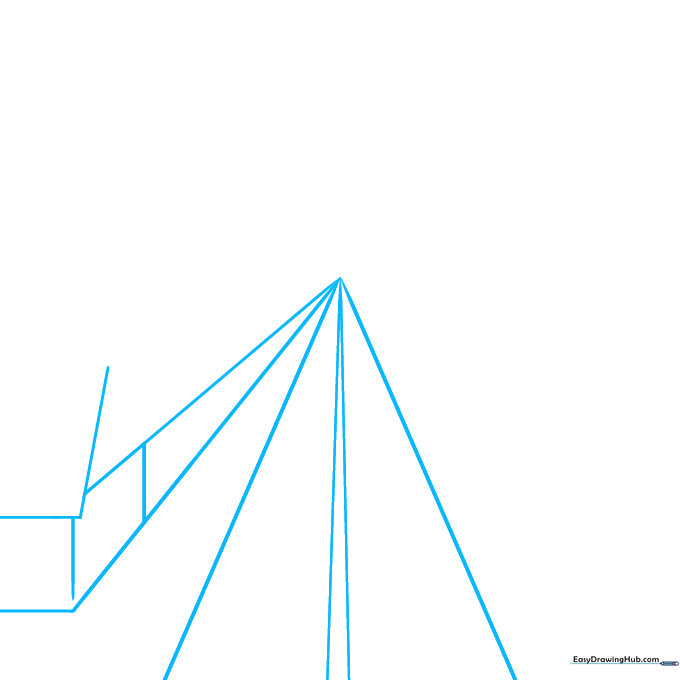
Mark a small dot in the center of your paper—this is your 'vanishing point' where everything meets. Use a ruler to draw six diagonal lines radiating from this point. Tip: Keep these lines very faint so you can easily erase them later; they are just your map for the road and buildings.
Step 2: Building the House
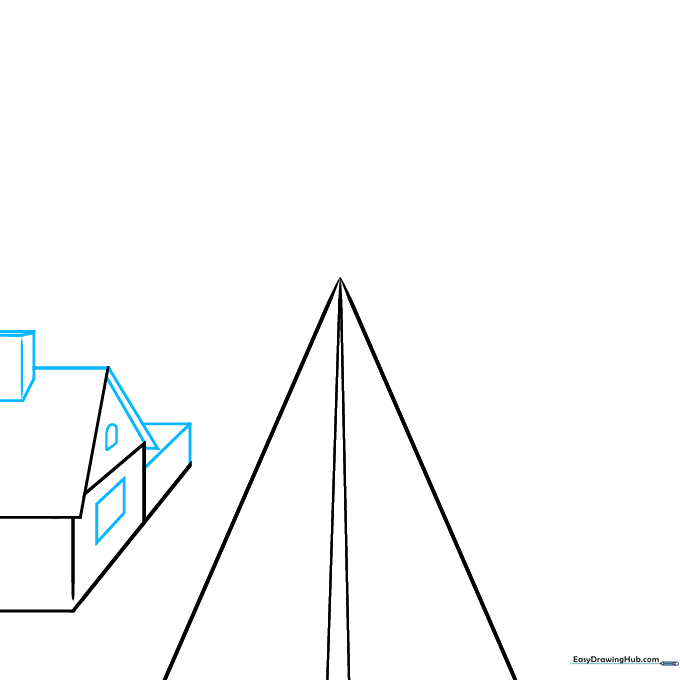
Erase your extra guide lines and define the house structure. Add a rectangular window, a simple fence, and a chimney using straight, confident strokes. Tip: Use the edge of your ruler to keep the roof lines perfectly parallel to the ground.
Step 3: Adding Windows and Trees
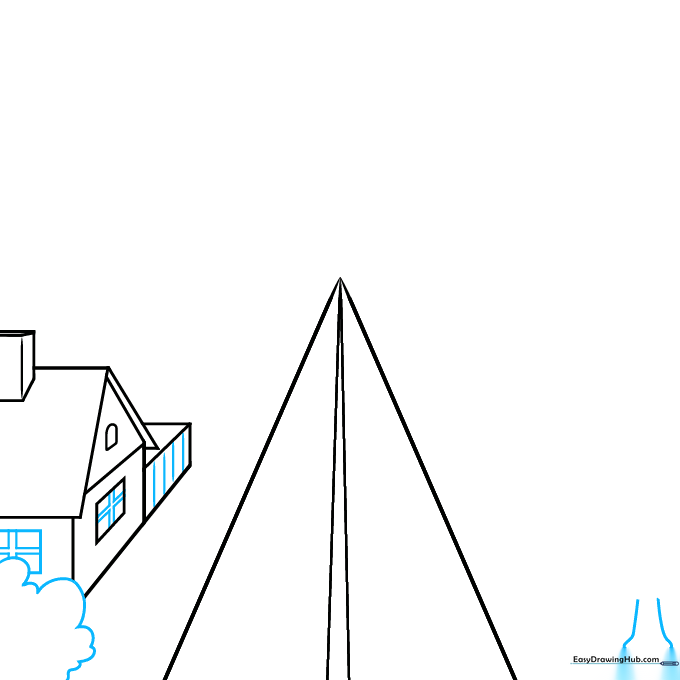
Add a cross-hatch pattern to your windows for a classic look and vertical lines to give the fence texture. On the opposite side of the road, sketch a tree trunk and a rounded crown. Tip: Vary the size of your tree shapes to make them look more natural and less like stamps.
Step 4: Creating Depth with Trees
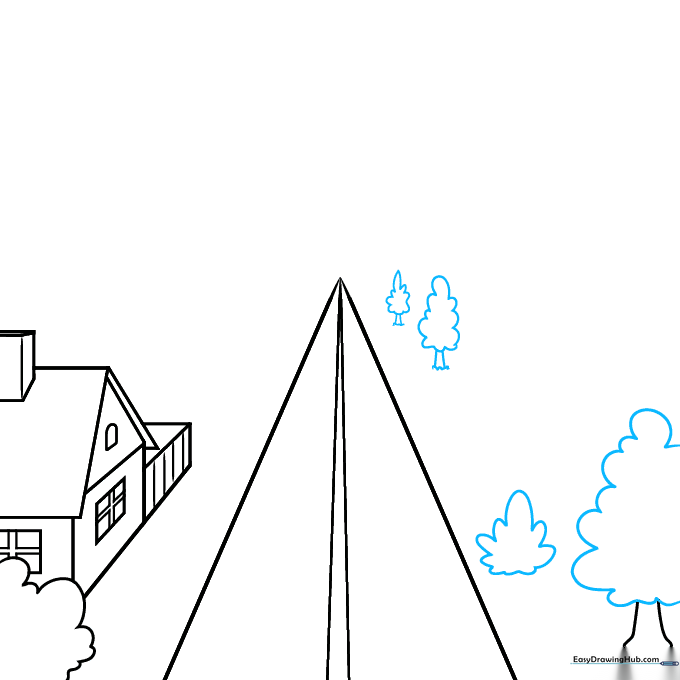
Use bubbly, connected curved lines to fill in the tree crowns. Add a bush and two smaller trees in the background. Tip: Remember the rule of perspective—objects further away should be drawn smaller and higher up on the page.
Step 5: Drawing the Horizon and Water
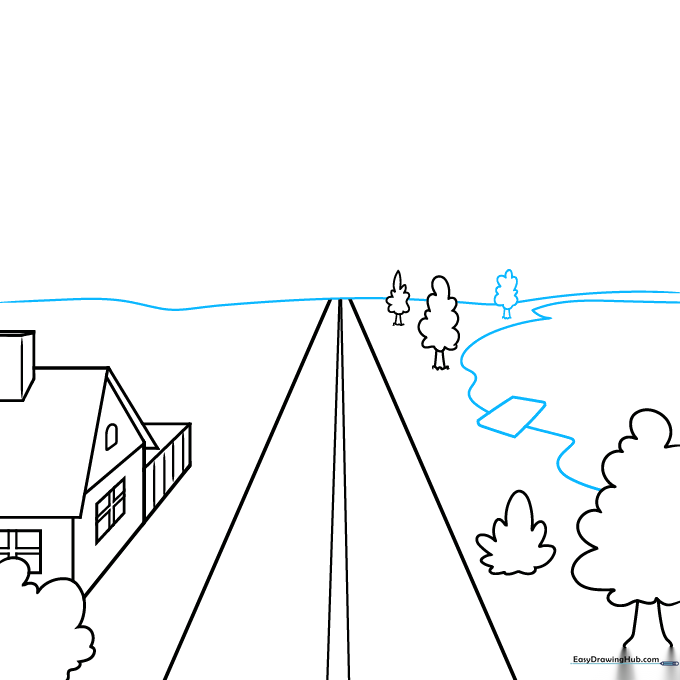
Draw a gentle, wavy horizon line across the back. Erase the road lines that cross into the sky area. Add a small lake and a dock near the bottom. Tip: A dock looks best when drawn with a simple rectangle shape that follows the perspective lines.
Step 6: Adding Details to the Dock
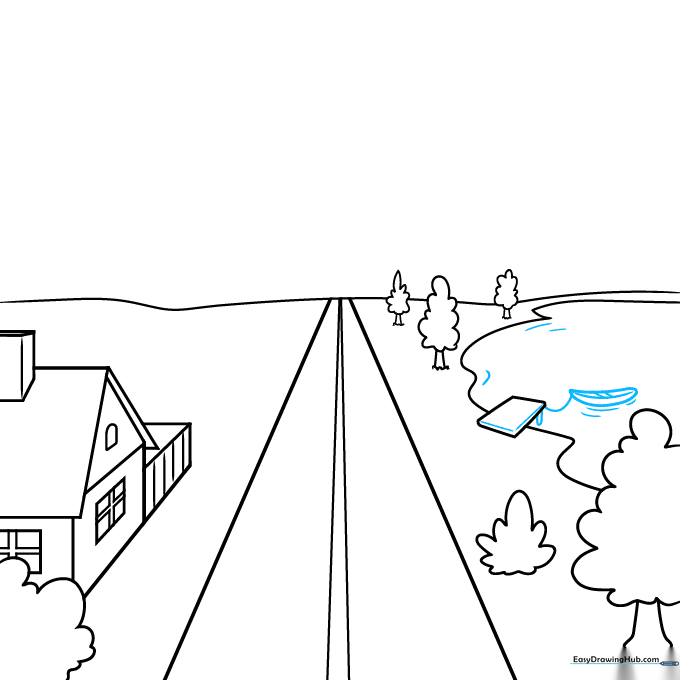
Add short horizontal lines to the dock to show wood planks and wavy lines on the water to show ripples. Sketch a small boat tied to the dock. Tip: Use a 'U' shape for the dock post to give it a 3D, cylindrical look.
Step 7: Adding Life to the Field
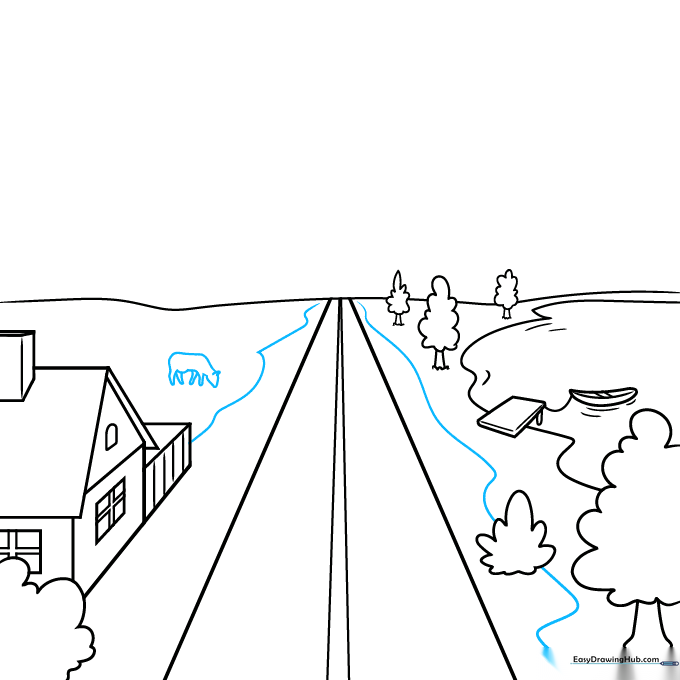
Draw wavy lines along the road edges to represent grass. Add a simple cow grazing in the field. Tip: Keep the cow small; if it's too big, it will look like a giant monster instead of a farm animal!
Step 8: Mountains and Treelines
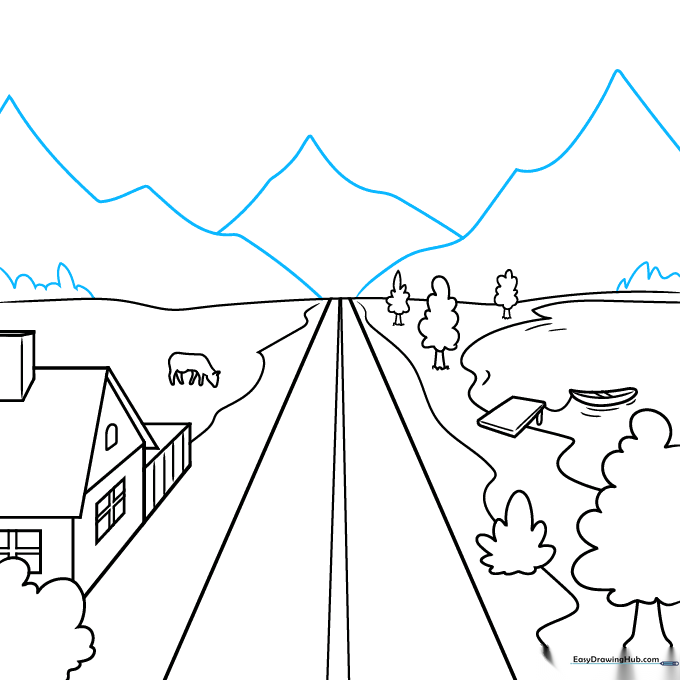
Use jagged, zig-zag lines to create mountains in the distance. Add a treeline below them using connected curves. Tip: Make your mountain peaks uneven to make them look more realistic.
Step 9: Final Touches
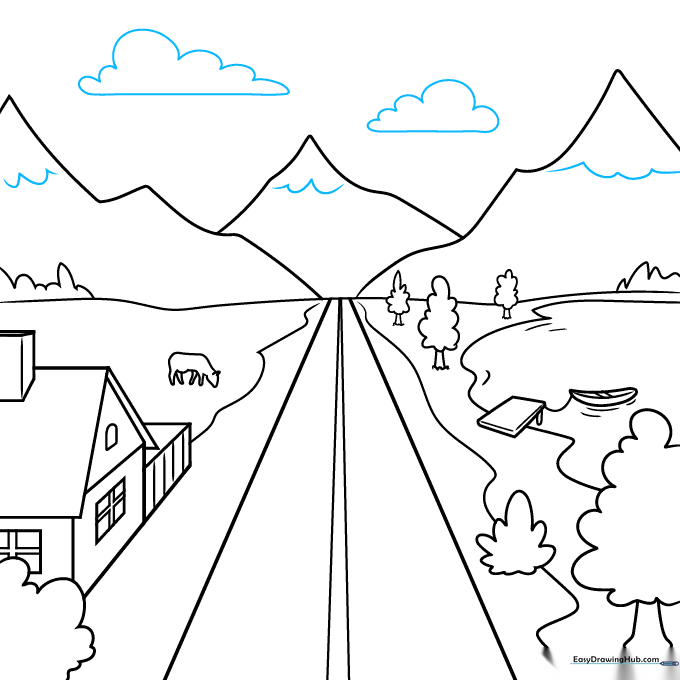
Add 'U' shapes to the mountain tops for snowcaps and fluffy clouds in the sky. Tip: Clouds look best when they are grouped in different sizes—don't make them all the same!
Step 10: Bring Your Landscape to Life

Your perspective landscape is finished! Now, grab your markers or colored pencils. Tip: Use cooler, lighter blues for the distant mountains to make them look even further away—this is called 'atmospheric perspective'!
More Tutorials


