How to Draw a Flying Angel: Simple Step-by-Step Guide
Bring a celestial character to life with this beginner-friendly drawing guide. Designed for ages 5 and up, this activity requires only a pencil, paper, and an eraser to build confidence in character design. Follow these simple steps to master the proportions of a flying angel, complete with wings and a halo.
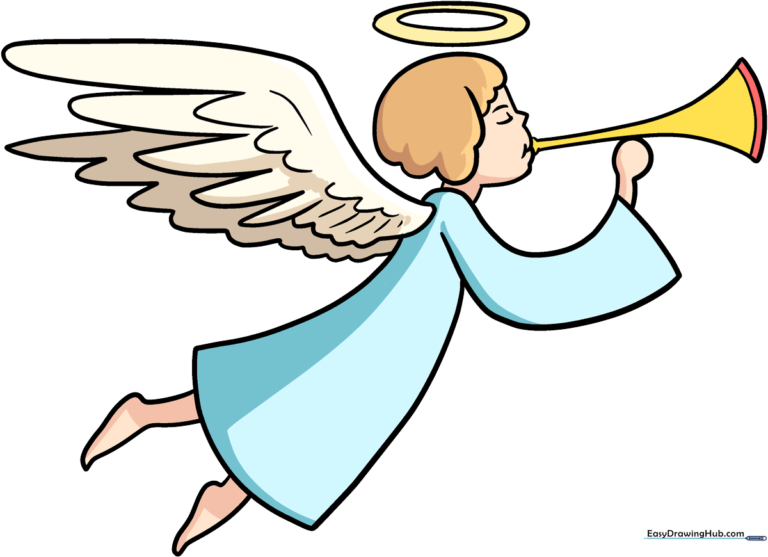
🎯 Final Result
Step-by-Step Instructions
Step 1: Sketching the Head and Face
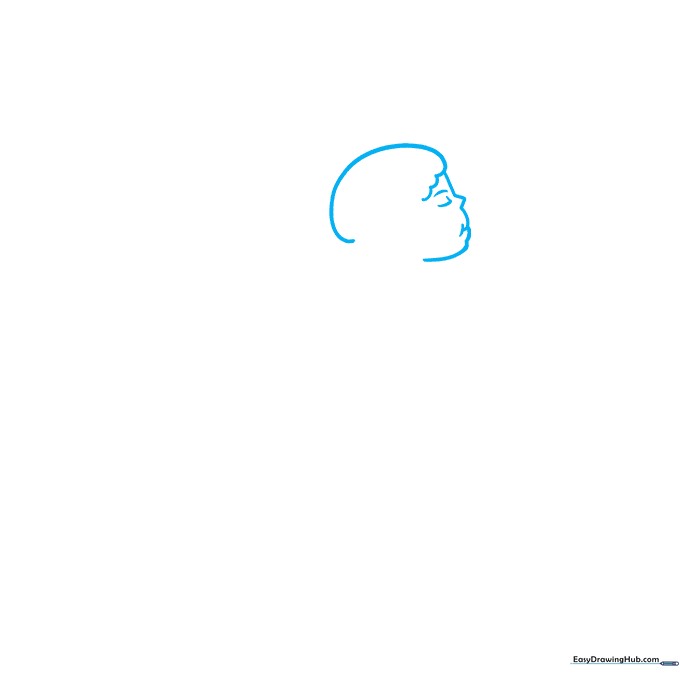
Start by drawing a light circle for the head. Add soft, curved lines for the hair and a gentle curve for the mouth. Tip: Keep the face small to leave plenty of room for the wings later!
Step 2: Defining the Hair and Neck
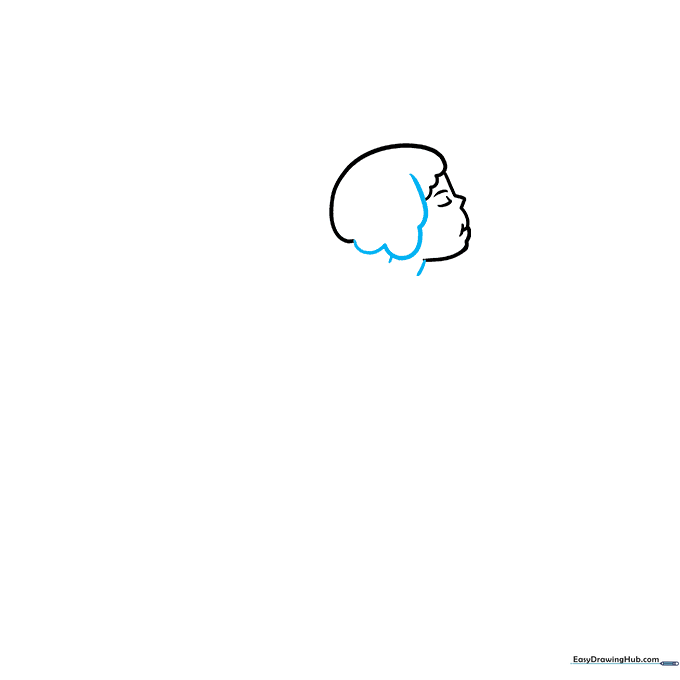
Add a scalloped line over the forehead to create the hair. Extend two short, parallel lines downward to form the neck. Tip: Use a light touch for the neck so it looks delicate.
Step 3: Drawing the Arm and Sleeve
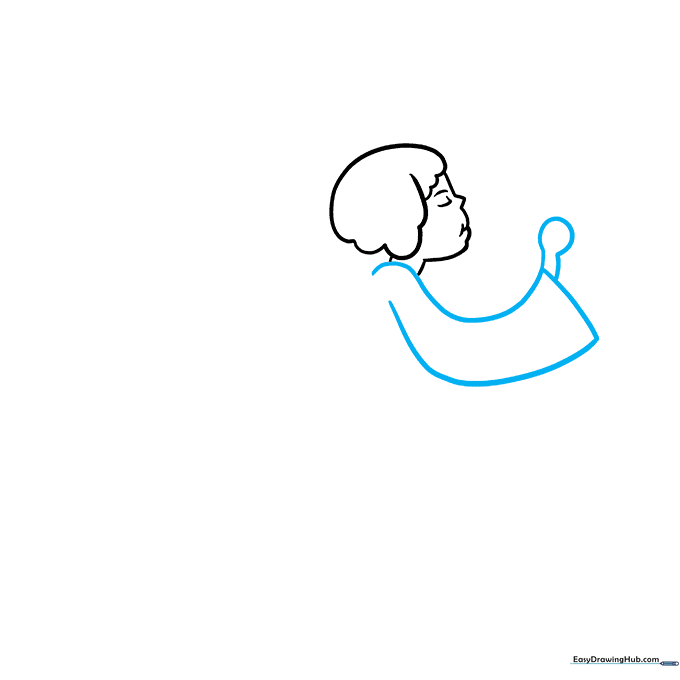
Draw a curved sleeve shape extending from the neck area. Add two lines for the arm and a small circle for the hand. Tip: Imagine the arm is reaching out to hold the horn.
Step 4: Sketching the Horn
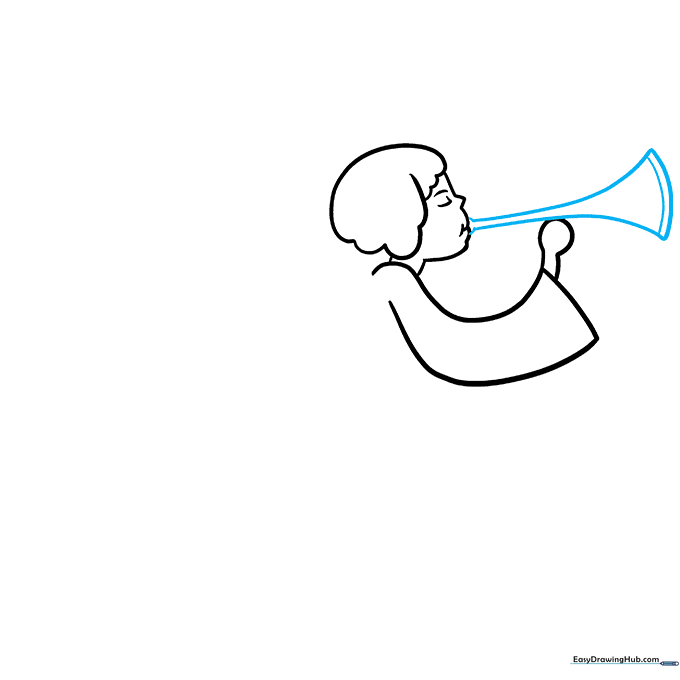
Draw the horn by sketching two long, parallel lines that curve outward. Connect them at the end. Tip: Make the horn look like a gentle trumpet shape.
Step 5: Outlining the Gown
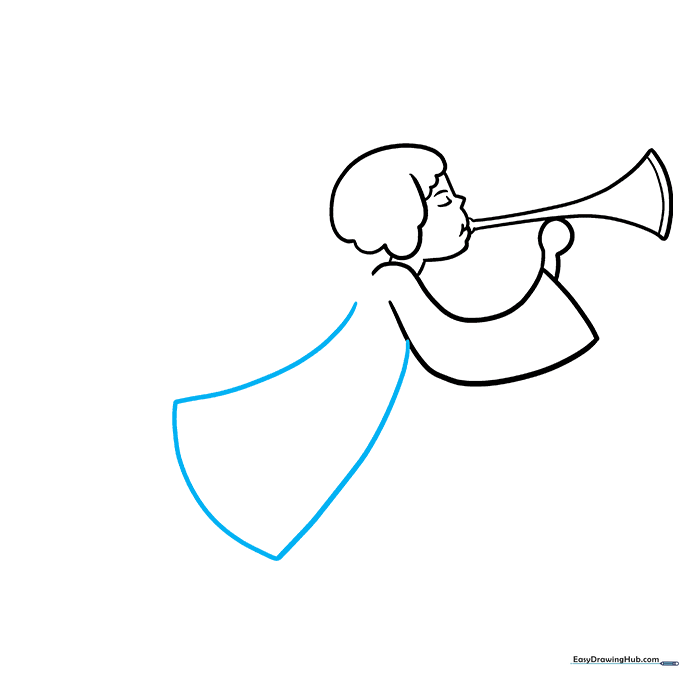
Draw two long, flowing lines from the arm to create the gown. Connect them at the bottom with a curve. Tip: Think of the gown as a bell shape to give it a sense of movement.
Step 6: Adding the First Wing
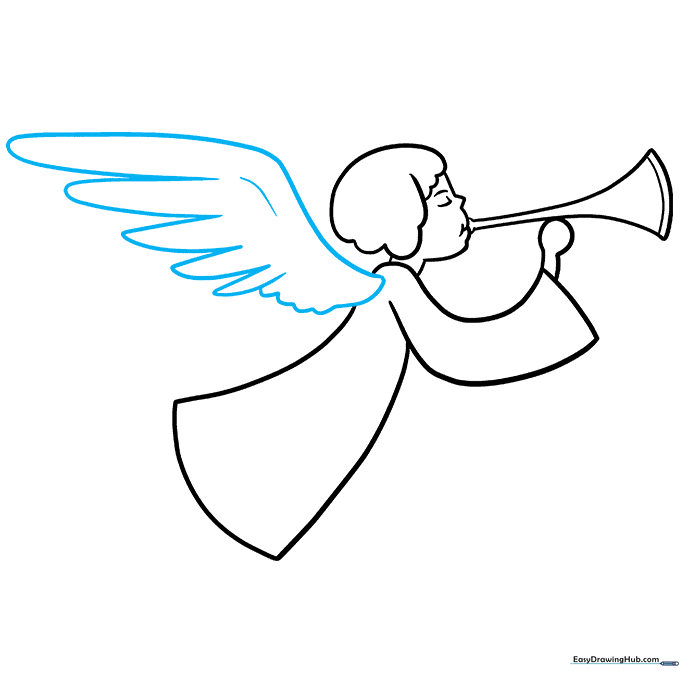
Draw a large, curved line for the back of the wing. Add 'U' shaped lines along the edge to represent feathers. Tip: Make the feathers slightly larger as you move toward the bottom.
Step 7: Adding the Second Wing
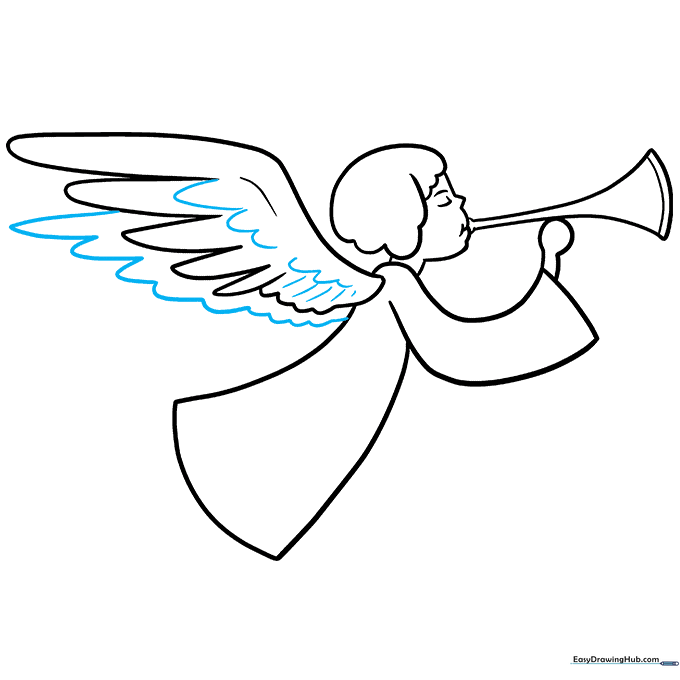
Add more feather details to the first wing, then draw a second wing partially hidden behind the first. Tip: Use lighter, thinner lines for the back wing to create depth.
Step 8: Drawing the Feet
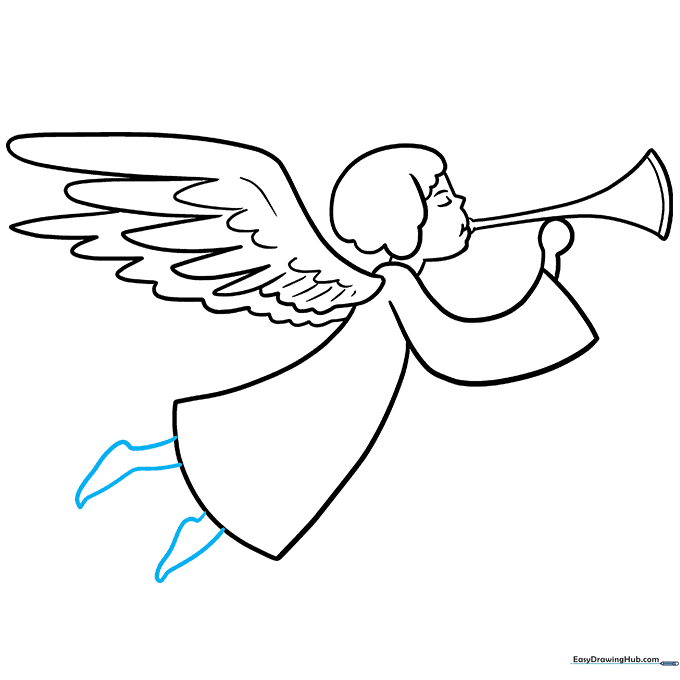
Add small, curved shapes at the bottom of the gown for the feet. Tip: Keep these simple—they don't need to be detailed since they are far from the face.
Step 9: Adding the Halo
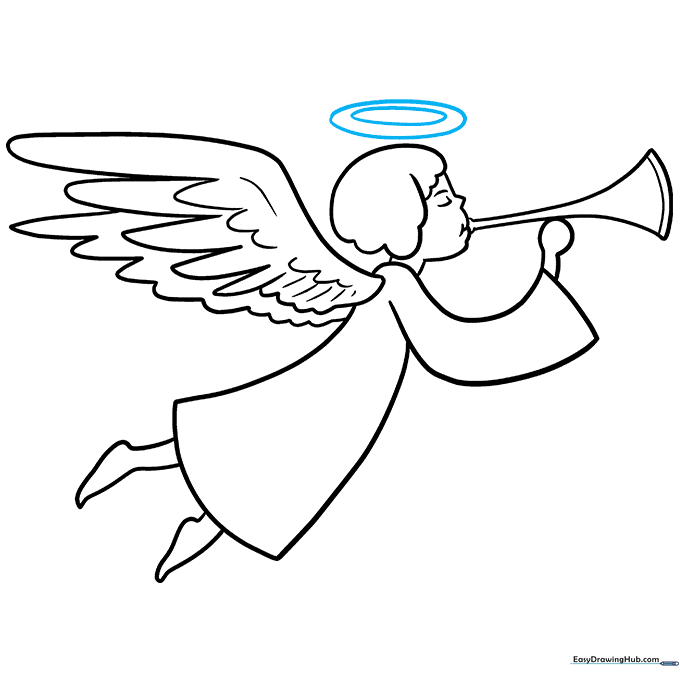
Draw an oval above the head, then a smaller oval inside it to create the halo. Tip: Make sure the halo is centered above the head for a balanced look.
Step 10: Coloring Your Angel

Bring your angel to life with color! Use gold for the halo and horn, and soft blues or whites for the gown. Tip: Use light pressure with your crayons to create a soft, ethereal look.
More Tutorials


