How to Draw a Cartoon Train: Easy 9-Step Guide for Kids
Looking for a fun, screen-free activity? This cartoon train tutorial is perfect for young artists ages 5 and up. Grab a pencil, an eraser, and a piece of paper to build your own locomotive from scratch, focusing on basic geometric shapes to master your drawing technique.
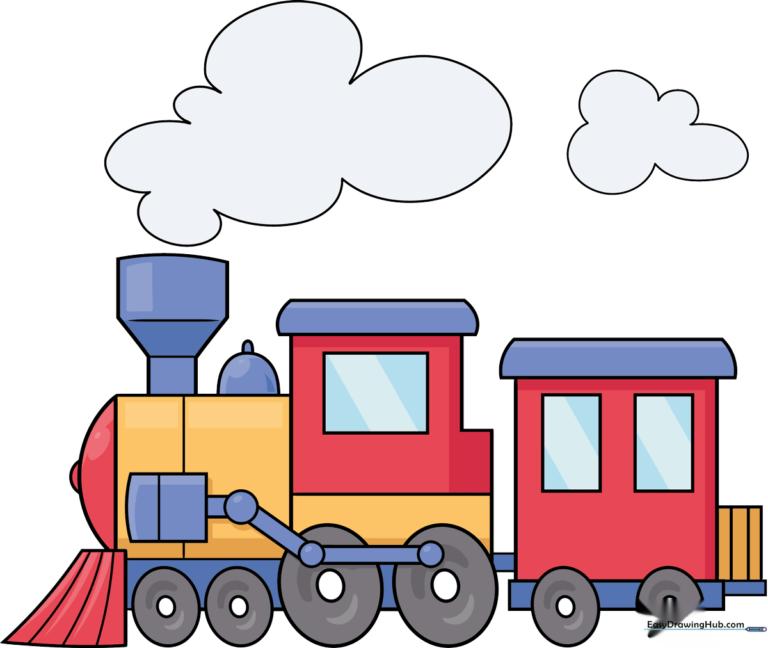
🎯 Final Result
Step-by-Step Instructions
Step 1: Sketching the Wheel Base

Start by drawing two small circles and two larger circles for the wheels. Connect them with short, straight lines to form the base. Teacher's Tip: Keep your pencil pressure light so you can easily adjust the spacing if the wheels look a bit wobbly.
Step 2: Building the Cab
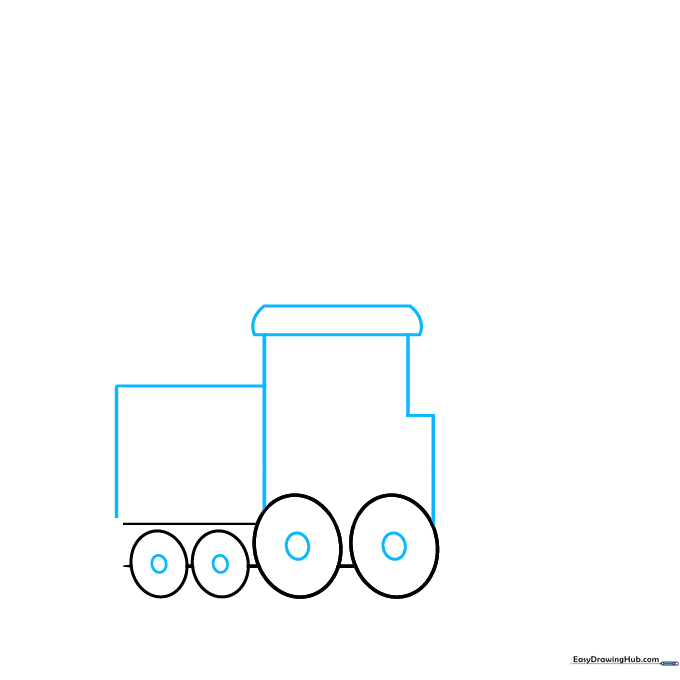
Draw a smaller circle inside each wheel for the hubs. Then, sketch the train cab by drawing a square above the small wheels and an irregular shape above the larger ones. Tip: Use a ruler if you want perfectly straight lines, or embrace the 'cartoon' style with slightly freehand edges.
Step 3: The Cowcatcher and Smokestack
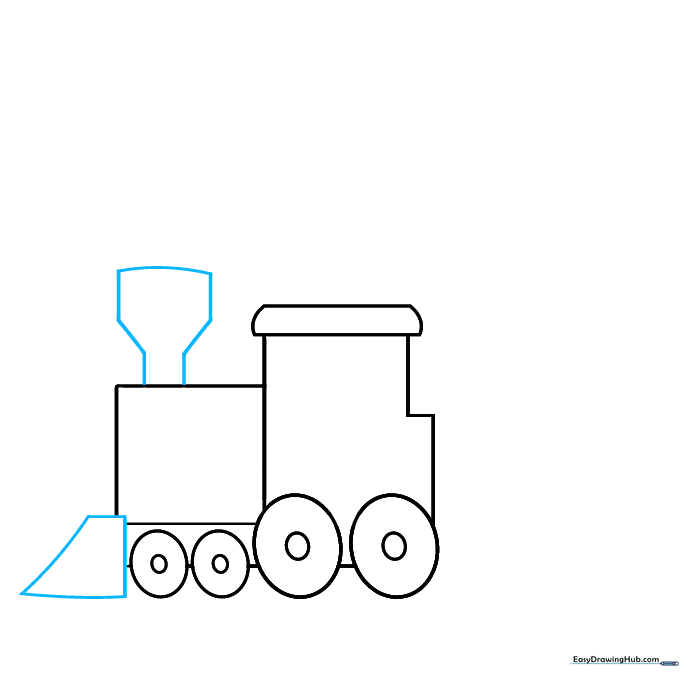
Add an irregular trapezoid at the very front—this is your cowcatcher! Above the front engine area, draw an irregular heptagon for the smokestack. Tip: Think of the smokestack as a tall, slightly tilted cup.
Step 4: Adding Engine Details

Draw horizontal lines across the cab and smokestack to give them texture. Add half-circles on top of the engine to create the boiler details. Tip: Keep your curves smooth by moving your whole arm rather than just your wrist.
Step 5: Windows and Panels

Sketch a square window on the cab and a rectangle on the engine body. Add vertical lines across the engine to represent the metal panels. Tip: Use a light touch; these lines don't need to be perfectly spaced to look great.
Step 6: Coupling Rods
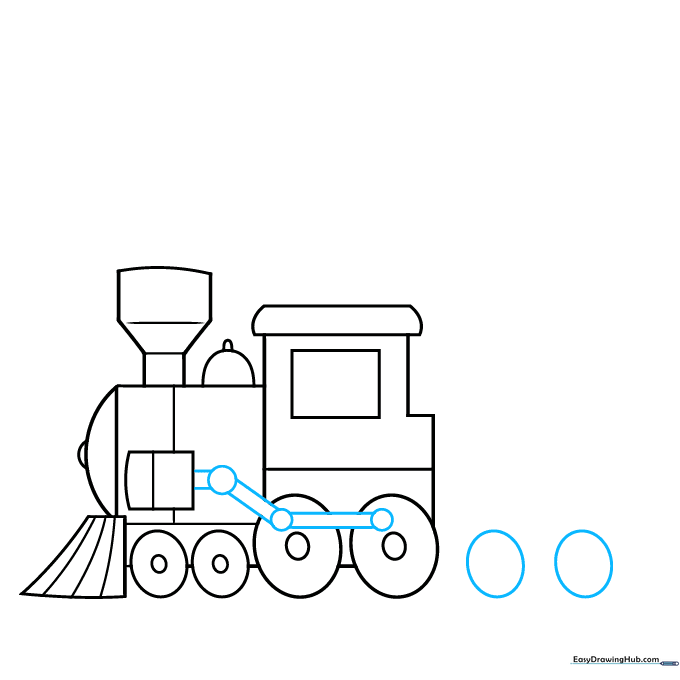
Draw small circles on the large wheels and connect them with straight lines to create the coupling rods. Add two more small oval wheels behind the engine. Tip: These rods are what make the wheels look like they are ready to turn!
Step 7: The Passenger Car
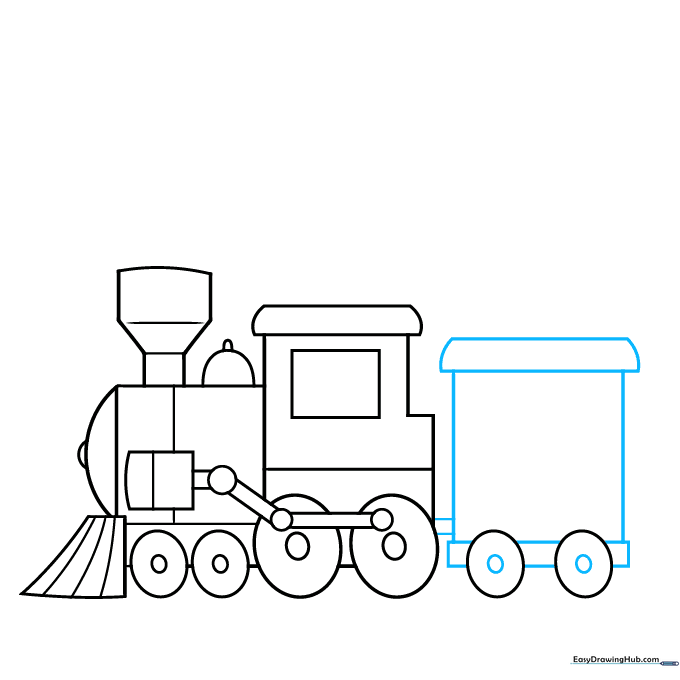
Add a circle inside each wheel. Use straight lines to draw the base and walls of the passenger car, connecting it to the engine. Tip: Ensure the passenger car is roughly the same height as your engine cab for a balanced look.
Step 8: Windows and Smoke
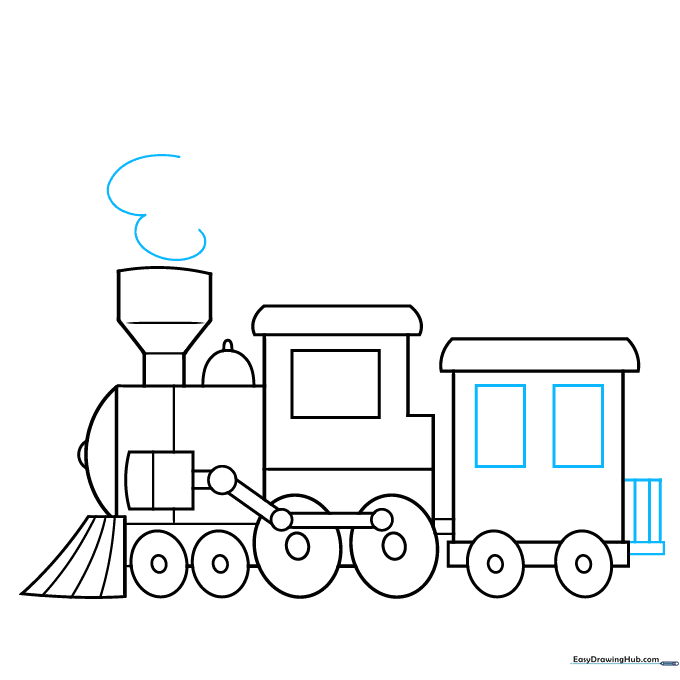
Draw rectangular windows on the passenger car and a small railing on the back. Start sketching a fluffy cloud of smoke above the smokestack using curved lines. Tip: Smoke is organic, so don't worry about making the curves perfect—the wavier, the better!
Step 9: Final Touches

Complete the smoke clouds with overlapping curved lines of different lengths. Now, look over your drawing and darken the lines you want to keep. Tip: Use an eraser to clean up any stray construction lines before you start coloring.
Step 10: Color Your Masterpiece
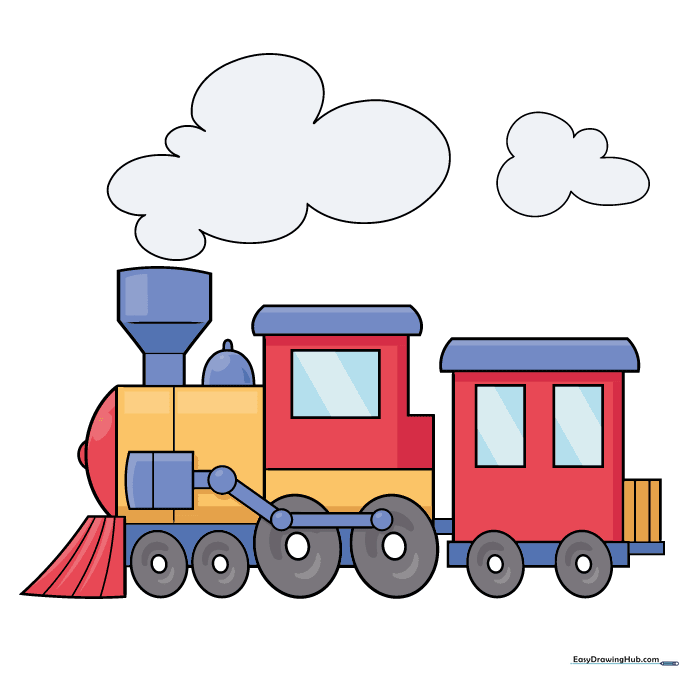
Your train is ready for color! Whether you choose a classic black and red or a bright, imaginative palette, have fun filling in the shapes. Tip: Use colored pencils for fine details and markers for bold, solid areas.
More Tutorials


