How to Draw a Cute Cartoon Sheep: Easy 9-Step Guide
This friendly cartoon sheep project is perfect for artists ages 5 and up. All you need is a pencil, an eraser, and a piece of paper to bring this fluffy character to life. Follow along to practice basic shapes and build your confidence in character design.
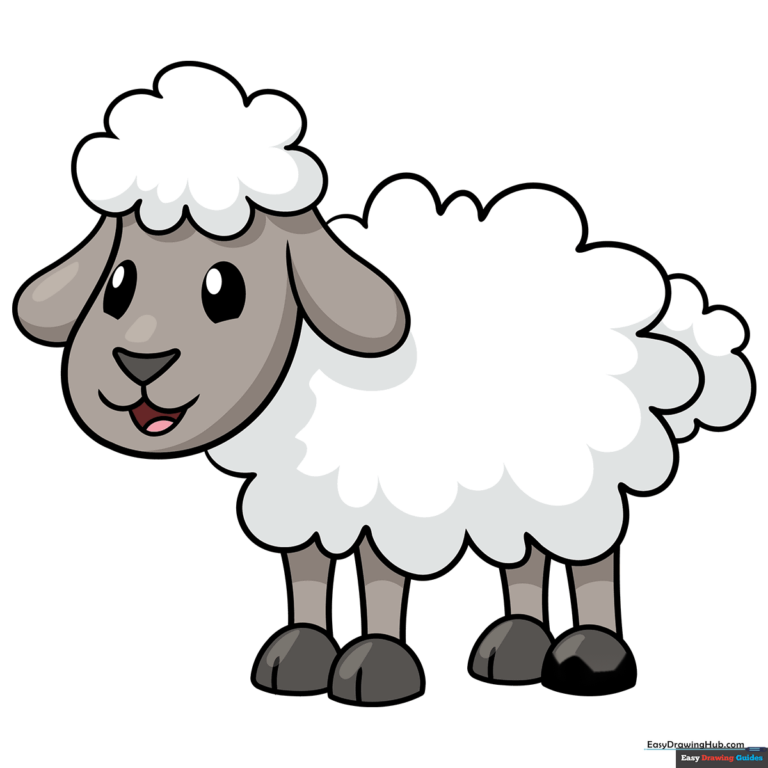
🎯 Final Result
Step-by-Step Instructions
Step 1: Sketching the Face

Start by drawing the sheep’s face. Use a curved triangle for the nose and two ovals for the eyes. Teacher's Tip: Keep your pencil lines light so you can easily erase any mistakes later.
Step 2: Adding the Smile

Draw a rounded “W” shape below the nose for the mouth, then add a “U” shape underneath for an open mouth. Add a small curved line inside for the tongue. Tip: Keep the lines soft to make the sheep look friendly and happy.
Step 3: Creating the Wooly Forehead
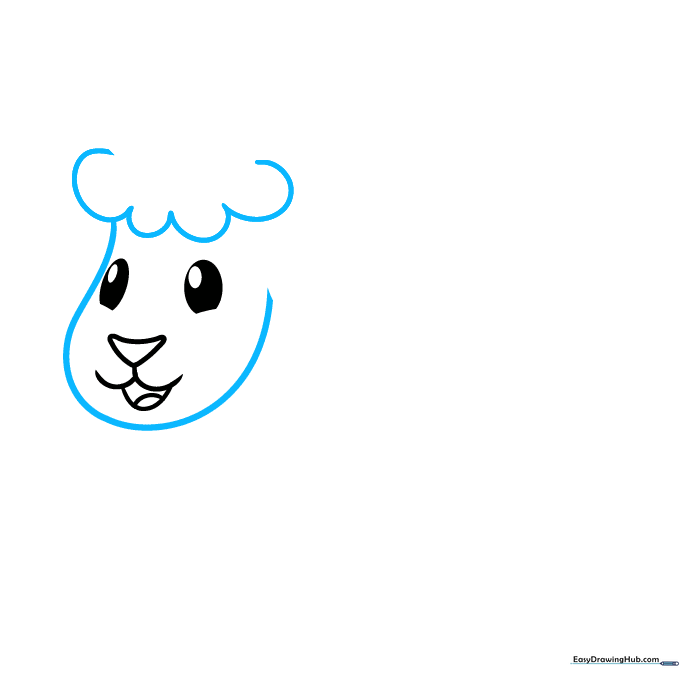
Outline the face with a long curved line. At the top, draw a puffy tuft of wool using a series of connected “U” shapes. Tip: Vary the size of your “U” shapes to make the wool look natural and fluffy.
Step 4: Finishing the Head and Ears
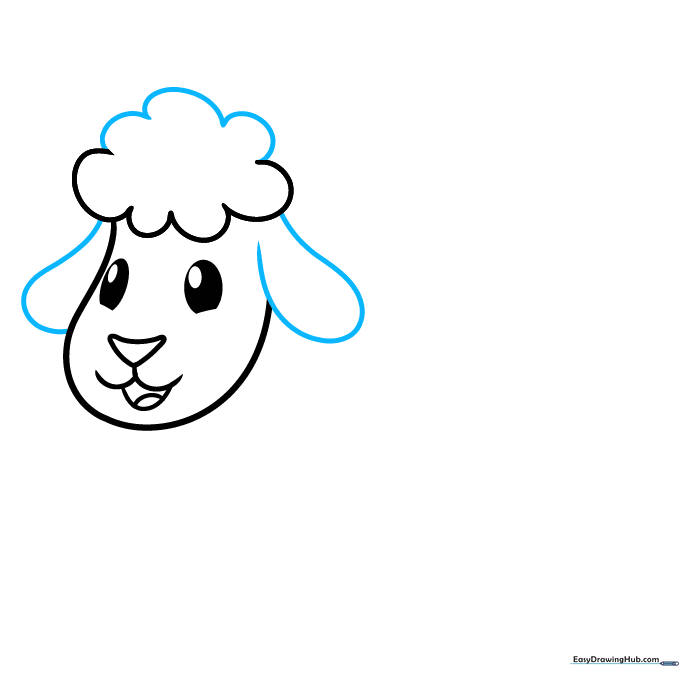
Continue the fluffy outline around the face and add two ears by drawing long, curved loops. Tip: Make sure the ears are symmetrical to give your sheep a balanced, cute look.
Step 5: Starting the Fluffy Body

Begin the body by drawing a series of connected “U” shapes. Tip: Don't worry about making them perfect; irregular shapes actually make the wool look more realistic and soft.
Step 6: Completing the Body and First Leg
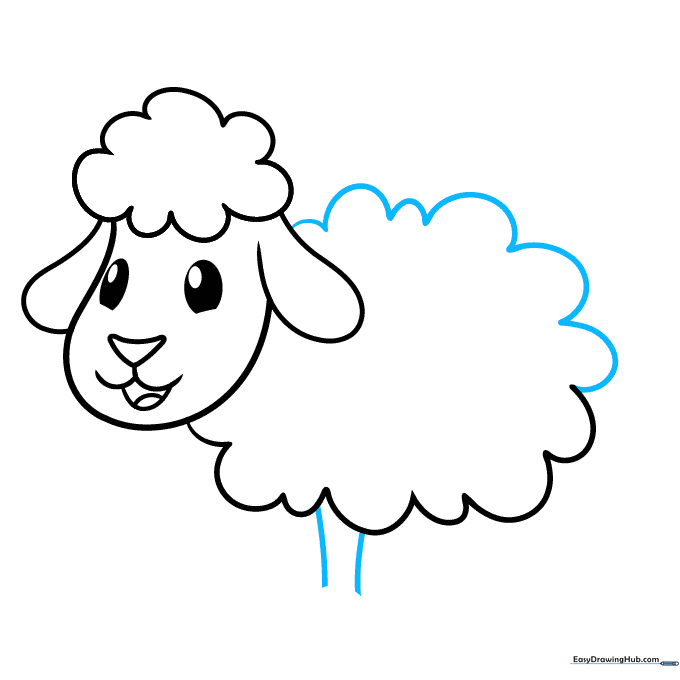
Finish the rounded body with more “U” shapes. Then, draw two parallel curved lines extending downward to form the first leg. Tip: Keep the leg lines slightly wider at the top for a sturdy appearance.
Step 7: Adding Legs and Hooves
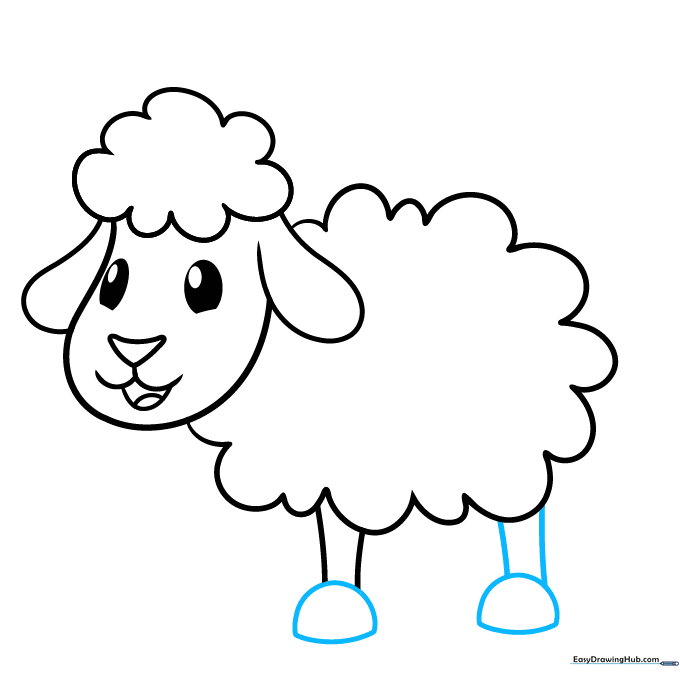
Draw the second leg and add a half-circle at the bottom of each leg to create the hooves. Tip: A simple horizontal line on the hoof adds a great sense of depth.
Step 8: Adding the Remaining Legs
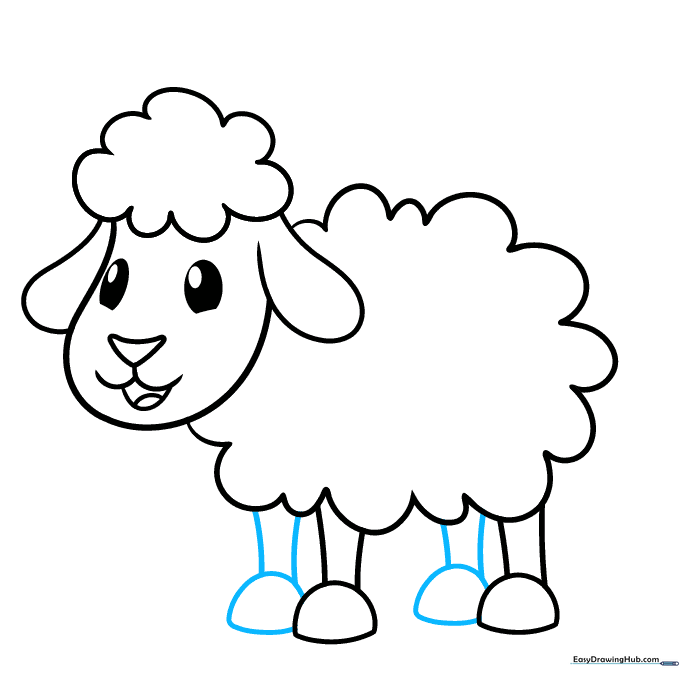
Draw the final two legs using the same technique as before. Tip: Since these are in the background, you can draw them slightly shorter to create a sense of perspective.
Step 9: Final Details
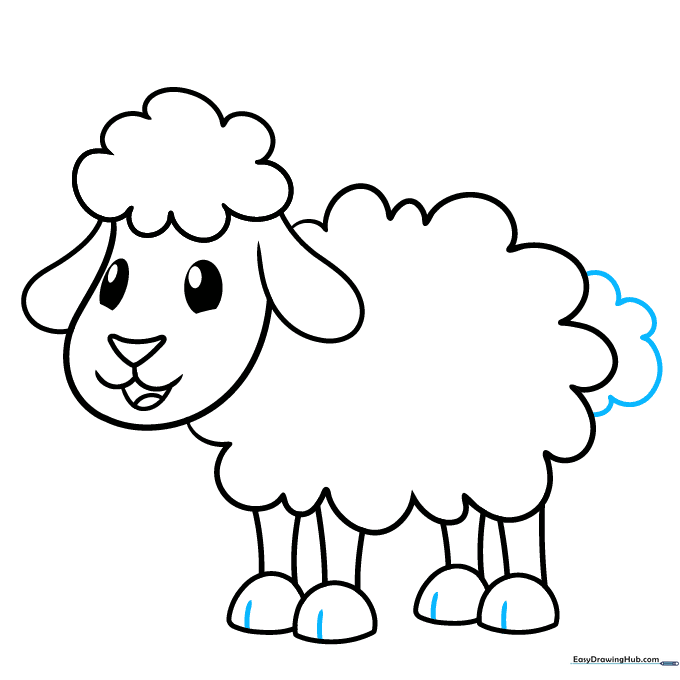
Add a small, fluffy tail using the same “U” shapes. Review your drawing and darken your favorite lines. Tip: Erase any overlapping guide lines inside the body to make the drawing look clean and professional.
Step 10: Bring Your Sheep to Life with Color
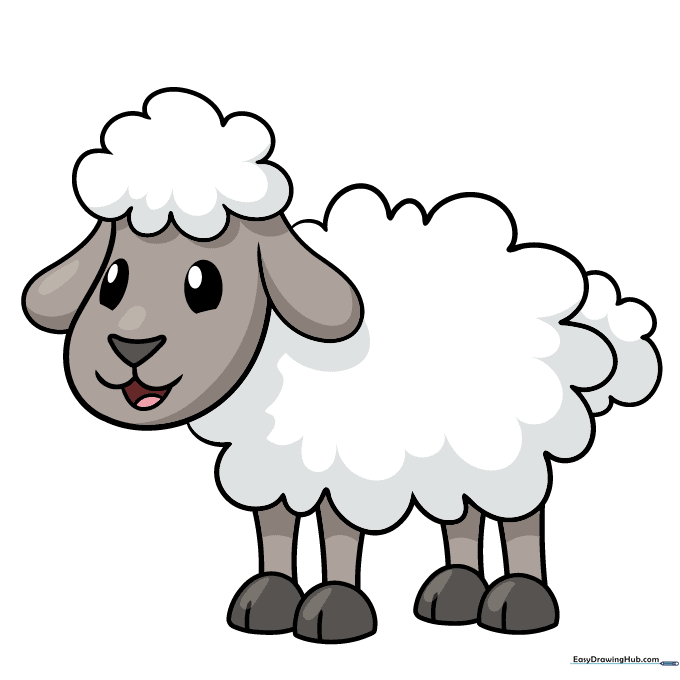
Now for the fun part! Use white, tan, or even grey for the wool. You can make your sheep unique by adding spots or using different colors for the face. Tip: Try using light pressure with your colored pencils to create a soft, wooly texture.
More Tutorials


