How to Draw a Cute Cartoon Chipmunk: Easy 10-Step Guide
Looking for a fun, screen-free activity? This tutorial is perfect for young artists ages 5 and up. All you need is a pencil, paper, and an eraser to bring this adorable chipmunk to life while practicing basic shapes and fine motor control.
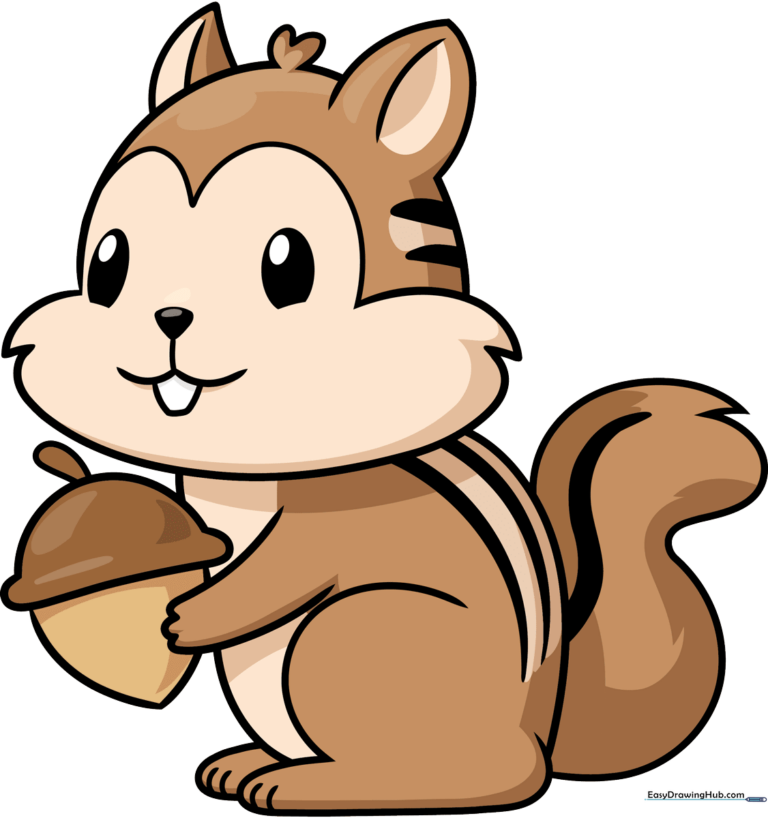
🎯 Final Result
Step-by-Step Instructions
Step 1: Sketching the Expressive Face

Start by drawing two short horizontal lines for the eyes, topping them with soft ovals. Add a smaller circle inside each for the pupils and shade them in. Tip: Keep your pencil pressure light so you can easily adjust the expression later!
Step 2: Defining the Head and Teeth
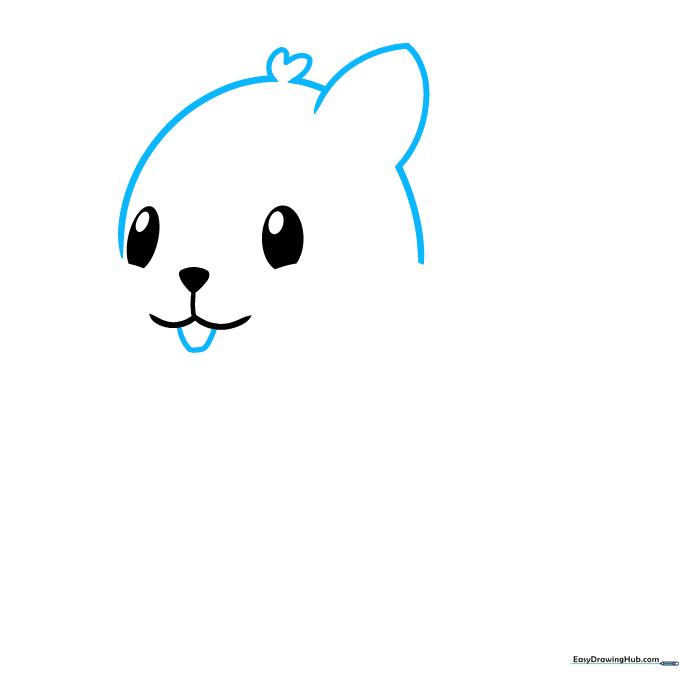
Draw a pentagon shape below the mouth to represent those signature chipmunk teeth. Use soft, curved lines to outline the top of the head and add a little tuft of fur at the crown. Tip: Use short, quick strokes to make the fur look soft and textured.
Step 3: Adding Ears and Cheeks
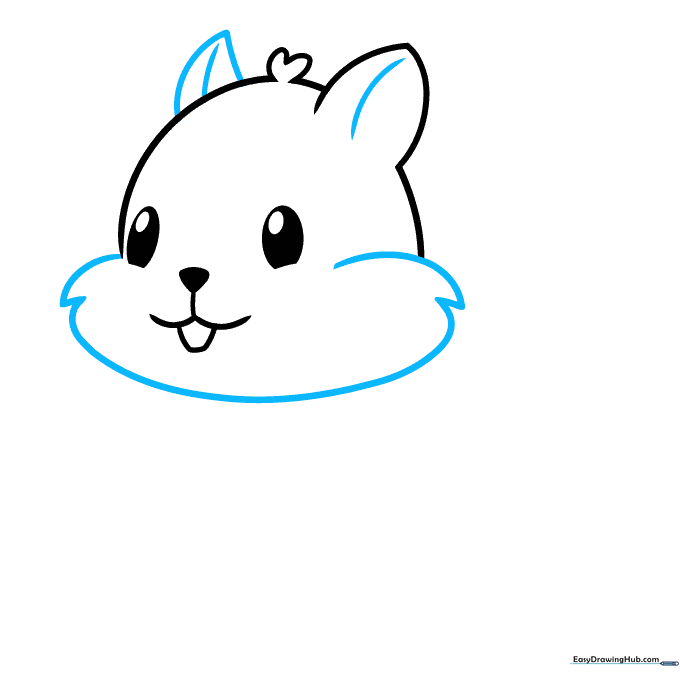
Add a curved triangle for the second ear and contour both ears with an inner line. Then, draw the chubby cheeks using a series of connected, rounded lines. Tip: Think of the cheeks as two soft clouds framing the face.
Step 4: Sketching the Arm and Paw
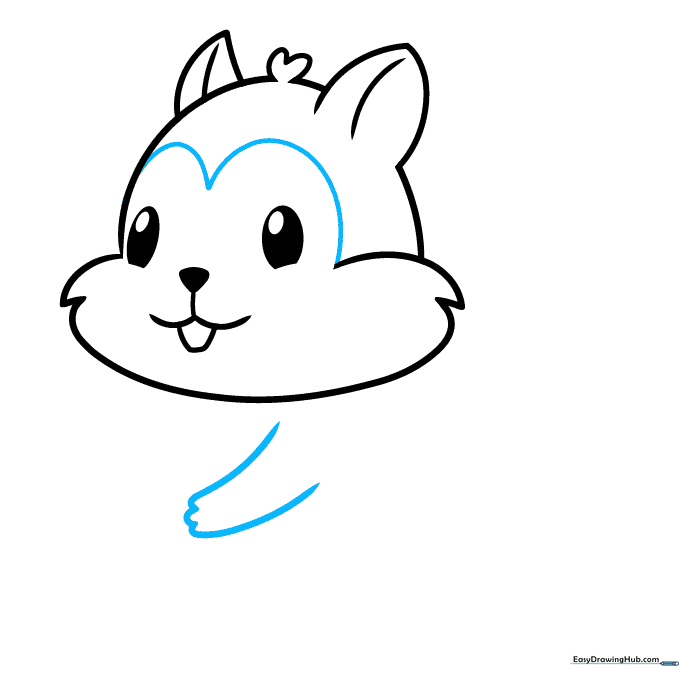
Draw a soft 'M' shape above the eyes for the forehead. Next, sketch the arm extending outward, finishing with small 'U' shapes for the fingers. Tip: Keep the fingers small to maintain the 'cute' cartoon aesthetic.
Step 5: Drawing the Acorn
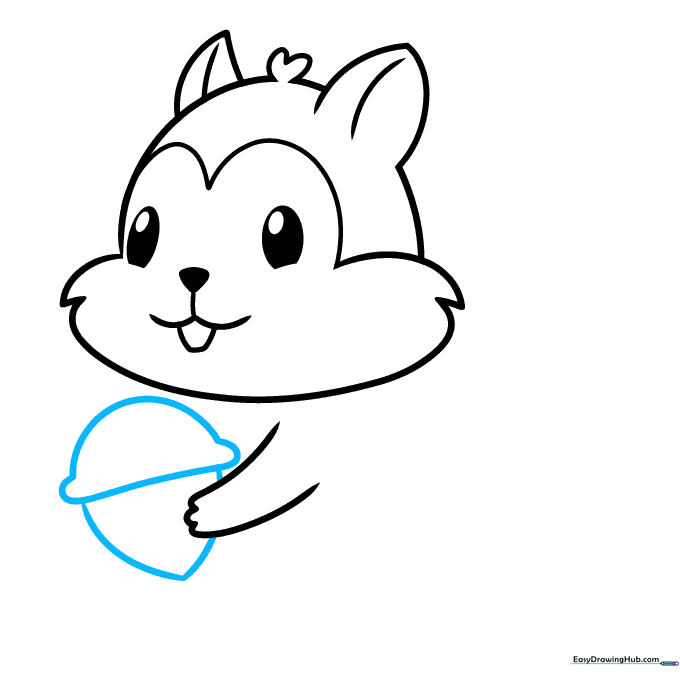
Place an acorn in the chipmunk's hand by drawing a half-circle cap with a small stem. Add a pointed base below the cap. Tip: Acorns are just two simple shapes—a cap and a teardrop—so don't worry about making it perfect!
Step 6: Forming the Body
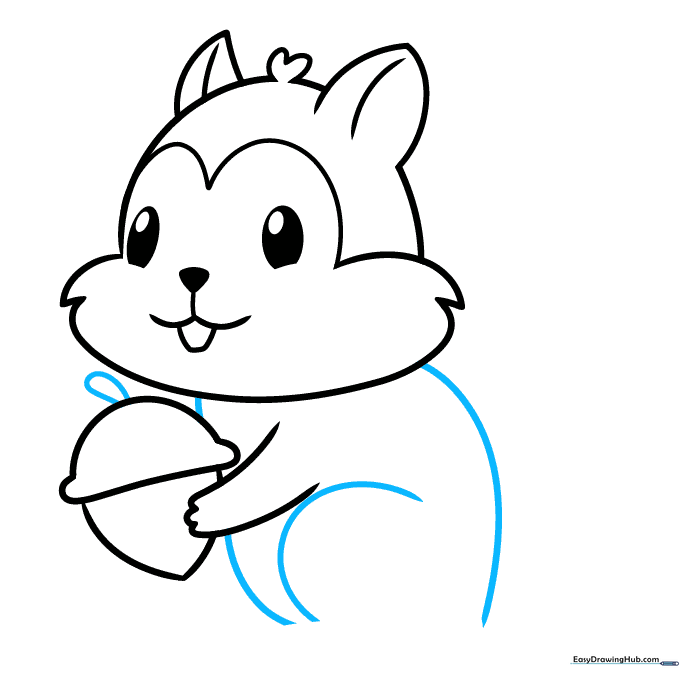
Complete the acorn stem, then use long, sweeping curved lines to draw the chipmunk's back, belly, and leg. Tip: Use one continuous motion for the back to keep the line smooth and fluid.
Step 7: Adding Feet
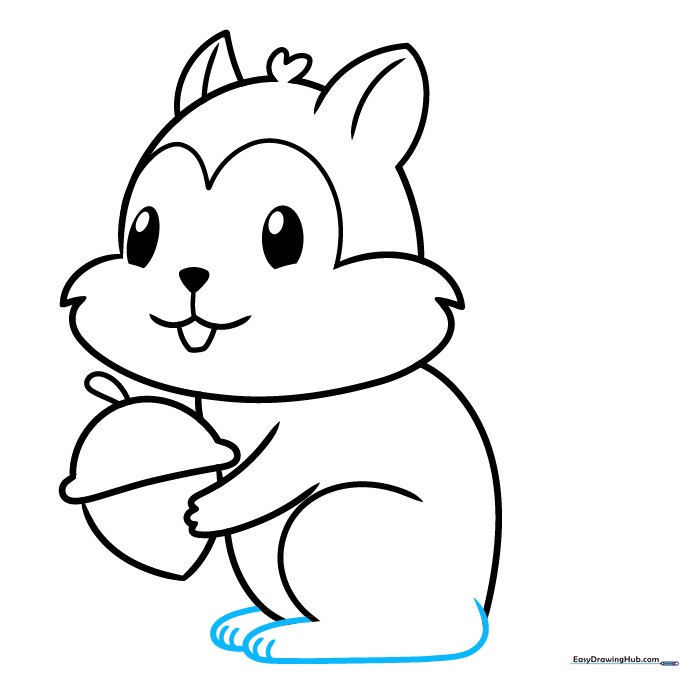
Draw the feet using curved, enclosed lines. Add a few small marks to define the toes. Tip: Keep the feet slightly rounded to match the cartoon style of the rest of the body.
Step 8: Tail and Back Stripes

Sketch a bushy, curved tail. Then, add two thick lines on the back of the head—these are the start of the chipmunk's iconic stripes. Tip: Make the tail look fluffy by using slightly jagged, uneven lines.
Step 9: Finalizing the Stripes

Draw two long, parallel stripes down the back and one stripe running down the center of the tail. Tip: Ensure the stripes follow the curve of the body to give your drawing a sense of depth.
Step 10: Bringing it to Life with Color

Your outline is ready! Use warm browns for the fur, black for the stripes, and a soft tan for the belly. Tip: Use a light touch with your colored pencils to blend the edges of the stripes for a more natural look.
More Tutorials


