How to Draw a Cute Cartoon Bug: Simple Step-by-Step Guide
This friendly cartoon bug tutorial is perfect for budding artists ages 5 and up. All you need is a pencil, an eraser, and some paper to bring this little character to life. Follow these simple steps to build confidence in your drawing skills while creating a charming insect friend.
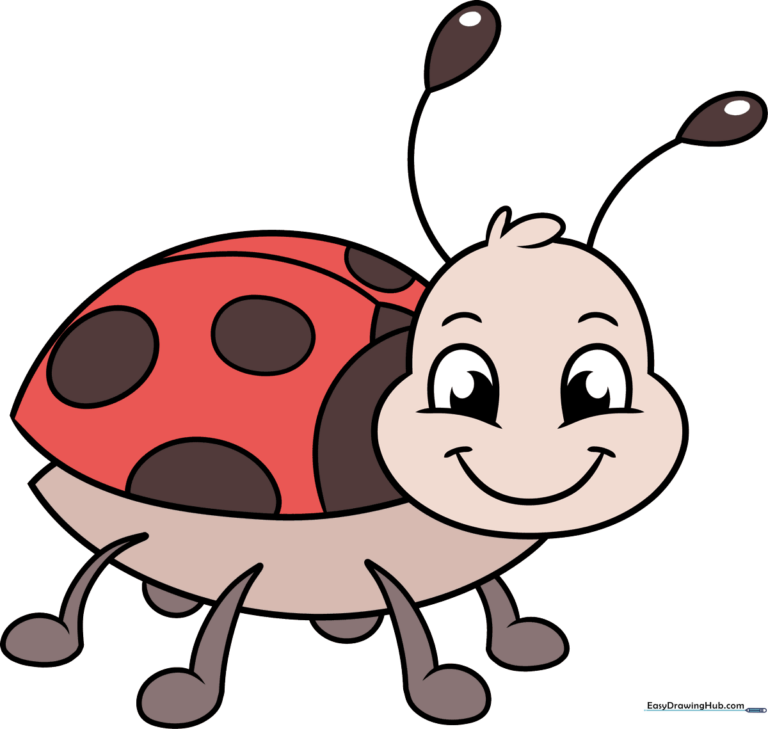
🎯 Final Result
Step-by-Step Instructions
Sketching the Head Shape

Draw a simple 'C' shaped curve to start the side of the bug's head. Teacher's Tip: Keep your pencil pressure light so you can easily adjust the shape later if needed.
Continuing the Head Outline

Add a curved line extending from the bottom of your first shape. Teacher's Tip: Try to make this curve smooth and rounded to give your bug a friendly, soft appearance.
Closing the Head Shape

Draw a mirroring curved line on the opposite side. Teacher's Tip: Don't worry if it isn't perfectly symmetrical; bugs in nature come in all shapes and sizes!
Adding a Fun Hair Tuft
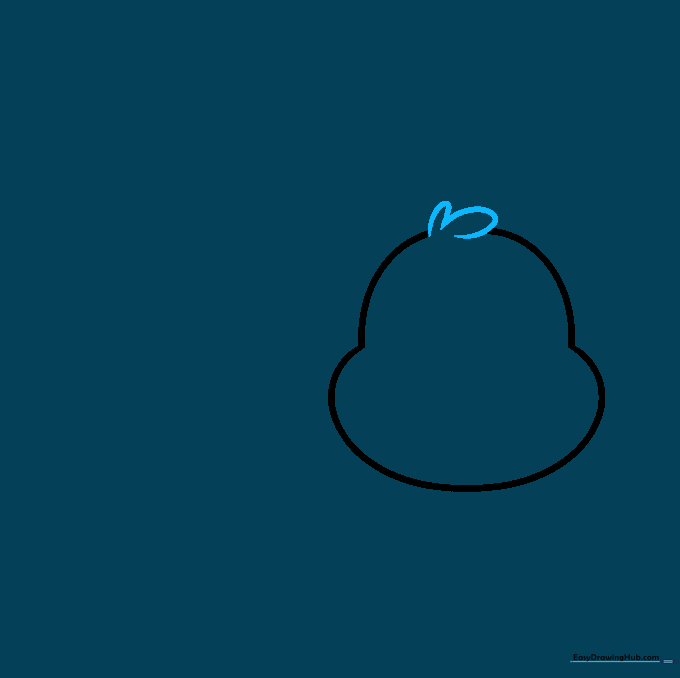
Draw two small curved lines on top to close the gap. Teacher's Tip: This adds character and makes your bug look like a cute, whimsical cartoon creature.
Drawing the Body
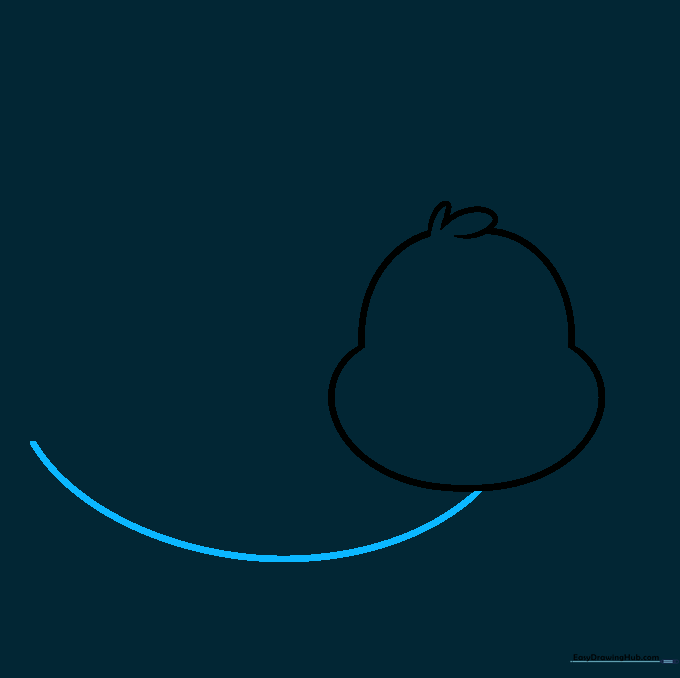
Draw a long, sweeping curved line starting beneath the head to form the belly. Teacher's Tip: Use a fluid motion with your wrist to get a nice, smooth curve.
Giving Your Bug a Personality

Draw two large eyes with pupils, eyebrows, and a smiling mouth. Teacher's Tip: Shading the pupils dark makes the eyes pop and gives your bug a friendly, alert expression.
Adding the Shell and Spots

Outline the shell with curved lines and add circles for spots. Teacher's Tip: Vary the size of your spots to make the shell look more natural and interesting.
Drawing the Legs
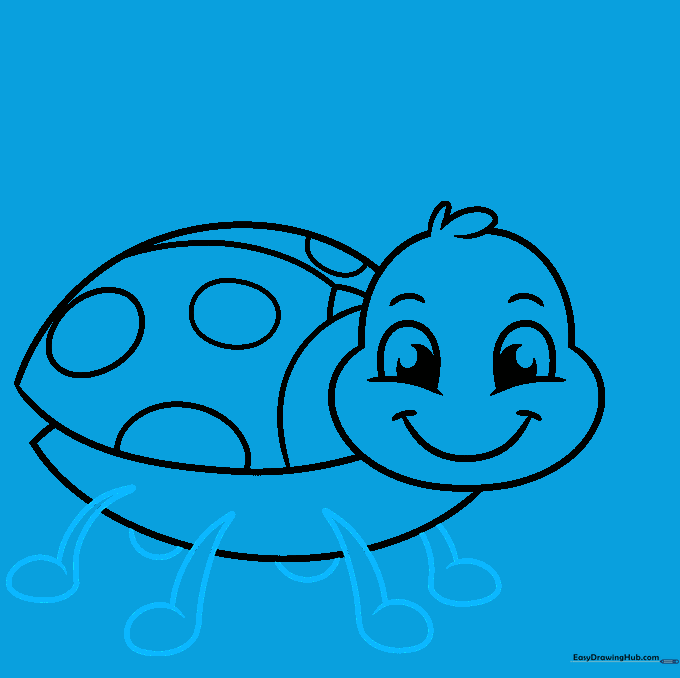
Add legs by drawing pairs of curved lines that meet at the feet. Teacher's Tip: Keep the legs simple—two or three pairs are plenty for a cute cartoon bug.
Adding Antennae
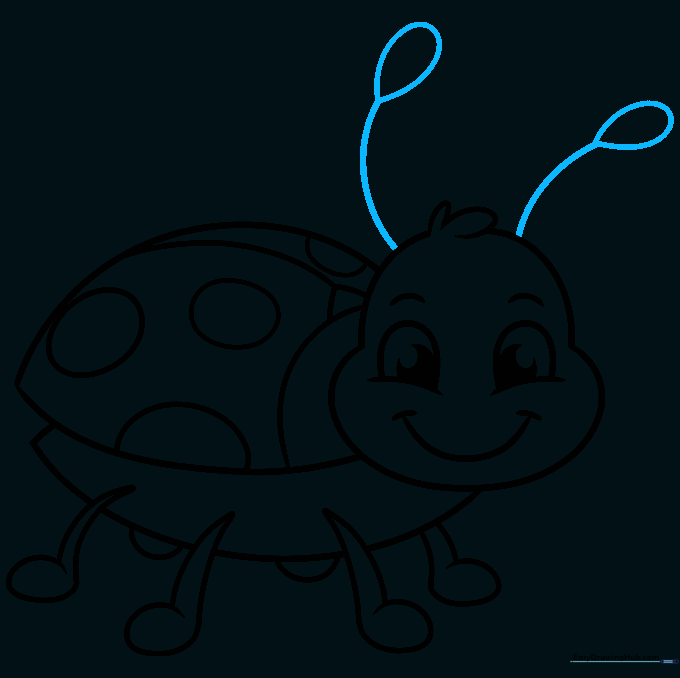
Draw two antennae with teardrop tips on the head. Teacher's Tip: Antennae help bugs 'feel' the world, so draw them curving outward to show movement.
Adding Color
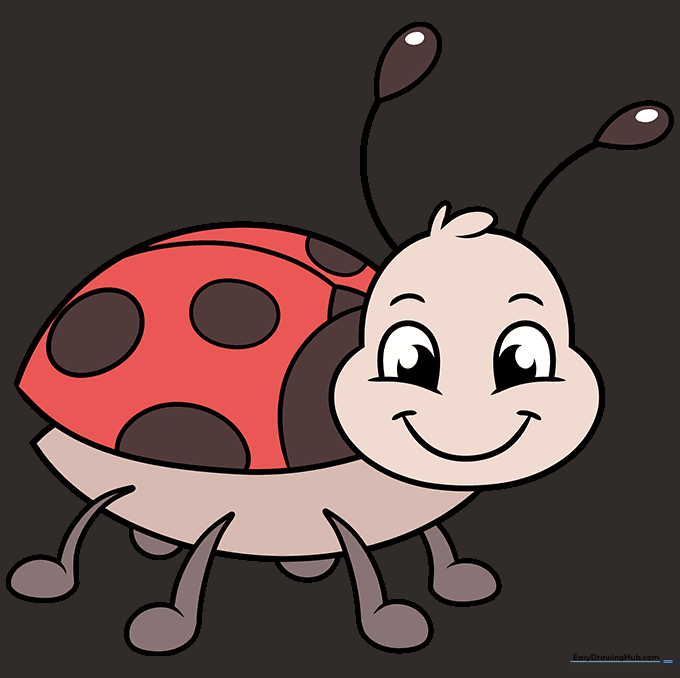
Bring your bug to life with color! We chose red for a classic ladybug look, but feel free to use your favorite colors. Teacher's Tip: Use light pressure for a soft look or heavy pressure for vibrant, bold colors.
More Tutorials


