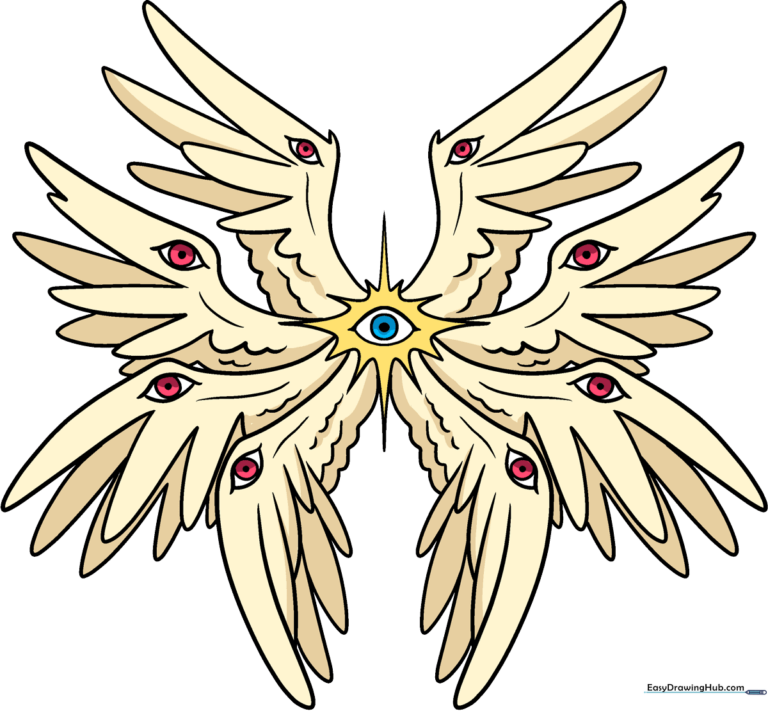
How to Draw a Biblically Accurate Angel: Easy 9-Step Guide
Looking for a creative drawing challenge? This tutorial breaks down the complex, multi-winged 'biblically accurate' angel into simple, manageable shapes. Perfect for artists ages 8 and up, all you need is a pencil, eraser, and paper to bring this celestial figure to life.
🎯 Final Result
Step-by-Step Instructions
Step 1: Sketching the Central Eye
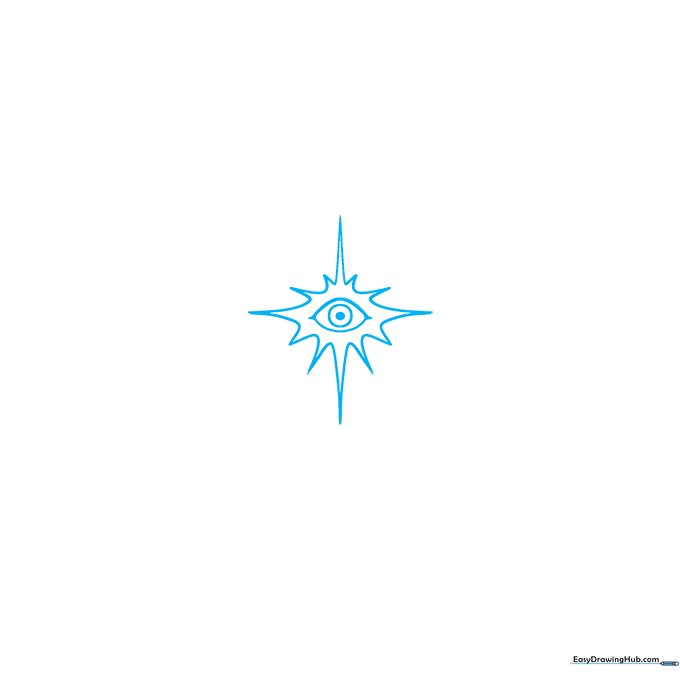
Start by drawing the central eye. Use two curved lines to create a double-pointed almond shape. Inside, draw a circle with a smaller shaded pupil. Teacher's Tip: Add a four-pointed starburst pattern around the eye using jagged lines to give it that ethereal, glowing look.
Step 2: Adding the First Wing
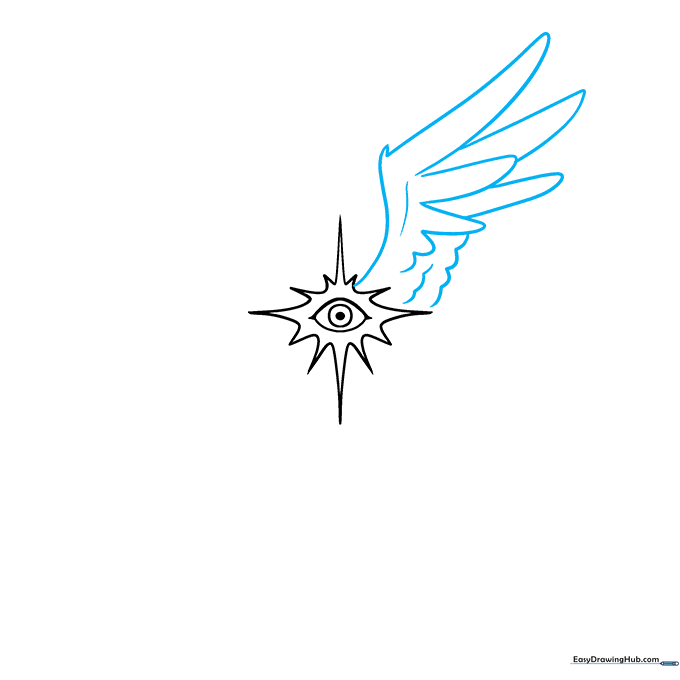
Draw the first wing extending from the center. Use a long, sweeping curved line for the spine of the wing and 'U' shaped lines for the primary feathers. Tip: Keep your pencil pressure light so you can easily adjust the feather shapes if they look uneven.
Step 3: Balancing with the Second Wing
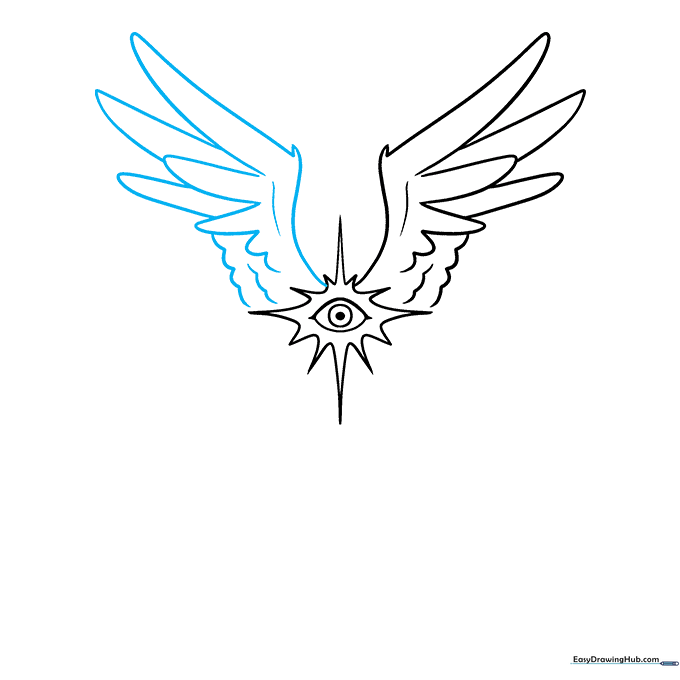
Mirror the first wing on the opposite side. Focus on creating a symmetrical flow. Tip: If your wings look too stiff, try adding a slight 'wave' to the feather tips to make them look more organic and soft.
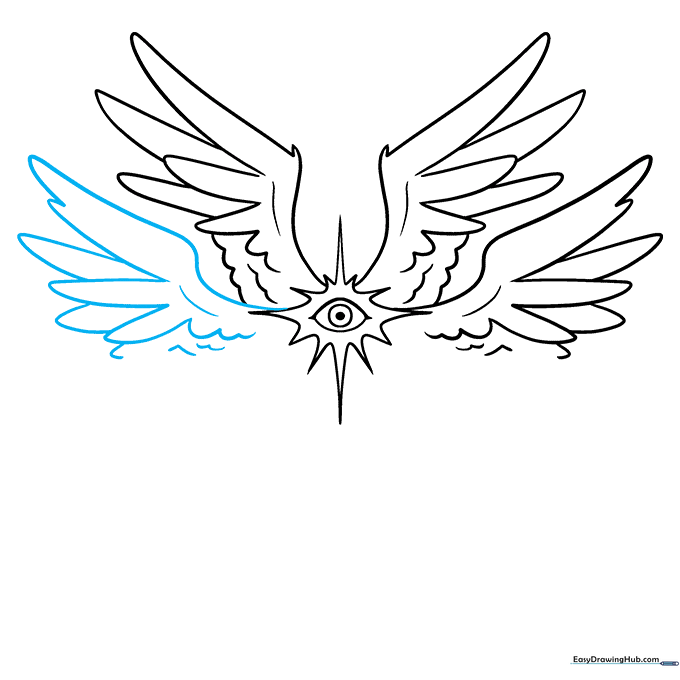
Step 4: Layering the Third Wing
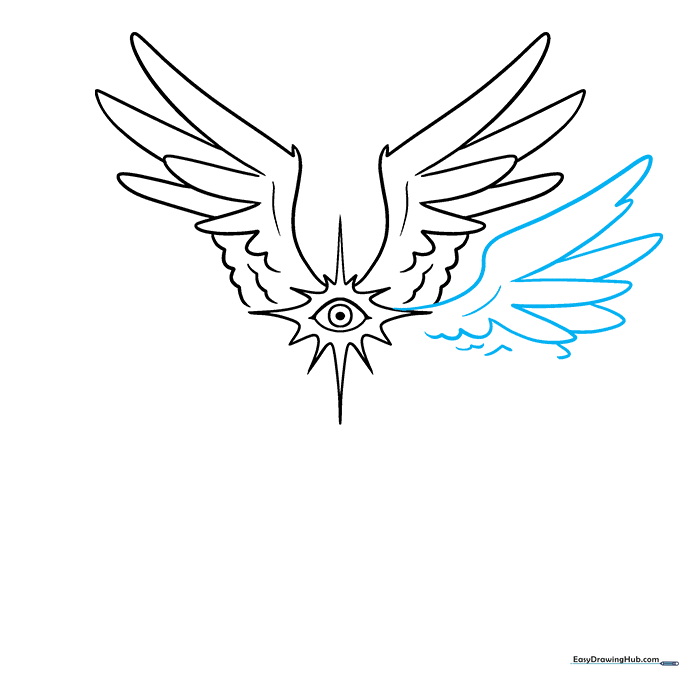
Draw a third wing tucked beneath the first one. By overlapping the wings, you create depth. Tip: Use shorter, tighter 'U' lines here to show that this wing is further back in the distance.
Step 5: Layering the Fourth Wing
Repeat the process for the fourth wing, placing it below the second wing. Ensure the feathers follow the same curvature as the wing above it to maintain consistency.
Step 6: Expanding the Wings
Add a fifth wing on the right side. Don't worry if the wings start to overlap; that's exactly what gives this drawing its 'biblically accurate' complexity! Tip: Vary the length of the feathers to make the wings look more natural.
Step 7: Completing the Wing Set
Add the sixth wing on the left side. Now you have a full set of wings surrounding your central eye. Tip: Check that your spacing is relatively even so the drawing doesn't look too crowded on one side.
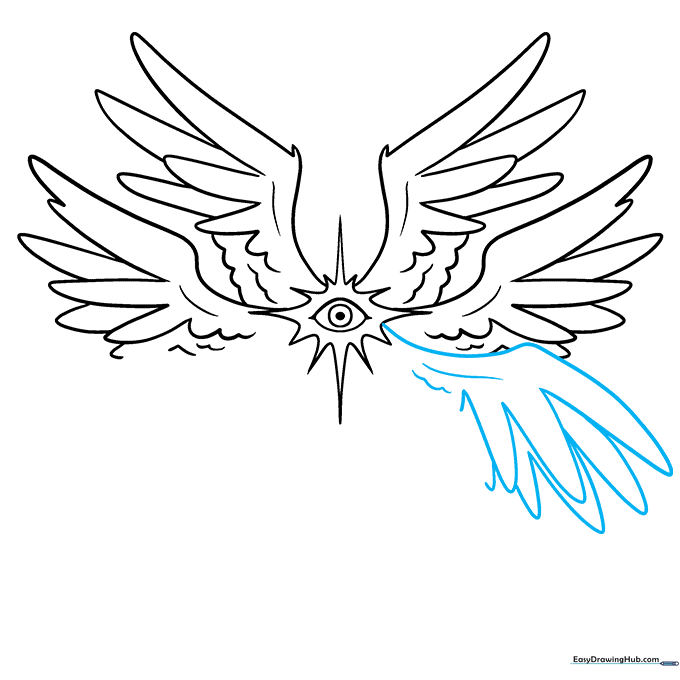
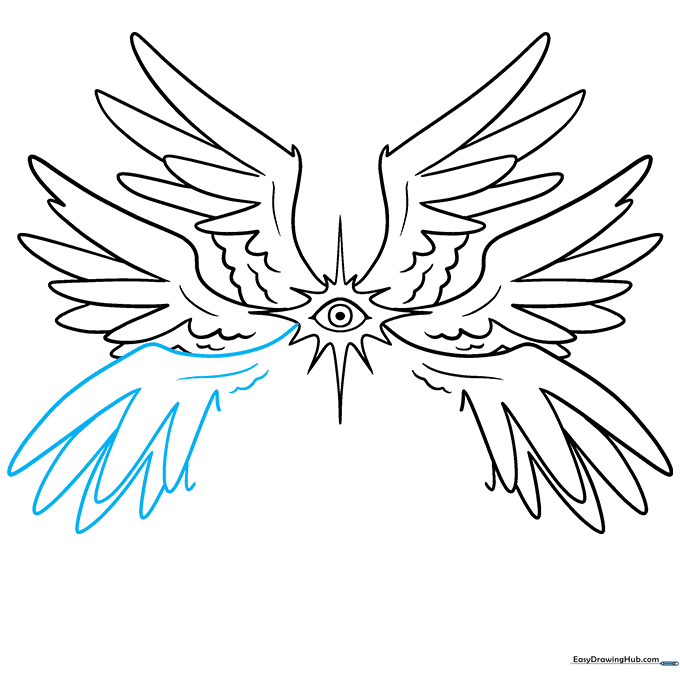
Step 8: Adding Curled Details
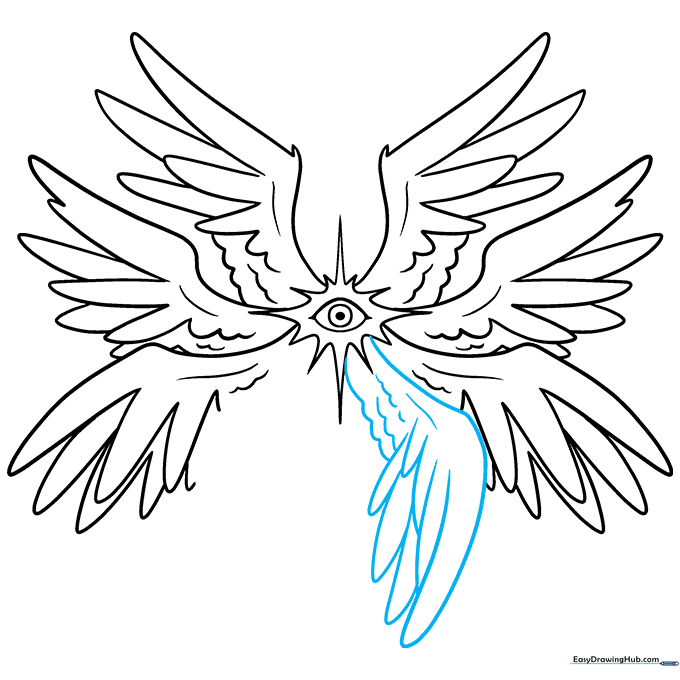
Draw a fourth wing on the right, but this time, curve it inward. This adds a sense of motion and volume to your drawing. Tip: Use a darker pencil stroke here to make this wing stand out against the others.
Step 9: Final Details and Eyes
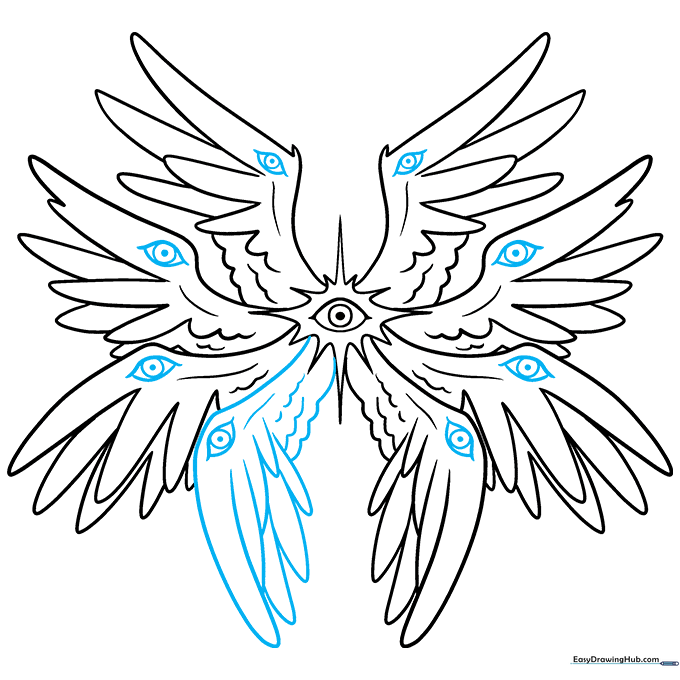
Finish by drawing the final wing and adding eyes to the wings. Draw a small circle with a pupil inside each wing. Tip: Don't make the eyes too large; keep them subtle so the central eye remains the focal point of the piece.
Coloring Your Angel
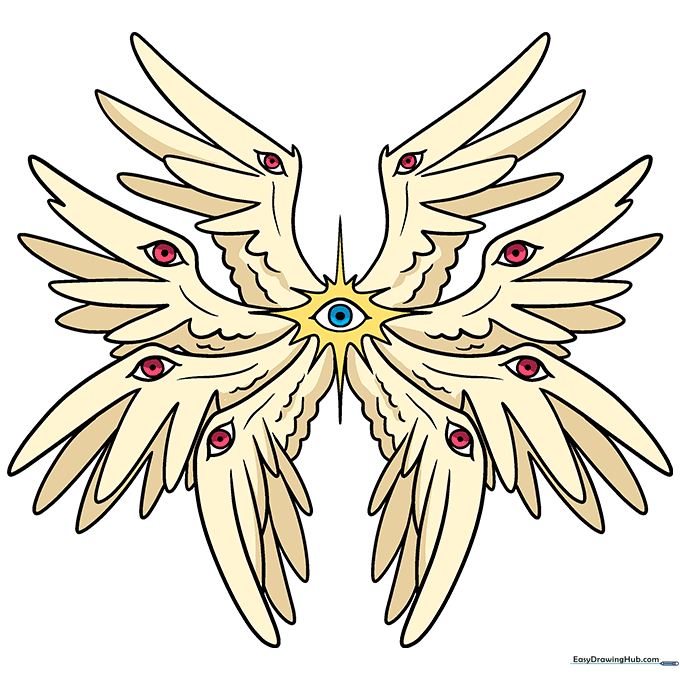
Time to bring your angel to life with color! We chose cream for the wings and red for the eyes to create a striking contrast. Tip: Use gold or yellow around the central eye to make it look like it's glowing.
More Tutorials


