How to Draw an Eagle Head: Easy 10-Step Guide
Ready to capture the spirit of the wild? This tutorial is perfect for young artists ages 6+ looking to draw a sharp, confident eagle head. Grab your pencil, eraser, and paper, and follow along to build your character using simple geometric shapes.
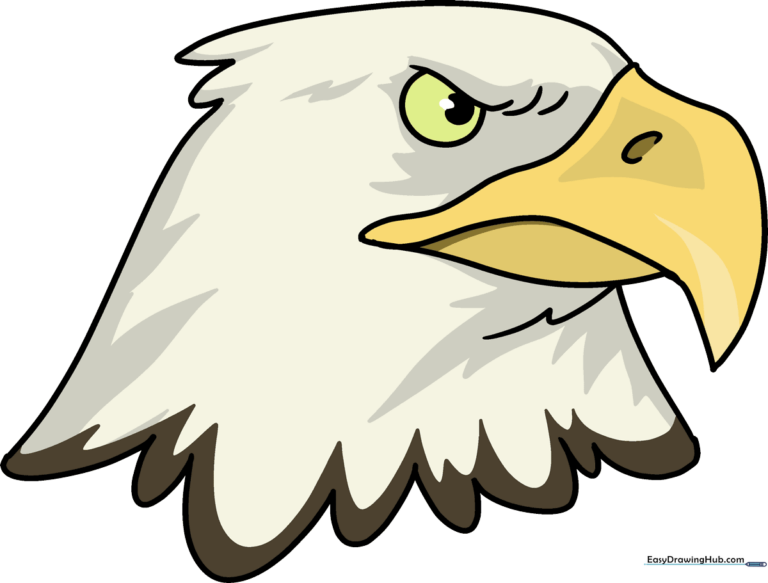
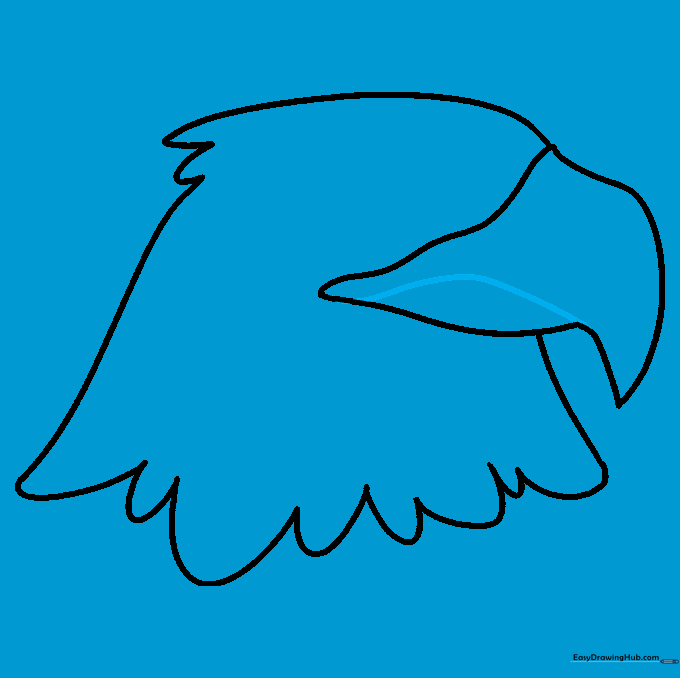
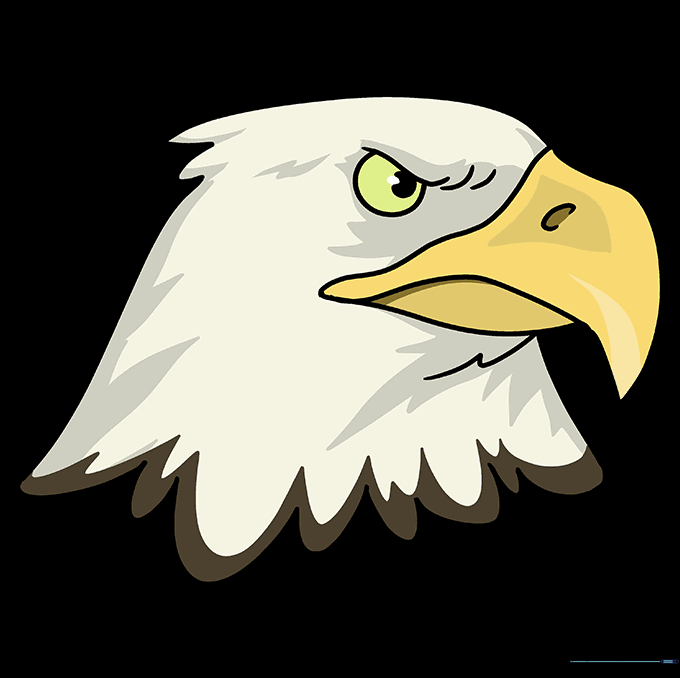
🎯 Final Result
Step-by-Step Instructions
Step 1: Sketching the Cranium
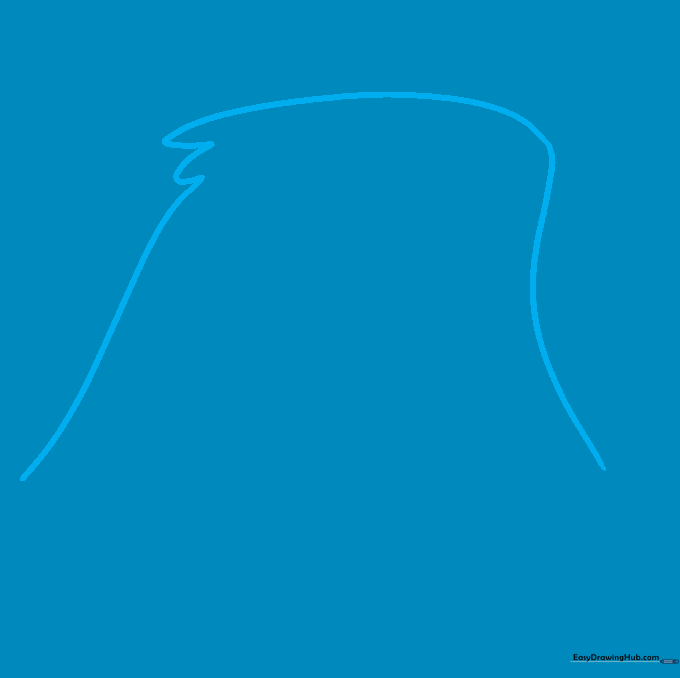
Start by sketching the top of the eagle's head. Use long, smooth curved lines. Tip: Add a few 'U' shaped bumps at the back to represent the ruffled feathers of the neck.
Step 2: Defining the Neck Feathers
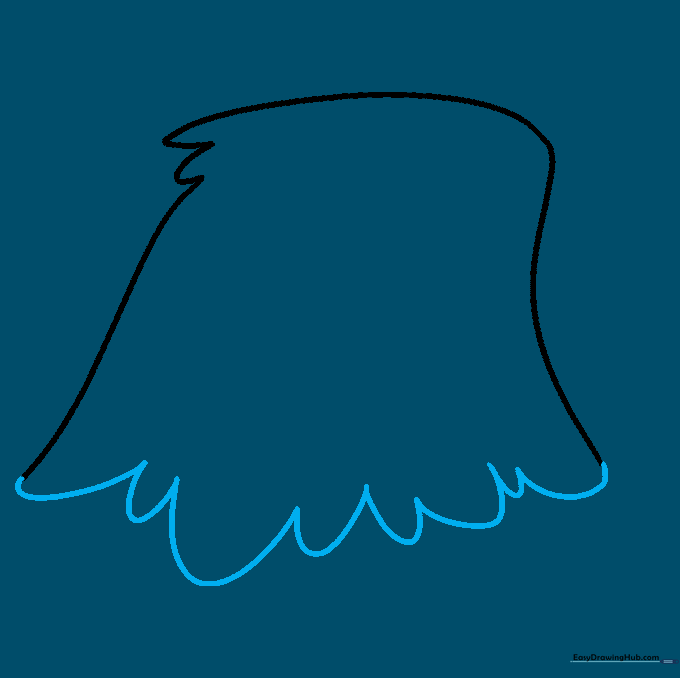
Create the base of the neck using alternating large and small 'U' shapes. Tip: Varying the size of these curves makes the feathers look natural and fluffy rather than stiff.
Step 3: Shaping the Powerful Beak
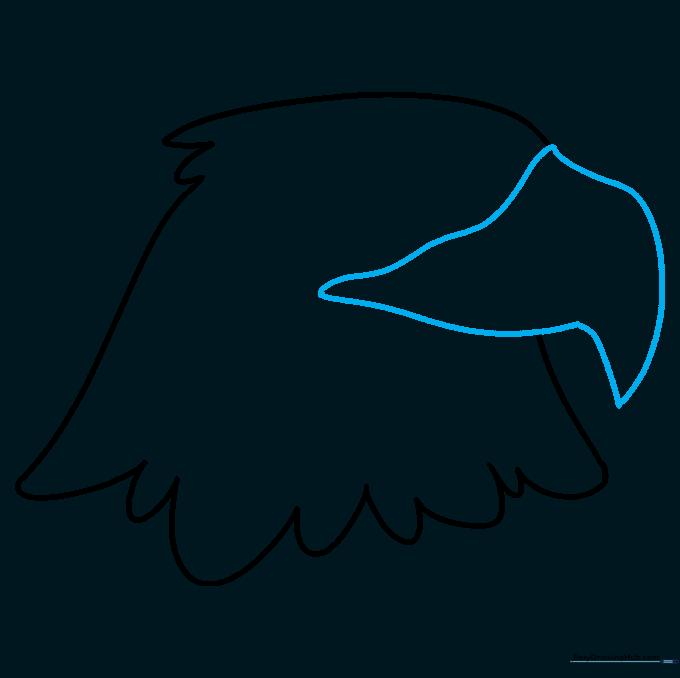
Draw the iconic curved beak using a long, sweeping line that comes to a sharp point. Tip: If you make a mistake, don't worry—lightly erase and redraw until the curve feels 'hooked' enough.
Step 4: Separating the Beak
Add a curved line across the beak to separate the upper and lower mandibles. Tip: Ensure the bottom shape is slightly smaller to give the beak a realistic, biting look.
Step 5: Adding the Nostril
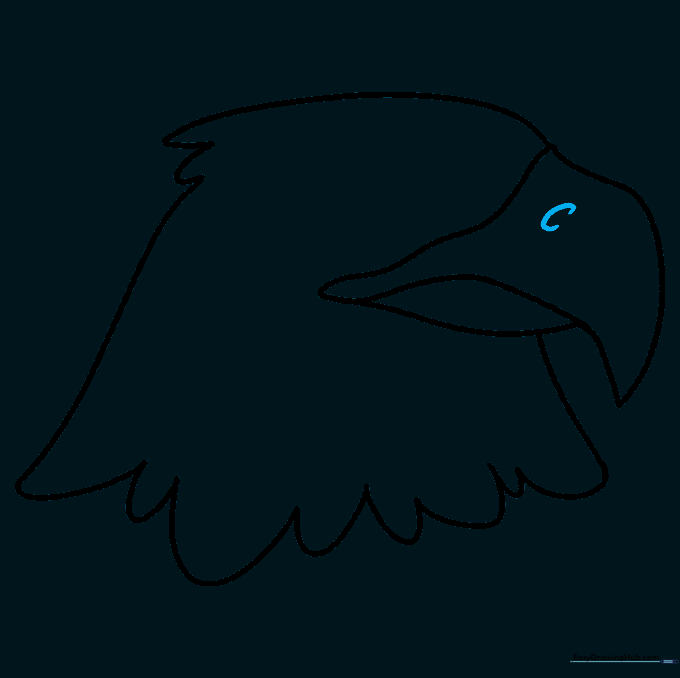
Draw a small 'C' shape near the base of the upper beak. Tip: Keep this small; it adds a great sense of realism to your cartoon eagle.
Step 6: Sketching the Eye
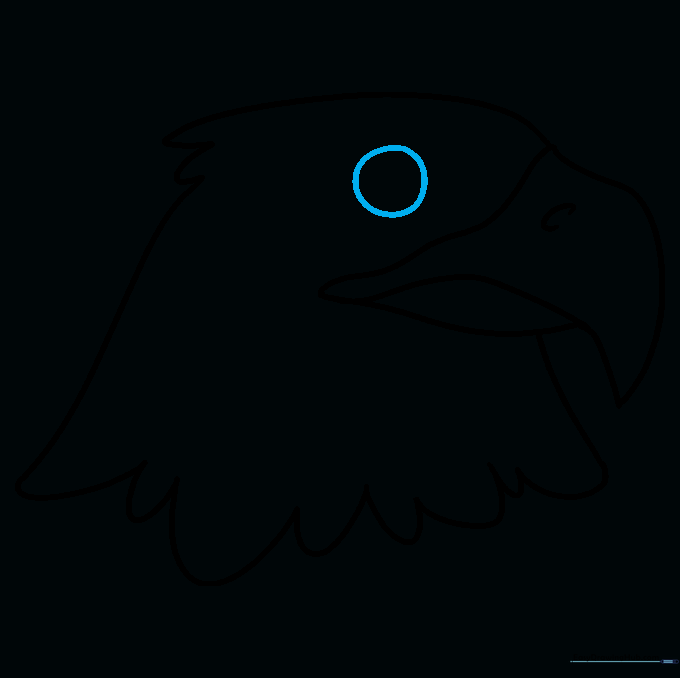
Place a circle in the center of the face for the eye. Tip: Use a light touch here so you can easily adjust the placement if it looks too high or low.
Step 7: Adding Depth to the Eye

Draw a backward 'C' inside the eye circle. Tip: This creates the pupil and gives the eagle an intense, focused gaze.
Step 8: Creating the Furrowed Brow
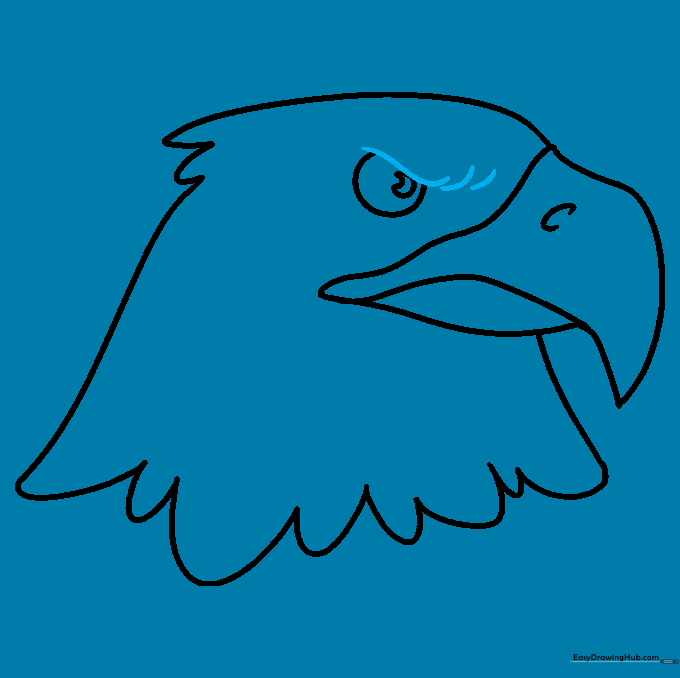
Erase the top of the eye circle and replace it with a sharp, curved line. Tip: This 'furrowed' look is what gives the eagle its classic, serious expression.
Step 9: Finalizing the Outline

Add a small zigzag line beneath the beak to show the texture of the feathers where they meet the beak. Tip: Keep these lines quick and sharp for a natural look.
Step 10: Bringing it to Life with Color
Time to color! Use bright yellow for the beak and keep the head feathers white or light gray. Tip: Use light pressure with your yellow pencil to create a nice gradient on the beak.
More Tutorials


