How to Draw an Azalea: Easy 9-Step Flower Tutorial
Bring the beauty of spring to your sketchbook with this simple azalea drawing tutorial. Designed for young artists and beginners, this guide uses basic shapes to build a vibrant floral masterpiece. All you need is a pencil, an eraser, and your favorite coloring supplies to get started.
🎯 Final Result

Step-by-Step Instructions
Step 1: Establishing the Stem

Start by sketching a 'Y' shaped stem using two parallel curved lines. At the top of one branch, draw a teardrop shape for your first petal. Tip: Keep your pencil lines light so you can easily erase any overlapping marks later.
Step 2: Adding Petal Layers
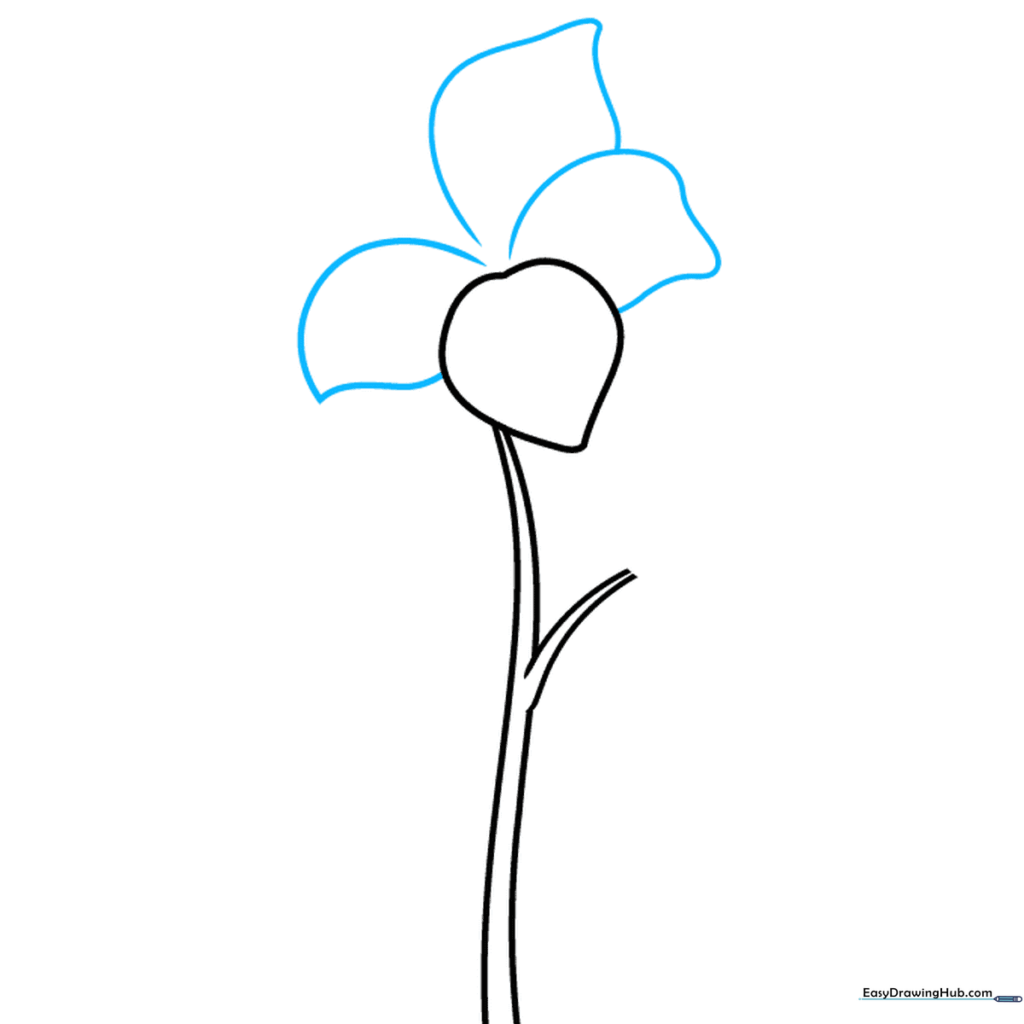
Add more petals around the first one using wavy, teardrop-like curves. Tip: Don't worry about making them perfect; azalea petals are naturally ruffled and organic, so a little wobble adds character!
Step 3: Stamens and Centers
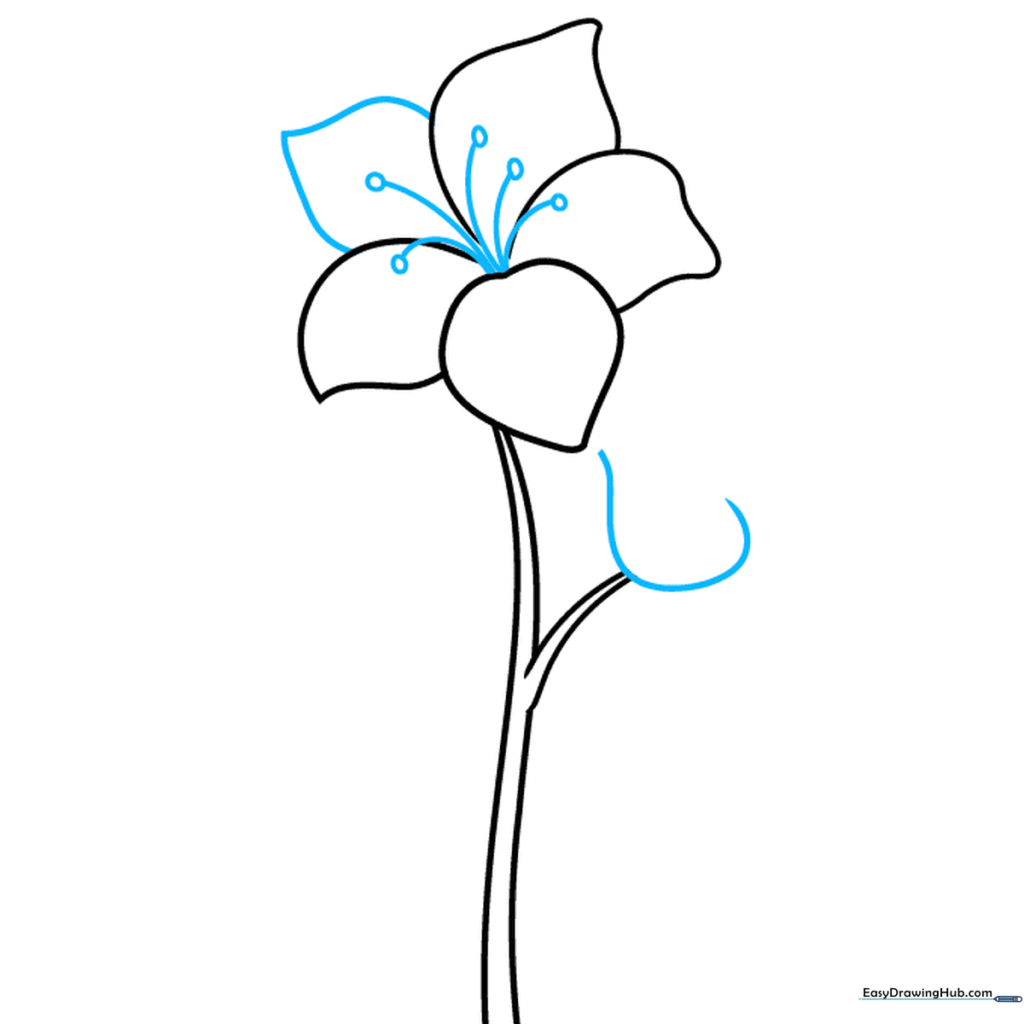
Close the final petal and add the stamens. Extend five thin lines from the center, ending each with a small oval for the anthers. Tip: These tiny details are what make the flower look realistic, so take your time with the ovals.
Step 4: Building the Second Flower

Start your second flower by drawing a heart-shaped petal. Add four more petals around it to create a full, blooming look. Tip: Overlap your lines slightly at the center to create depth.
Step 5: Detailing the Second Flower
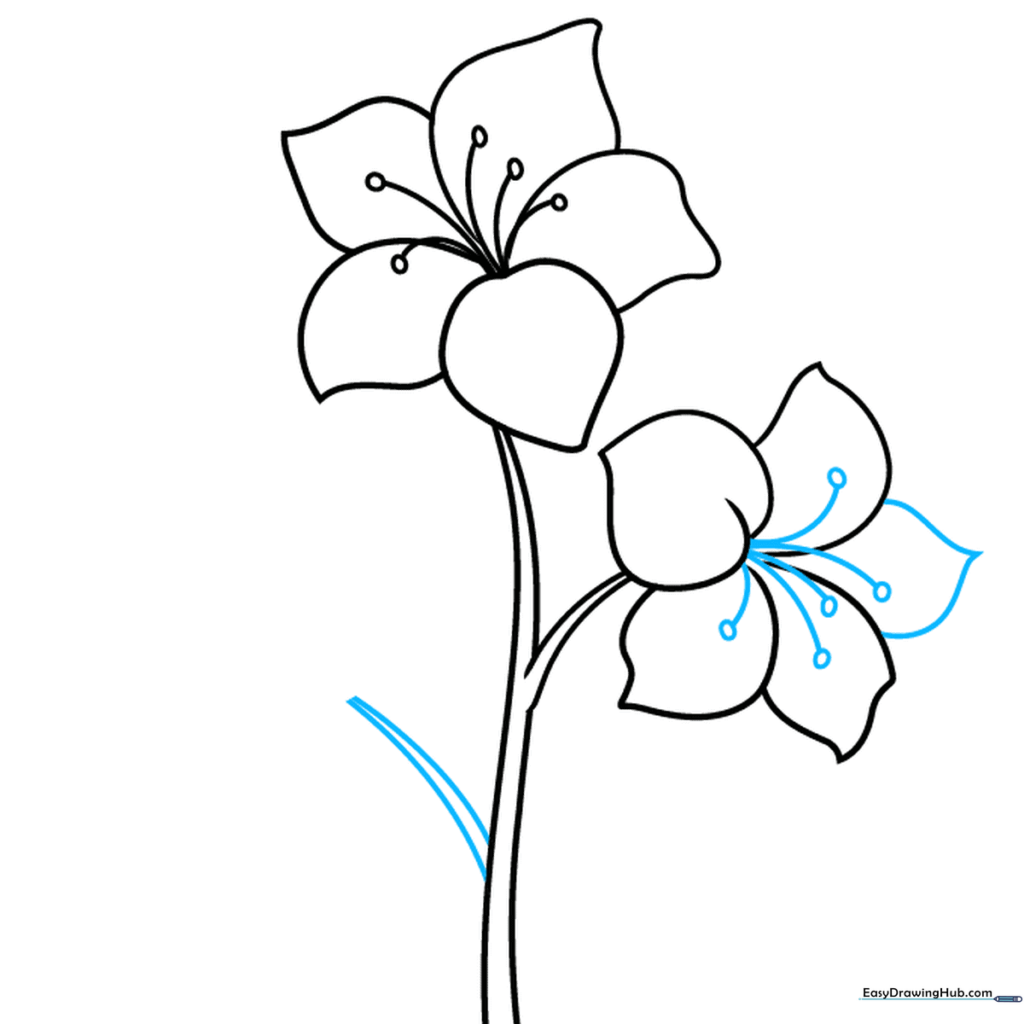
Finish the second flower's petals and add its stamens just like you did for the first. Then, extend two curved lines from the side of the stem to prepare for more growth. Tip: Keep your lines fluid to mimic the natural curve of a plant stem.
Step 6: Adding a Third Bloom
Draw a third flower on the new branch. Use curved lines to form a heart-shaped petal and two partially visible petals behind it. Tip: Drawing 'incomplete' petals creates the illusion that the flower is turned away from the viewer.
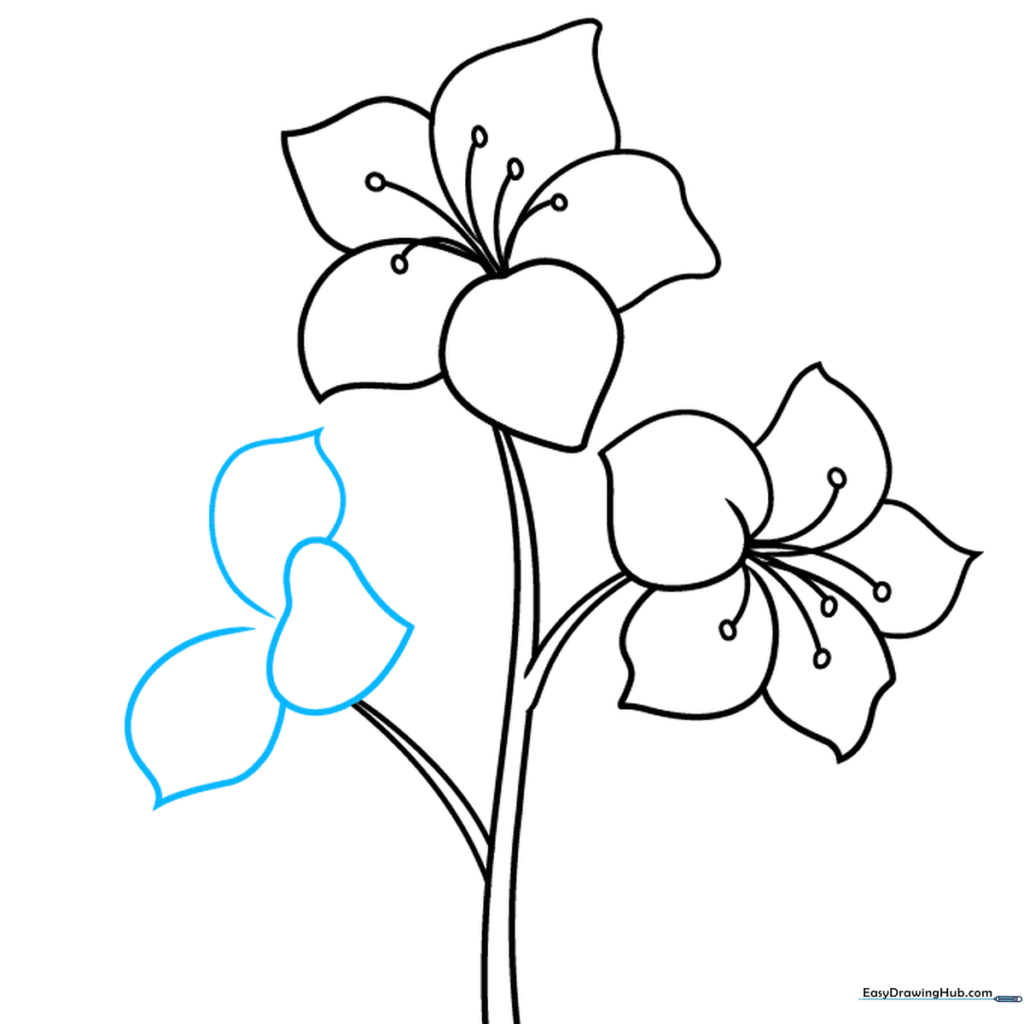
Step 7: Finalizing the Third Flower
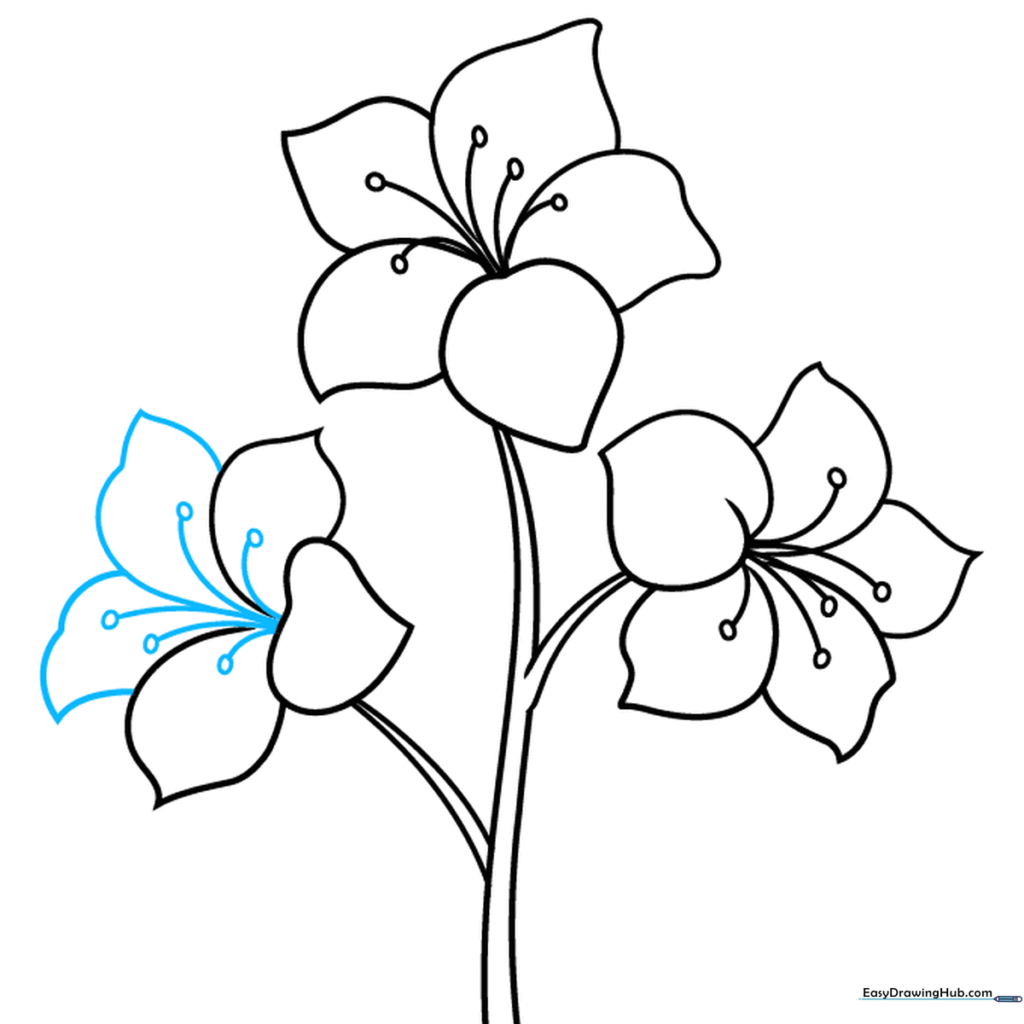
Complete the petals for the third flower and add its stamens. Tip: Make sure the stamens point toward the center of the flower to maintain perspective.
Step 8: Drawing the Leaves

Add leaves along the stem. Use two curved lines that meet at a point to create an elongated oval shape. Tip: Vary the size of the leaves to make your drawing look more natural.
Step 9: Adding Leaf Veins
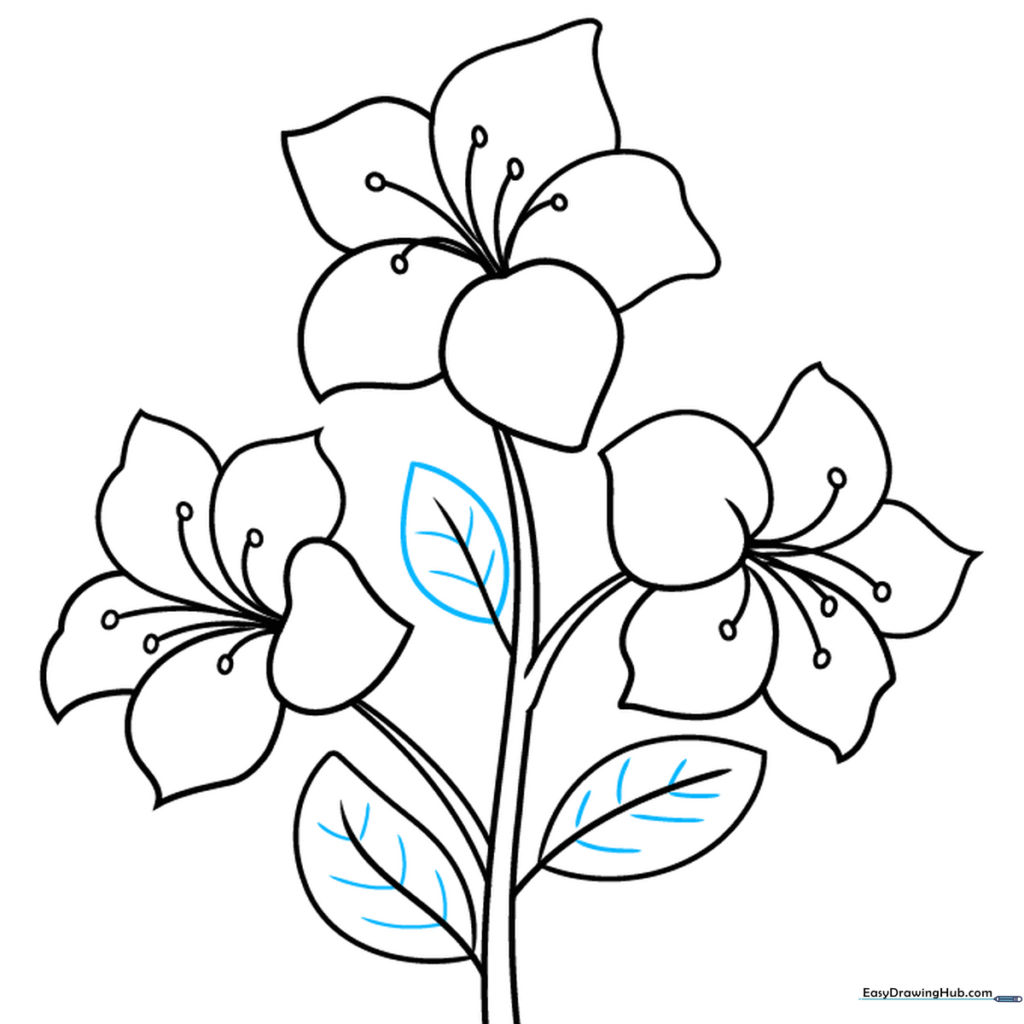
Finish your leaves by drawing a central line and small, diagonal lines branching out for the veins. Tip: Keep these vein lines very short and thin to avoid cluttering the drawing.
Step 10: Adding Color

Time to bring your flower to life! Azaleas come in beautiful shades of pink, red, and white. Try using a darker shade near the center of the petals and a lighter shade at the edges for a professional, blended look.
More Tutorials


