How to Draw an Astronaut: Easy 10-Step Guide for Kids
Blast off into creativity with this simple astronaut drawing guide, perfect for young artists ages 5 and up. You will only need a pencil, an eraser, and a piece of paper to bring this space explorer to life. Follow these steps to build confidence in your sketching skills while creating a fun, out-of-this-world character.
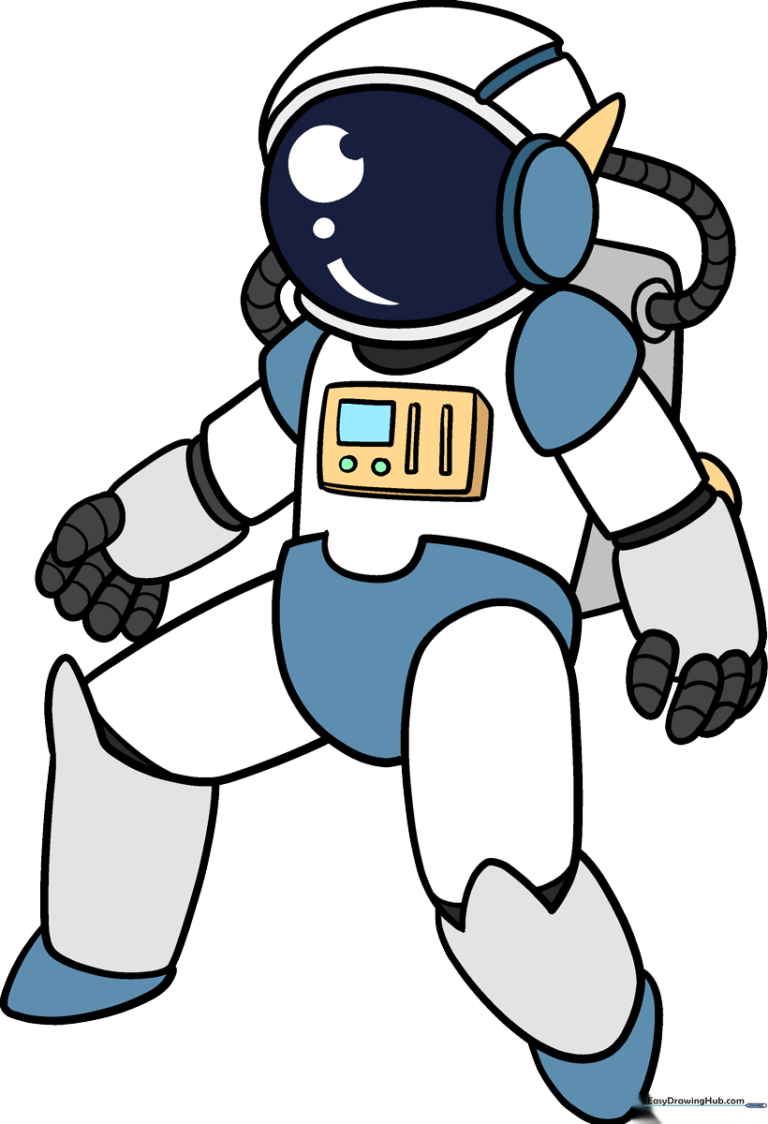
🎯 Final Result
Step-by-Step Instructions
Step 1: Sketching the Helmet Visor
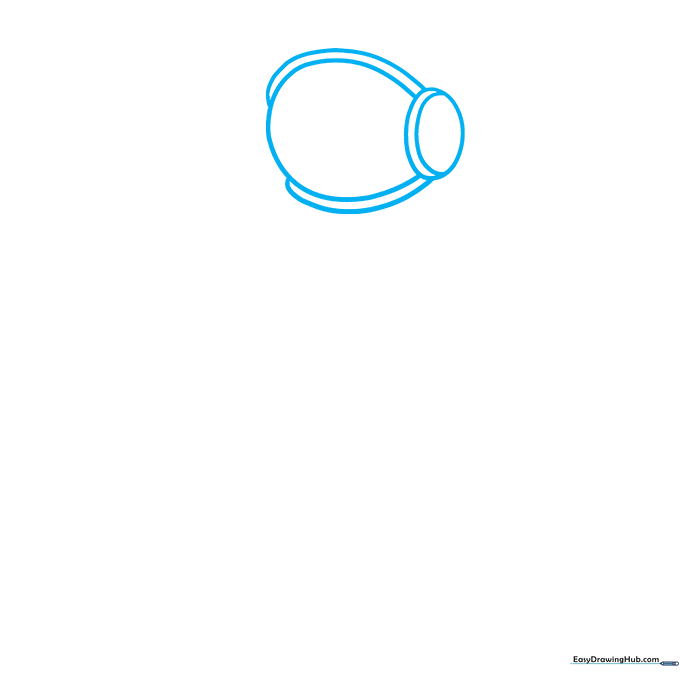
Start by drawing a large oval for the helmet, then add a smaller oval inside for the visor. Draw curved lines at the top and bottom of the visor to give it depth. Teacher's Tip: Keep your pencil lines light so you can easily erase any overlapping marks later.
Step 2: Defining the Helmet and Shoulders
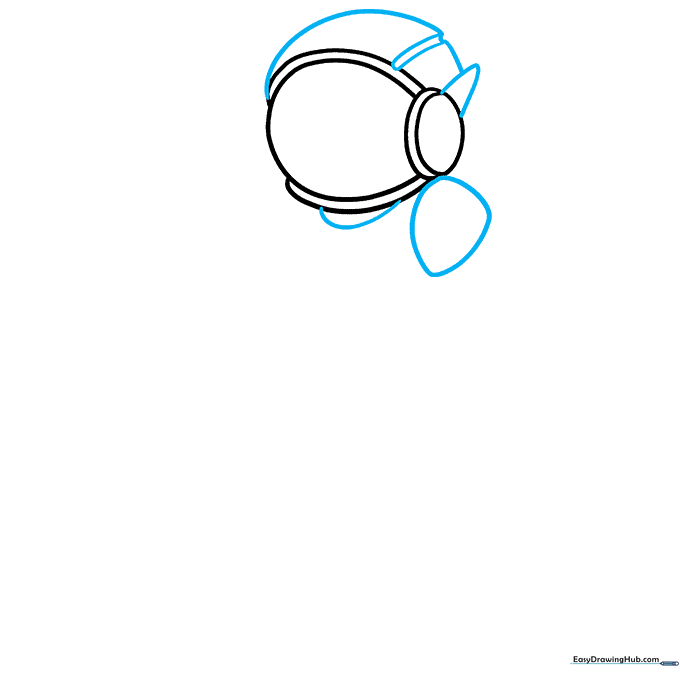
Use smooth, curved lines to sketch the top of the helmet, adding ridges for detail. Continue these lines down to form the neck and shoulder area of the suit. Teacher's Tip: Think of the shoulders as a wide, rounded 'U' shape to make the suit look bulky and protective.
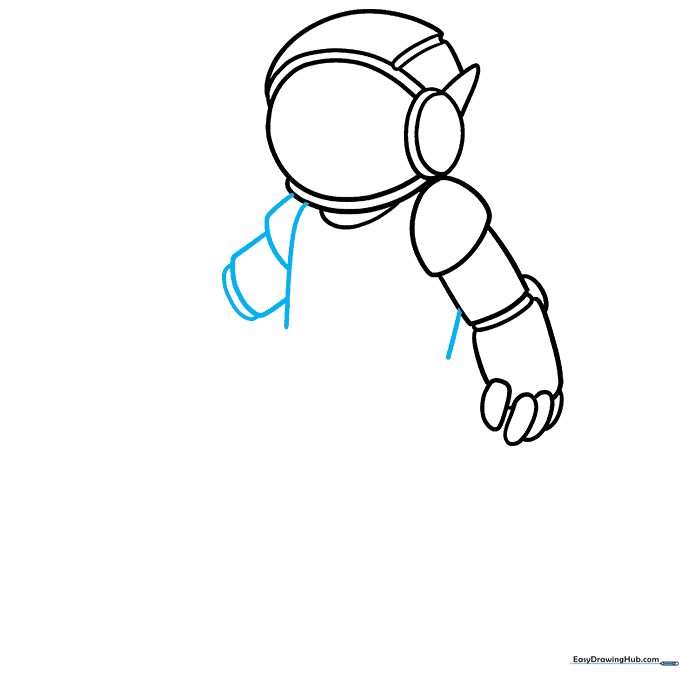
Step 3: Sketching the Arms and Hands
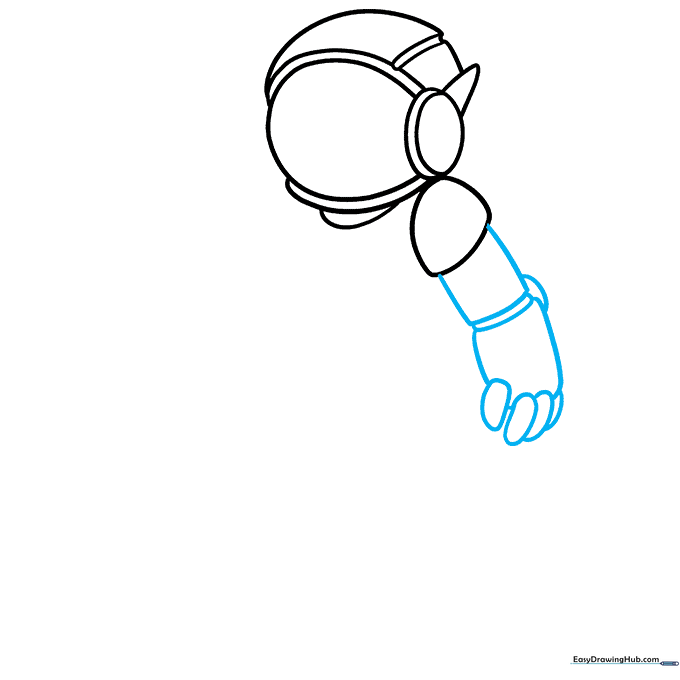
Draw two rectangles for the upper and lower arm, connecting them with a small oval at the elbow joint. Finish by adding rounded shapes for the fingers. Teacher's Tip: Drawing the elbow as a separate oval helps kids understand how joints move in a drawing.
Step 4: Building the Torso
Use long, curved lines to create the main body of the spacesuit. Begin sketching the second arm using similar rectangular segments. Teacher's Tip: Keep the torso wide to emphasize the heavy, pressurized nature of a real astronaut's suit.
Step 5: Completing the Second Arm
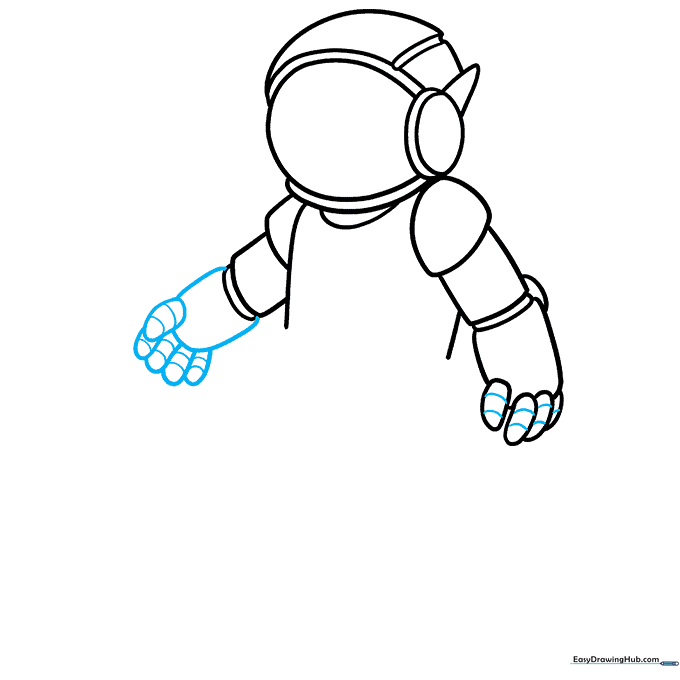
Add the final arm segment and hand, using curved lines to create the fingers. Add small bands across the fingers to represent the suit's joints. Teacher's Tip: Adding these small 'bands' is a great way to practice drawing texture and detail.
Step 6: Adding the Chest Control Panel
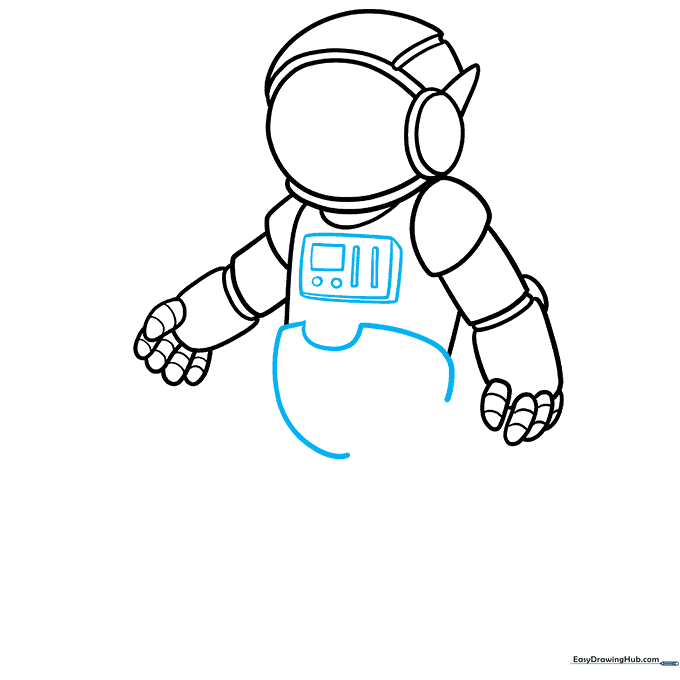
Draw a rectangular prism on the chest area. Inside, add small buttons and dials using circles and narrow rectangles. Finish the bottom of the torso with a curved notch. Teacher's Tip: Encourage kids to invent their own 'buttons'—it makes the drawing unique to them!
Step 7: Drawing the First Leg
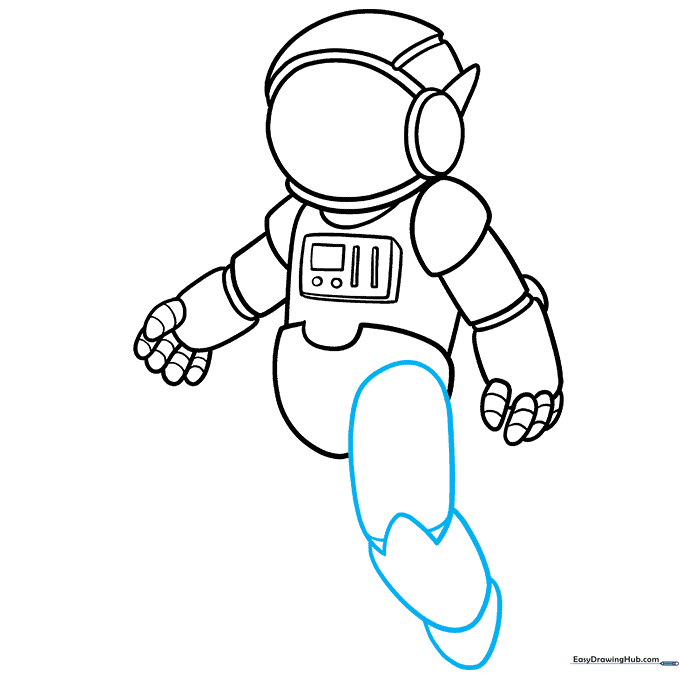
Sketch overlapping round shapes to form the leg and the bulky boot of the spacesuit. Teacher's Tip: Use rounded shapes to suggest the thickness of the fabric, which helps the character look like it's floating in space.
Step 8: Drawing the Second Leg
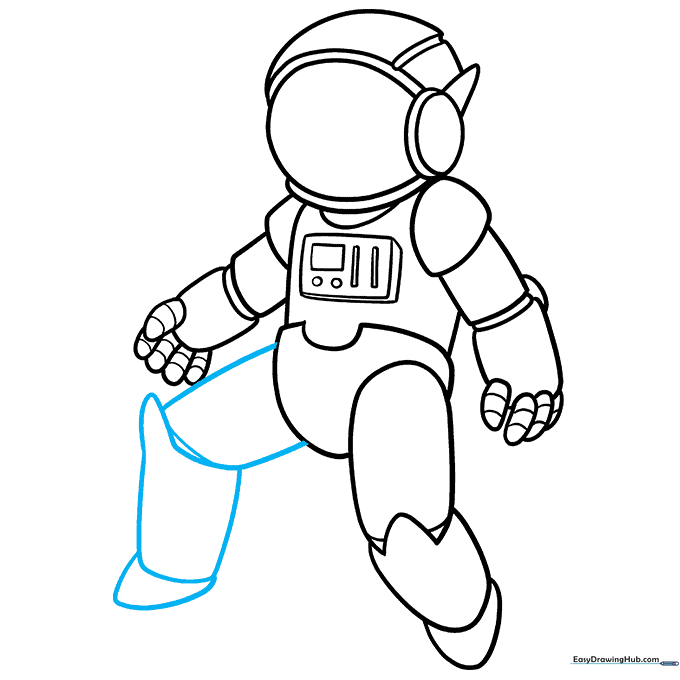
Repeat the process for the second leg using irregular rectangles and a rounded triangle for the boot. Teacher's Tip: Don't worry if the legs aren't perfectly symmetrical; space suits are baggy and move in all directions!
Step 9: Adding the Life-Support Backpack
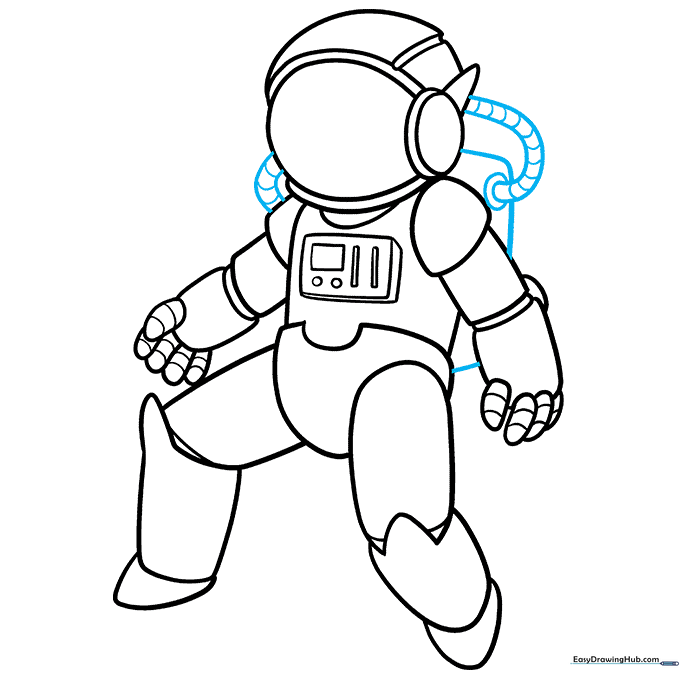
Draw a square backpack behind the astronaut and connect it to the helmet with two hoses. Add small bands to the hoses for detail. Teacher's Tip: The hoses are what make the astronaut look 'official'—take your time drawing those curves!
Step 10: Coloring Your Astronaut
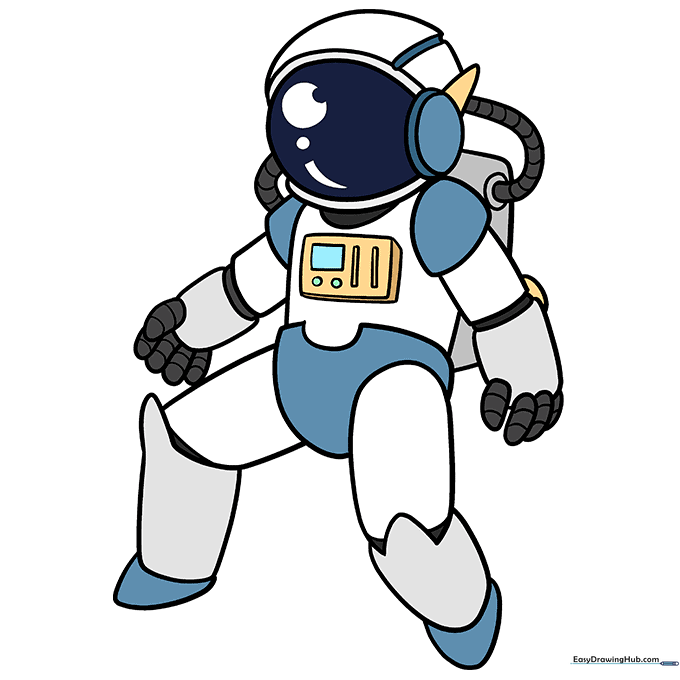
Your outline is complete! Use white for the main suit, but feel free to add pops of color like blue, red, or orange to the control panel and visor. Teacher's Tip: Use a light blue or grey to shade the white suit to give it a 3D look.
More Tutorials


