How to Draw an Archaeopteryx: Easy 10-Step Dinosaur Guide
Ready to bring a prehistoric creature to life? This tutorial is perfect for young paleontologists ages 7+ who want to master drawing the 'first bird.' You'll need a pencil, eraser, and paper to follow along as we build this dinosaur from simple shapes to feathered details.
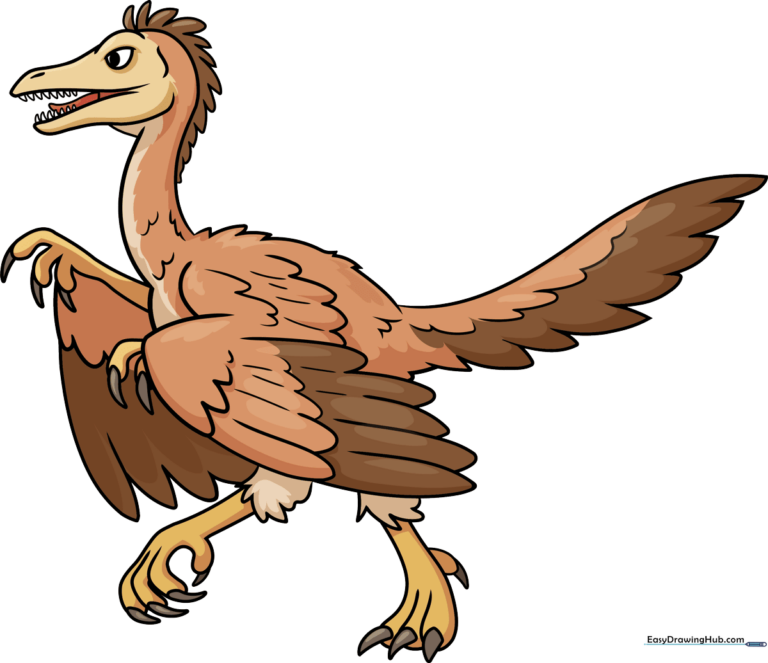
🎯 Final Result
Step-by-Step Instructions
Step 1: Sketching the Head
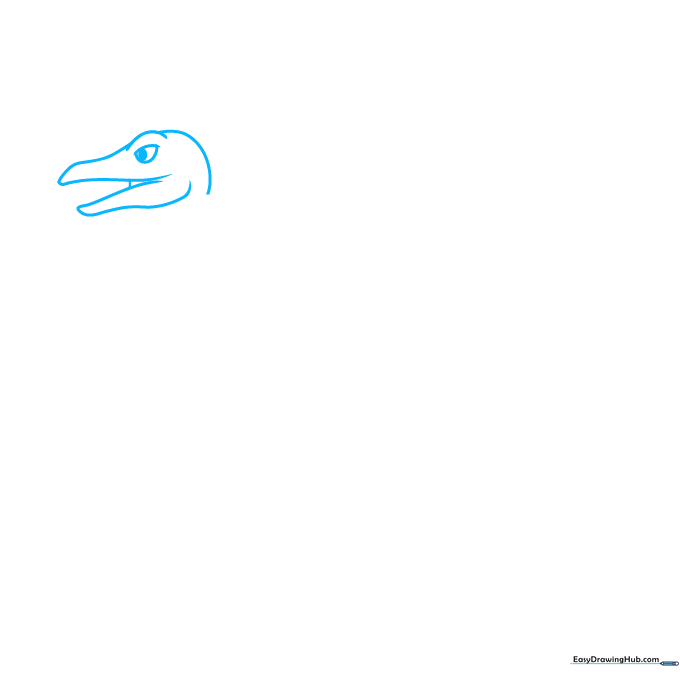
Start by sketching the dinosaur’s head using curved lines for the jaw and eye ridge. Tip: Keep the eye shape like a small teardrop, and add a tiny oval inside for the pupil to give your Archaeopteryx a focused, alert expression.
Step 2: Adding Teeth and Neck
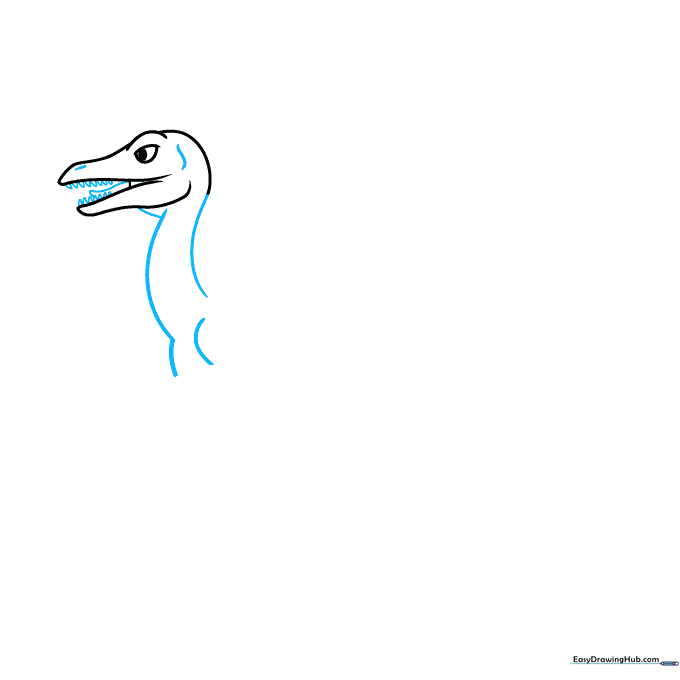
Draw small, sharp triangles for teeth and a curved line for the tongue. Tip: Use smooth, sweeping curves to connect the head to the chest, creating a graceful, bird-like neck posture.
Step 3: Shaping the Wing
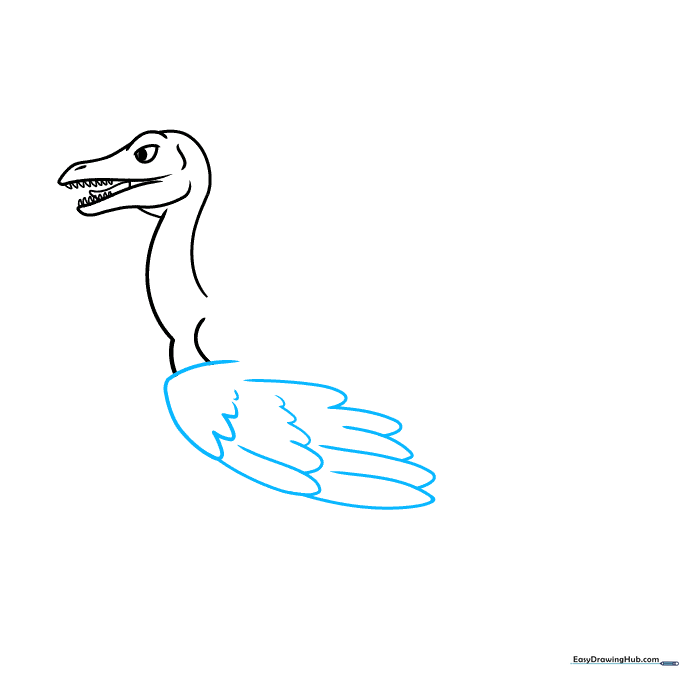
Sketch the primary wing structure using a long, elegant curve. Tip: Layer your feather lines like shingles on a roof to make the wing look natural and aerodynamic.
Step 4: Adding Claws and Legs
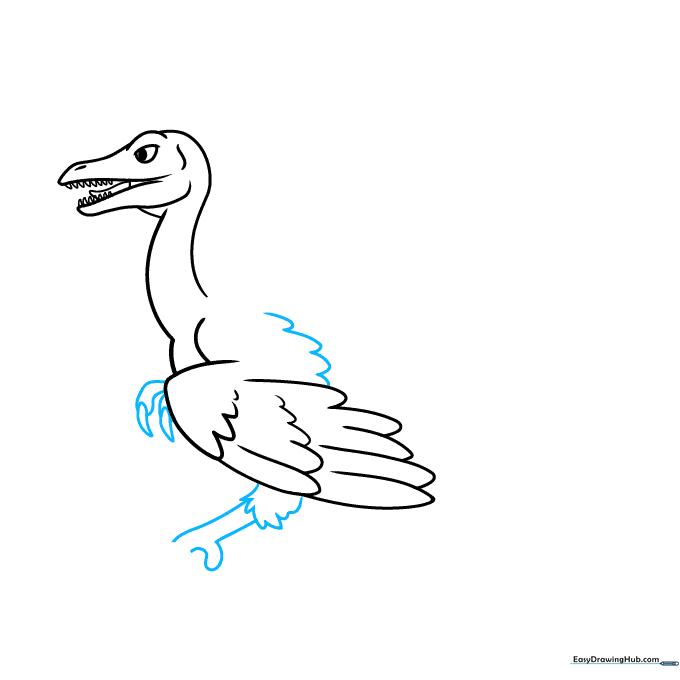
Use 'U' shapes to finish the wing base and draw the clawed fingers. Tip: Keep the claws sharp and pointed to emphasize the dinosaur's predatory nature.
Step 5: Sketching the Feet
Draw the toes and talons using overlapping curves. Tip: Think of these like bird feet, but with an extra sharp, curved claw for gripping branches or prey.
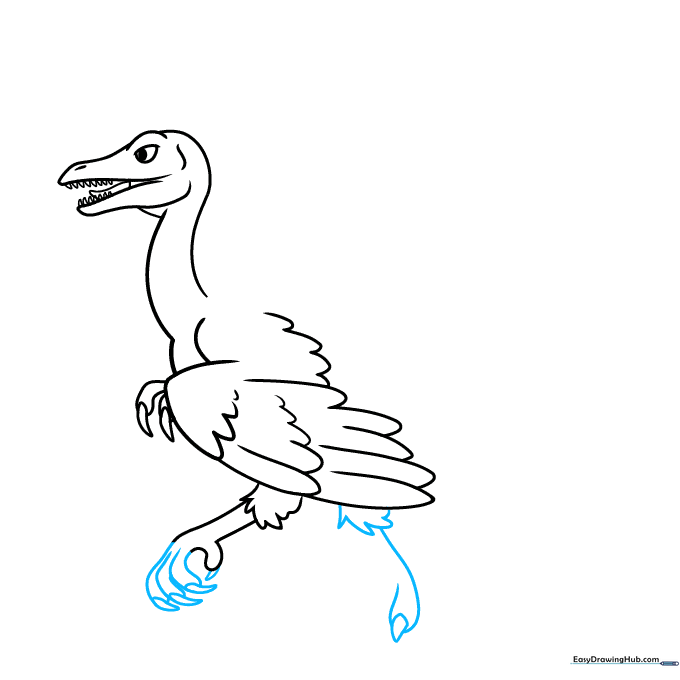
Step 6: Completing the Legs
Finish the rear leg and add the forearm emerging from the chest. Tip: Ensure the limbs look proportional to the body so your dinosaur looks balanced.
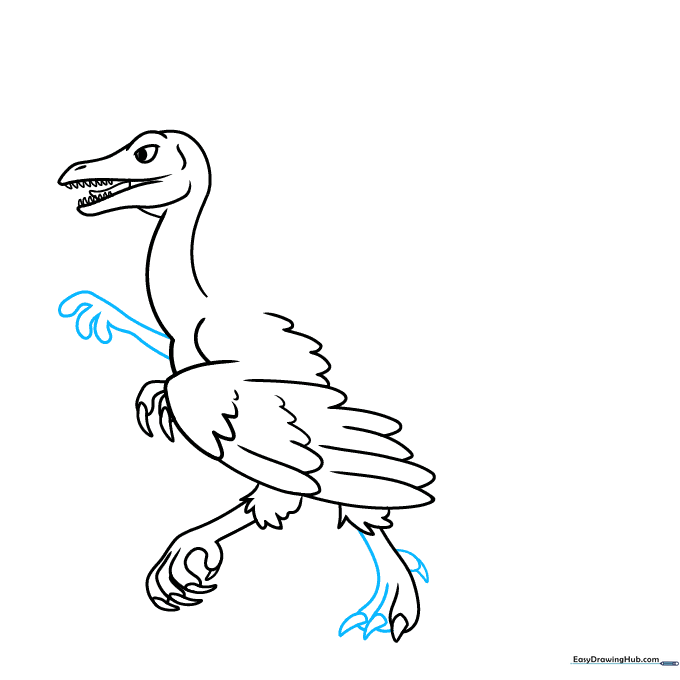
Step 7: Adding Back Feathers
Add triangle-shaped claws to the fingers and continue the feather pattern along the back. Tip: Use jagged lines here to represent the texture of primitive feathers.
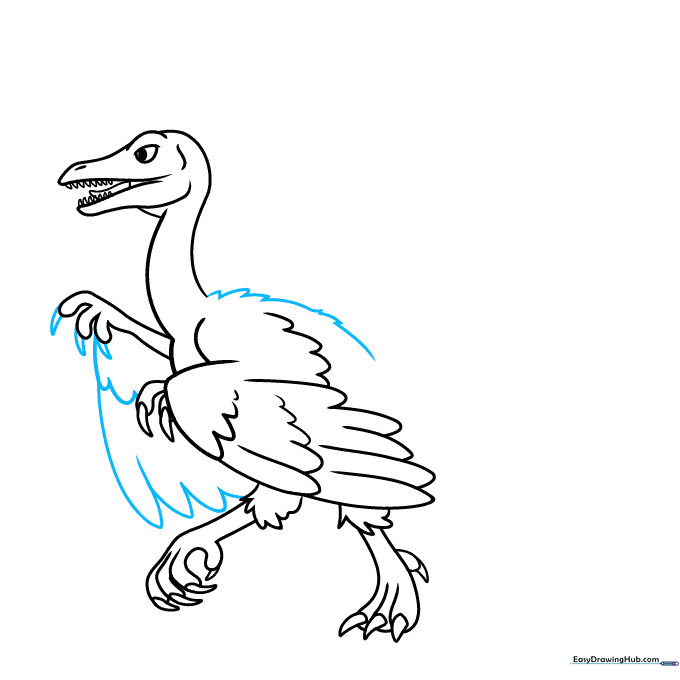
Step 8: Drawing the Tail
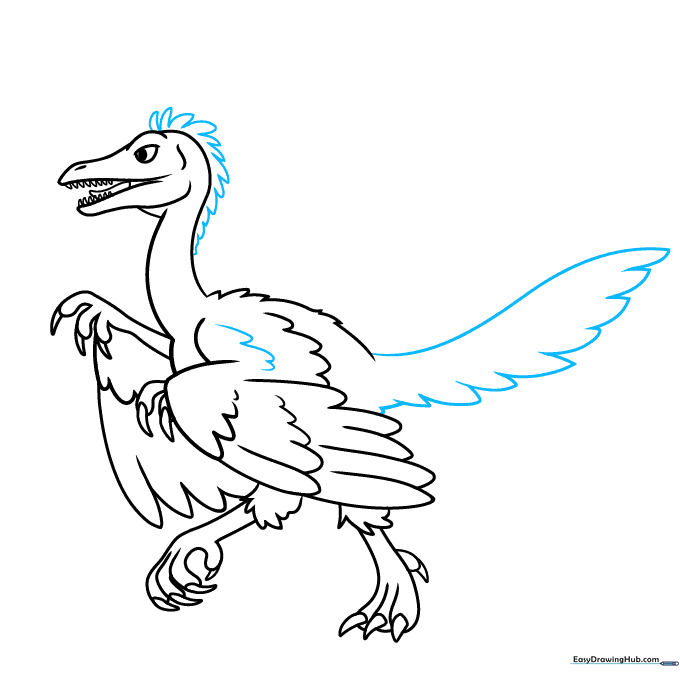
Extend a long, curved line for the tail. Tip: Use jagged lines along the bottom to give the tail a bushy, feathered appearance.
Step 9: Final Texturing
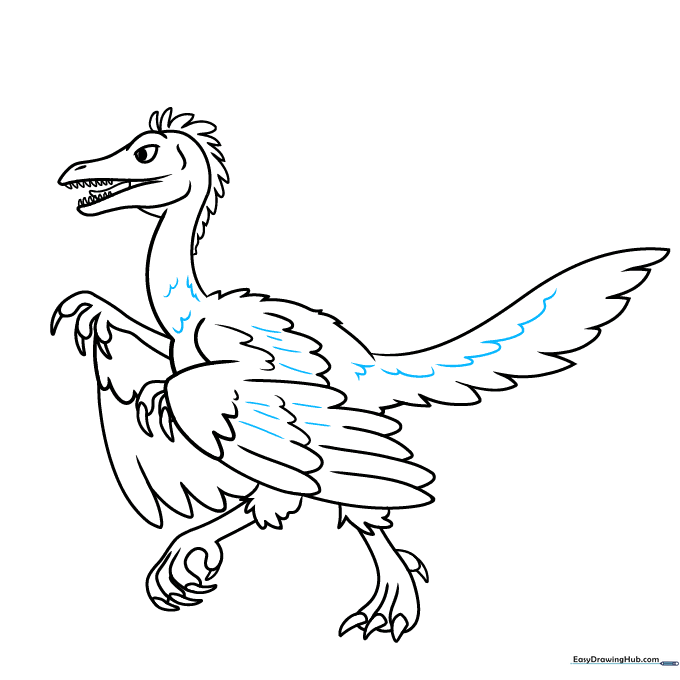
Go over your drawing and add small, curved lines throughout the body to represent individual feathers. Tip: Vary the length of these lines to make the plumage look realistic.
Step 10: Coloring Your Dinosaur
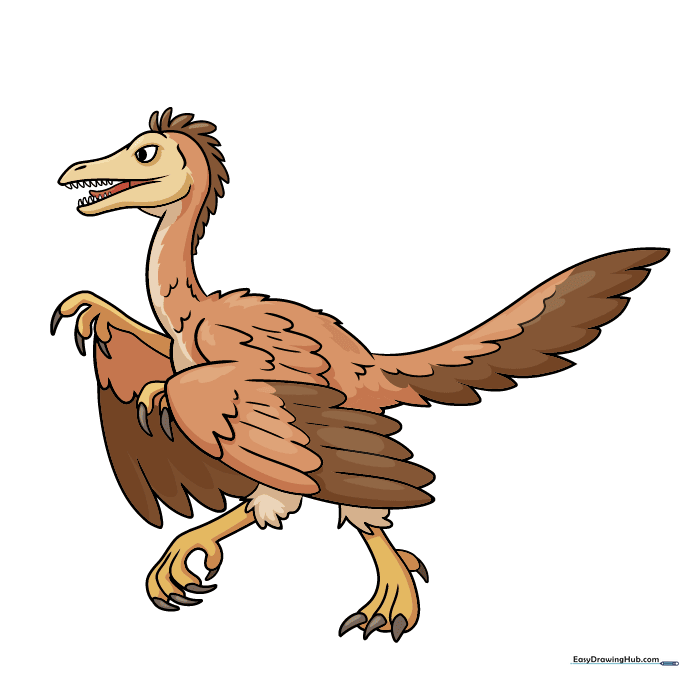
Time to bring your Archaeopteryx to life with color! Tip: Since we don't know their exact colors, feel free to use earthy browns or get creative with bright, parrot-like patterns.
More Tutorials


