How to Draw an Anime Shirt: Easy Step-by-Step Guide
Ready to bring your anime characters to life? This tutorial is perfect for artists ages 8+ looking to master clothing folds and structure. You’ll only need a pencil, eraser, and paper to get started. Follow these simple steps to add professional-looking detail to your character's wardrobe.
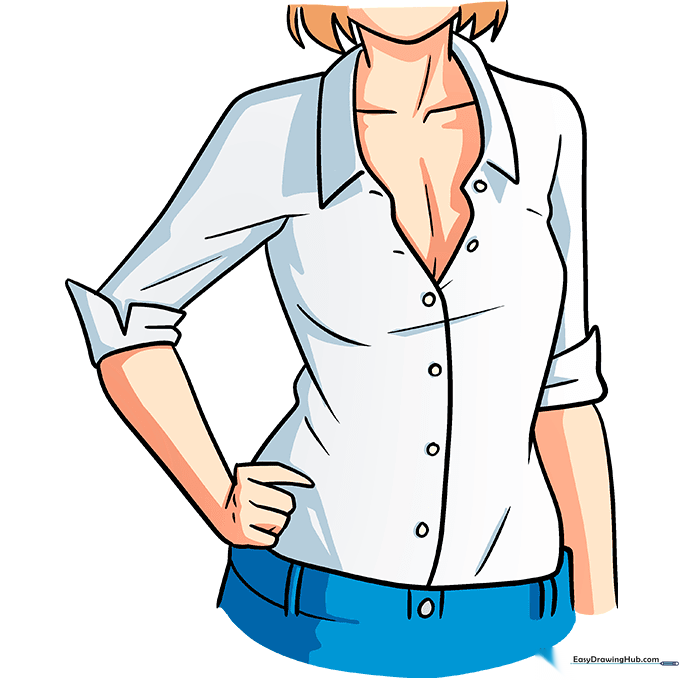
🎯 Final Result
Step-by-Step Instructions
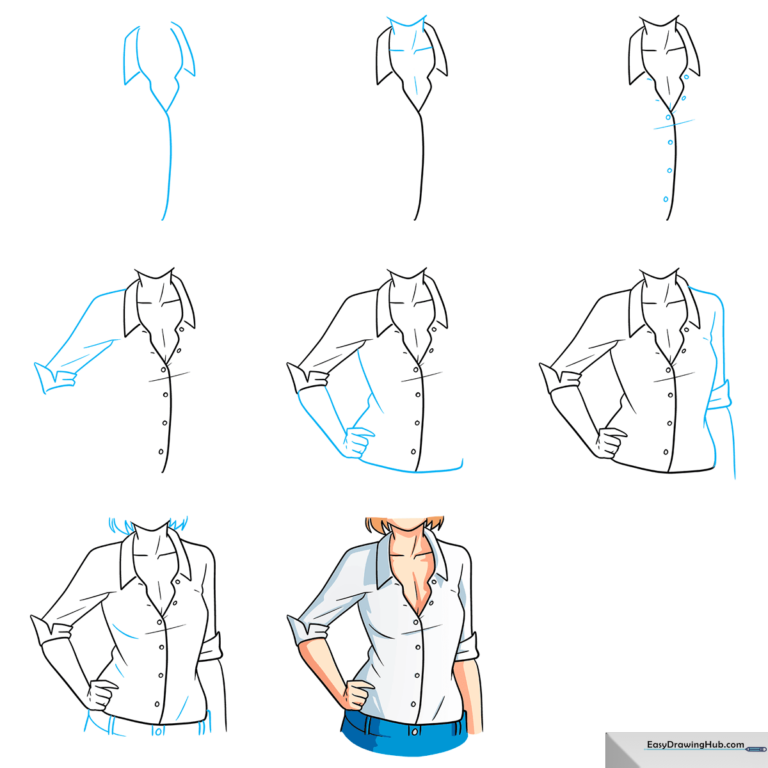
Step 1: Sketching the Collar
Start by drawing a 'Y' shape with slightly crooked arms to form the neck opening. Add two small parallelograms on either side to create the collar. Teacher's Tip: Keep these lines light; they serve as the anchor for the rest of the shirt.
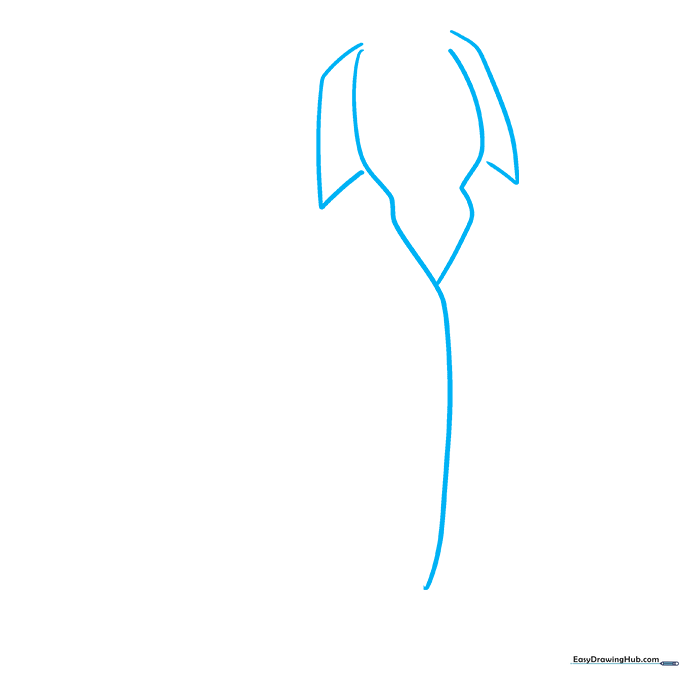
Step 2: Defining the Neckline
Use soft, curved lines to draw the chin and neck, then add subtle contours for the collarbones. Teacher's Tip: Don't press too hard here; the neck should look delicate to balance the structure of the shirt.
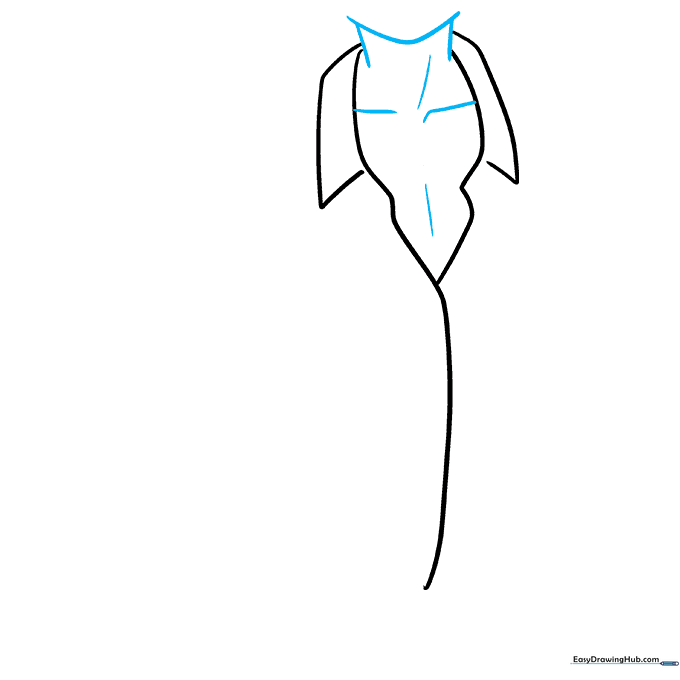
Step 3: Adding Buttons and Placket
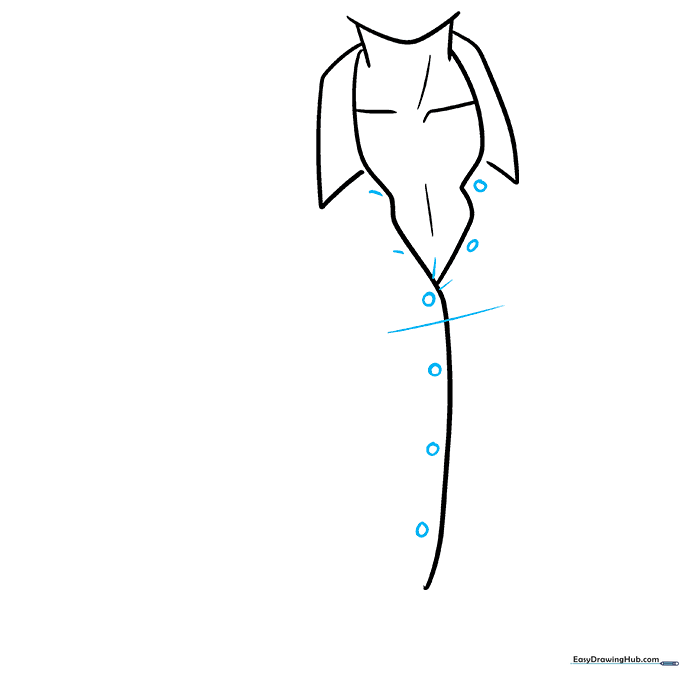
Draw a diagonal line down from the 'V' of the collar. Add small circles for buttons and tiny curved lines next to them for buttonholes. Teacher's Tip: Space your buttons evenly to make the shirt look realistic.
Step 4: Drawing the First Sleeve
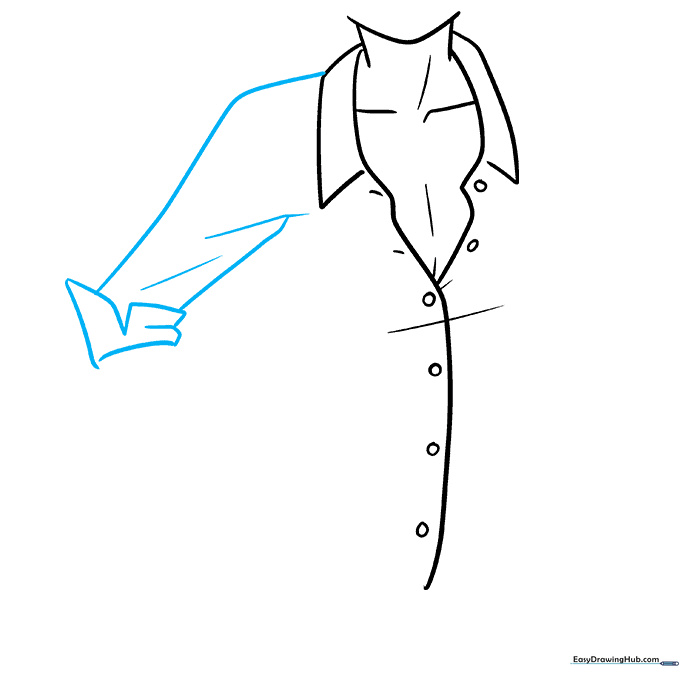
Sketch the sleeve using overlapping curved lines to show the fabric's volume, ending in a rolled cuff. Teacher's Tip: Think of the sleeve as a tube; the overlapping lines help create the illusion of depth.
Step 5: Shaping the Torso
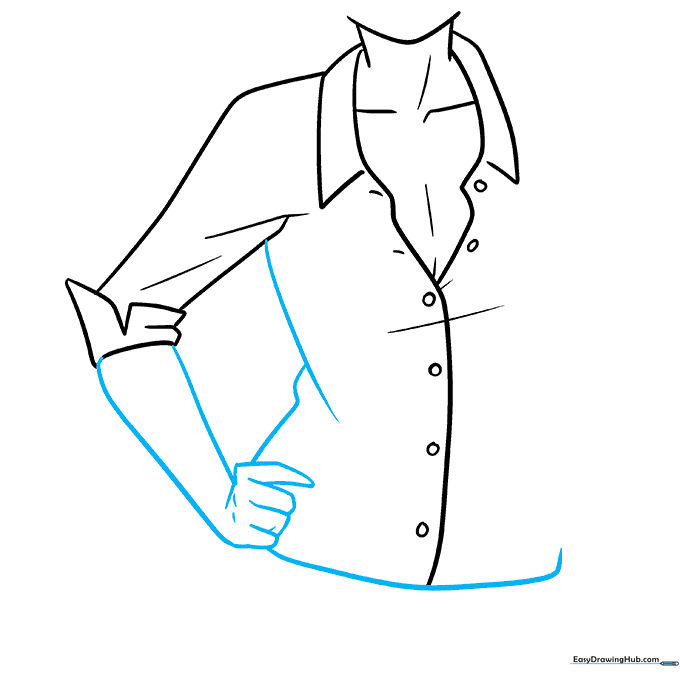
Draw the arm resting on the hip, then trace the rectangular shape of the torso. Teacher's Tip: Keep the waist slightly narrower than the chest to maintain natural anime proportions.
Step 6: Completing the Silhouette
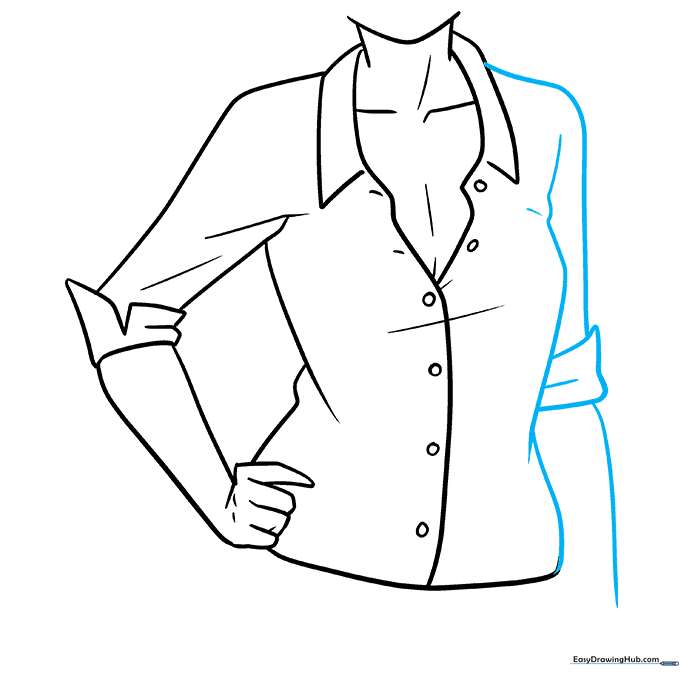
Finish the other side of the torso and draw the remaining shoulder and arm. Teacher's Tip: Check that both sides are symmetrical to ensure the shirt fits the character correctly.
Step 7: Adding Final Details
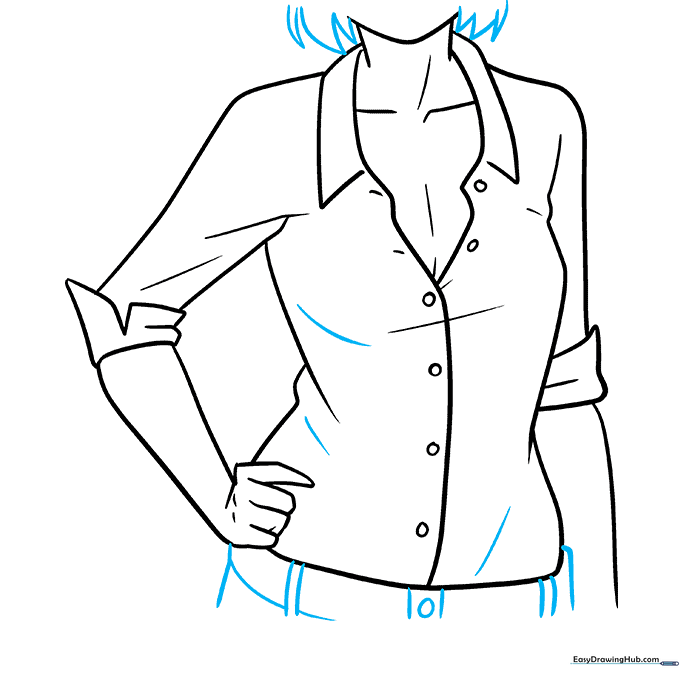
Add hair tips, a belt, and extra curved lines on the shirt to represent fabric folds. Teacher's Tip: Use short, sharp lines for hair to give it that classic anime look.
Step 8: Coloring Your Creation
Add your favorite colors! You can keep it a crisp white or try bold patterns. Teacher's Tip: Use light shading under the arms to make the shirt look three-dimensional.
More Tutorials


