How to Draw an Anime Male Body: Easy 6-Step Guide
Ready to bring your own anime characters to life? This guide breaks down the complex male anatomy into simple, manageable geometric shapes perfect for artists aged 10+. Grab a pencil, an eraser, and a ruler to start building a balanced, proportional character base from the ground up.
🎯 Final Result
Step-by-Step Instructions
Step 1: Establishing the Grid

Start by drawing a light grid with two vertical lines and eight horizontal lines to create 14 equal squares. Teacher's Tip: Keep your pencil pressure very light here; these lines are just a map and will be erased later, so don't press hard into the paper!
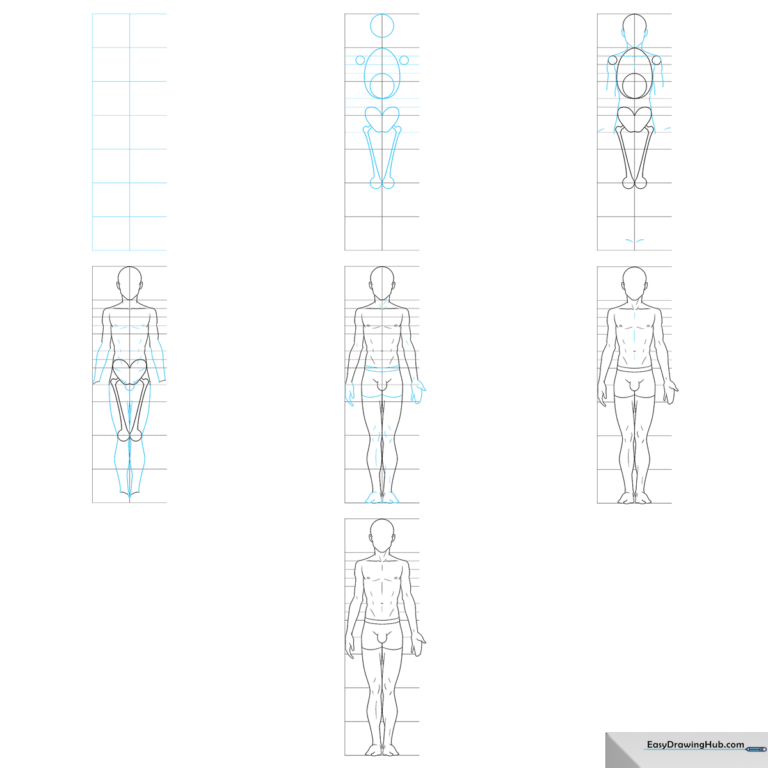
Step 2: Mapping the Anatomy

Place a circle for the head in the top segment, then sketch the torso, shoulders, and leg joints using ovals and circles within your grid. Teacher's Tip: Think of these shapes like building blocks—the 'heart' shape for the hips is the secret to getting that classic anime stance right.
Step 3: Defining the Silhouette
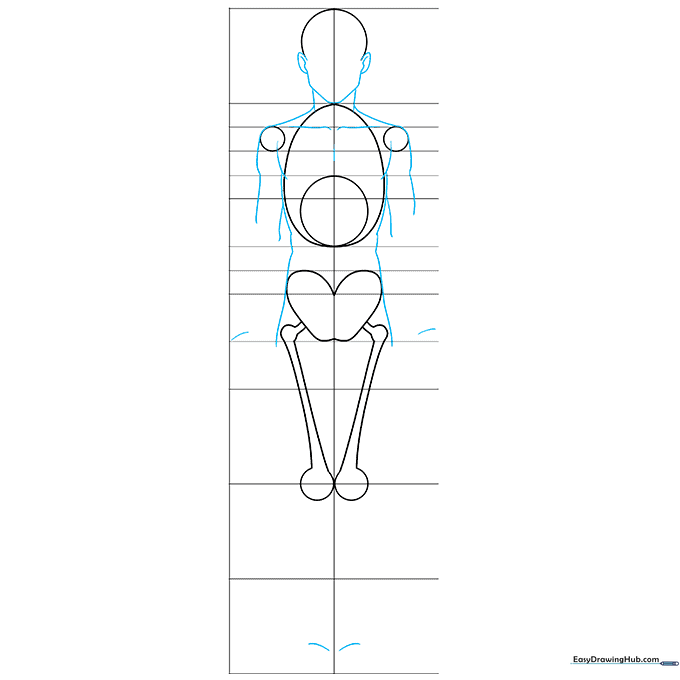
Connect your shapes by drawing the chin, neck, and shoulder contours. Teacher's Tip: Use smooth, flowing lines to connect the joints. If your lines look a bit stiff, try 'ghosting' your movement in the air above the paper before committing to the stroke.
Step 4: Adding Muscular Structure
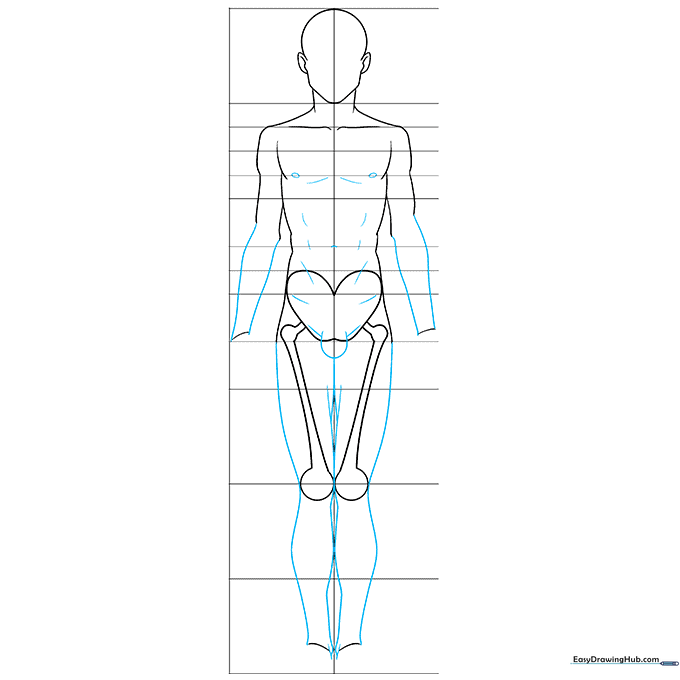
Outline the arms and legs, adding subtle curves to suggest chest and abdominal muscles. Teacher's Tip: Less is more! Use short, curved lines to imply muscle rather than drawing every single detail; this keeps the character looking clean and professional.
Step 5: Finalizing Extremities
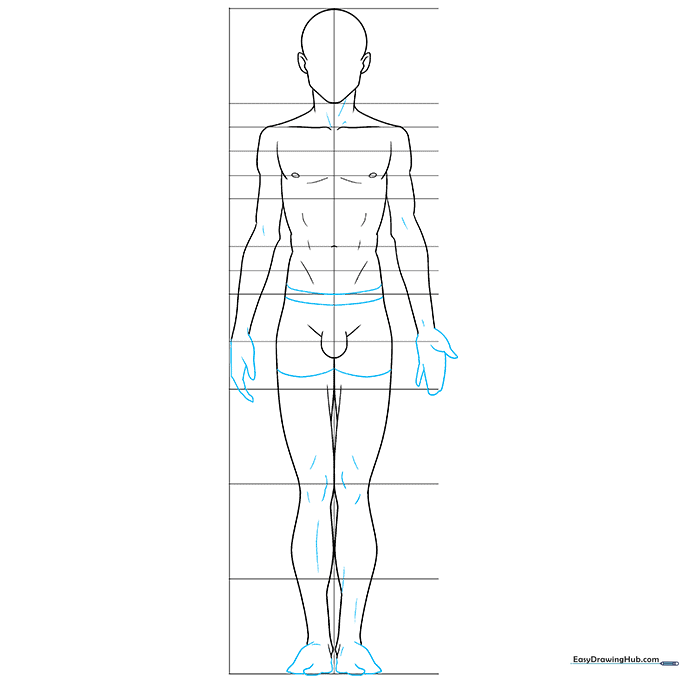
Draw the hands, feet, and joints like elbows and knees. Teacher's Tip: Hands are tricky! If you struggle, remember they are roughly the size of the character's face. Keep your lines confident and steady.
Step 6: Clean Up and Polish

Erase your original grid lines and refine the final outline. Teacher's Tip: Use a kneaded eraser to gently lift the grid lines without smudging your final character lines. You've just created a perfect base for any character design!
More Tutorials