How to Draw an Anime Hoodie: Easy 9-Step Guide
Ready to level up your character design? This tutorial is perfect for artists ages 8+ looking to master clothing folds and anime-style proportions. You will need a pencil, eraser, and paper to follow along as we build a cozy, realistic hoodie from the neckline down.
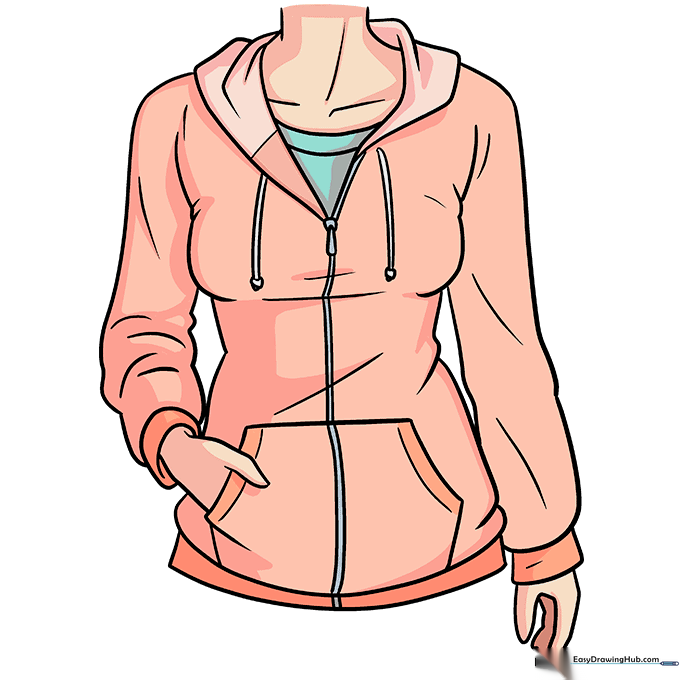
🎯 Final Result

Step-by-Step Instructions
Step 1: Establishing the Neckline
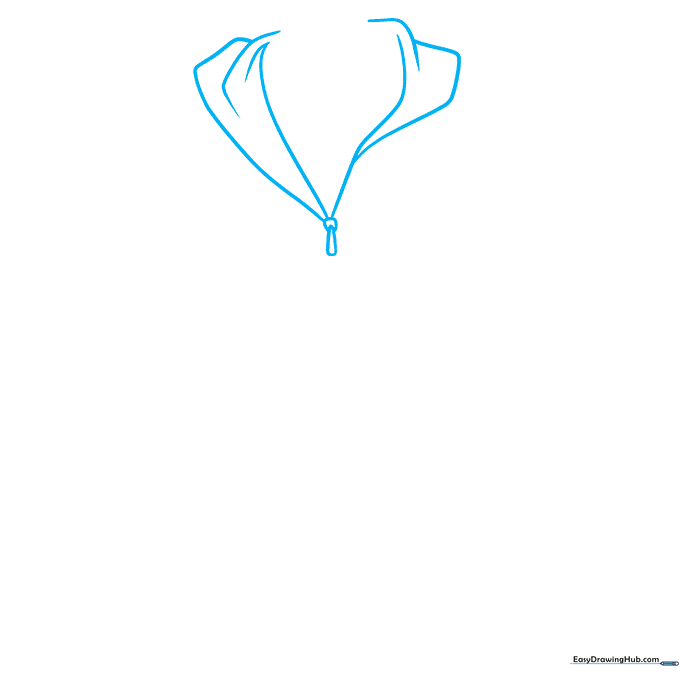
Start by sketching a soft 'V' for the neck opening. Add a small circle and a teardrop shape at the base for the zipper pull. Teacher's Tip: Keep your pencil pressure light here; these are just guidelines that we will refine later.
Step 2: Adding the Base Layer
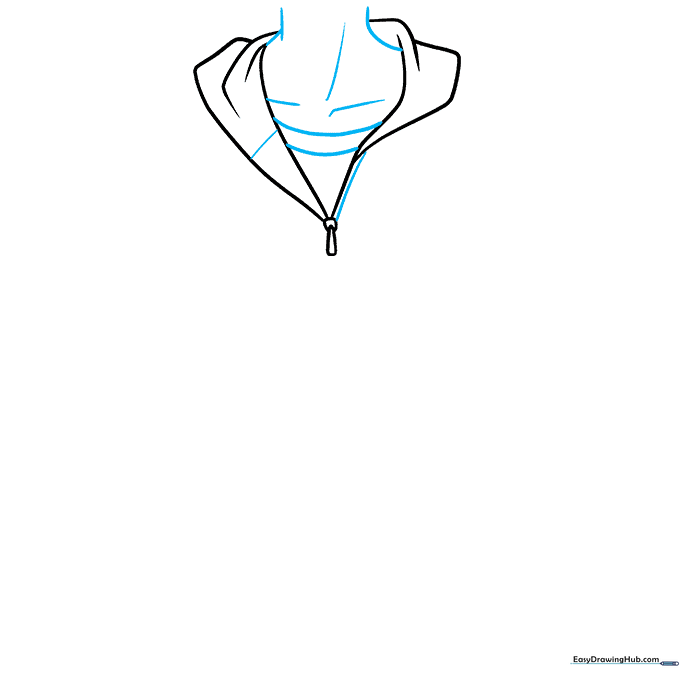
Draw a rounded line inside the V-neck to represent the t-shirt underneath. Add two gentle curves for the neck contour. Tip: Ensure the neck isn't too wide, or the hoodie will look like it's falling off the shoulders!
Step 3: Shoulders and Drawstrings
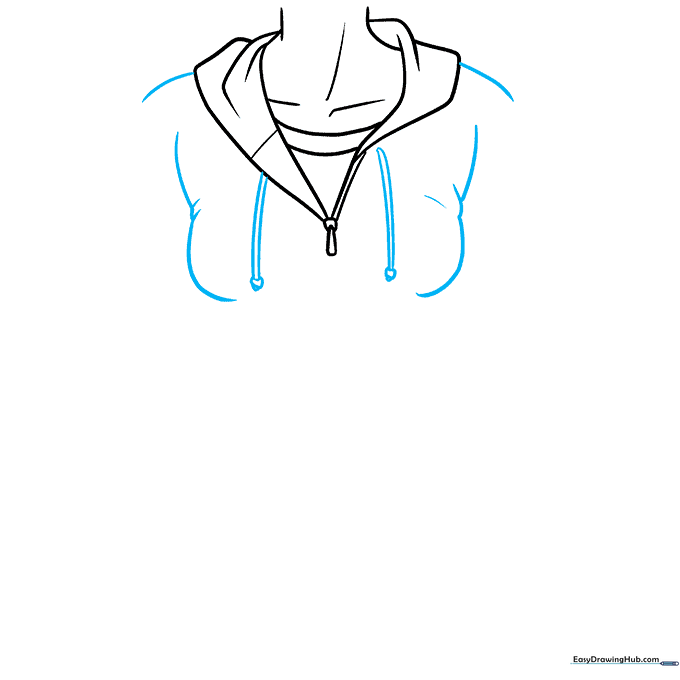
Sketch the shoulder slope and add two dangling lines from the hood, ending in small rounded shapes for the drawstring tips. Tip: Make the drawstrings slightly asymmetrical to give the drawing a more natural, dynamic feel.
Step 4: Sleeves and Hands
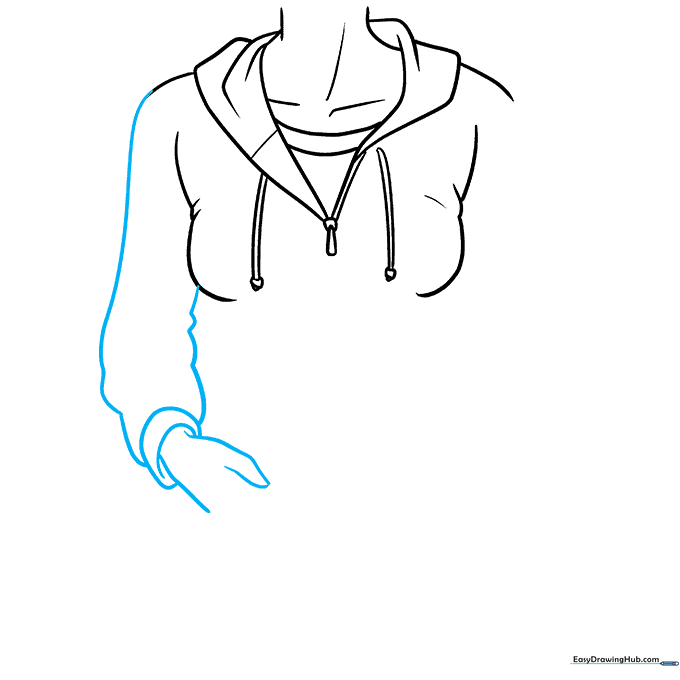
Use wavy lines to create the sleeve, ending in a cuff. Sketch the hand partially tucked inside the pocket area. Tip: Don't worry about drawing the full hand; the 'hidden' look makes the pose more relaxed.
Step 5: Defining the Torso
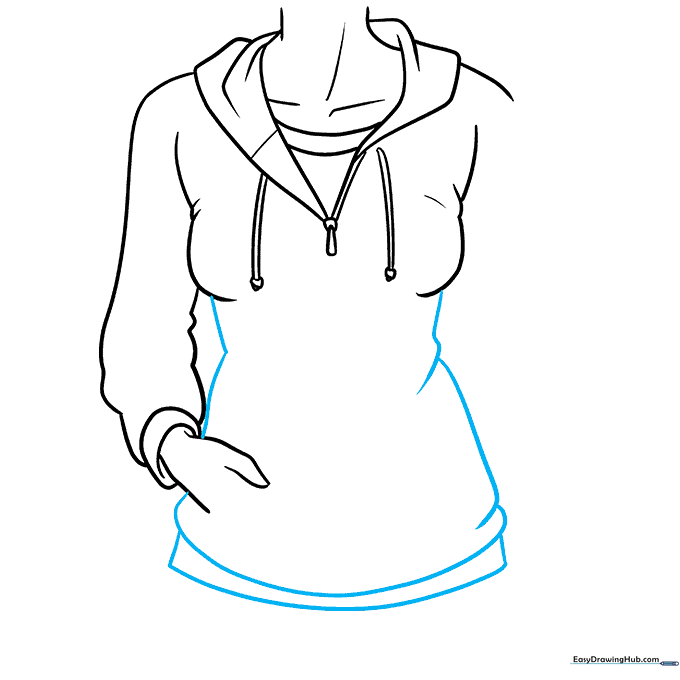
Outline the torso using smooth, long curves that follow the body's natural shape. Keep the lines slightly loose to suggest soft fabric. Tip: Think about where the fabric would stretch—usually around the chest and waist.
Step 6: The Kangaroo Pocket
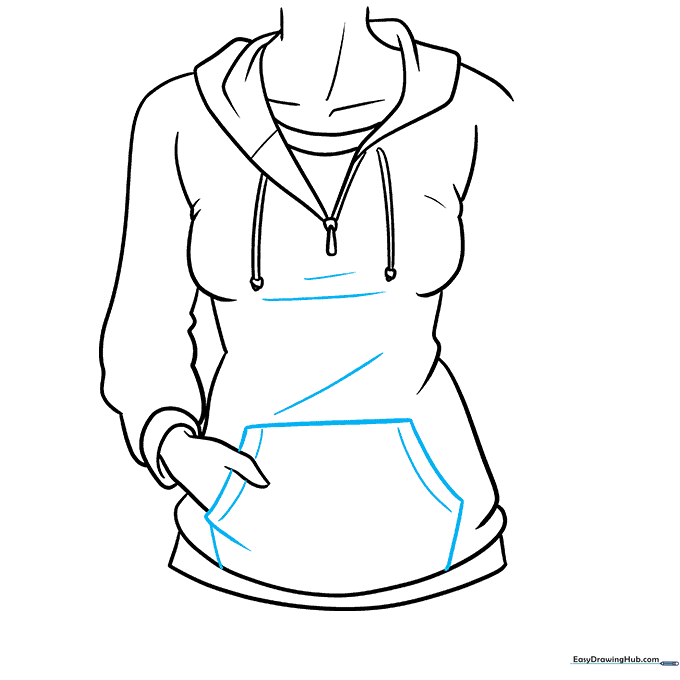
Draw a large, hexagonal shape on the front for the pocket. Add small curved lines near the edges to show the fabric bunching up. Tip: Make sure the pocket looks like it's sitting 'on top' of the hoodie by adding a slight shadow line underneath.
Step 7: Adding Zipper Details
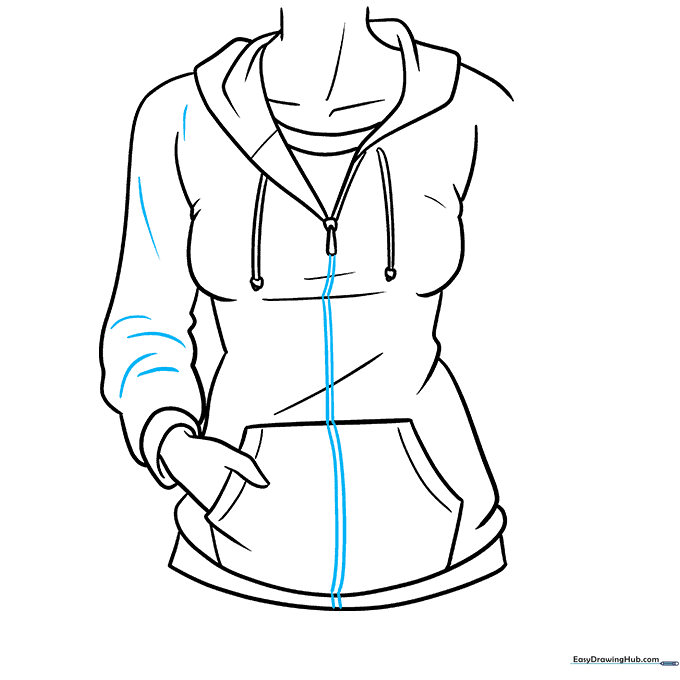
Draw a vertical line from the neck down to the hem to represent the zipper. Add small horizontal marks for the teeth. Tip: Use a ruler if you struggle with straight lines, but a freehand line looks more organic for fabric.
Step 8: Finalizing the Sleeves
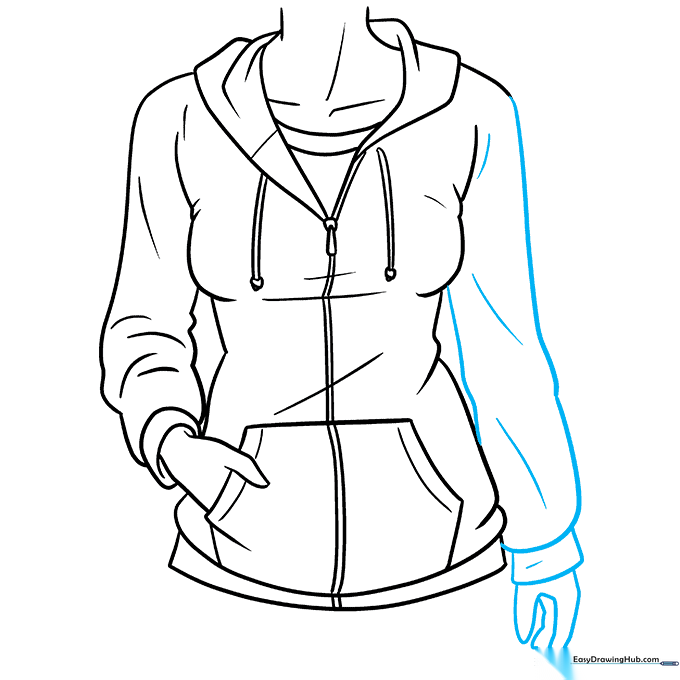
Complete the second sleeve and hand. Add a few 'wrinkle' lines at the elbow and wrist to show the fabric is bunching. Tip: Wrinkles are just small 'V' or 'Y' shapes—use them sparingly for a realistic look.
Step 9: Adding Color
Time to bring your hoodie to life! Choose your favorite color palette. Tip: Use a darker shade of your main color to add shadows under the arms and near the pocket to give your drawing depth.
More Tutorials


