How to Draw an Anime Profile: Easy 8-Step Guide
Ready to bring your anime characters to life from a new angle? This side-view tutorial is perfect for artists ages 8+ looking to master facial proportions. All you need is a pencil, an eraser, and a sheet of paper to start building your character's profile.
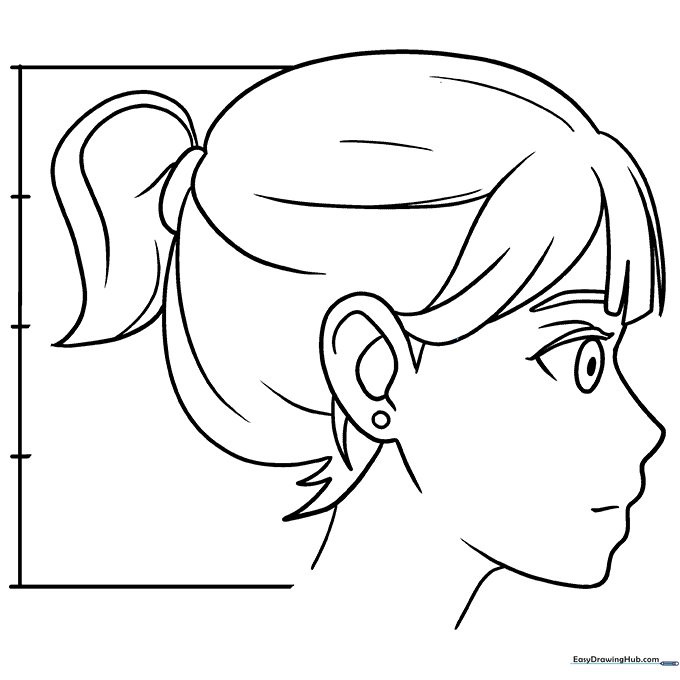
🎯 Final Result
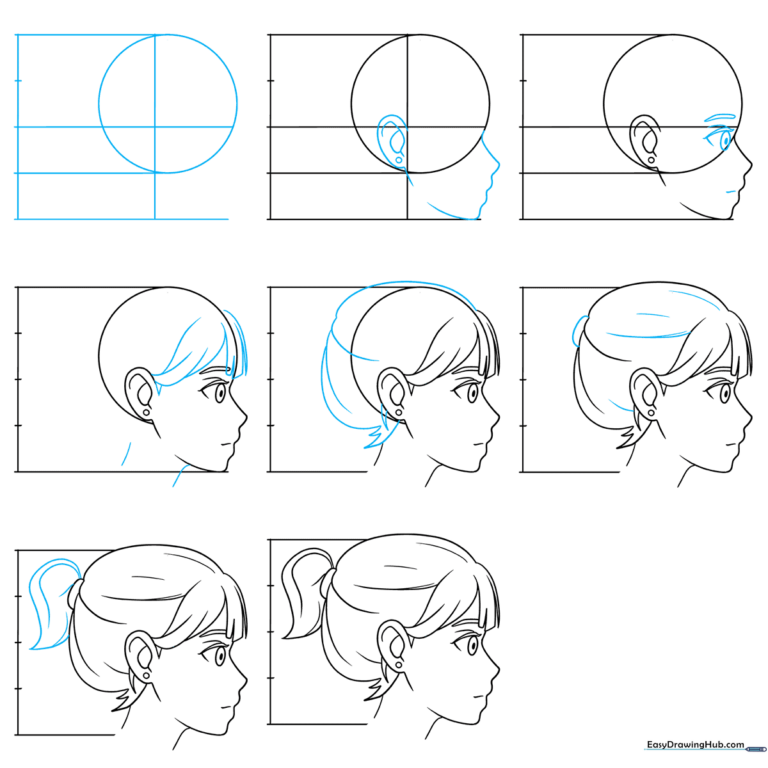
Step-by-Step Instructions
Step 1: Establishing the Proportions
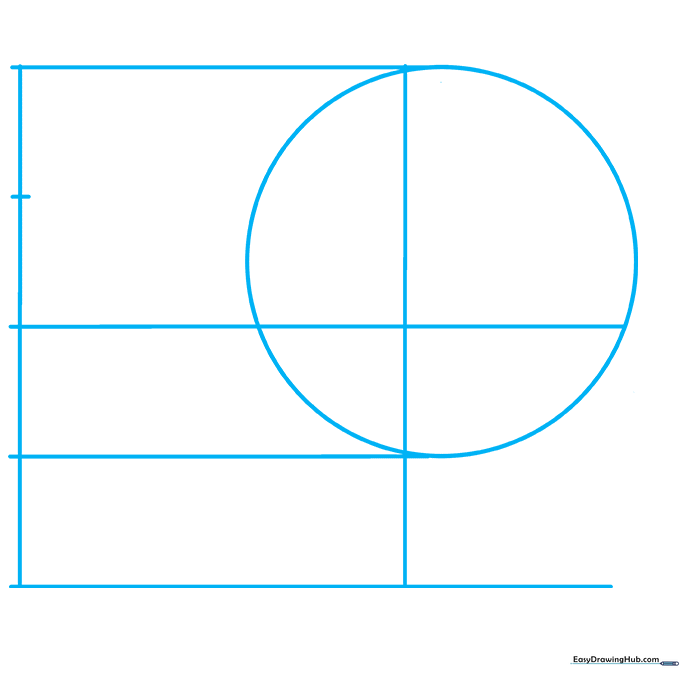
Draw a light grid using a vertical and horizontal line that meet in the bottom left, then add a second set in the center. Sketch a circle between the top and three-quarter guidelines. Teacher's Tip: Keep your pencil pressure very light here; these are just structural guides that we will erase later!
Step 2: Shaping the Jaw and Ear
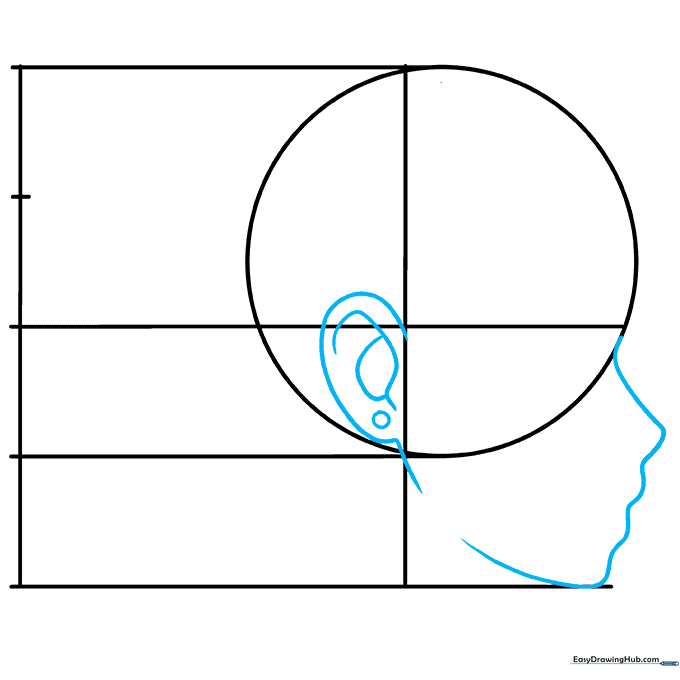
Extend a wavy line from the horizontal midline to form the nose, mouth, and chin, angling it back toward the circle. Add the ear using the cross-guide for placement. Teacher's Tip: The ear should sit roughly between the eyebrow line and the nose line—this is a classic rule of thumb for human proportions!
Step 3: Adding Facial Features
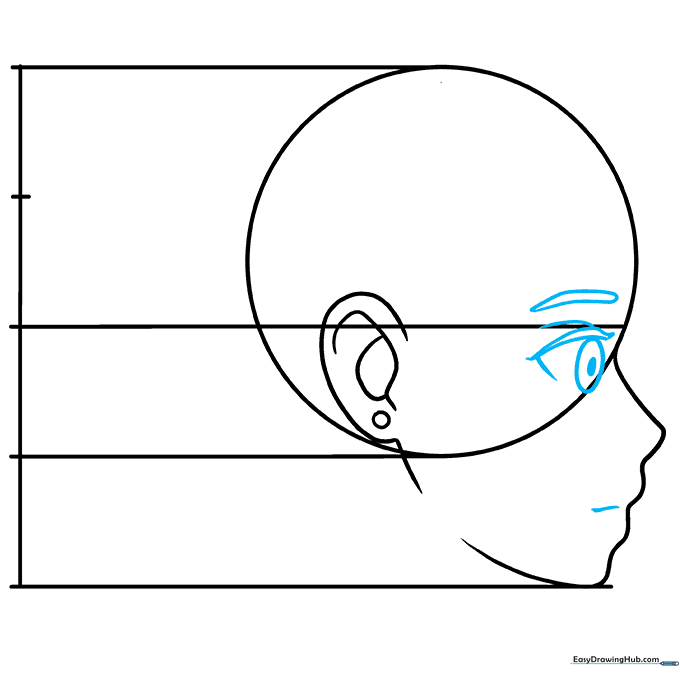
Erase the vertical guide and sketch the eye just below the horizontal midline. Because we are looking from the side, draw the eye as a slightly flattened, conical shape. Add the eyebrow and mouth. Teacher's Tip: Anime eyes in profile are narrower than front-facing ones; focus on the lash line to give it that signature look.
Step 4: Outlining the Hair and Neck
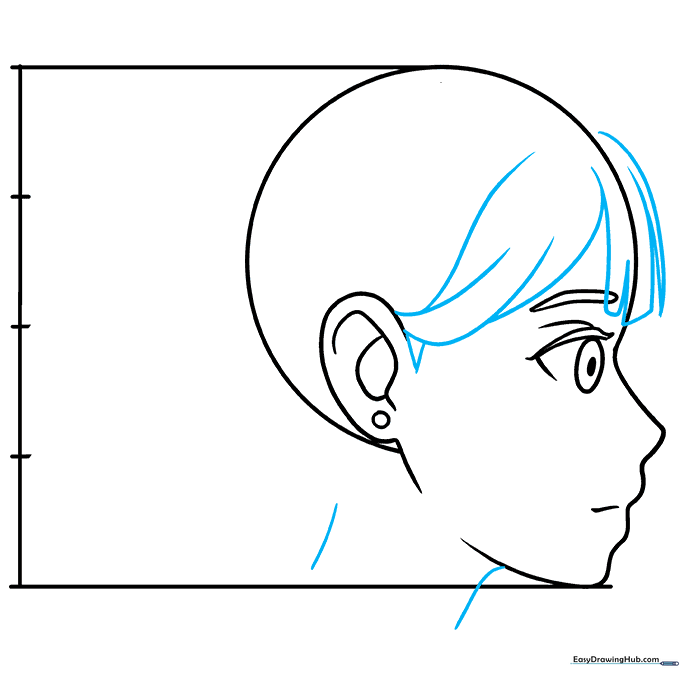
Clear away the horizontal guidelines. Use sharp, angular lines to sketch the hair framing the face, and draw two parallel lines for the neck. Teacher's Tip: Don't draw the hair too close to the skull; leave a little space to make the hair look voluminous and natural.
Step 5: Defining the Back of the Head
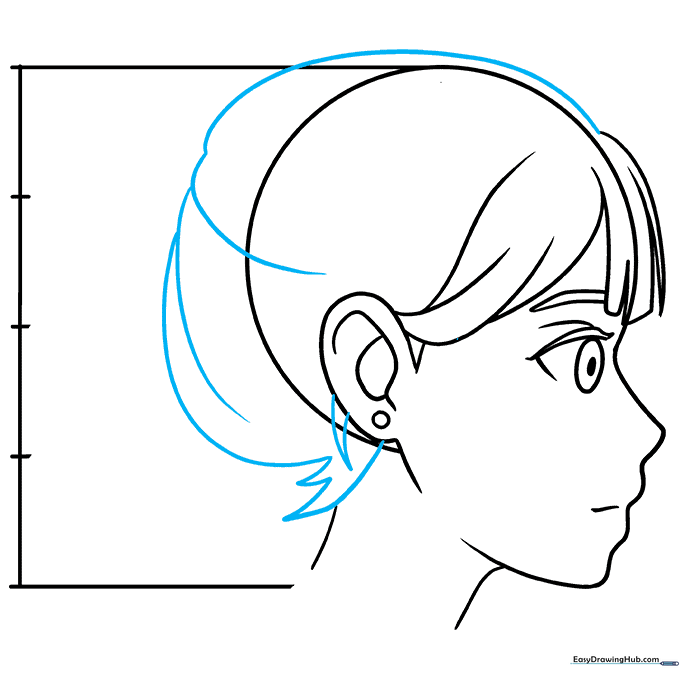
Sketch the back of the head using long, sweeping curves that overlap slightly. Add shorter, pointed strokes below the ear to suggest hair texture. Teacher's Tip: Overlapping lines create depth, making the hair look like it has layers rather than being a flat shape.
Step 6: Refining Hair Details
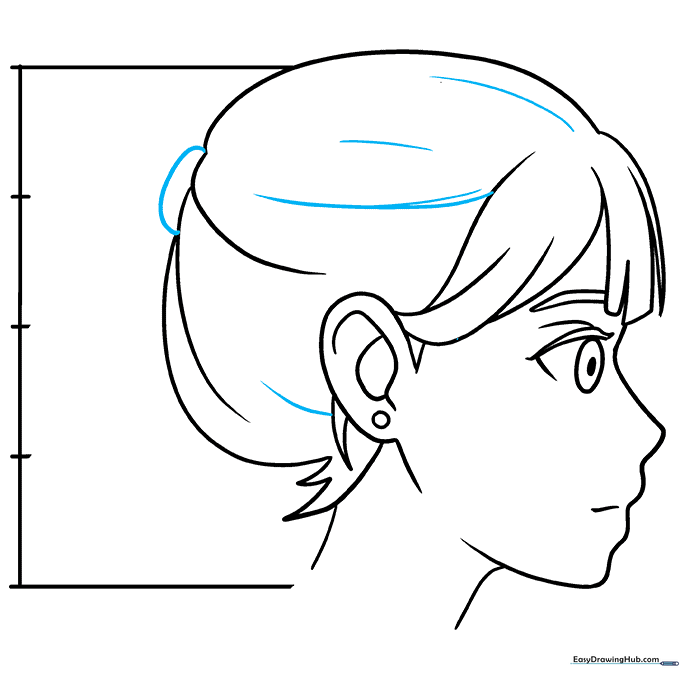
Erase the remaining circle guidelines. Add more curved lines throughout the hair for texture and draw a hairband at the back. Teacher's Tip: Use varying line weights—thicker lines for the outer edges and thinner lines for the inner hair strands—to make your drawing pop.
Step 7: Drawing the Ponytail
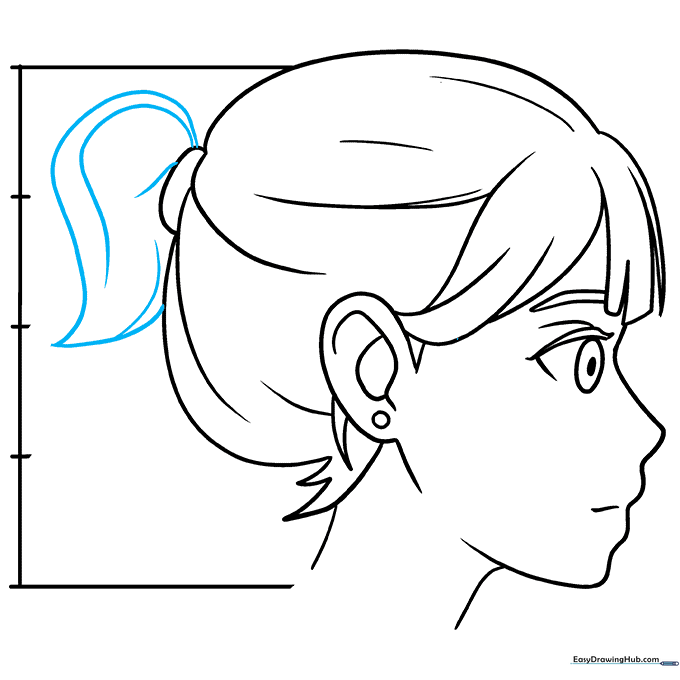
Sketch the ponytail using curved lines that meet at a point. Add extra lines inside the ponytail to show movement and texture. Teacher's Tip: Think of the ponytail as a single flowing shape first, then add the individual hair strands inside it.
Step 8: Final Cleanup
Carefully erase any stray pencil marks or remaining construction lines. Your anime profile is complete! Teacher's Tip: If you're planning to ink your drawing, wait until all pencil lines are cleaned up so your ink lines stay crisp and dark.
More Tutorials


