How to Draw an Anime Head: Easy 3/4 View Tutorial
Ready to take your anime characters to the next level? This 3/4 view tutorial is perfect for artists ages 8+ looking to add depth and dimension to their portraits. Grab a pencil, an eraser, and a sheet of paper to learn how to construct a professional-looking anime face from a dynamic angle.
🎯 Final Result
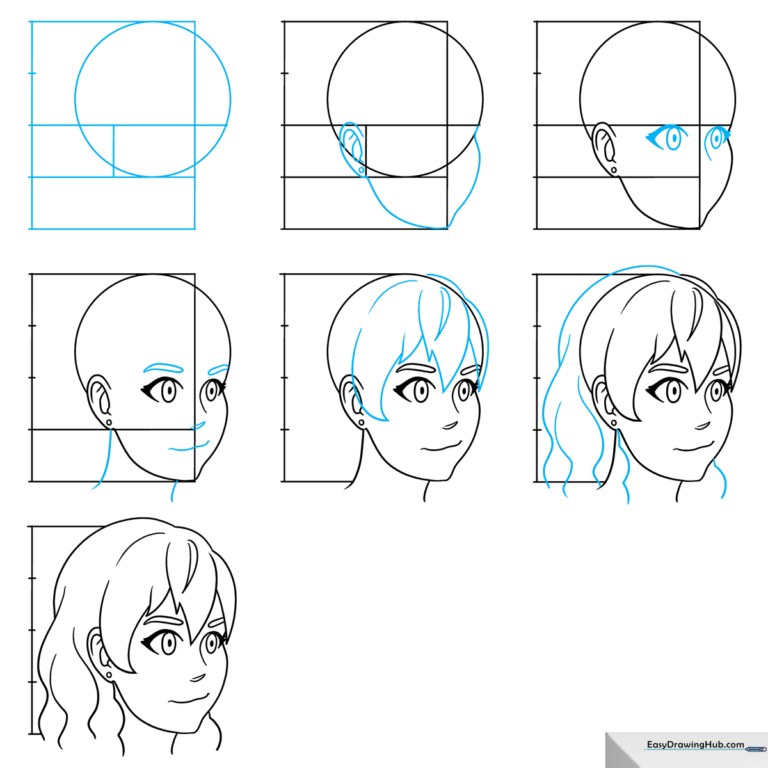
Step-by-Step Instructions
Step 1: Setting the Structural Guidelines
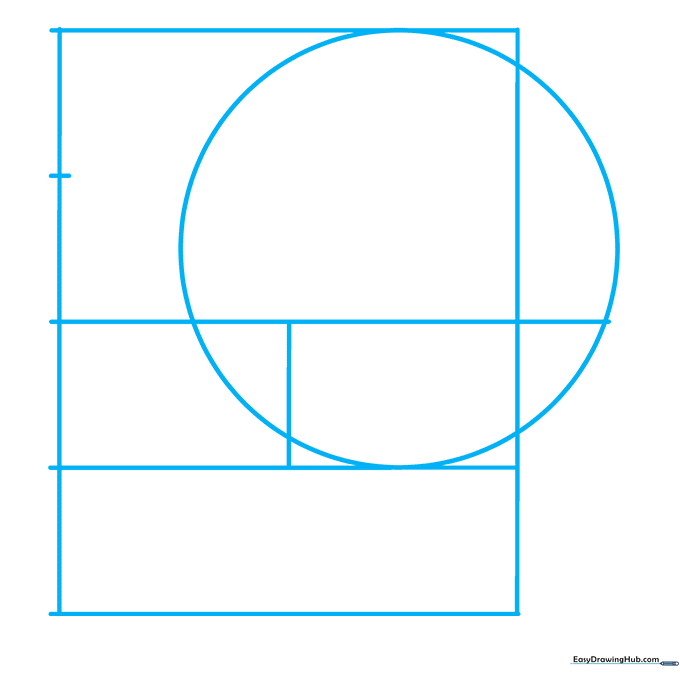
Start by drawing a light vertical center line and four horizontal cross-sections to map out the face. Add a short vertical line between the second and third horizontal marks to define the side plane. Draw a circle that touches the top and third horizontal lines, letting the side vertical line cut through it to create that signature 3/4 perspective. Teacher’s Tip: Keep your pencil pressure very light here—these are just 'map lines' we will erase later!
Step 2: Defining the Jawline and Ear
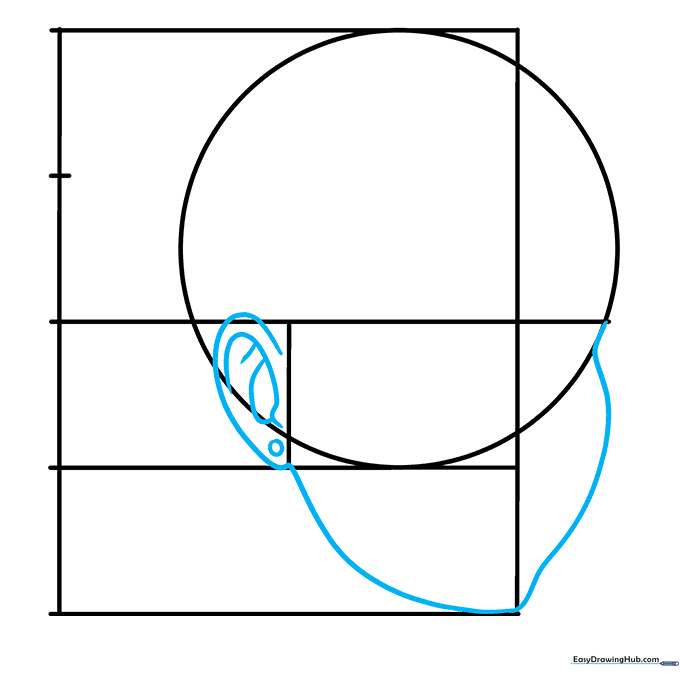
Extend a curved line from the side of your circle down to the bottom horizontal guide to form the cheek and chin. Sketch the ear between the two middle horizontal lines using a 'C' shape, adding small inner curves for detail. Don't forget a tiny circle for an earring! Teacher’s Tip: The jawline should be smooth and slightly angled; if it looks too sharp, gently round it off with your eraser.
Step 3: Drawing Expressive Eyes
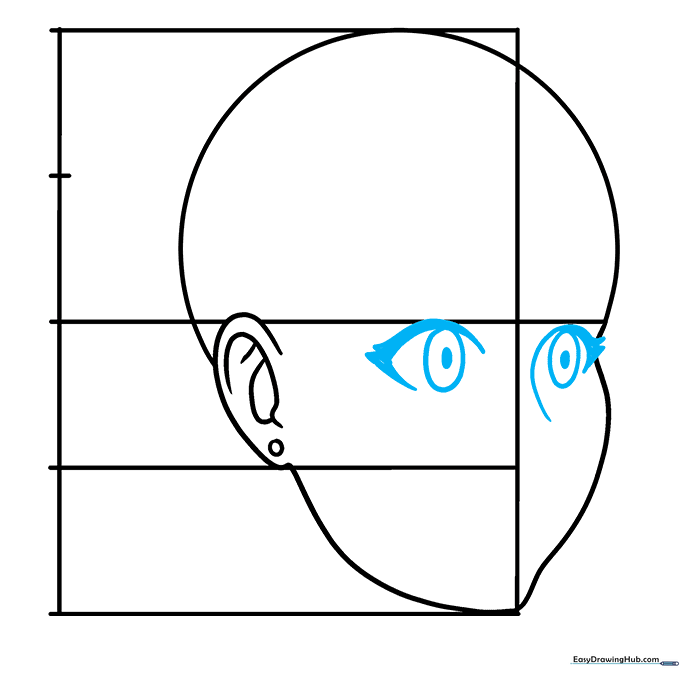
Erase the bottom of the circle to clear space for the face. Draw the eyes below the middle horizontal line using bold, curved strokes. Add the pupils and irises, making sure to leave a small white 'sparkle' inside for that classic anime look. Teacher’s Tip: Remember that in a 3/4 view, the eye further away should look slightly narrower than the one closer to the viewer.
Step 4: Adding Facial Features and Neck
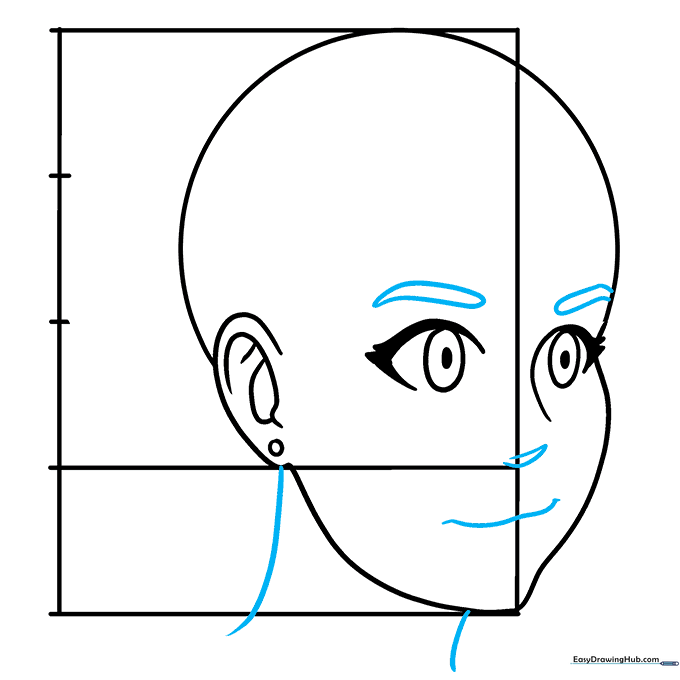
Clear away the upper horizontal guide. Sketch the eyebrows, a small nose, and a simple mouth using gentle curves. Add two lines descending from the jaw to create the neck. Teacher’s Tip: Keep the nose and mouth very simple—in anime, less is often more to maintain that clean, iconic aesthetic.
Step 5: Sketching the Hairline
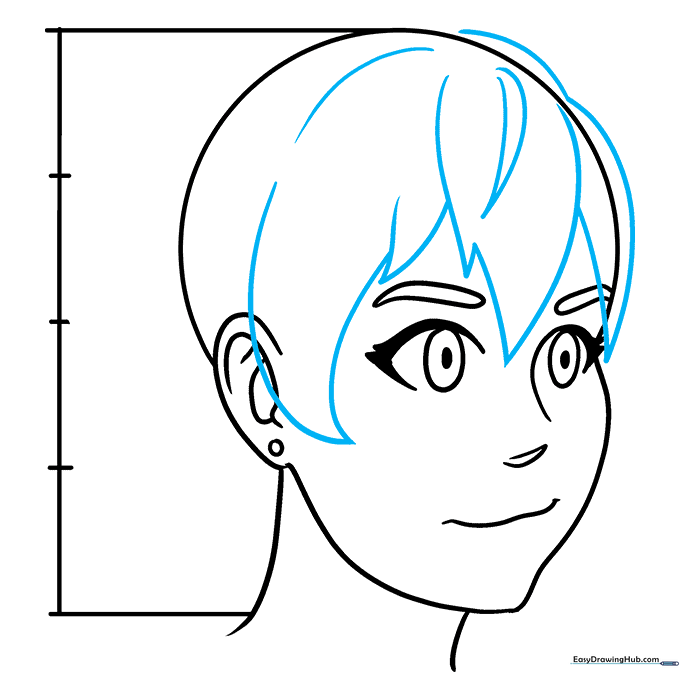
Erase all remaining construction guidelines. Start drawing the hair by using pointed, curved locks that frame the face. Teacher’s Tip: Imagine the hair has weight; draw the locks flowing away from the crown of the head to make it look natural.
Step 6: Adding Hair Texture

Use long, sweeping curved lines to add volume to the back of the hair and texture along the neck. Teacher’s Tip: Vary the length of your lines to create the illusion of individual strands rather than one solid block.
Step 7: Final Cleanup
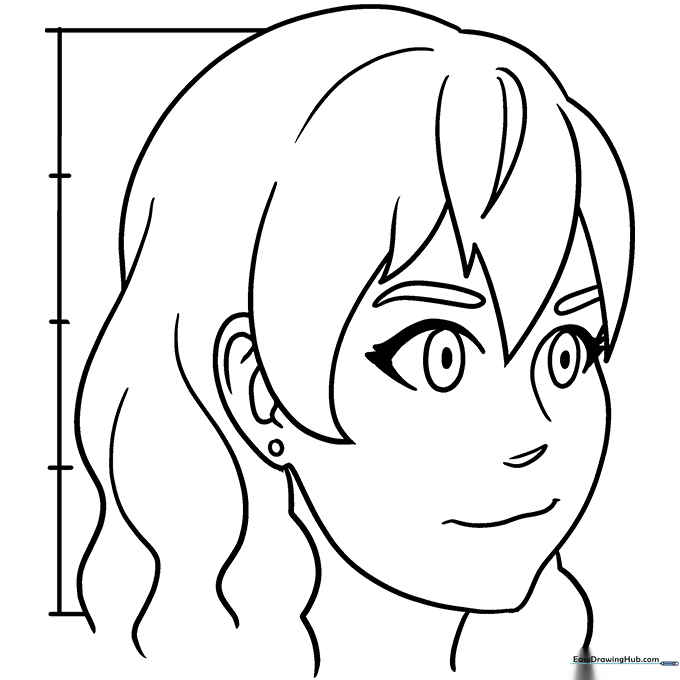
Do a final check and erase any stray marks or remnants of the original circle hidden within the hair. Your anime character is now ready to be inked or colored! Teacher’s Tip: Use a fine-liner pen to go over your best lines before erasing the pencil marks for a professional, clean finish.
More Tutorials


