How to Draw an Anime Girl Body: Simple Proportions Guide
Perfect for aspiring manga artists, this guide breaks down the complex human form into simple, manageable shapes using a professional grid technique. You will need a pencil, eraser, and a ruler to ensure your proportions remain accurate. By the end of this lesson, you will have a solid anatomical foundation ready for clothing and character design.
🎯 Final Result
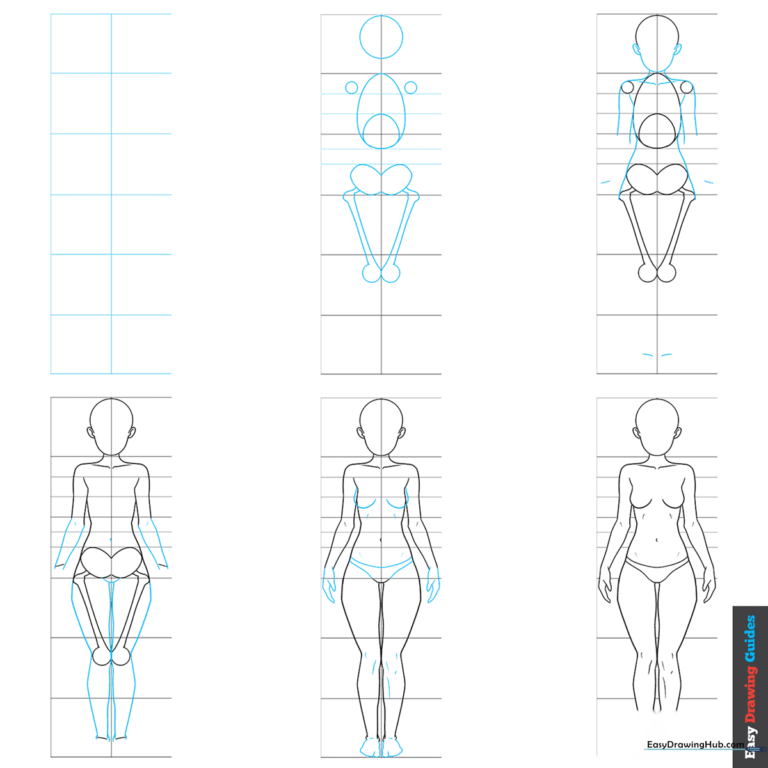
Step-by-Step Instructions
Step 1: Setting the Grid
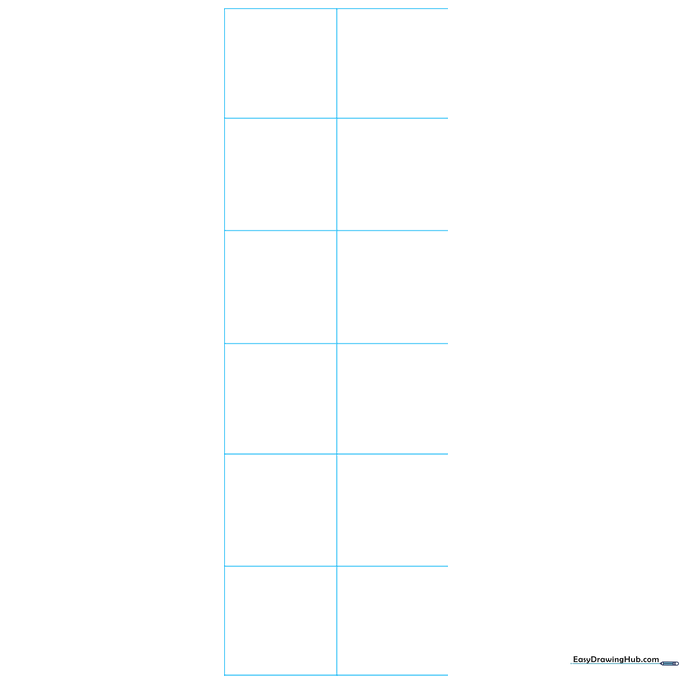
Create a structural grid using two vertical lines and seven horizontal lines. Tip: Use a ruler to ensure your squares are perfectly uniform; this grid is the secret to keeping your character's proportions balanced and professional.
Step 2: Mapping the Core Shapes
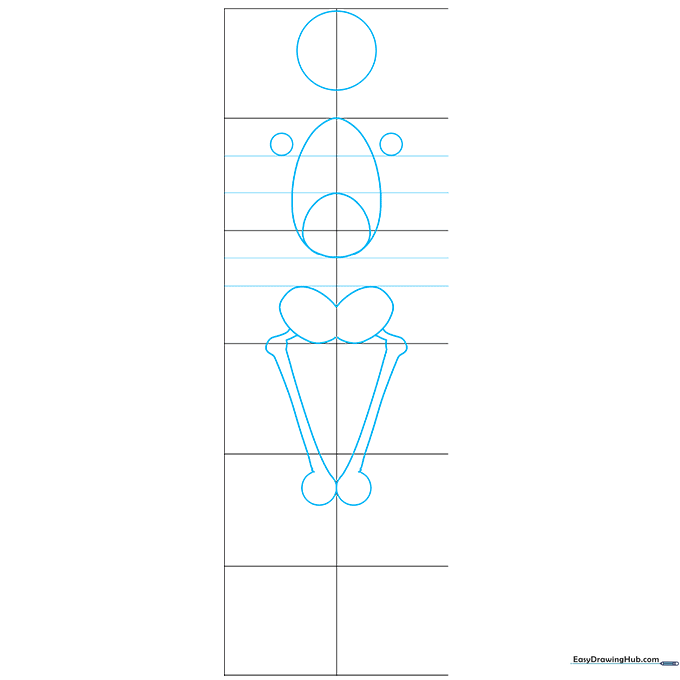
Sketch the head as a circle in the top row, then add a teardrop shape for the torso and circles for the shoulders and hips. Tip: Keep your pencil pressure light here. These are 'construction lines' that you will refine later, so don't press too hard!
Step 3: Connecting the Anatomy
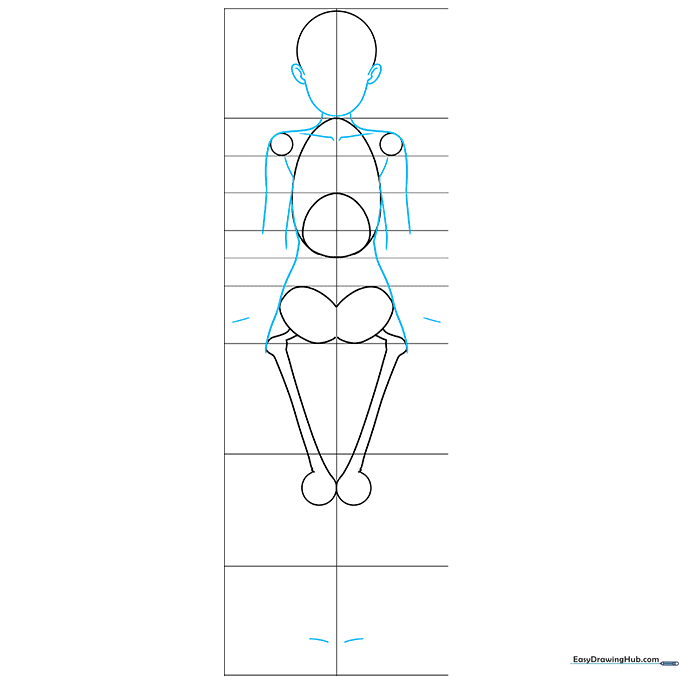
Connect your shapes with smooth, flowing lines to define the neck, collarbones, and limbs. Add small markers for wrists and ankles. Tip: Think of the body as a series of connected tubes; focus on the flow of the lines rather than individual muscles at this stage.
Step 4: Refining the Silhouette
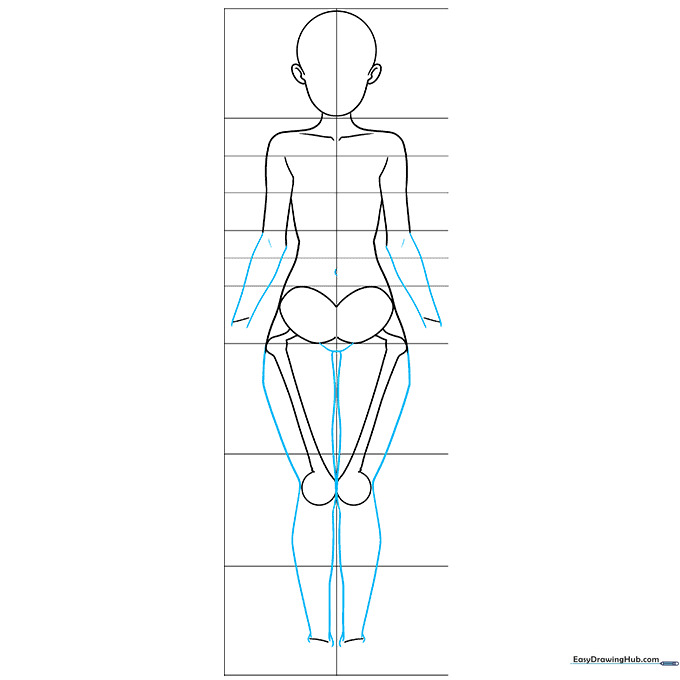
Use confident, curved strokes to finalize the shape of the arms and legs, then erase the internal grid lines from the torso. Tip: If your lines look a bit shaky, try 'ghosting' the movement with your hand above the paper before making the actual mark.
Step 5: Adding Anatomical Details

Add hands, feet, and subtle contour lines for the elbows, knees, and torso. Tip: Keep these details minimal; in anime, less is often more. Focus on clean, simple curves to maintain the aesthetic style.
Step 6: Final Cleanup
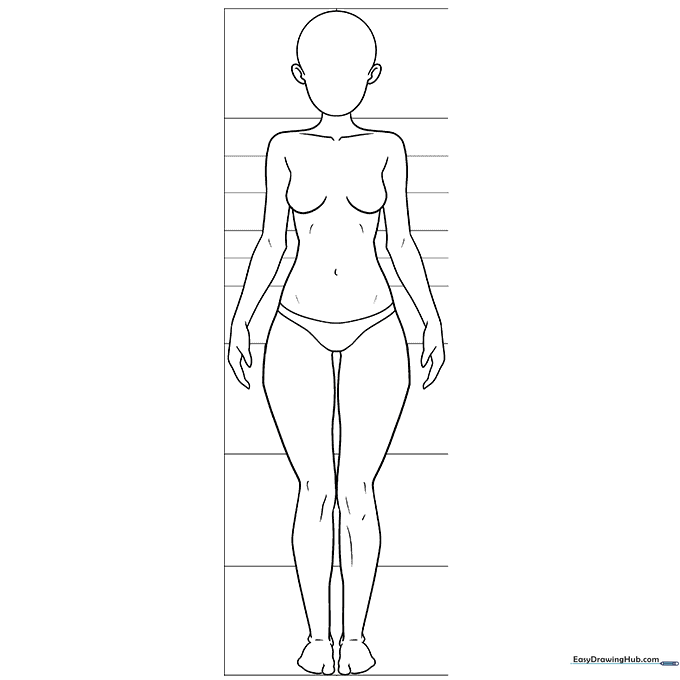
Carefully erase all remaining grid lines and stray marks. Your clean anime base is now ready to be dressed or colored! Tip: Use a kneaded eraser to gently lift away any graphite smudges for a professional, crisp finish.
More Tutorials