How to Draw an Anime Coat: Easy Step-by-Step Guide
Ready to level up your character designs? This tutorial is perfect for artists ages 7+ looking to master the basics of drawing anime-style outerwear. You'll only need a pencil, eraser, and paper to create a professional-looking coat that adds personality to any character sketch.
🎯 Final Result
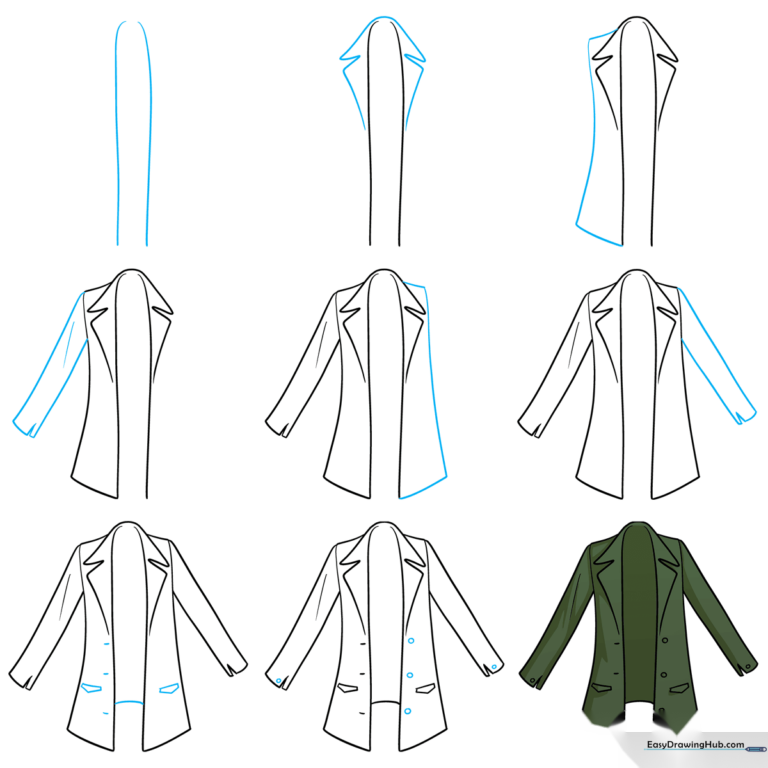
Step-by-Step Instructions
Step 1: The Neckline
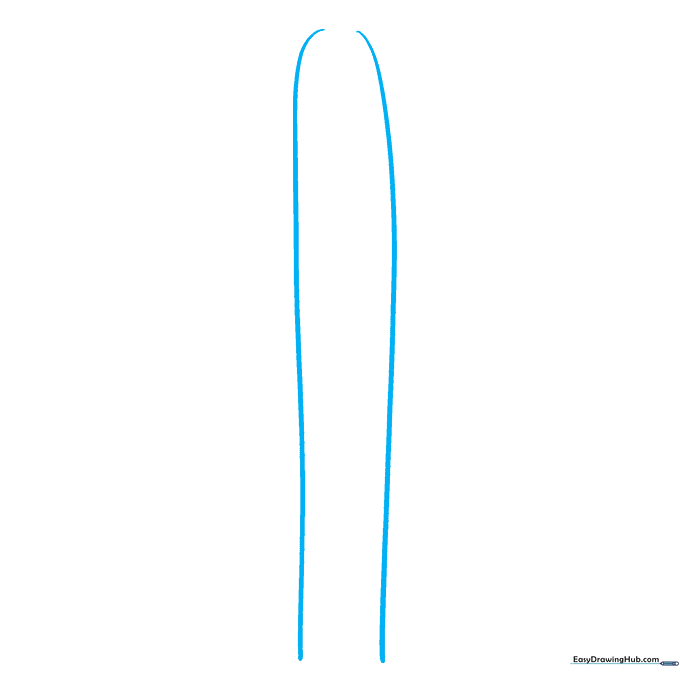
Draw two vertical curved lines that nearly meet at the top to form the neck and front opening. Teacher's Tip: Keep these lines close together to ensure the coat looks like it fits properly around the neck.
Step 2: Adding the Collar
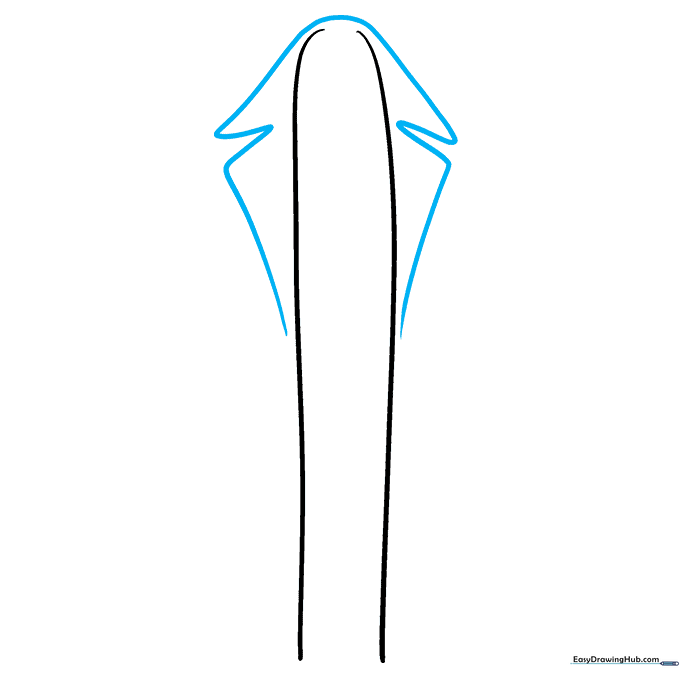
Sketch the four connected triangle shapes of the collar using curved lines. Teacher's Tip: Think of these as small 'wings' resting on the shoulders; keep them symmetrical for a clean look.
Step 3: Defining the Body
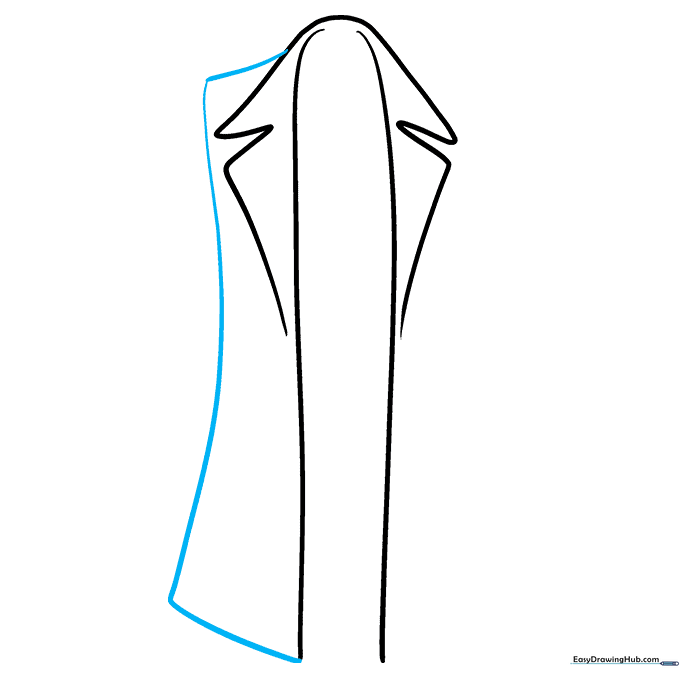
Use curved lines to trace the rectangular shape of one side of the jacket. Teacher's Tip: Use a gentle curve to suggest the fabric is draping over a body, rather than being a stiff board.
Step 4: The First Sleeve
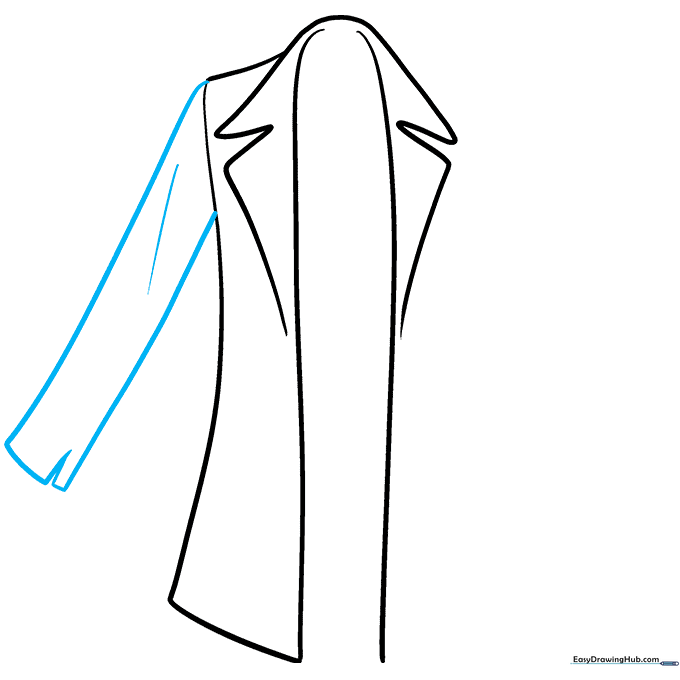
Draw the first arm using curved lines, adding a triangular split at the cuff. Teacher's Tip: That little triangle at the cuff adds a nice 'anime' flair that makes the sleeve look dynamic.
Step 5: The Second Side
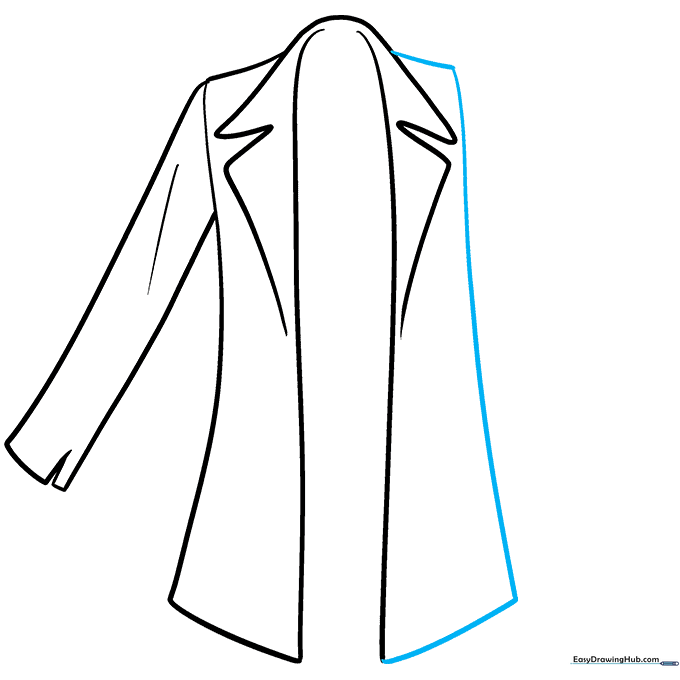
Trace the rectangular shape of the jacket's remaining side. Teacher's Tip: Check that this side matches the width of the first side to keep your character looking balanced.
Step 6: The Second Sleeve
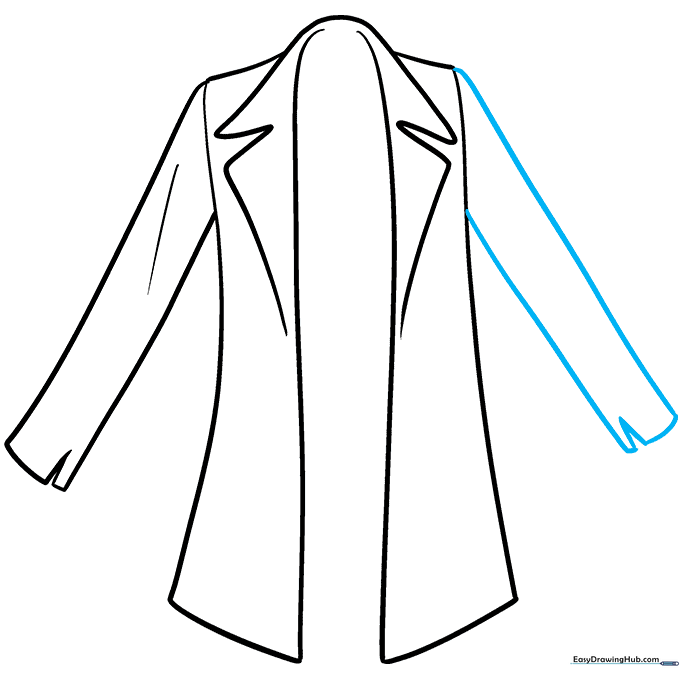
Draw the second sleeve as a mirror image of the first. Teacher's Tip: If you find mirroring difficult, try turning your paper upside down to see the shapes from a new perspective!
Step 7: Adding Details

Add the back hemline, pocket flaps, and button holes. Teacher's Tip: Use short, precise lines for the button holes to make them look realistic.
Step 8: Buttons
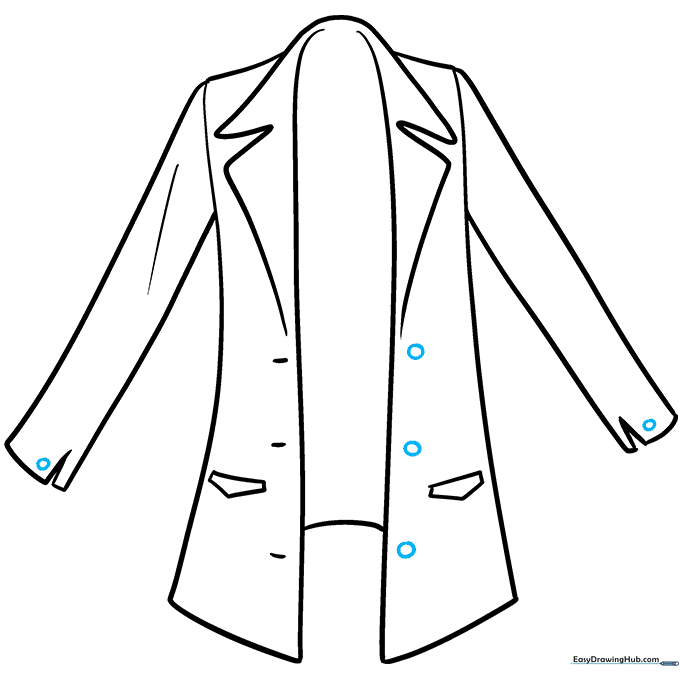
Draw small, circular buttons along the front and cuffs. Teacher's Tip: Space them evenly so the coat looks neatly fastened.
Step 9: Coloring

Bring your coat to life with color! We chose army green for a rugged look. Teacher's Tip: Use a slightly darker shade of your base color near the folds to create a simple shadow effect.
More Tutorials


