How to Draw an Anime Boy Face: Easy 10-Step Guide
Ready to bring your own anime character to life? This tutorial is perfect for ages 8+ and requires only a pencil, eraser, and paper. You will learn how to construct a balanced side-profile face using simple geometric shapes, building foundational skills for manga and character illustration.
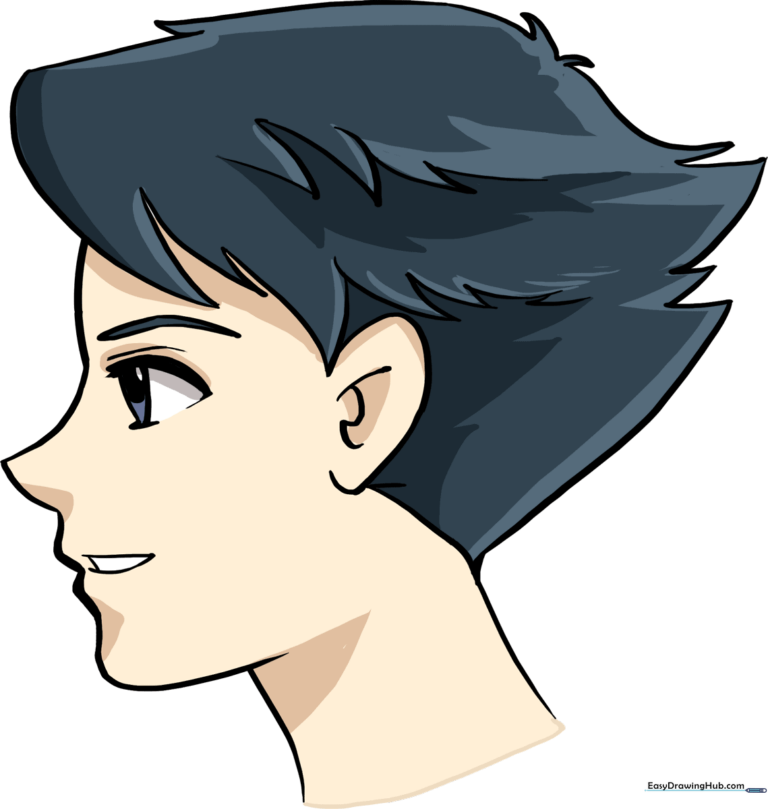
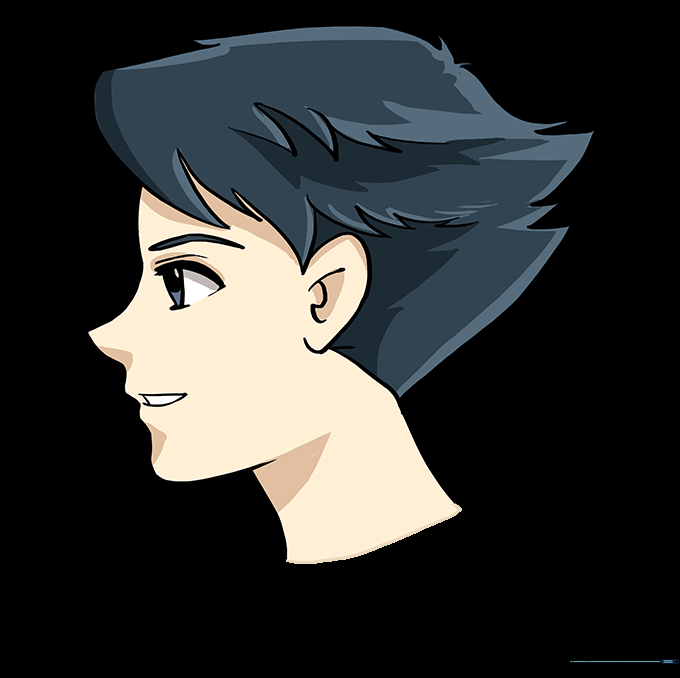
🎯 Final Result
Step-by-Step Instructions
Sketching the Head Base

Draw a light circle to serve as the cranium. Teacher's Tip: Keep it about the size of a tennis ball; don't worry if it's not perfect, as this is just a structural guide.
Adding Alignment Guides
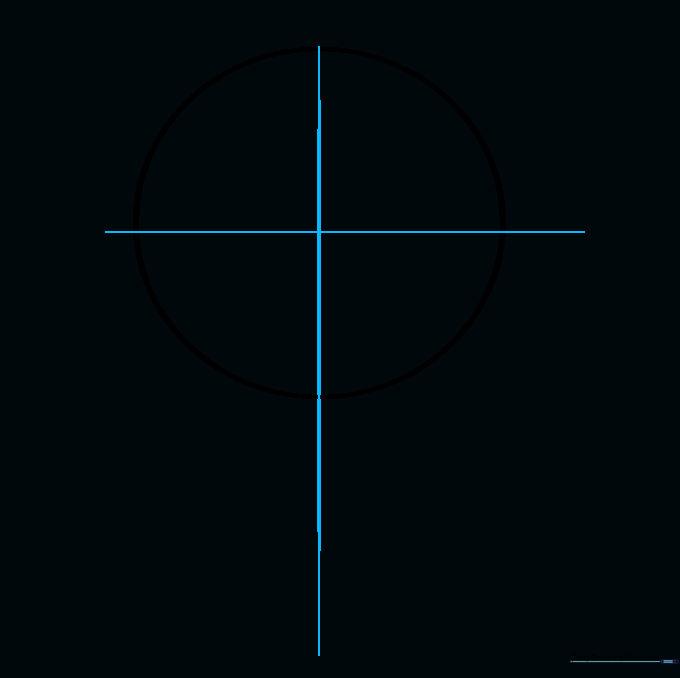
Draw a vertical and horizontal line crossing through the center of the circle to form a 'T'. Extend the vertical line downward to map out the jawline. Teacher's Tip: Use a ruler if you struggle with straight lines, but try freehand for a more natural flow.
Defining the Jaw and Neck

Sketch the nose, lips, and chin in the lower-left quadrant. Connect these to a curved line for the neck. Teacher's Tip: Keep the chin slightly pointed, as this is a classic anime aesthetic.
Drawing the Mouth

Use a short straight line for the mouth and a curved line for the lip. Teacher's Tip: Keep the mouth small; anime characters often have subtle, minimalist expressions.
Sketching the Ear

Draw a 'C' shape for the ear, centered on the vertical guide line. Add small curves inside for the cartilage. Teacher's Tip: The top of the ear usually aligns with the eye level.
Cleaning the Construction Lines

Gently erase the circle and crosshair guides. You should now have a clean profile outline. Teacher's Tip: Use a kneaded eraser to lift graphite without smudging your work.
Adding the Hair
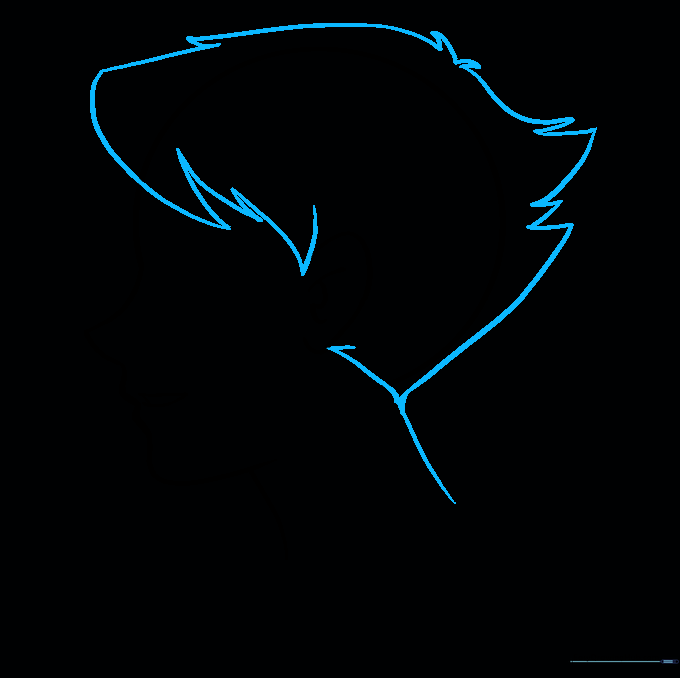
Sketch jagged, curved lines to create hair locks. Vary the length of the strokes for a natural look. Teacher's Tip: Think of hair as 'clumps' rather than individual strands.
Refining the Silhouette

Erase any remaining guide lines inside the hair area. Ensure the transition from hair to forehead is smooth. Teacher's Tip: Check your drawing in a mirror to spot any lopsided proportions.
Drawing the Eye and Eyebrow
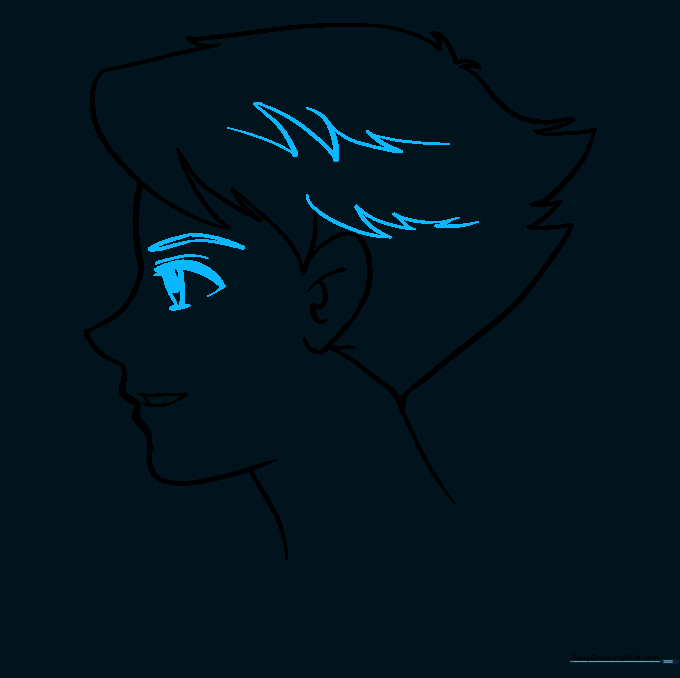
Draw a triangular eye shape with a bold pupil. Add a curved eyebrow above. Teacher's Tip: The intensity of the eye can change the character's mood—try a sharper angle for a serious look.
Adding Color
Fill in your character with your favorite colors. Use darker shades for the hair to add depth. Teacher's Tip: Try using colored pencils for a soft, blended look or markers for bold, flat anime colors.
More Tutorials


