How to Draw a Crying Anime Boy: Easy 8-Step Guide
Capturing raw emotion is a core skill for any manga artist. This step-by-step guide is designed for artists of all levels to practice drawing expressive, tearful anime faces using simple geometric shapes. Grab your pencil and paper, and let's bring this character to life together.
🎯 Final Result
Step-by-Step Instructions
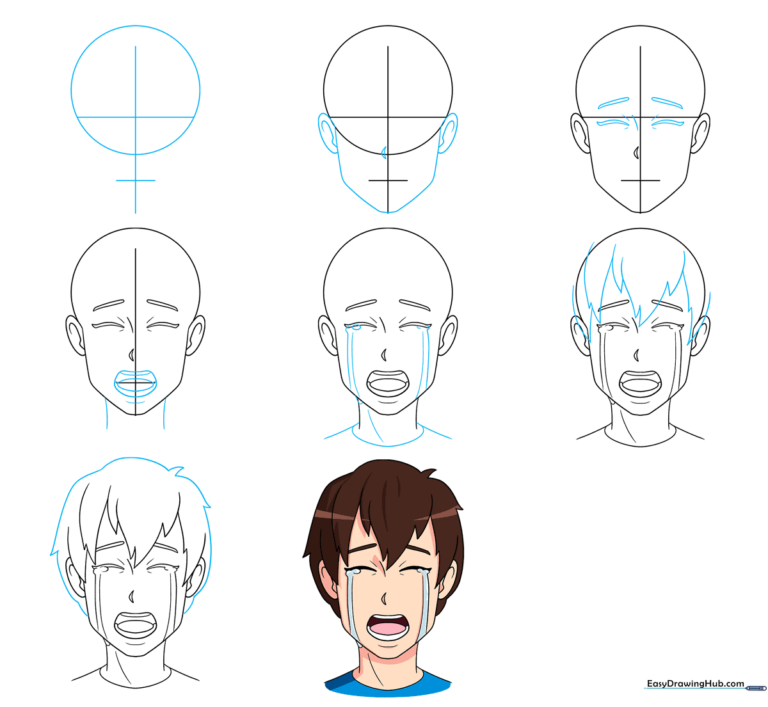
Step 1: Establishing the Facial Grid
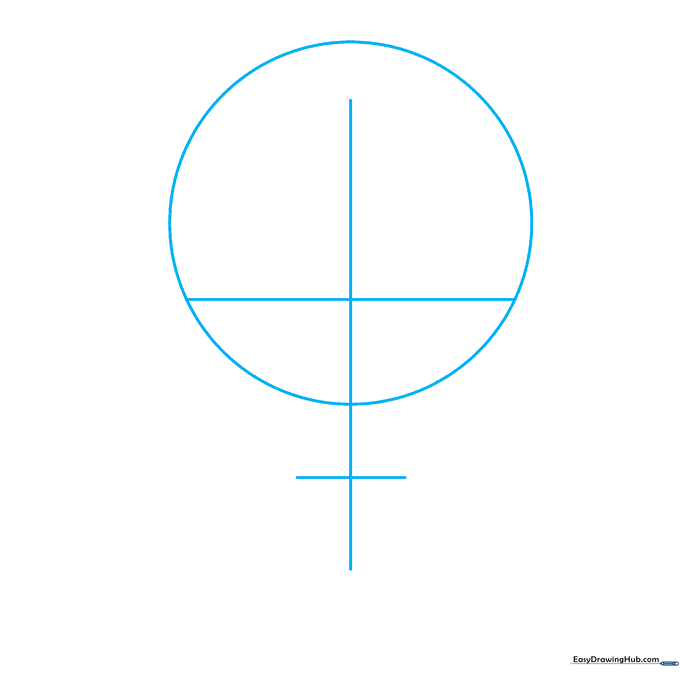
Start by drawing a circle for the head, then add a vertical line down the center and a horizontal line slightly below the middle. Add a smaller horizontal line near the bottom for the chin. Teacher's Tip: Keep your pencil pressure very light here; these are just structural guides that we will erase later.
Step 2: Shaping the Jaw and Nose
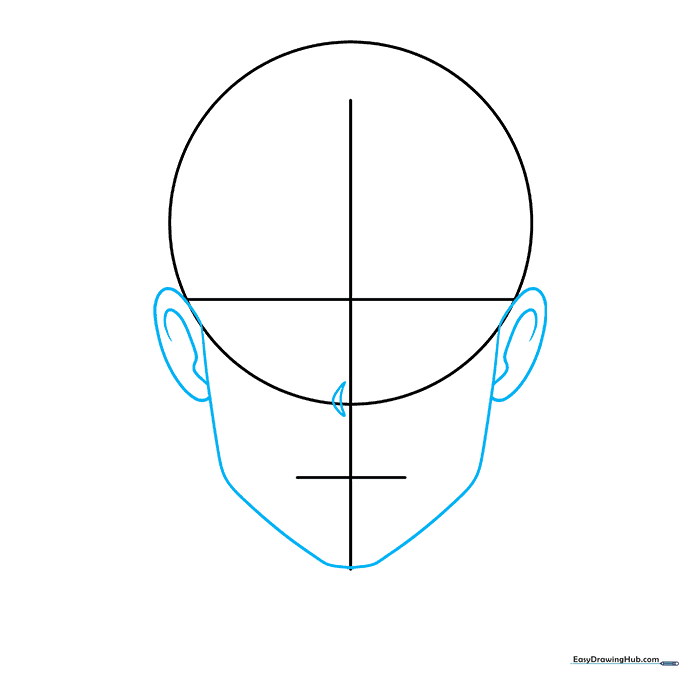
Connect the ears to the head, then draw a smooth, curved line from the ear base around the chin guide to form the jaw. Add a small curved mark for the nose. Teacher's Tip: Ensure the jawline is symmetrical to keep the face looking balanced.
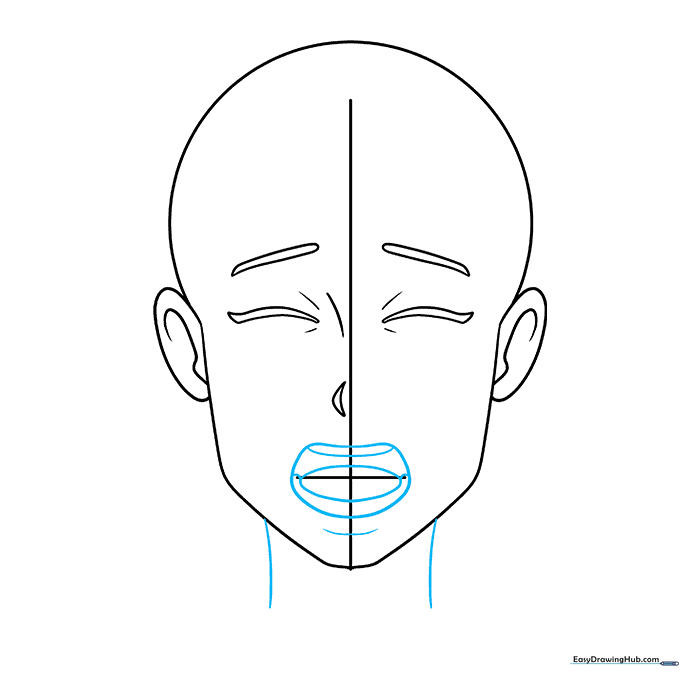
Step 3: Sketching Closed Eyes and Brows

Erase the bottom of your circle guide. Draw two thick, curved lines for the closed eyes and add small 'wrinkle' lines near the nose to show distress. Place the eyebrows well above the eyes. Teacher's Tip: Angling the eyebrows downward toward the center helps convey a sad or crying expression.
Step 4: Drawing the Open Mouth and Neck
Remove the horizontal grid line. Draw an open, irregular shape for the mouth, adding details for teeth and the tongue inside. Finish by drawing two lines for the neck. Teacher's Tip: Don't worry about perfect anatomy here; focus on making the mouth shape look expressive and open.
Step 5: Adding Tears and Shoulders
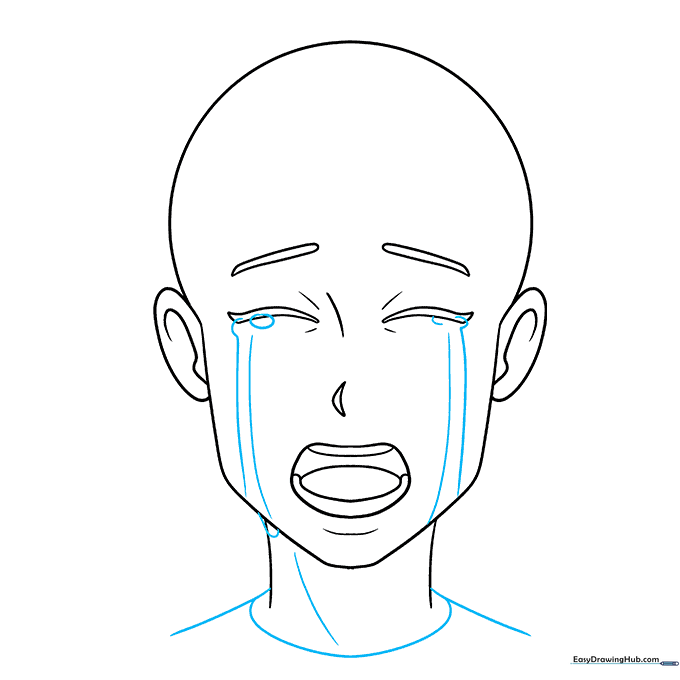
Erase remaining grid lines. Draw overlapping oval shapes around the eyes and parallel lines flowing down to the jaw to represent streaming tears. Add the shoulders. Teacher's Tip: Use fluid, wavy lines for the tears to make them look like they are running down the face.
Step 6: Sketching the Hair

Use sharp, curved lines to create the hair, letting the points overlap the forehead. Teacher's Tip: Anime hair is all about 'clumps.' Draw the hair in sections rather than individual strands to get that classic manga look.
Step 7: Finalizing the Hairline
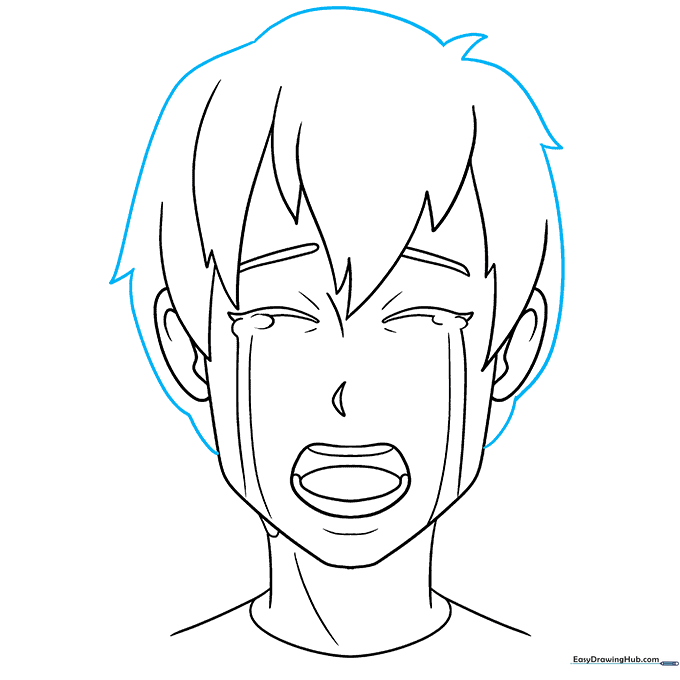
Complete the hair by adding more layers and volume around the sides of the head. Teacher's Tip: Make sure the hair follows the curvature of the head so it doesn't look like a flat hat.
Step 8: Adding Color
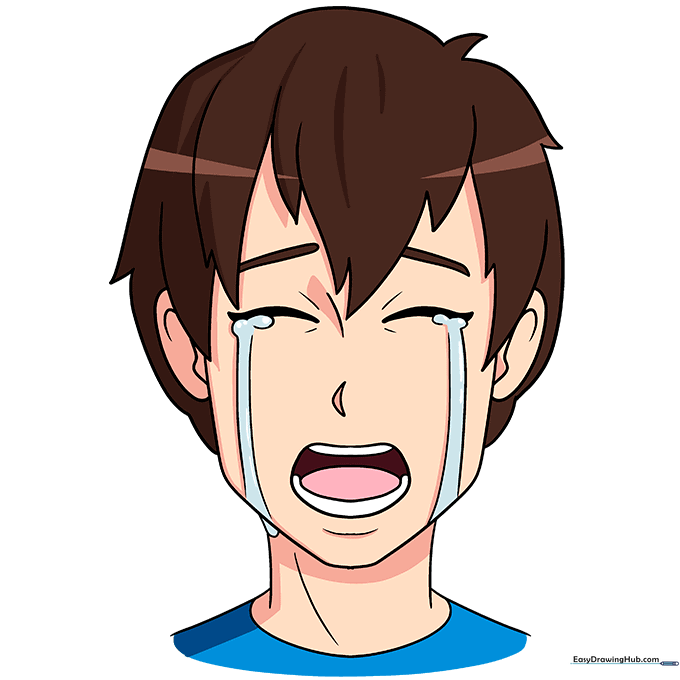
Bring your drawing to life with your favorite colors. Use soft blues for the tears to make them stand out. Teacher's Tip: Use a darker shade of your hair color to add simple shadows, which will give your drawing more depth and dimension.
More Tutorials


