How to Draw an Anime Boy Body: Easy Proportions Guide
Ready to bring your anime characters to life? This guide is perfect for artists ages 10+ who want to master the basics of male anatomy using a simple grid method. Grab a pencil, an eraser, and a ruler to build a balanced, professional-looking character base in minutes.
🎯 Final Result
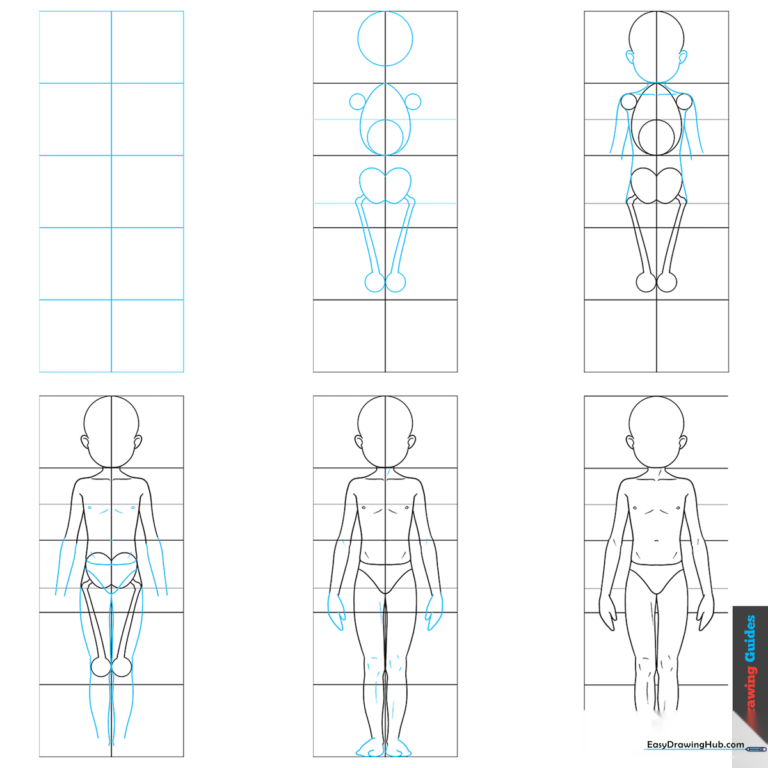
Step-by-Step Instructions
Step 1: Setting the Grid
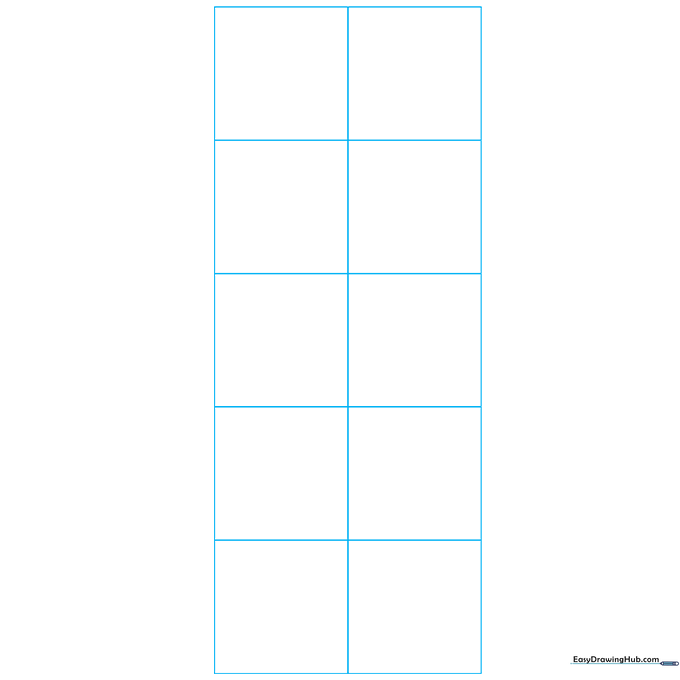
Draw a light grid consisting of 10 equal squares. Teacher's Tip: Use a ruler and keep your pencil pressure very light; these lines are just a map and will be erased later!
Step 2: Mapping the Joints
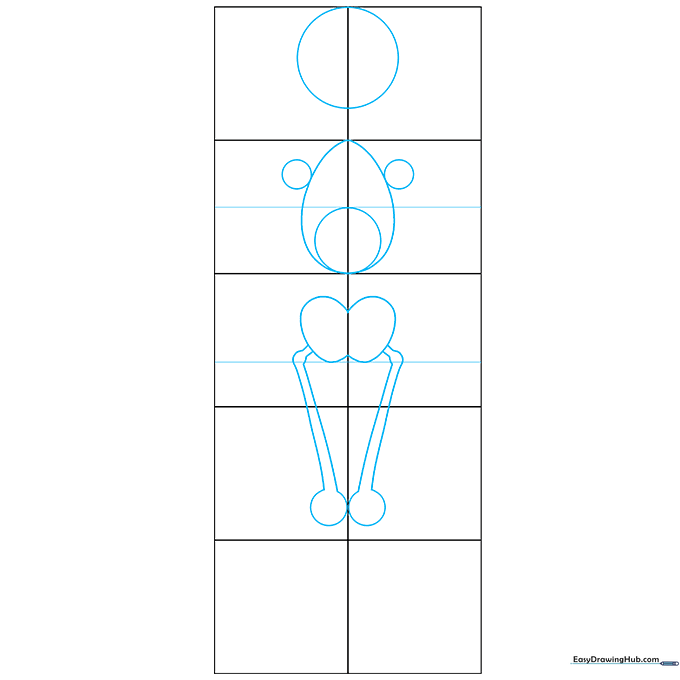
Sketch a circle for the head and an egg shape for the torso. Add smaller circles for shoulders and joints. Teacher's Tip: Think of these as 'marionette' joints—they help you visualize where the limbs bend before you add muscle.
Step 3: Defining the Silhouette
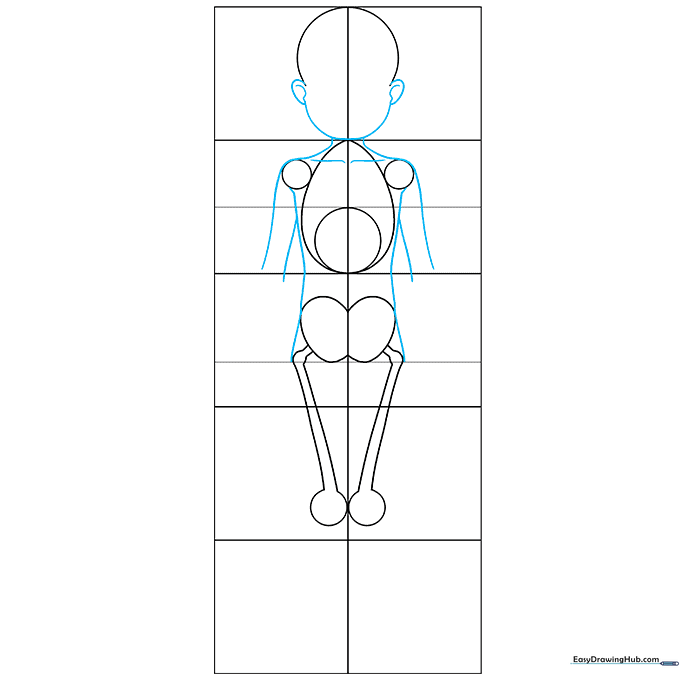
Connect your shapes with smooth, flowing lines to create the neck, shoulders, and torso. Teacher's Tip: Use long, confident strokes to connect the joints, which helps the body look fluid rather than stiff.
Step 4: Adding Limbs and Muscle
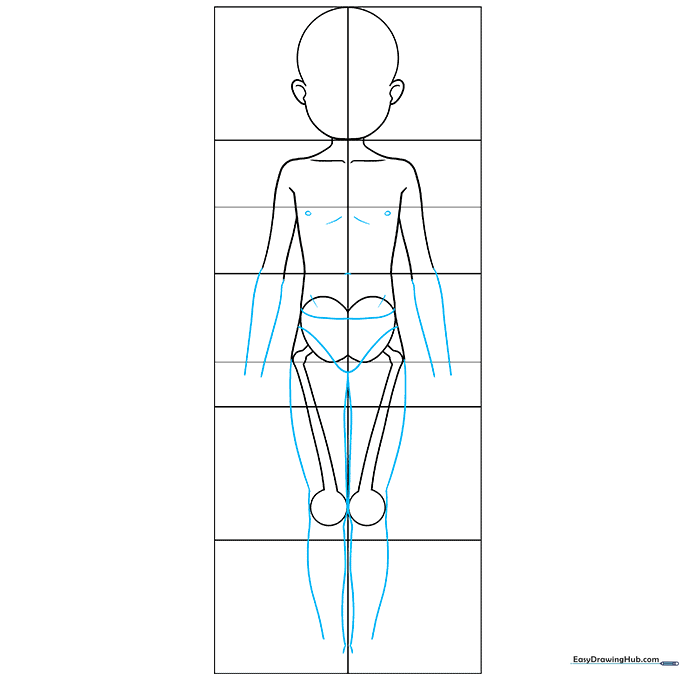
Extend the arm lines and outline the legs using tapered shapes. Add subtle curves for the chest and abs. Teacher's Tip: Keep the leg lines slightly curved to suggest natural muscle tone without over-detailing.
Step 5: Finalizing Details
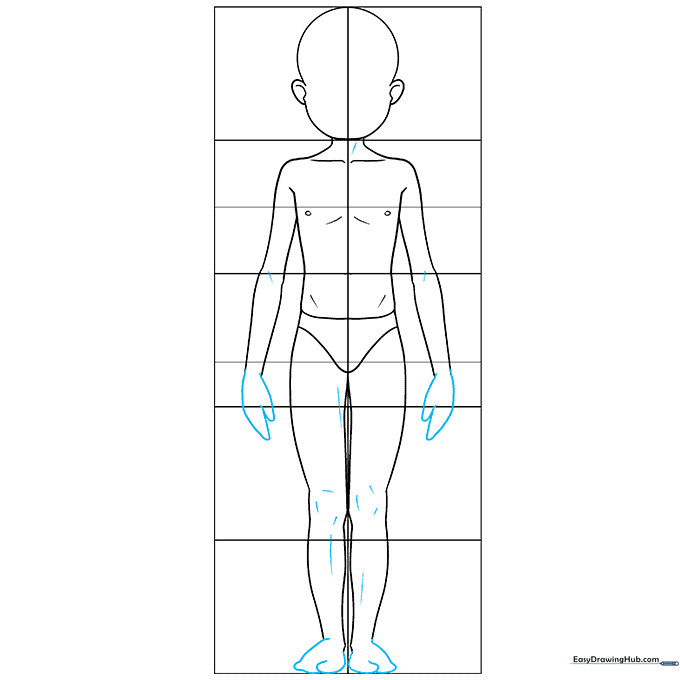
Erase your remaining grid lines and refine the hands, feet, and knee contours. Teacher's Tip: Use a kneaded eraser to gently lift away the guide lines without smudging your final character lines.
Step 6: Your Finished Base

Your anime boy base is ready for clothing or hair! Teacher's Tip: Now that you have the anatomy down, try drawing different outfits over this base to practice character design.
More Tutorials