How to Draw an Angel Halo: Easy Step-by-Step Guide
This whimsical angel halo drawing is a perfect project for young artists ages 5 and up. You will only need a pencil, an eraser, and a piece of paper to bring this heavenly design to life. Follow along to practice your cursive lettering and symmetrical wing drawing skills.
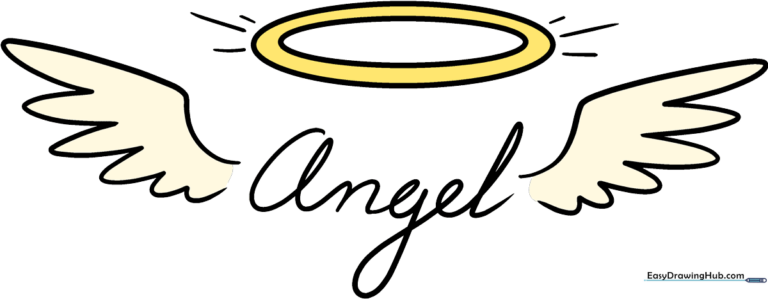
🎯 Final Result
Step-by-Step Instructions
Step 1: Starting the Cursive 'A'
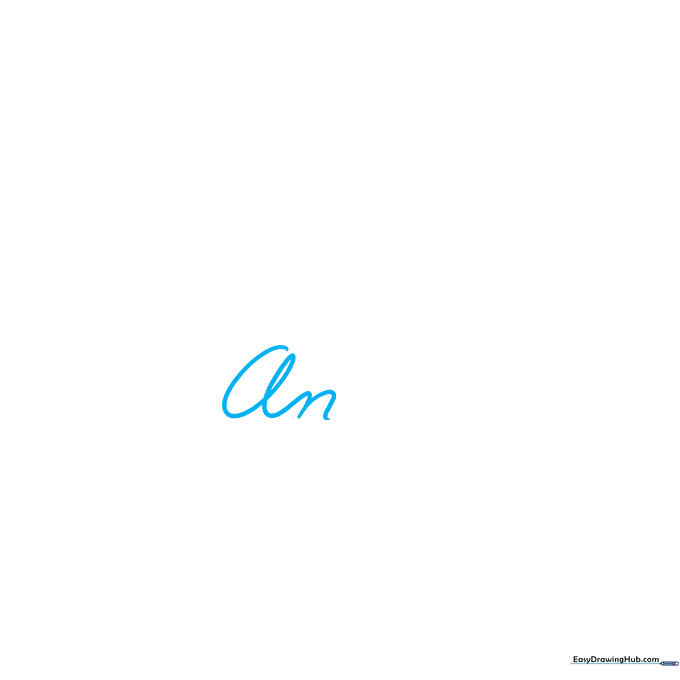
Begin by sketching the first part of the word 'Angel' in cursive. Teacher's Tip: Keep your pencil pressure light; this helps you adjust the curves of the 'A' and 'n' without leaving dark marks on your paper.
Step 2: Finishing the Word
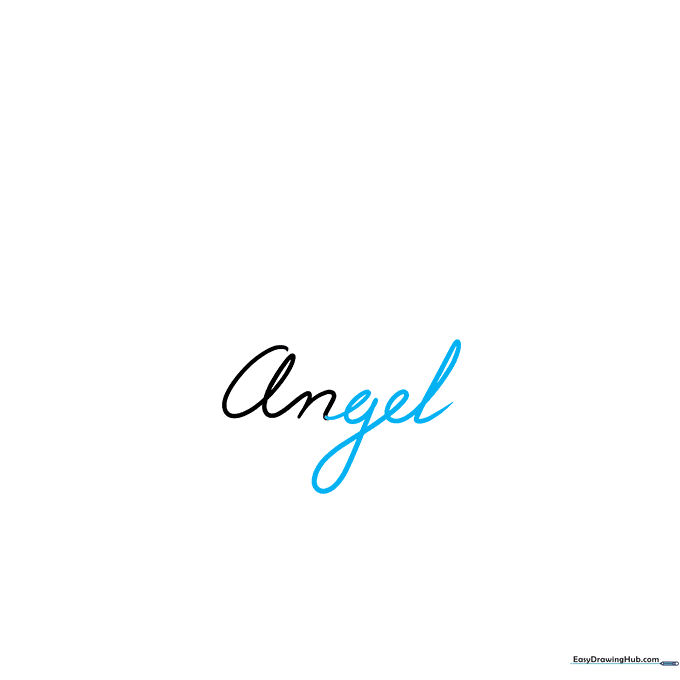
Complete the word 'Angel' by adding the 'g', 'e', and 'l' in a flowing cursive script. Tip: Focus on keeping the letters connected to create a smooth, elegant look.
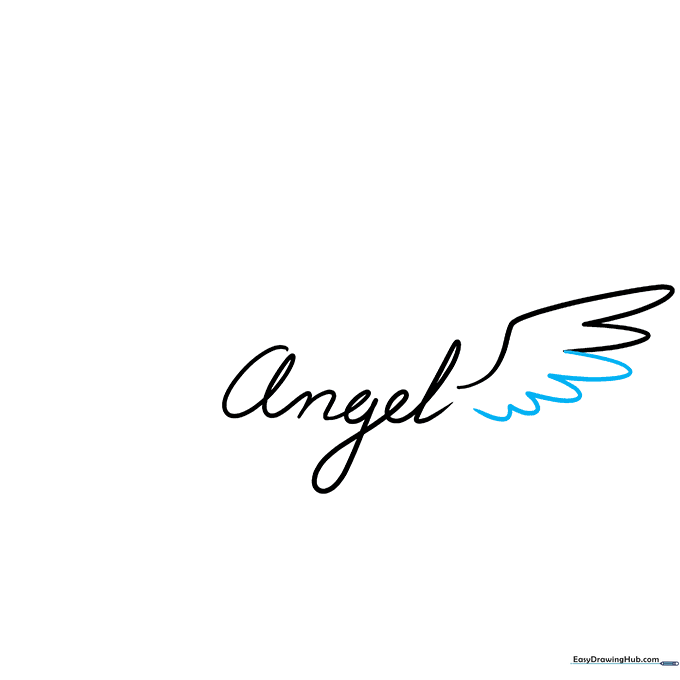
Step 3: Sketching the First Wing
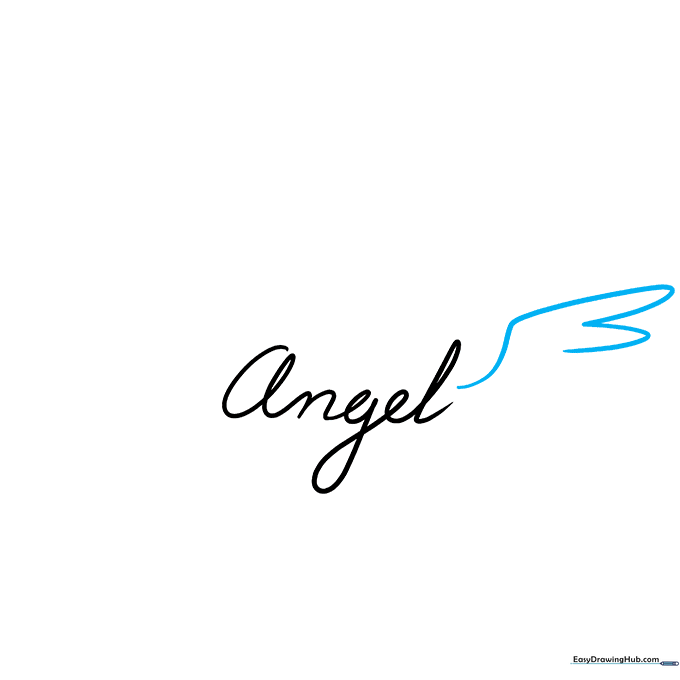
Draw a long, graceful curved line extending from the word for the top of the wing. Add 'U' shaped lines underneath to represent the primary flight feathers. Tip: Make the 'U' shapes rounded to give the wings a soft, fluffy appearance.
Step 4: Layering the Feathers
Continue the wing by adding smaller 'U' shaped lines beneath the first row. Tip: As you move down the wing, make the feathers slightly smaller to create a realistic tapering effect.
Step 5: Drawing the Second Wing
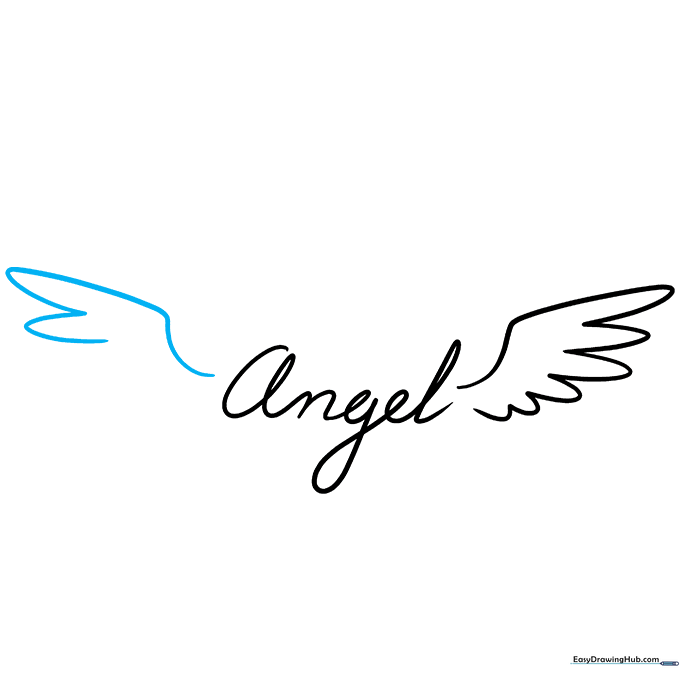
Repeat the process on the opposite side of the word. Use a long curved line for the top and 'U' shapes for the feathers. Tip: Try to match the angle of this wing to the first one to keep your drawing symmetrical.
Step 6: Completing the Second Wing

Finish the second wing with smaller 'U' shaped lines. Tip: Don't worry if they aren't perfectly identical; real feathers vary in size and shape!
Step 7: Sketching the Halo
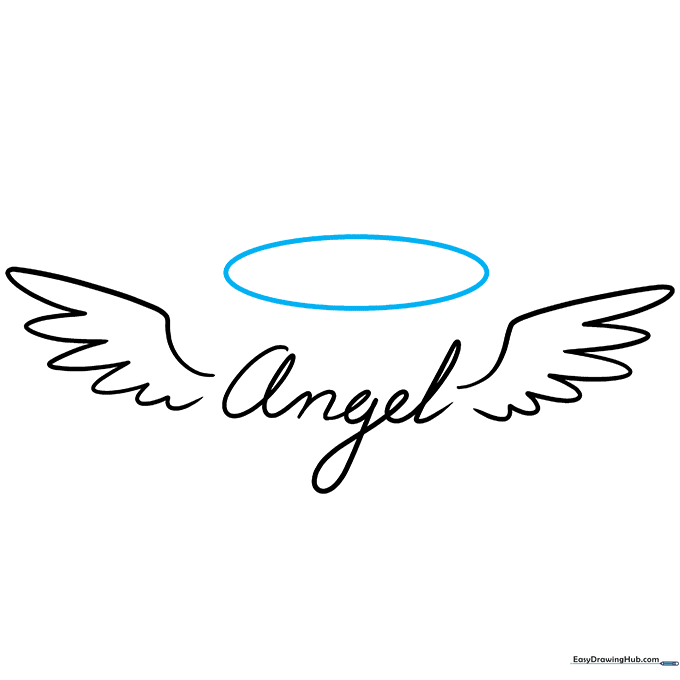
Draw a large, wide oval floating above the word 'Angel'. Tip: Use a light touch to draw the oval, as you might need to adjust the shape to make it look perfectly centered.
Step 8: Adding Depth to the Halo
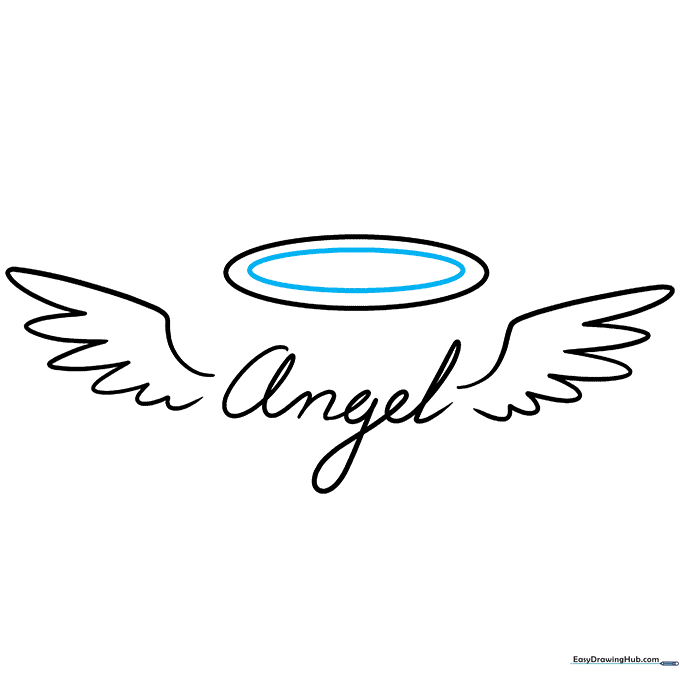
Draw a second, smaller oval inside the first one to create the thickness of the halo. Tip: Keep the space between the two ovals consistent all the way around.
Step 9: Adding the Glow
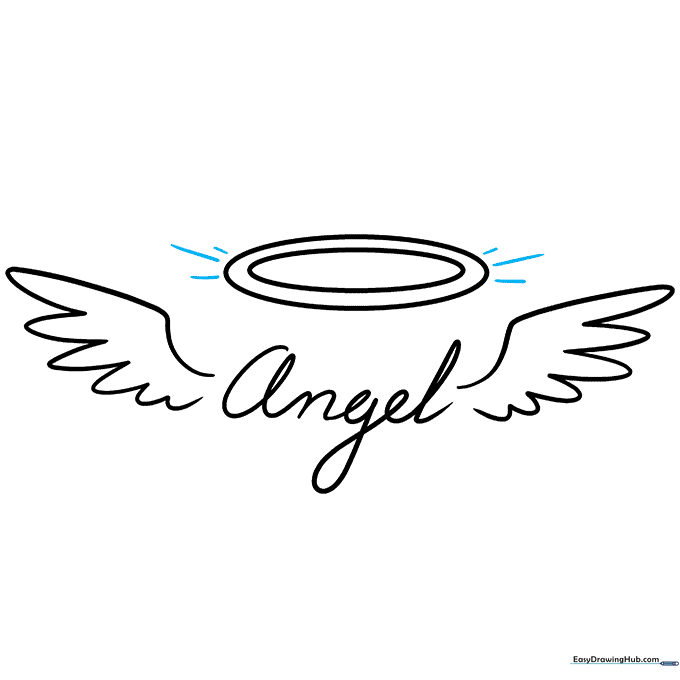
Draw three small lines on each side of the halo to represent a magical glow. Make the center line the longest. Tip: These lines should radiate outward, making the halo look like it is shining.
Step 10: Coloring Your Masterpiece
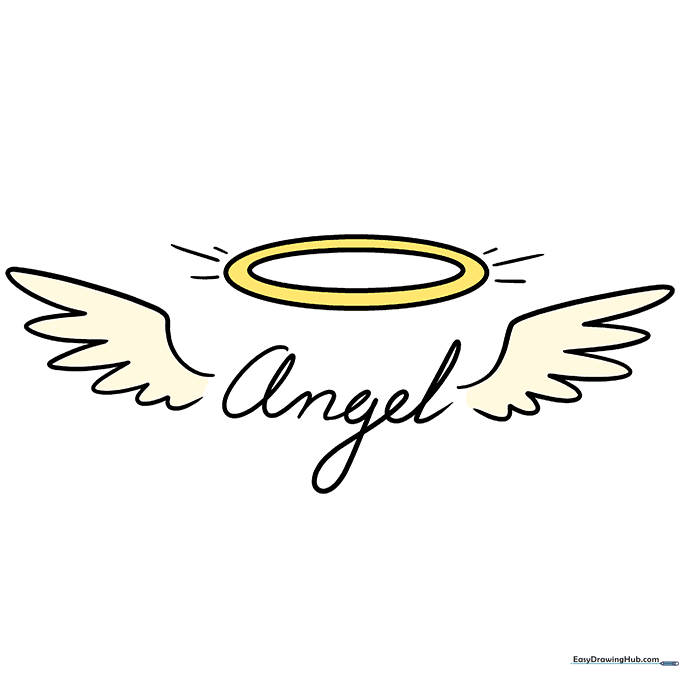
Your outline is complete! Now, bring it to life with color. We suggest bright yellow for the glowing halo and clean white or soft grey for the wings. Tip: Use a light touch with your colored pencils to keep the drawing looking airy and light.
More Tutorials


