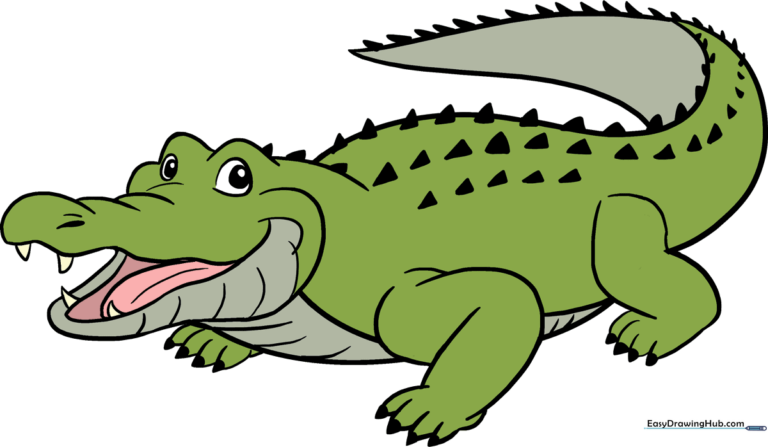
How to Draw an Alligator: Easy 10-Step Guide for Kids
Ready to bring a swamp-dwelling reptile to life? This tutorial is perfect for young artists ages 6+ looking to master animal anatomy. Grab your pencil, eraser, and paper, and follow along to build your alligator from simple shapes into a detailed masterpiece.
🎯 Final Result
Step-by-Step Instructions
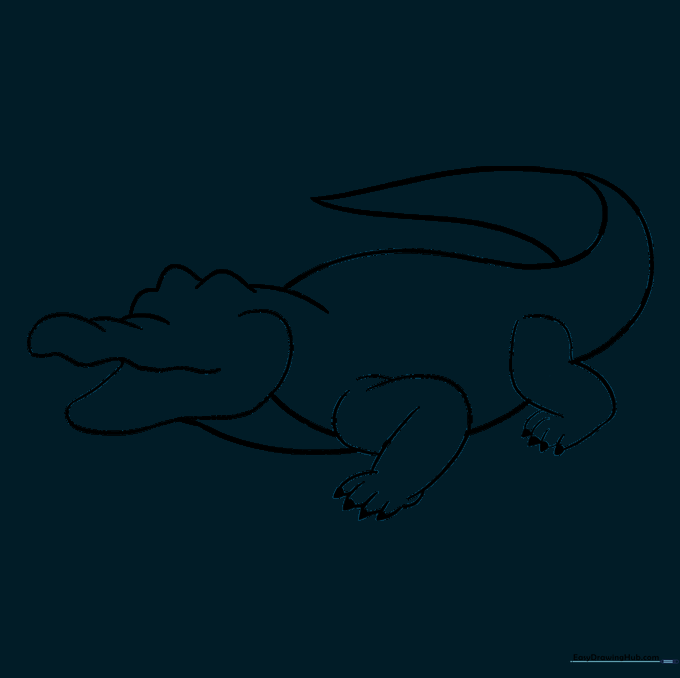
Step 1: Sketching the Base Shapes

Draw two overlapping ovals—one small for the head and one larger for the body. Teacher's Tip: Keep your pencil pressure very light so these construction lines are easy to erase later!
Step 2: Defining the Neck and Eye Ridges

Connect the ovals with a curved line to create the neck. Add small, bumpy curves on top of the head for the eye ridges. Tip: Alligators have bumpy skin, so don't worry about making these lines perfectly smooth!
Step 3: Shaping the Snout

Use wavy, overlapping lines to form the top of the snout and the underside of the jaw. Tip: Alligator snouts are broad and rounded, not pointy like a crocodile's.
Step 4: Starting the Tail
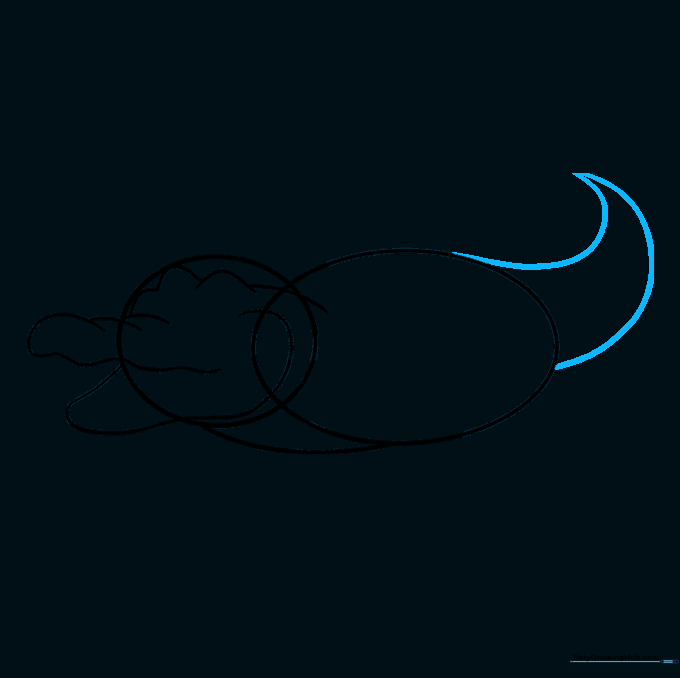
Extend two long, sweeping lines from the back of the body to form a tapered tail. Tip: Make sure the lines meet at a sharp point to give your alligator a realistic look.
Step 5: Adding a Bend to the Tail
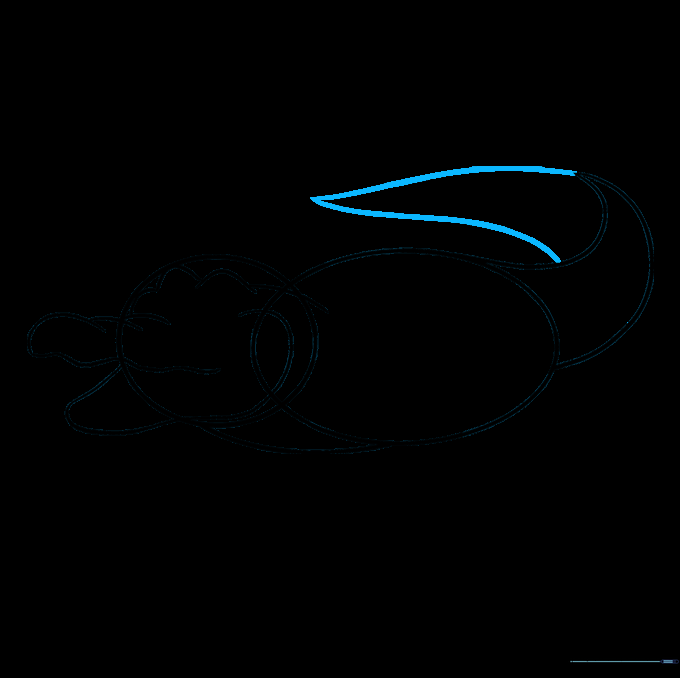
Add a second set of lines to the tail to create a curve. This adds depth and makes your drawing look like it's in motion. Tip: Imagine the tail is swishing through water!
Step 6: Drawing the Legs and Claws
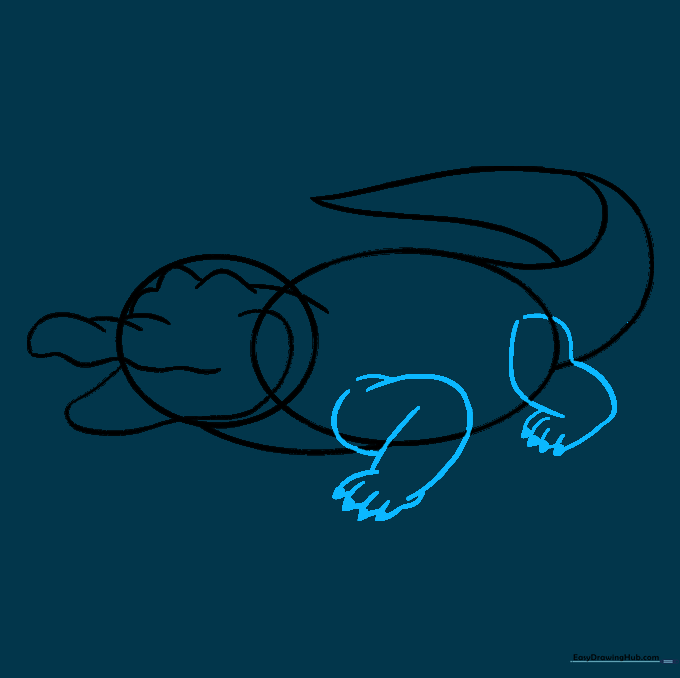
Sketch the shoulders, hips, and bent knees. Use 'U' shapes for the toes and add tiny triangles at the tips for claws. Tip: Keep the legs short and sturdy to match an alligator's low-to-the-ground stance.
Step 7: Cleaning Up
Carefully erase the original overlapping ovals you drew in Step 1. Tip: Use a clean eraser and go slowly so you don't smudge your work!
Step 8: Adding Facial Details
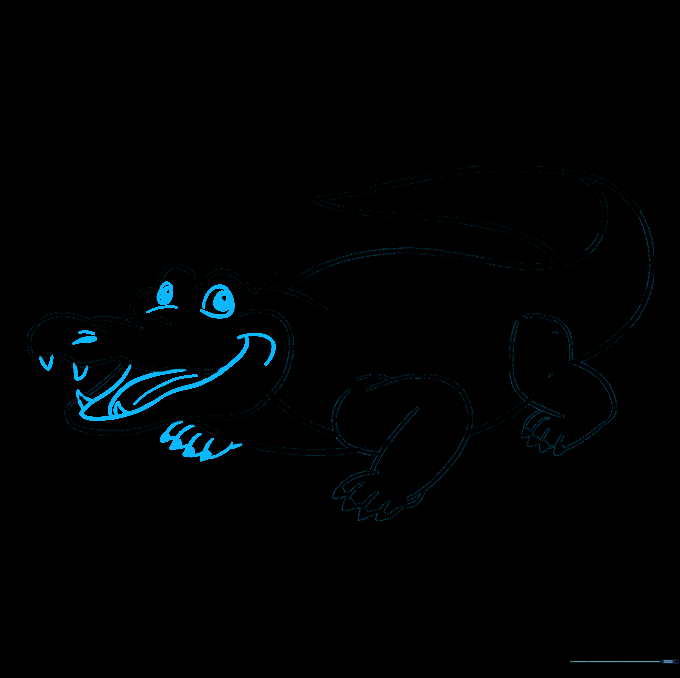
Draw the mouth, tongue, sharp teeth, and eyes. For the eyes, draw two circles and shade the space between them. Tip: Adding a pupil makes the alligator look alert and alive.
Step 9: Adding Texture
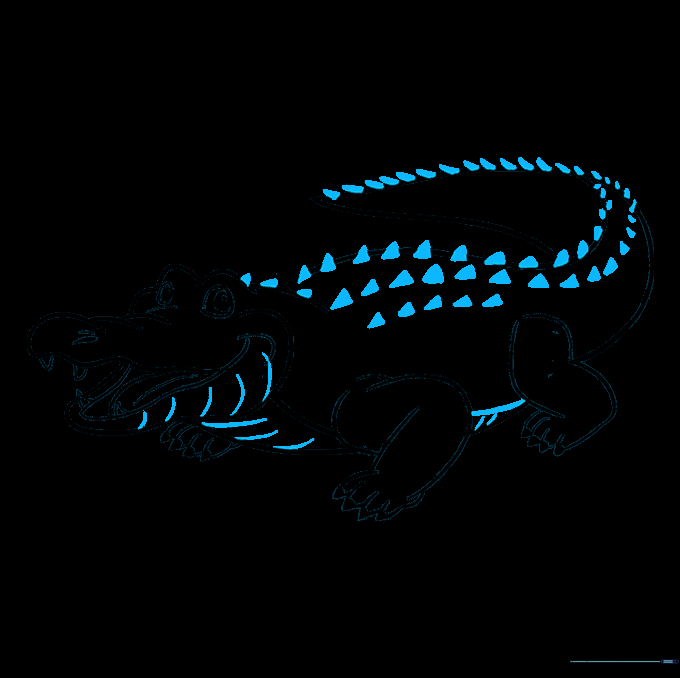
Add ridges to the belly and triangular spikes along the back and tail. Tip: These small details are what make your drawing look like a real reptile rather than a cartoon.
Step 10: Bringing it to Life with Color
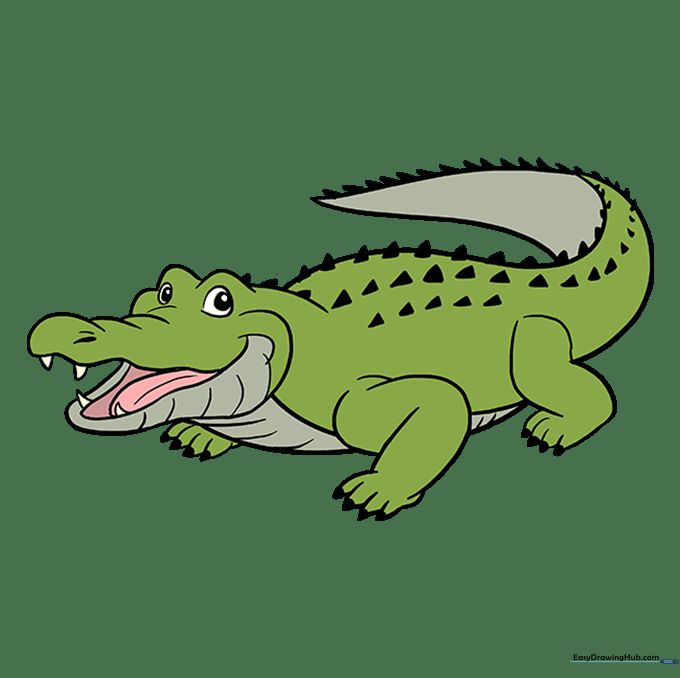
Time to color! Use shades of green, brown, or grey. If you're drawing a baby alligator, try adding yellow stripes. Tip: Use light pressure for a natural look or press harder for bold, vibrant scales.
More Tutorials


