How to Draw a Zombie Hand: Easy Spooky Art Tutorial
Looking for a fun, spooky project for Halloween? This tutorial is perfect for artists ages 7+ to practice drawing organic, weathered textures. All you need is a pencil, an eraser, and a black fine-liner to bring this undead hand to life.
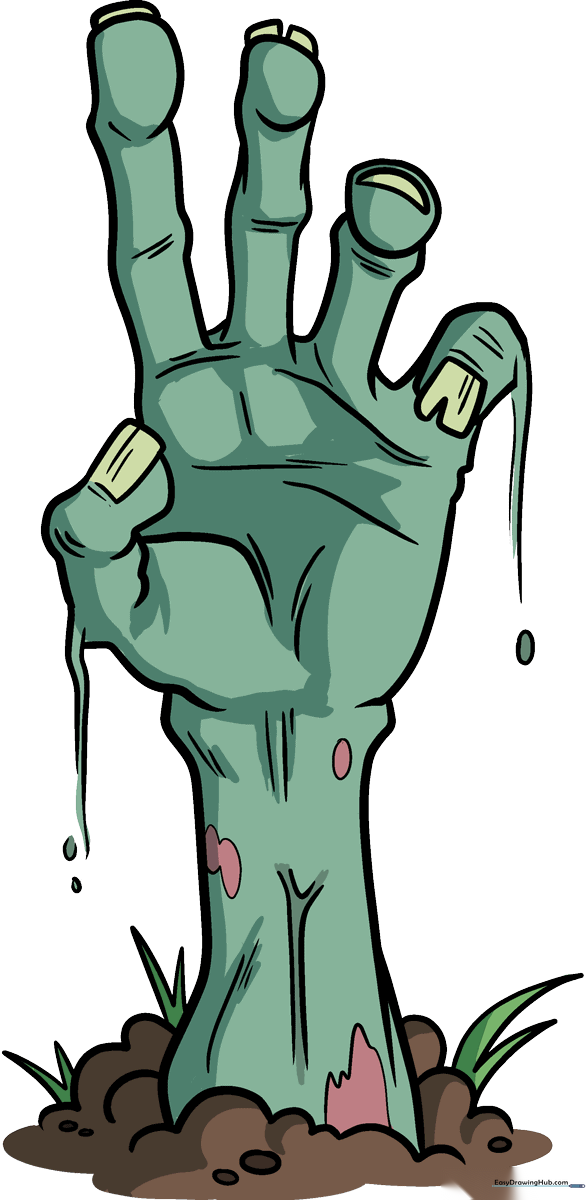
🎯 Final Result
Step-by-Step Instructions
Step 1: Establishing the Fingernail and Base
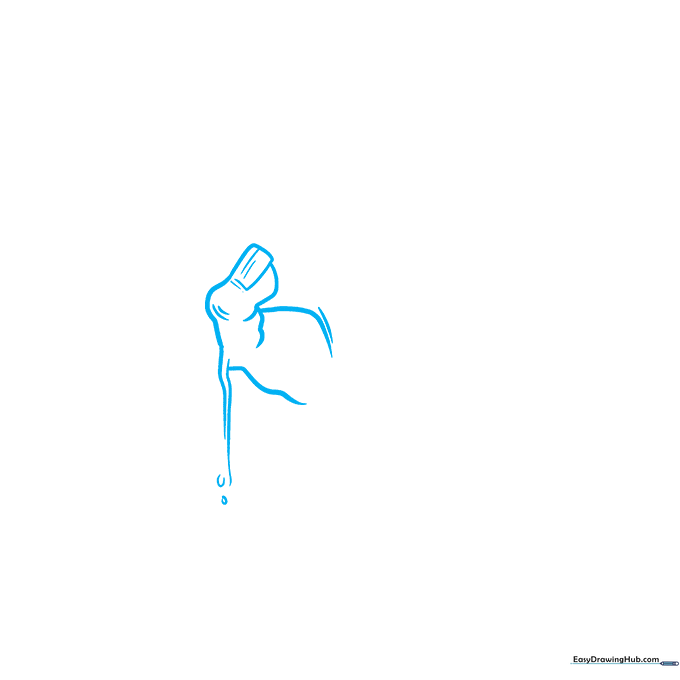
Start by drawing a small rectangle for the fingernail, then add a curve on the left and two lumpy shapes on the right. Below this, sketch a vertical line and a '3' shape to form the finger structure. Tip: Keep your pencil lines light so you can easily refine the 'rotted' edges later.
Step 2: Adding Finger Texture
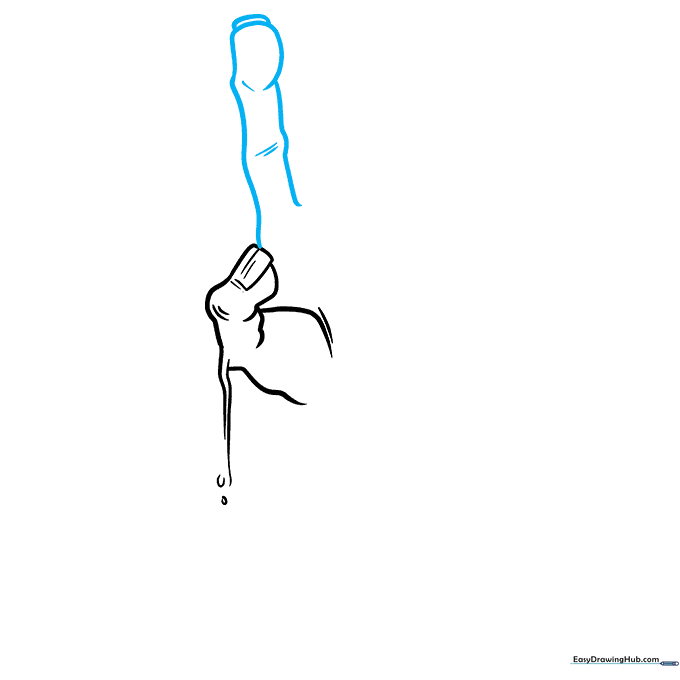
Draw an uneven oval near the top to define the knuckle. Outline the finger using two slightly wavy lines. Add small dashes inside to suggest wrinkles. Tip: Zombies aren't perfect, so let your lines be a bit shaky to show age.
Step 3: Connecting the Fingers
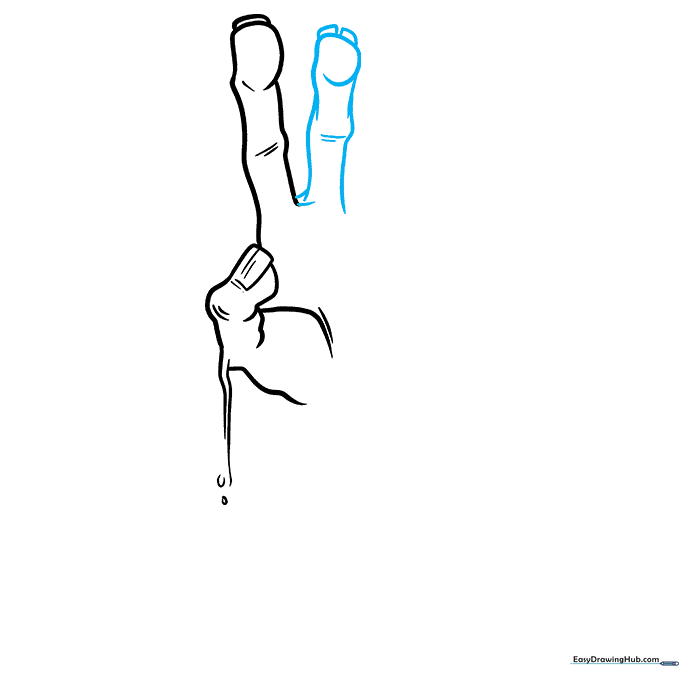
Repeat the process for the next finger, using two rectangles for the nail. Use short, curved lines to connect the base of the fingers. Tip: Think of these connections as the 'webbing' between fingers.
Step 4: Detailing the Knuckles
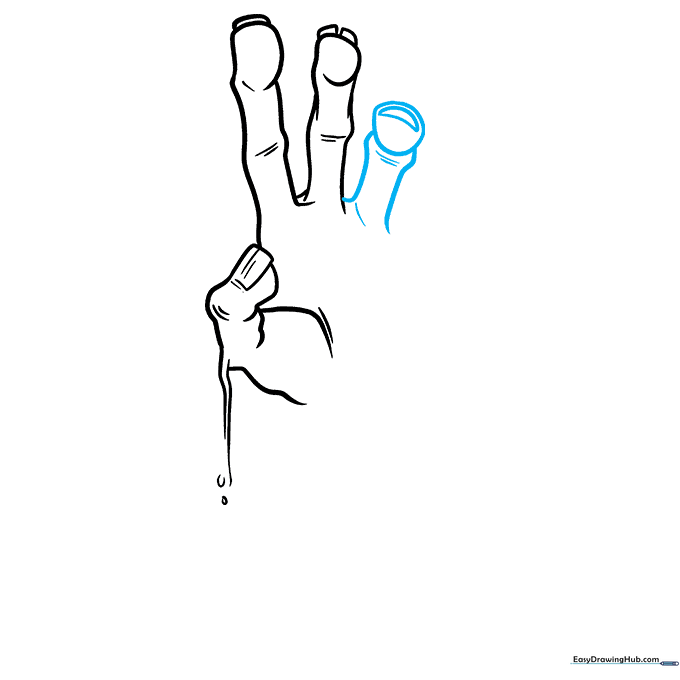
Draw a semi-oval with a moon shape inside to represent a damaged knuckle. Add two vertical lines with bumps at the top. Tip: The 'moon' shape adds depth, making the knuckle look bony and exposed.
Step 5: Forming the Palm
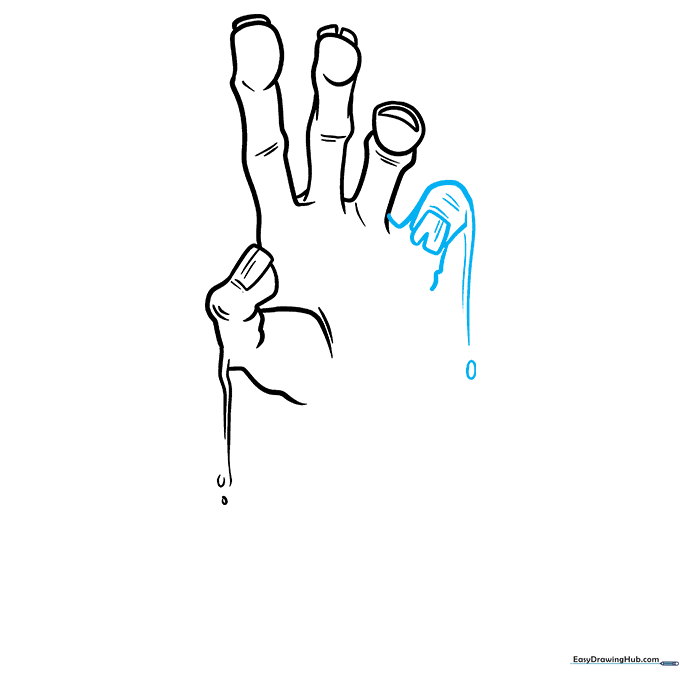
Add a square inside an uneven oval, then cut a triangle out of the square to show a 'wound.' Connect this to the other fingers with a V-shape. Tip: Use the V-shape to create a sense of tension in the hand.
Step 6: Defining the Palm
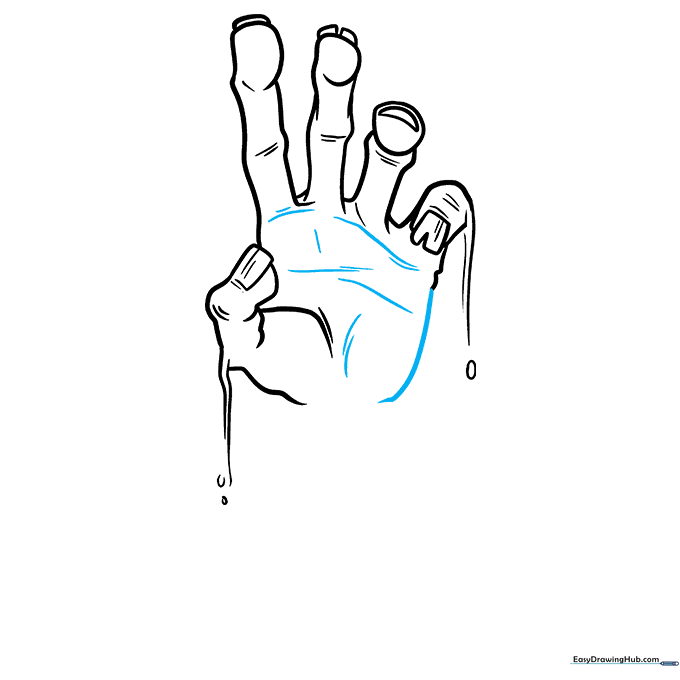
Complete the palm with a vertical line that ends in a curve. Add long and short dashes inside the hand to show skin texture. Tip: Varying the length of your lines creates a more realistic, weathered look.
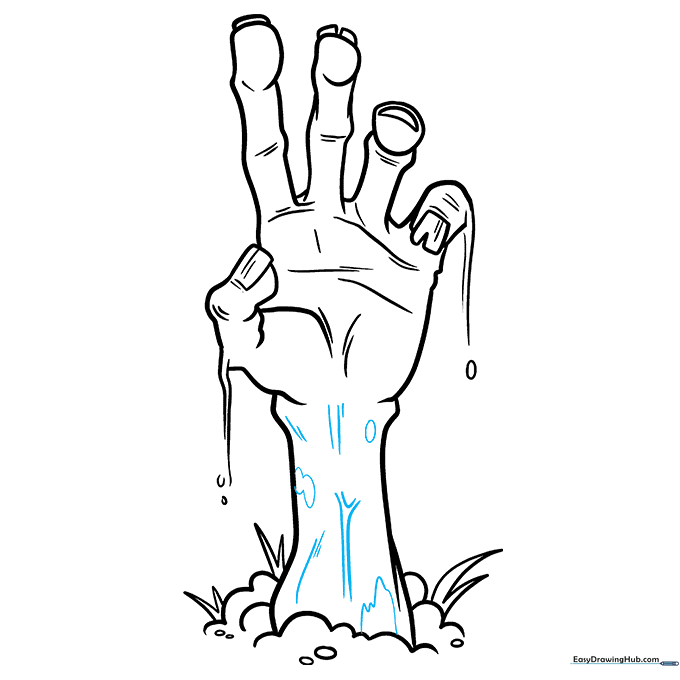
Step 7: Drawing the Wrist
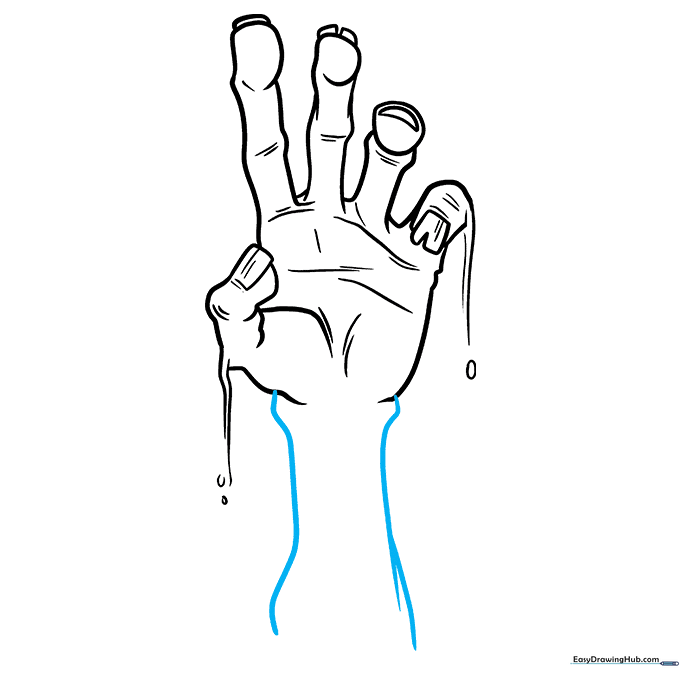
Draw the arm using two wavy vertical lines. Highlight the wrist bones with slight curves. Tip: Keep the lines slightly uneven to make the arm look like it's pushing through dirt.
Step 8: Adding the Ground Texture
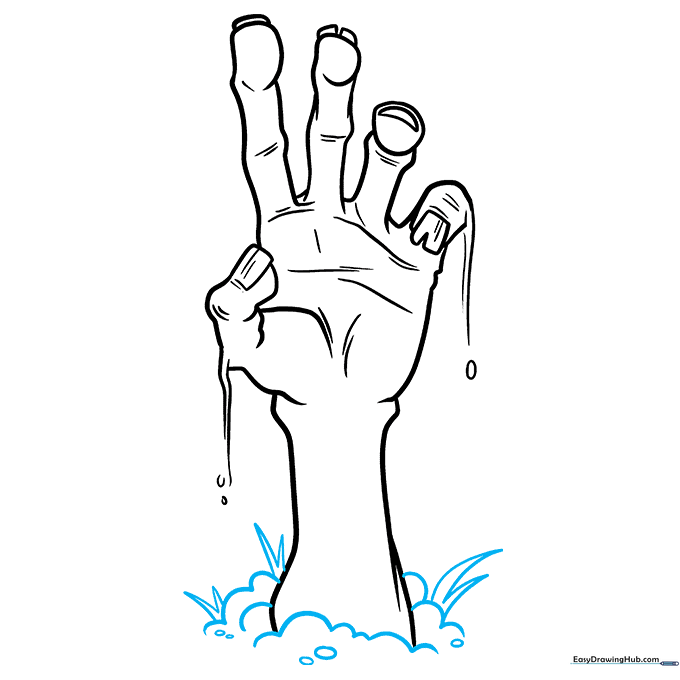
For the dirt, draw several loopy hill shapes surrounded by small ovals and narrow triangles. Make them look rough and uneven. Tip: These shapes represent clumps of earth being pushed aside.
Step 9: Final Outlining
Add final details like small ovals and triangles for texture. Outline your drawing with a black fine-liner. Tip: Use a lighter touch for the smaller texture lines and a firmer touch for the main outline to create contrast.
Step 10: Adding Color
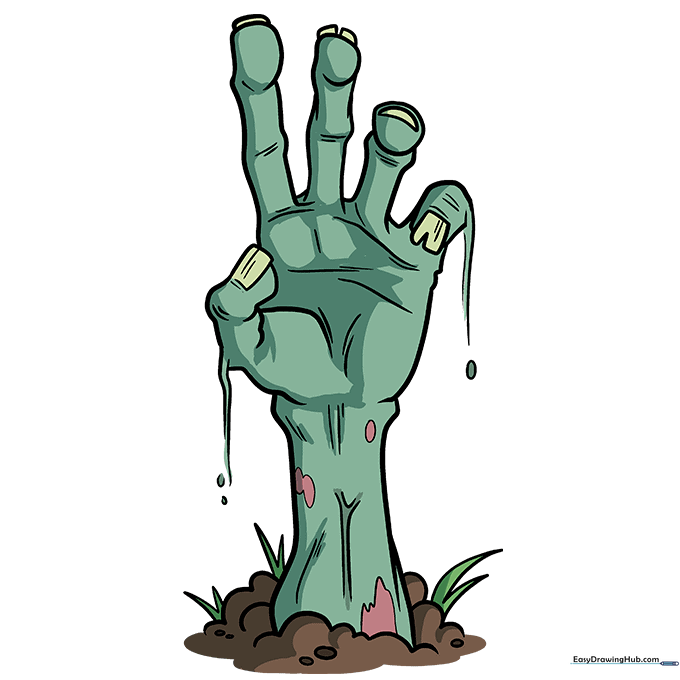
Bring your zombie to life with two shades of teal, off-white for the nails, pink for the exposed muscle, and brown for the dirt. Tip: Use a light green for the grass to make the brown dirt pop.
More Tutorials


