How to Draw a Zombie Face: Easy 10-Step Guide
Ready to create your own spooky character? This guide is perfect for young artists ages 8+ looking to practice expressive facial features. You will only need a pencil, an eraser, and a piece of paper to bring this cartoon zombie to life.
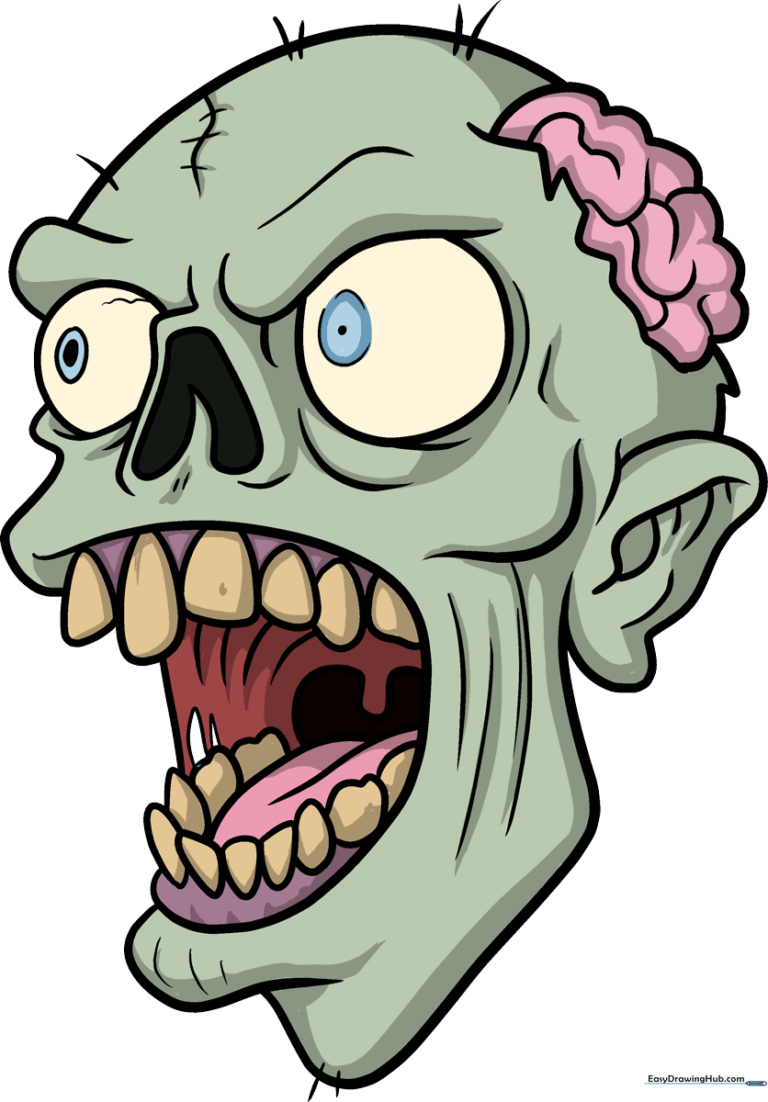
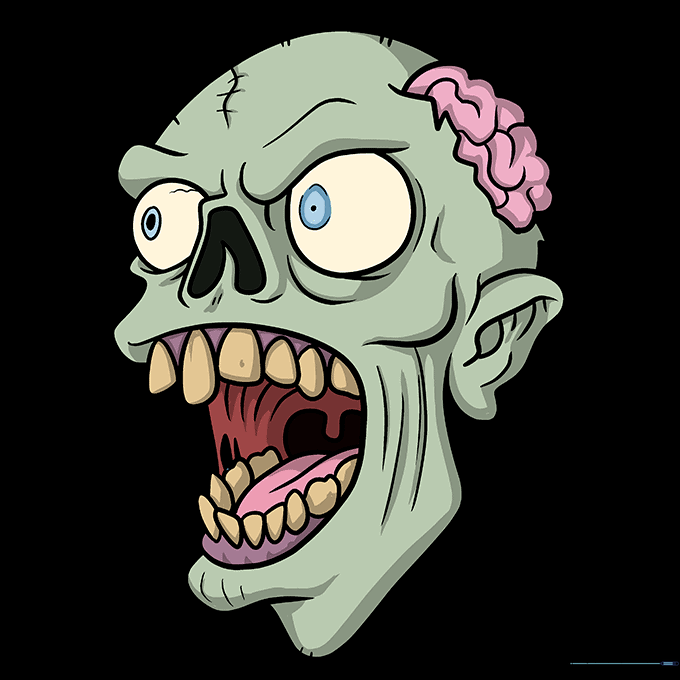
🎯 Final Result
Step-by-Step Instructions
Step 1: Sketching the Eye

Draw a circle for the eye socket, then add a small dot inside an egg-shaped pupil. Add a hook shape above to suggest a heavy brow. Teacher's Tip: Keep your lines light so you can easily adjust the expression later.
Step 2: Defining the Nose

Draw an upside-down V shape for the nose, similar to a wishbone. Add a curved line on the left side with two small dashes for texture. Teacher's Tip: Zombies look best with asymmetrical, slightly messy features!
Step 3: Adding the Second Eye
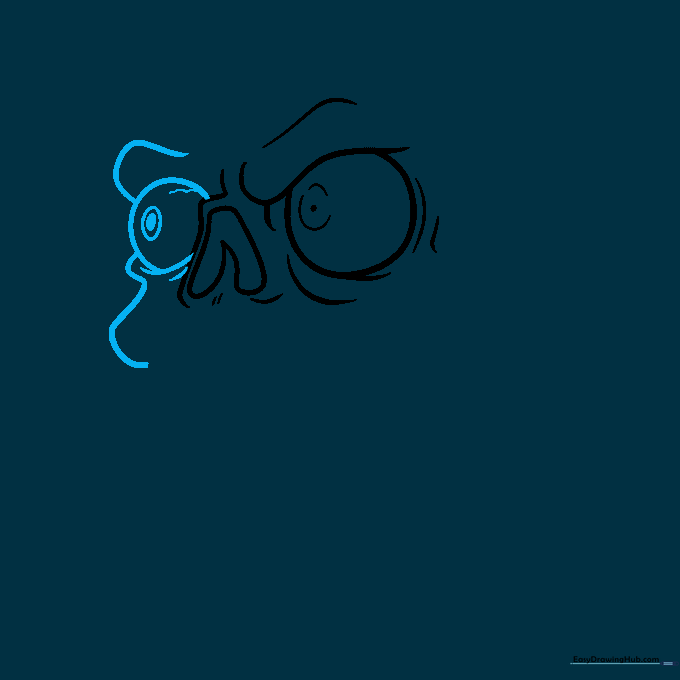
Draw a second eye on the left, mirroring the first with an oval pupil and extra curves underneath. Add a hook above and a wavy line below to show tired, sunken skin. Teacher's Tip: Use these extra lines to make your character look more 'undead'.
Step 4: Shaping the Cheek and Ear
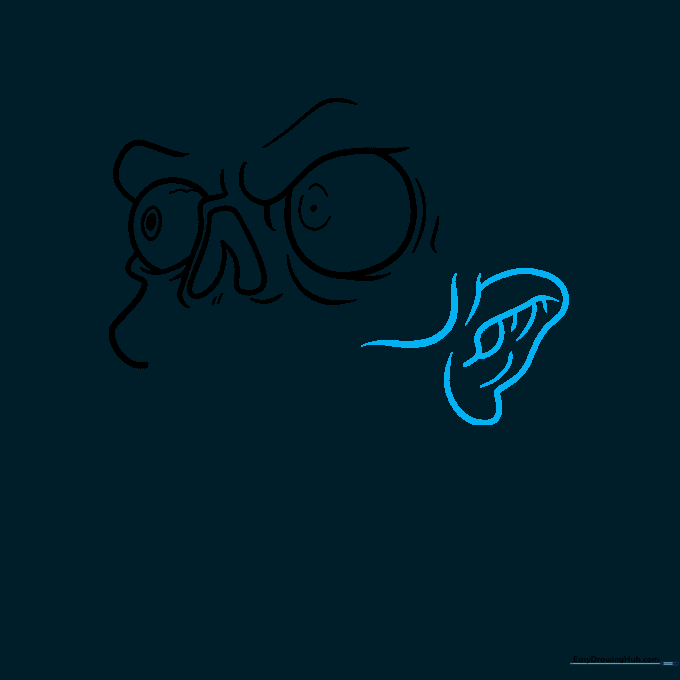
Sketch a curve for the cheekbone and a potato-chip-shaped ear on the right. Add internal lines to the ear to create depth. Teacher's Tip: Don't worry about making the ear perfect; a slightly lopsided ear adds character.
Step 5: Sketching the Brain
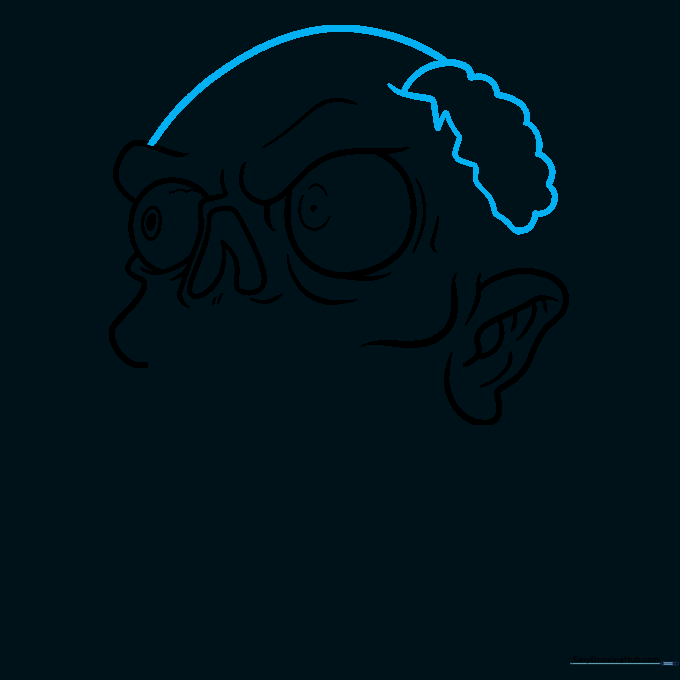
Draw a dome for the top of the head, then add a loose, cloud-like shape on the right that overlaps the dome. Teacher's Tip: Make the cloud shape irregular to represent the brain texture.
Step 6: Adding Brain Folds
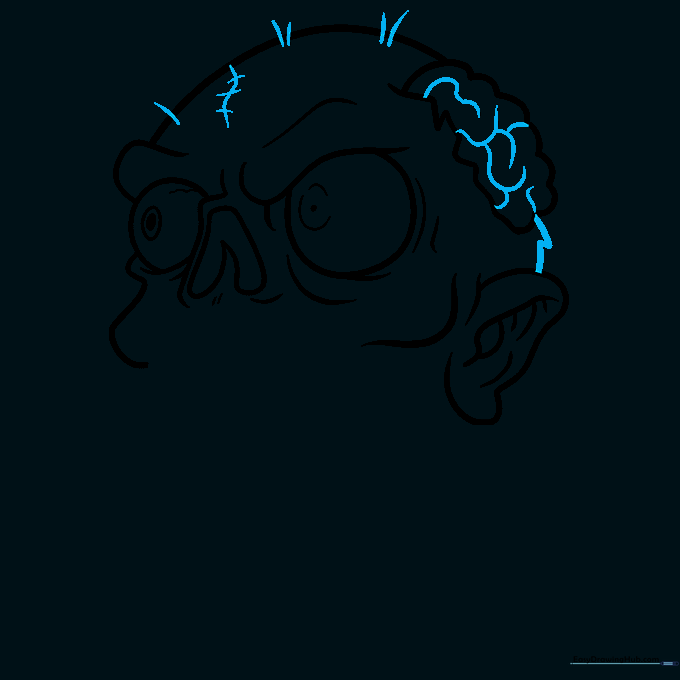
Fill the cloud shape with wavy lines to represent brain folds. Add small dashes around the top of the head for extra detail. Teacher's Tip: Vary the length of your wavy lines to make it look more organic.
Step 7: Drawing the Open Mouth
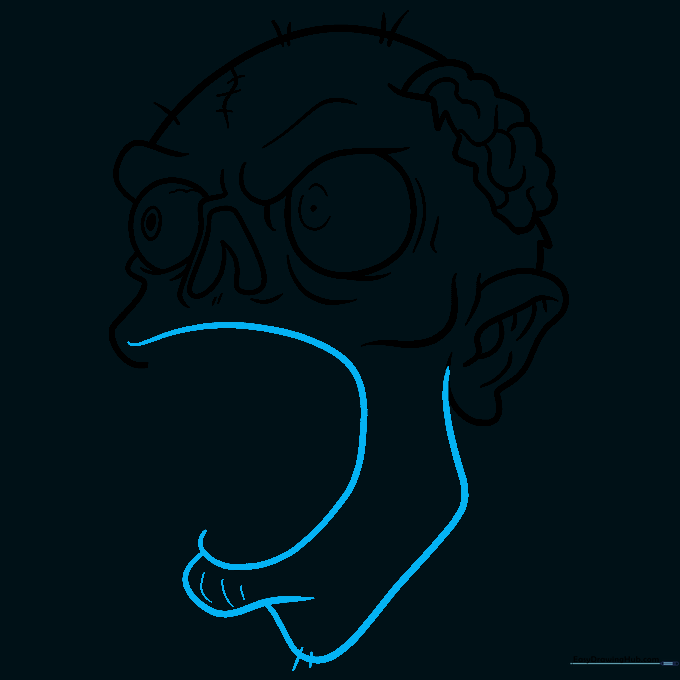
Sketch a round, open mouth. Add a hook shape underneath for the chin and trail the line upward to complete the face shape. Teacher's Tip: A wide-open mouth makes the zombie look extra surprised or hungry!
Step 8: Adding Top Teeth
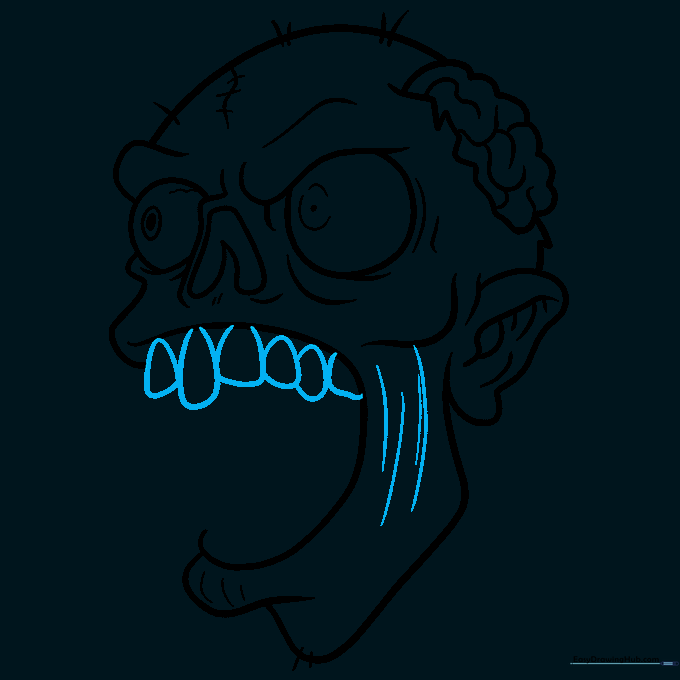
Use uneven, rounded triangles to draw the top teeth. Make them look crooked and loose. Teacher's Tip: Don't use a ruler! The more irregular the teeth, the scarier the zombie.
Step 9: Adding Bottom Teeth and Tongue
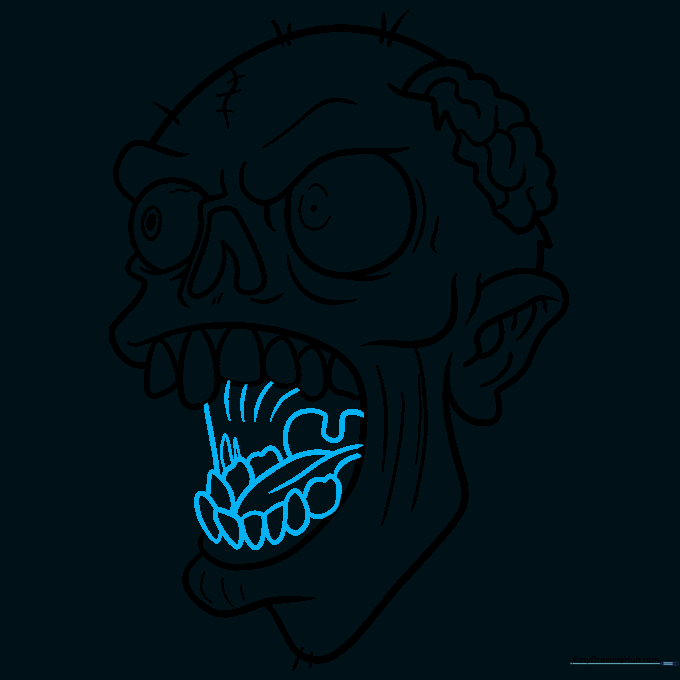
Repeat the process for the bottom teeth. Add a tongue using overlapping curves and an oval for the back of the throat. Teacher's Tip: Adding a tongue adds depth to the mouth.
Step 10: Adding Color
Outline your drawing with black ink. Use grayish-green for the skin, muted pink for the brain and tongue, and pale yellow for the teeth. Teacher's Tip: Use light pressure with your colored pencils to create a 'muted' zombie look.
More Tutorials


