How to Draw a Wolf: Easy 10-Step Guide for Beginners
Ready to bring a wild wolf to life on your page? This tutorial is perfect for young artists ages 7+ who want to master drawing fur textures and animal anatomy. Grab a pencil, an eraser, and a piece of paper to start building your wolf from the snout to the tail.
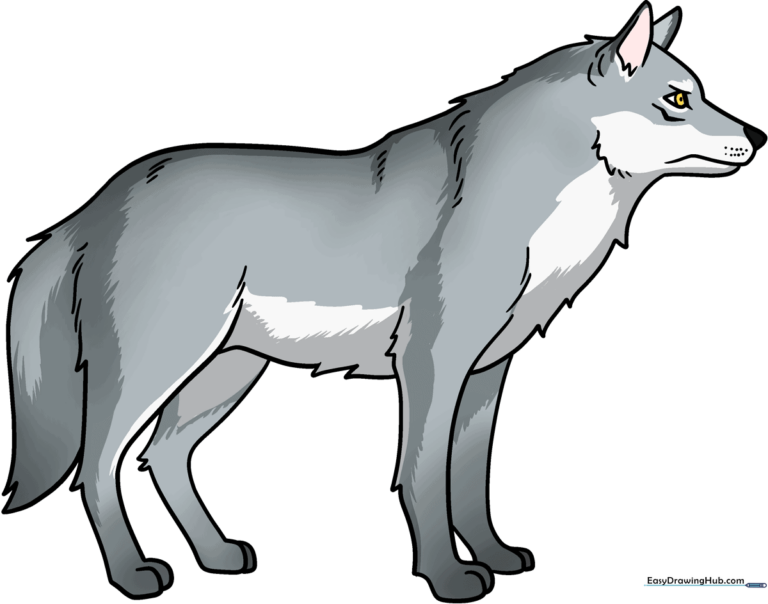
🎯 Final Result
Step-by-Step Instructions
Step 1: Sketching the Wolf's Profile
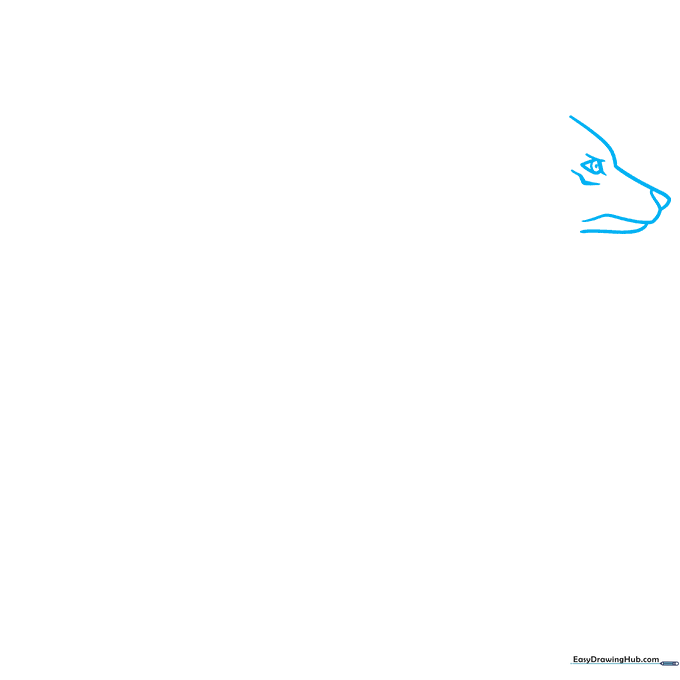
Start by drawing the wolf's face profile. Use smooth, curved lines for the forehead, snout, and nose. Teacher's Tip: Keep your pencil pressure light here so you can easily adjust the snout shape if it looks a bit too long or short.
Step 2: Adding Ears and Fur Texture

Draw the alert, triangular ears on top of the head. Use short, jagged lines around the base of the head to mimic thick fur. Teacher's Tip: Vary the length of your jagged lines to make the fur look natural rather than perfectly uniform.
Step 3: Defining the Neck and Chest
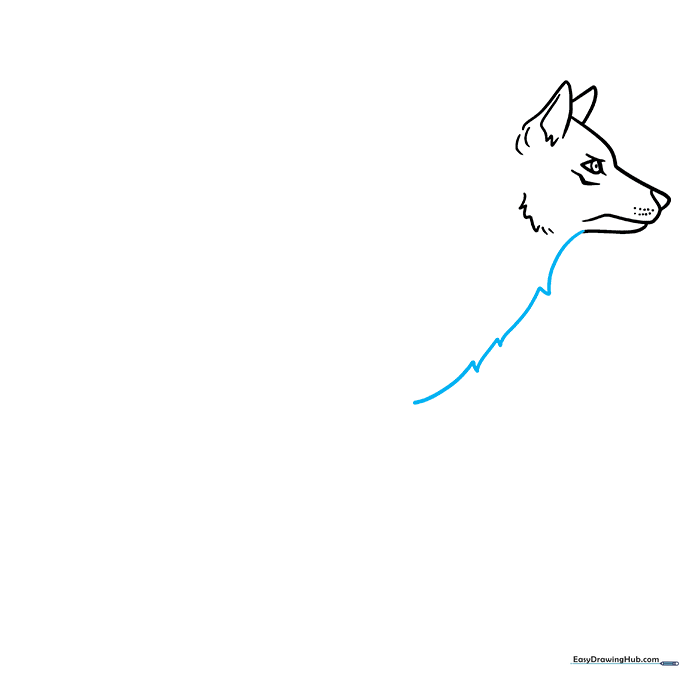
Use a series of overlapping, jagged lines to sketch the wolf's neck and chest. This creates the illusion of a thick, winter coat. Teacher's Tip: Imagine the fur is flowing downward; let your hand follow that direction for a more realistic look.
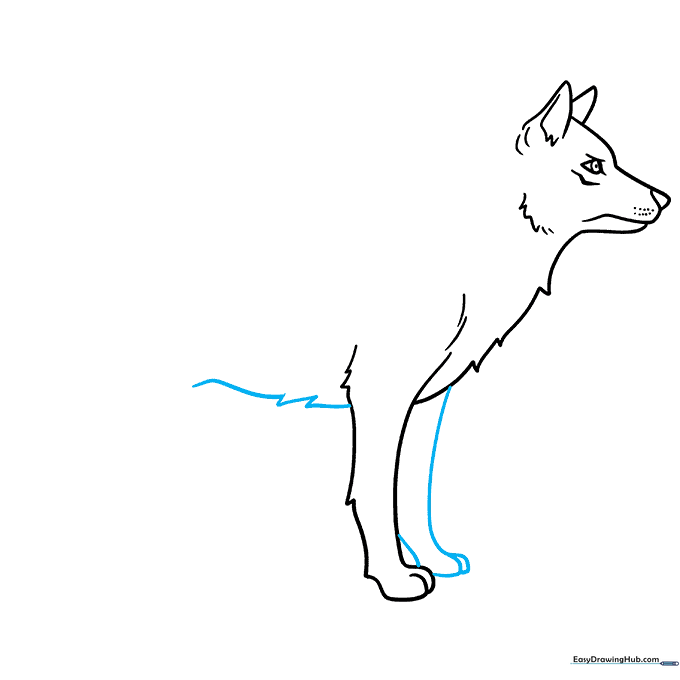
Step 4: Sketching the Front Leg
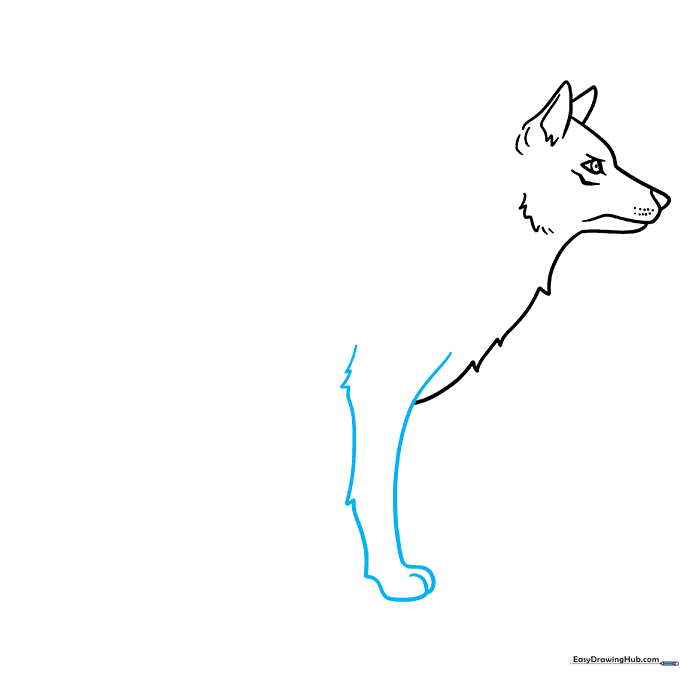
Draw the front leg using curved lines that meet at sharp points for the fur. For the paw, use small, overlapping curves to represent the toes. Teacher's Tip: Don't worry about perfect circles for the toes; organic, slightly uneven shapes look more like real paws.
Step 5: Forming the Belly and Second Leg
Connect the chest to the back leg with a curved line for the belly, then sketch the second front leg. Teacher's Tip: Keep the second leg slightly behind the first to create depth in your drawing.
Step 6: Drawing the Hind Leg
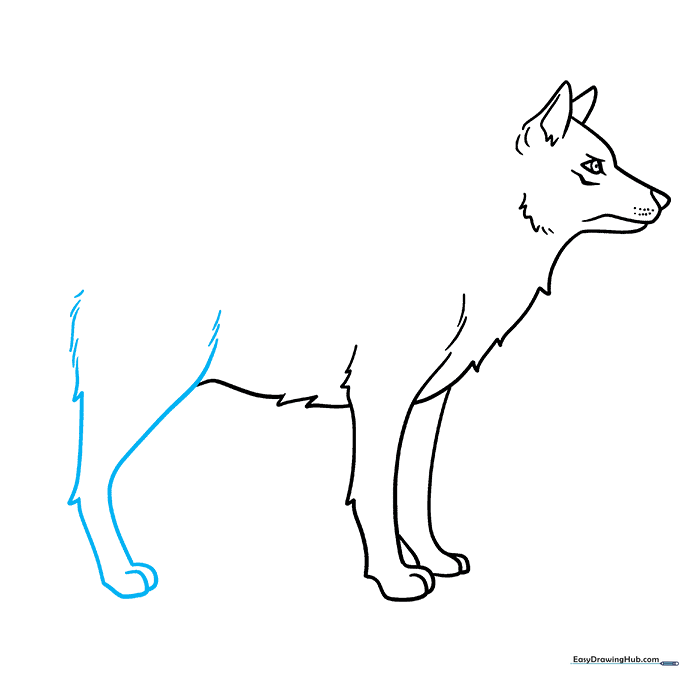
Draw the large, muscular hind leg using overlapping curves. Add extra jagged lines at the top of the thigh to show where the fur is thickest. Teacher's Tip: The hind leg should look slightly bent to show the wolf is ready to move.
Step 7: Adding the Second Hind Leg
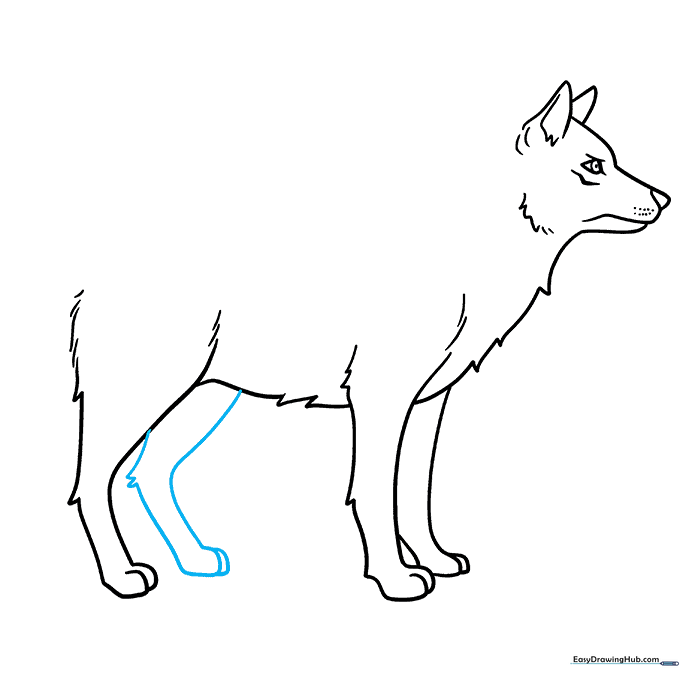
Complete the stance by drawing the second hind leg visible behind the first. Keep the lines consistent with the fur texture you used previously. Teacher's Tip: Ensure the paws are roughly level with each other so your wolf looks like it is standing on flat ground.
Step 8: Detailing the Back and Shoulders
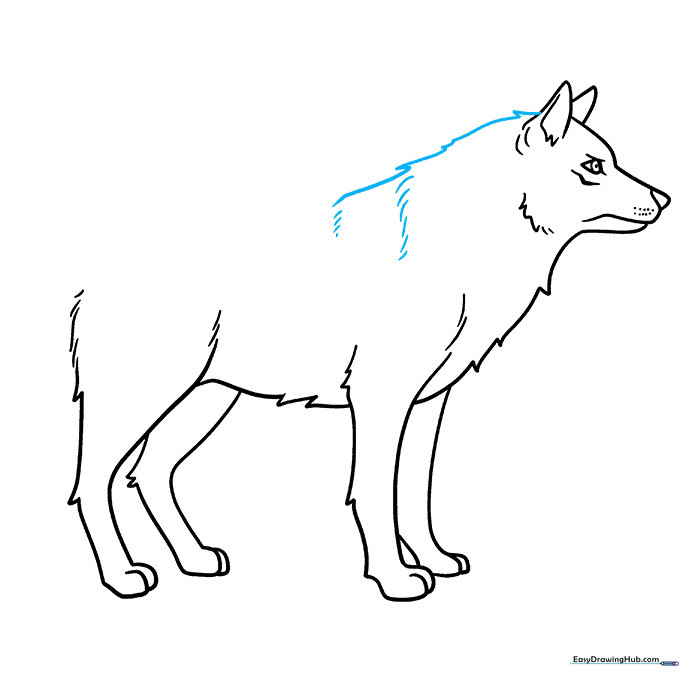
Use jagged lines to define the back of the neck and contour the shoulder area with short, disconnected curved lines. Teacher's Tip: These small lines act as 'shadows' in the fur, adding volume to your drawing.
Step 9: Finishing the Tail
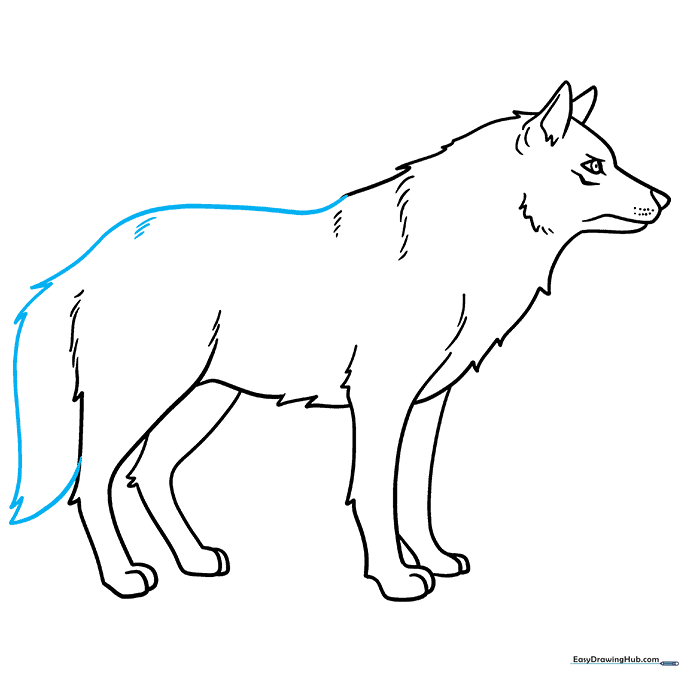
Extend a long, flowing curved line from the back to form the tail. Use jagged, pointed lines to make the tail look bushy. Teacher's Tip: A bushy tail helps balance the weight of the wolf's head in your composition.
Step 10: Adding Color
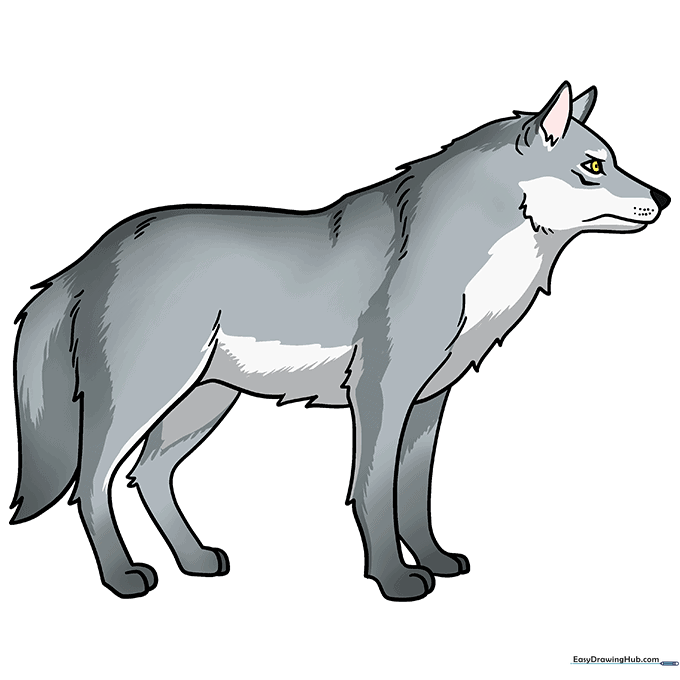
Your wolf is ready for color! Use shades of gray, brown, or even white. Teacher's Tip: Try using light gray for the main body and darker charcoal for the ears and back to give your wolf a realistic, multi-tonal coat.
More Tutorials


