How to Draw a Weathervane: Easy 10-Step Guide
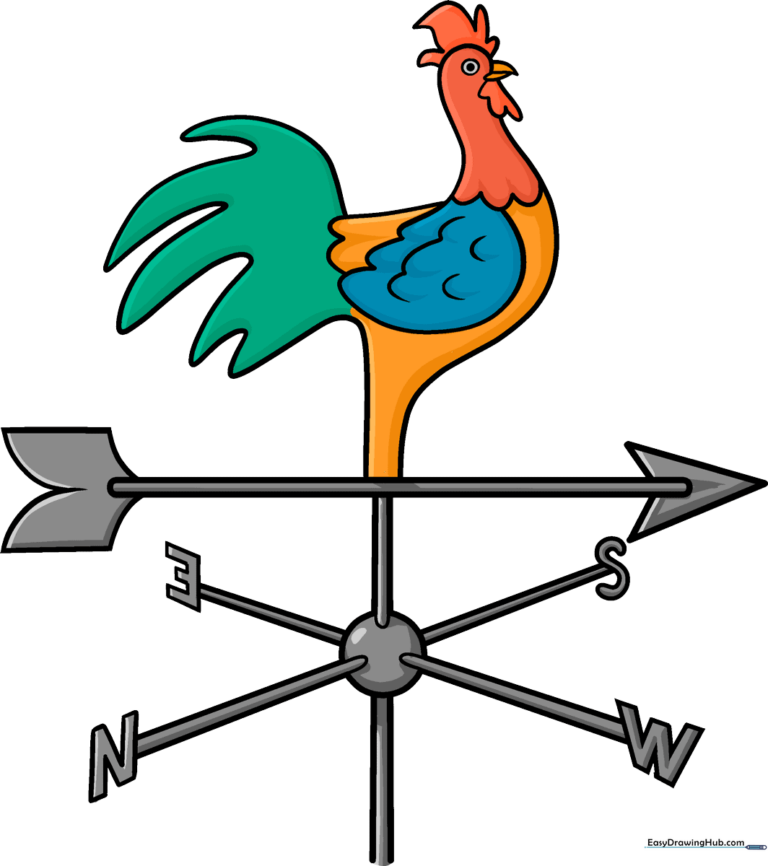
Bring a touch of rustic charm to your sketchbook with this fun weathervane project. Designed for artists ages 6 and up, this activity uses basic geometric shapes to build a complex-looking structure. Grab your pencil and eraser, and let's capture the wind!
🎯 Final Result
Step-by-Step Instructions
Step 1: Sketching the Central Rod
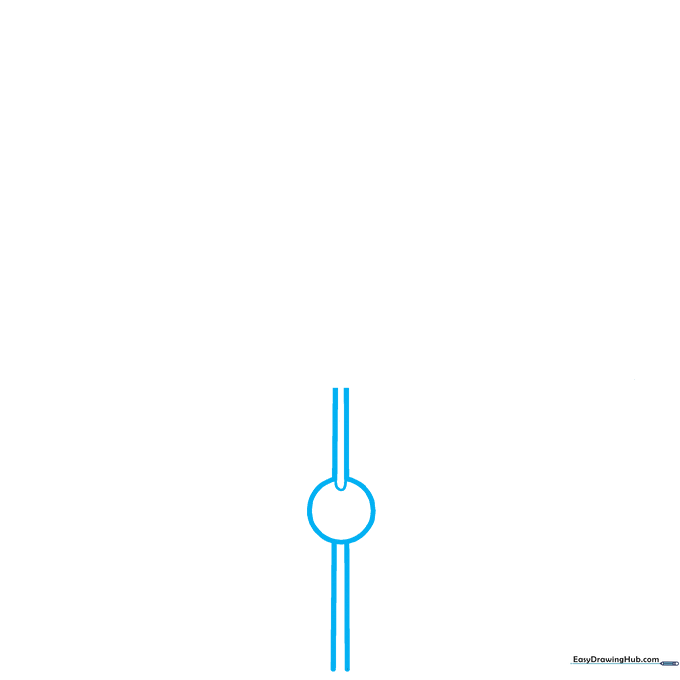
Start by drawing a small circle for the center hub. Extend two straight, parallel lines upward and downward from the circle to create the main support rod. Teacher's Tip: Use a light touch with your pencil so you can easily erase the lines inside the circle later.
Step 2: Forming the Directional Arms
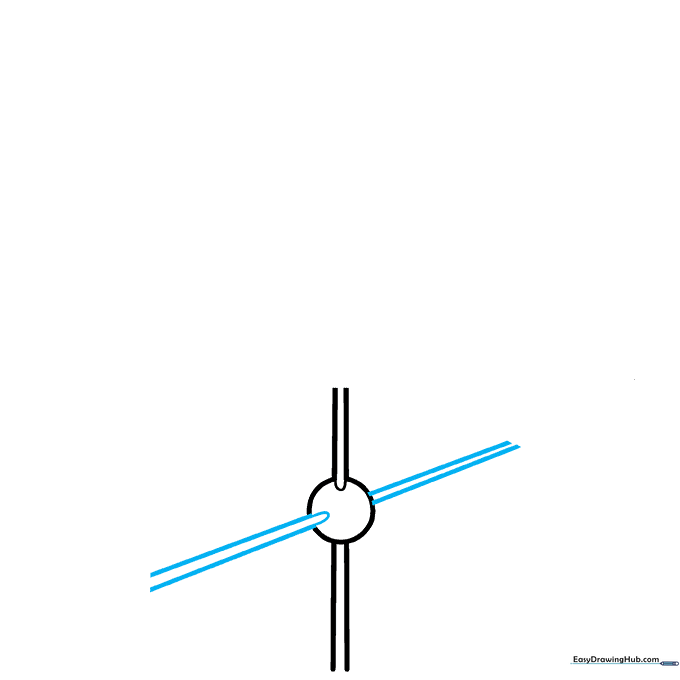
Extend two diagonal lines from the center circle to form a cross shape. These will eventually hold your compass letters. Teacher's Tip: Keep your ruler or hand steady to ensure these lines look like they are coming directly out of the center point.
Step 3: Completing the Compass Base
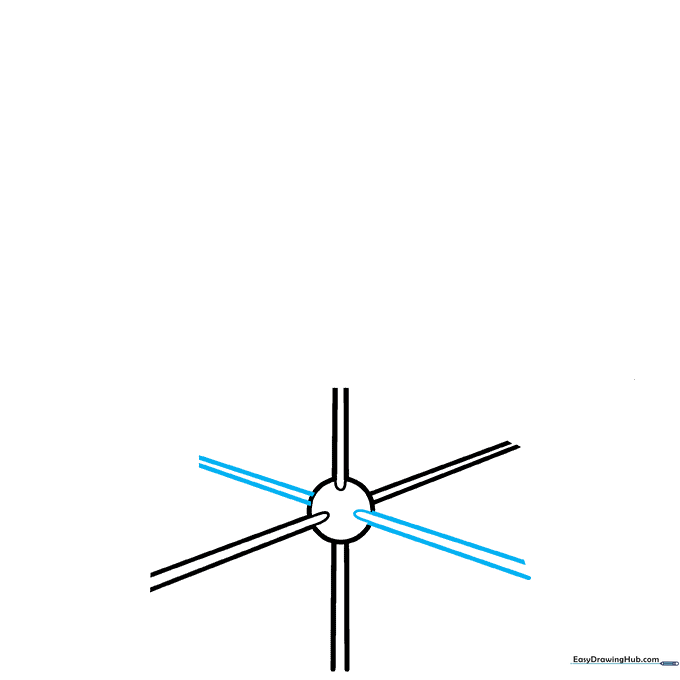
Add a second set of diagonal lines to complete the 'X' shape behind the vertical rod. This gives your weathervane a 3D, sturdy look. Teacher's Tip: Check that your angles are symmetrical so the base looks balanced.
Step 4: Labeling the Directions
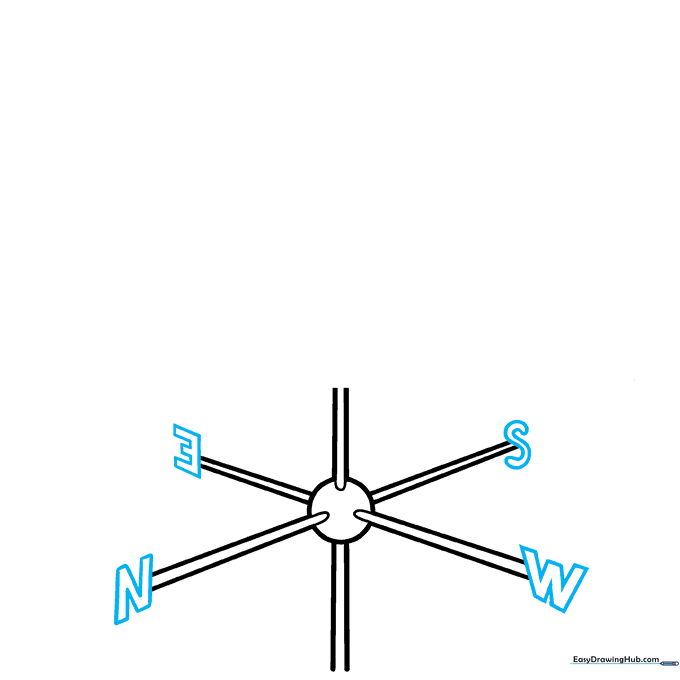
Write the letters 'N', 'W', 'S', and 'E' at the ends of your arms. This turns your drawing into a functional weather tool! Teacher's Tip: Use block letters to make them stand out clearly against the metal rod.
Step 5: Drawing the Arrow Shaft
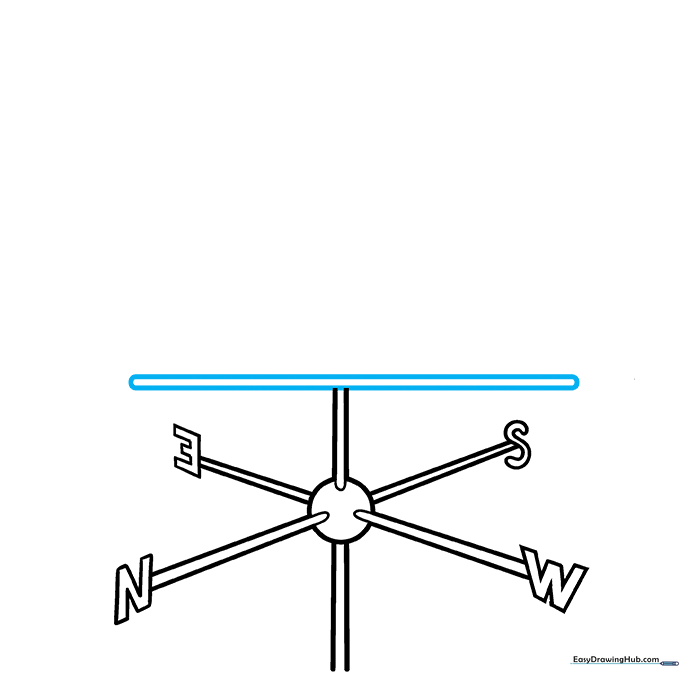
Draw two parallel horizontal lines near the top of the rod. This is the arrow that pivots with the wind. Teacher's Tip: Keep these lines close together to represent a thin metal bar.
Step 6: Adding the Arrowhead and Tail
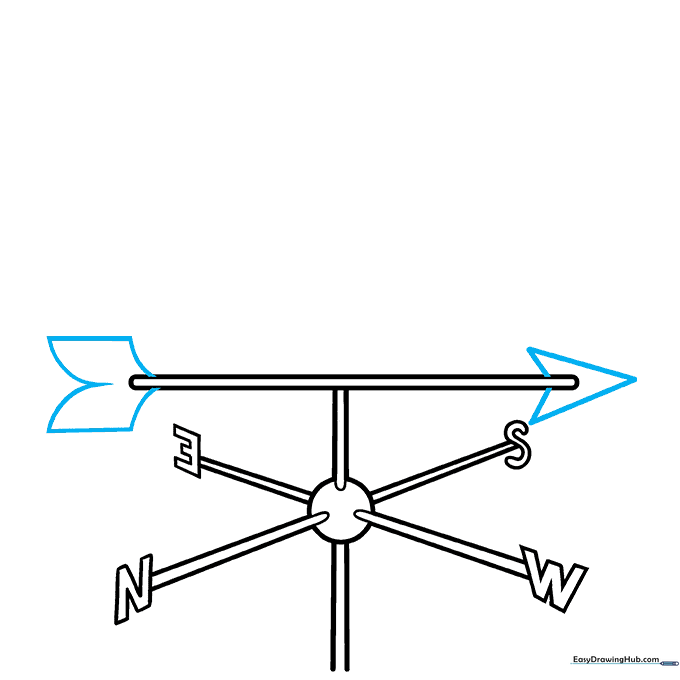
Add a triangle to the front of the shaft and a decorative 'open book' shape to the back. Teacher's Tip: The tail creates drag, which helps the arrow point into the wind—a great science fact to share while drawing!
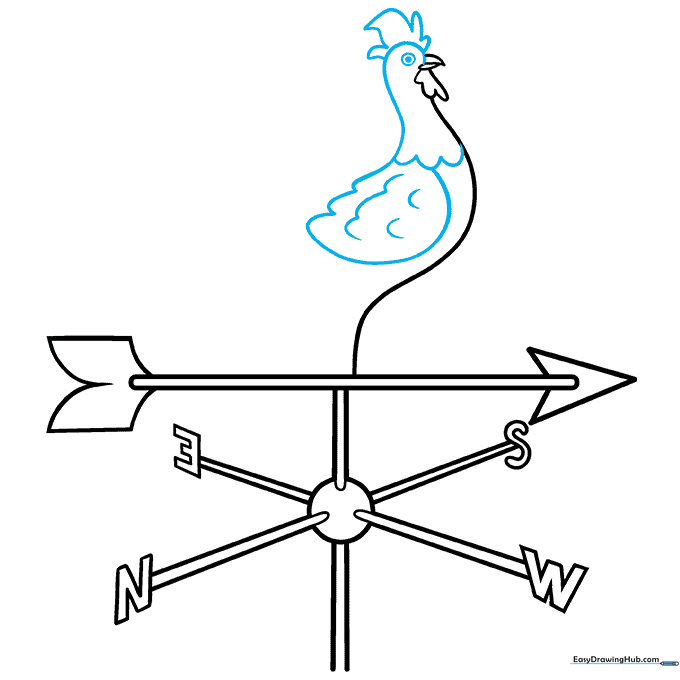
Step 7: Sketching the Rooster's Head
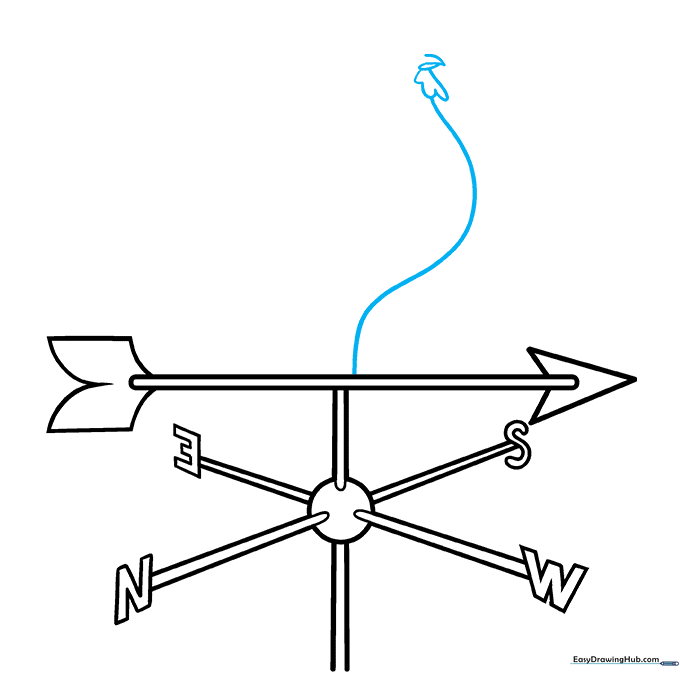
Draw a curved line on top of the arrow to start the rooster. Sketch a pointed beak and a rounded wattle underneath. Teacher's Tip: Keep the shapes simple and rounded to make the rooster look friendly.
Step 8: Adding Rooster Details
Add the comb on top of the head, a wing, and a circular eye. Use small, quick strokes to suggest feathers at the neck. Teacher's Tip: Use a darker pencil pressure for the eye to make it pop.
Step 9: Finalizing the Tail Feathers
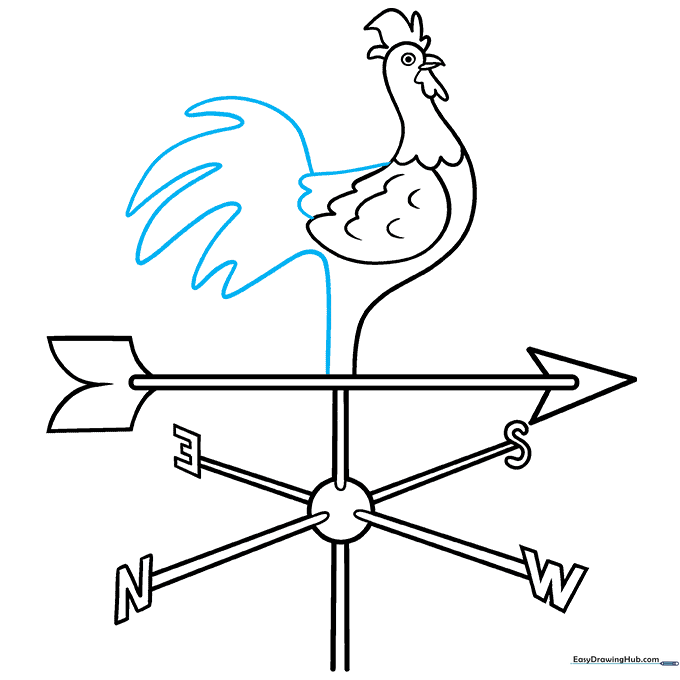
Draw long, flowing curved lines for the tail feathers, doubling back to create volume. This adds movement to your drawing. Teacher's Tip: Don't worry about making every feather perfect; overlapping lines create a more natural, fluffy look.
Step 10: Bringing It to Life with Color
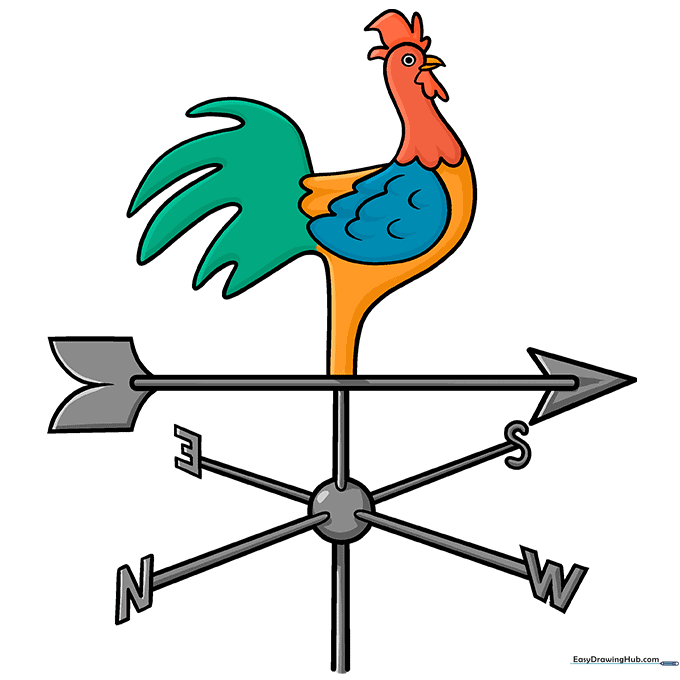
Time to color! Use metallic grays for the rod and bold, bright colors for your rooster. Teacher's Tip: Try using a bronze or copper color for the metal to give it an 'antique' feel.
More Tutorials


