How to Draw a Unicorn Girl: Easy 9-Step Tutorial
Bring a magical unicorn girl to life with this beginner-friendly drawing guide. Designed for ages 5 and up, this activity uses simple shapes to build confidence and artistic skills. Grab a pencil, an eraser, and some paper to get started on your fantasy character.
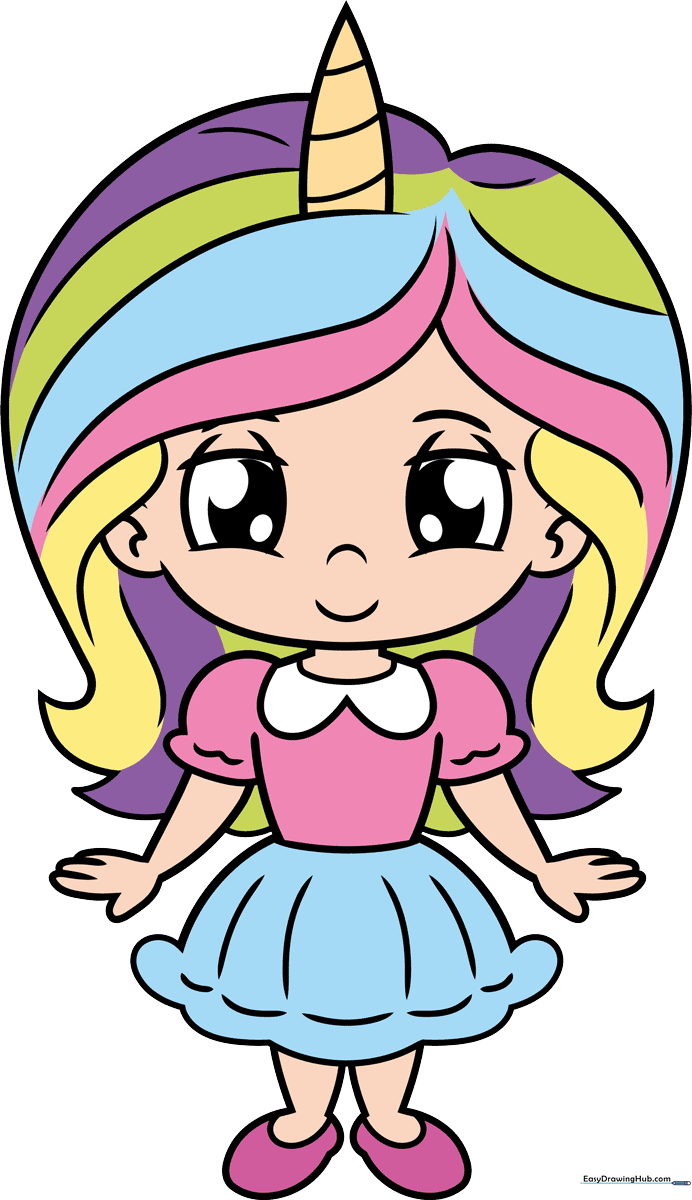
🎯 Final Result
Step-by-Step Instructions
Step 1: Sketching the Expressive Eyes
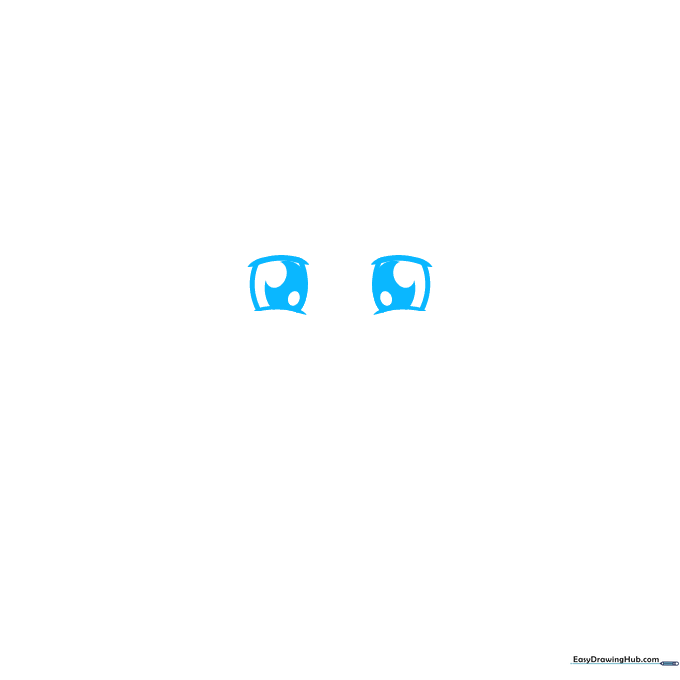
Draw two sets of parallel curved lines for the eye outlines. Inside, add three ovals, shading the largest one to create a bright, cartoon pupil. Teacher's Tip: Keep your pencil pressure light so you can easily adjust the symmetry if one eye looks a bit different than the other.
Step 2: Defining the Face Shape
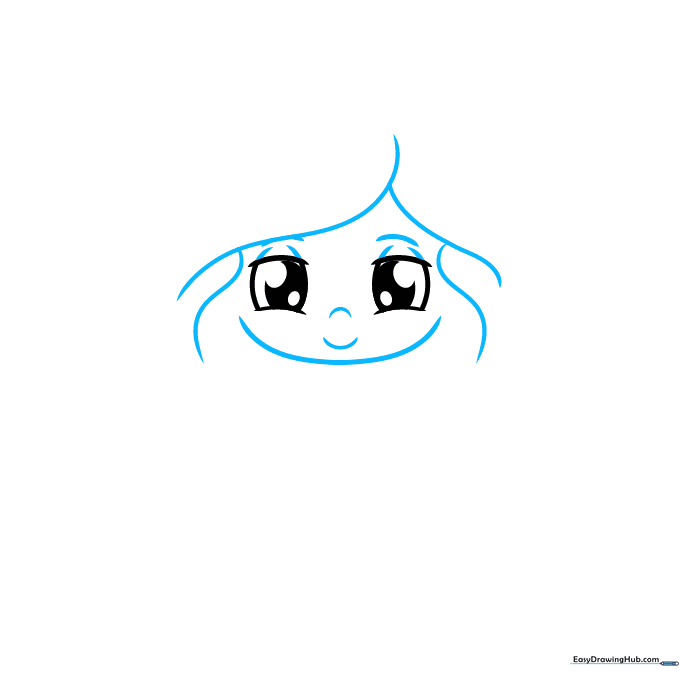
Use soft, curved lines to outline the chin and cheeks. Add small marks for the nose and a gentle curve for the smile. Teacher's Tip: A rounded chin makes the character look younger and cuter!
Step 3: Adding the Magical Horn
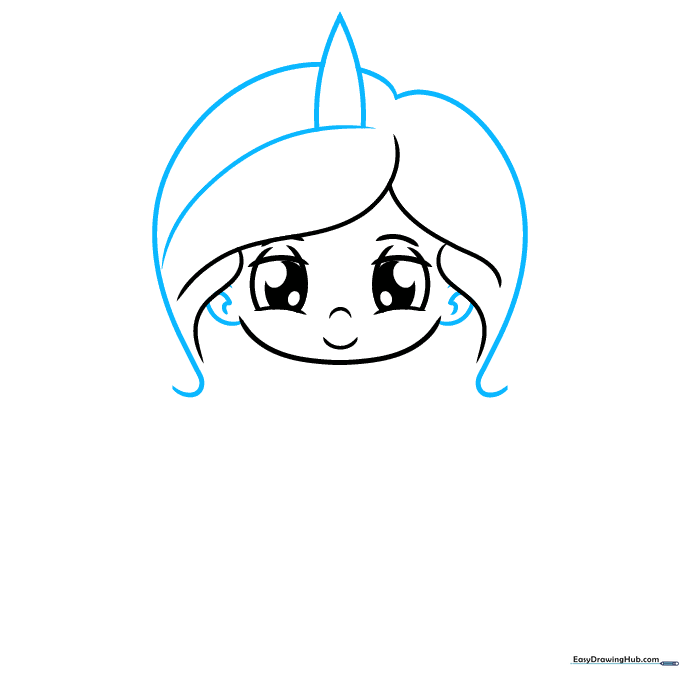
Frame the face with long, flowing hair lines. At the top center, draw two curved lines meeting at a point to form the unicorn horn. Teacher's Tip: Make the horn slightly off-center to give your character a more dynamic, natural look.
Step 4: Drawing the Neck and Collar
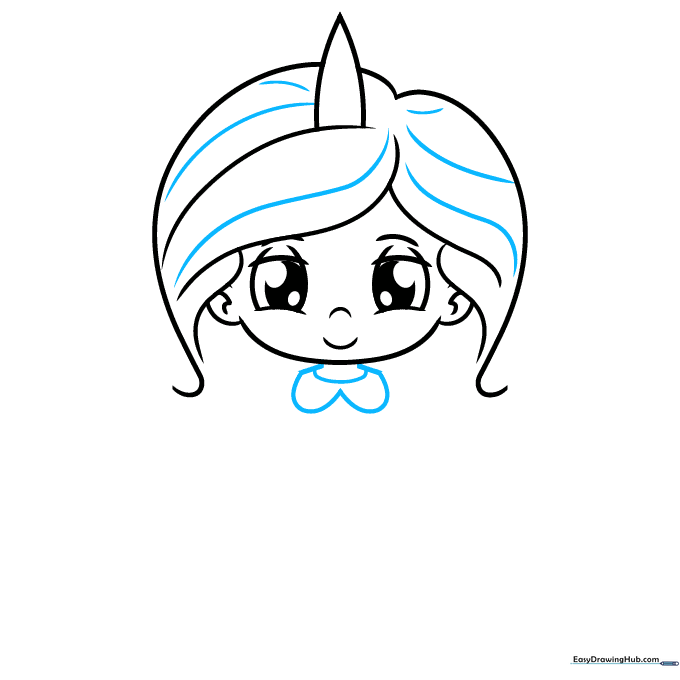
Add texture to the hair with a few curved strokes. Then, draw two lines for the neck and a rounded collar for the dress. Teacher's Tip: Use 'C' shaped curves for the collar to make it look like soft fabric.
Step 5: Sketching the Puffy Sleeves
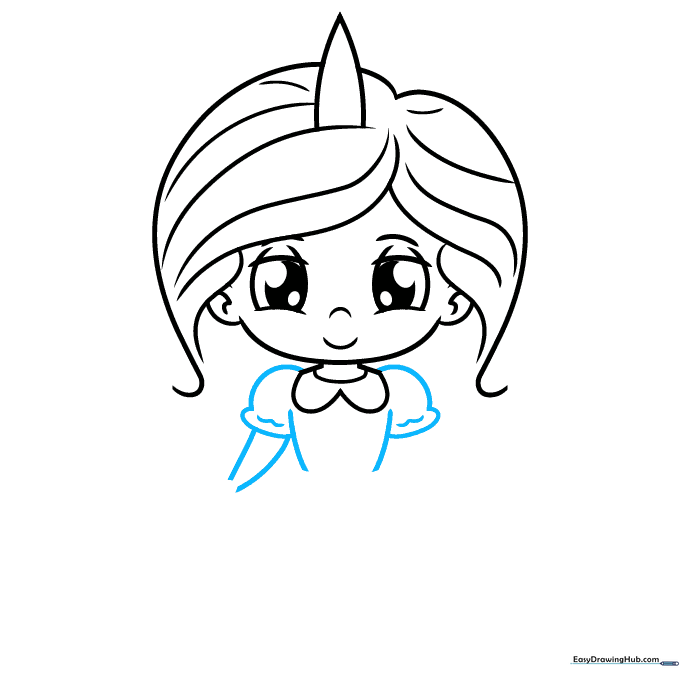
Outline the torso and the puffy sleeves of the dress. Add small scallops at the edges for a lacey effect. Teacher's Tip: Puffy sleeves are just big, rounded bubbles—don't worry about making them perfectly symmetrical!
Step 6: Adding the Arms
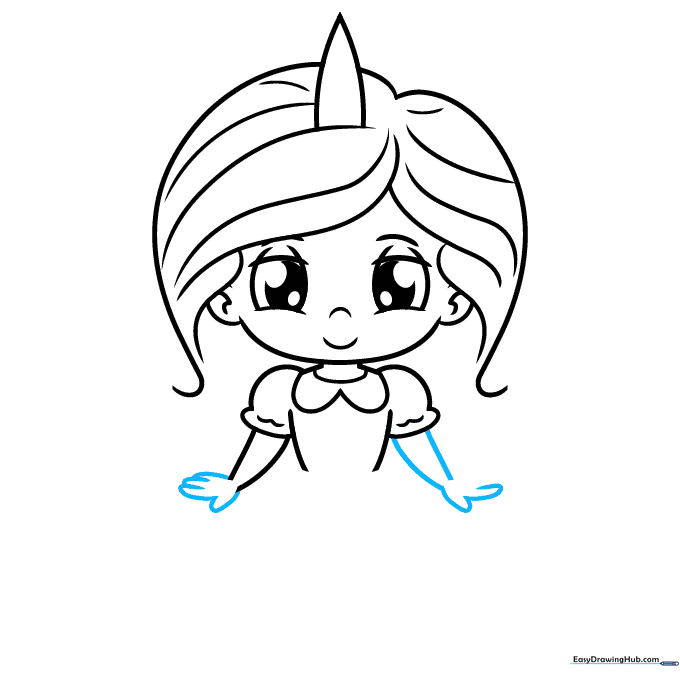
Extend the arms downward using smooth, curved lines. Draw simple shapes for the hands. Teacher's Tip: If drawing fingers is tricky, keep them as simple, rounded mitten shapes for a cute cartoon style.
Step 7: Creating the Skirt
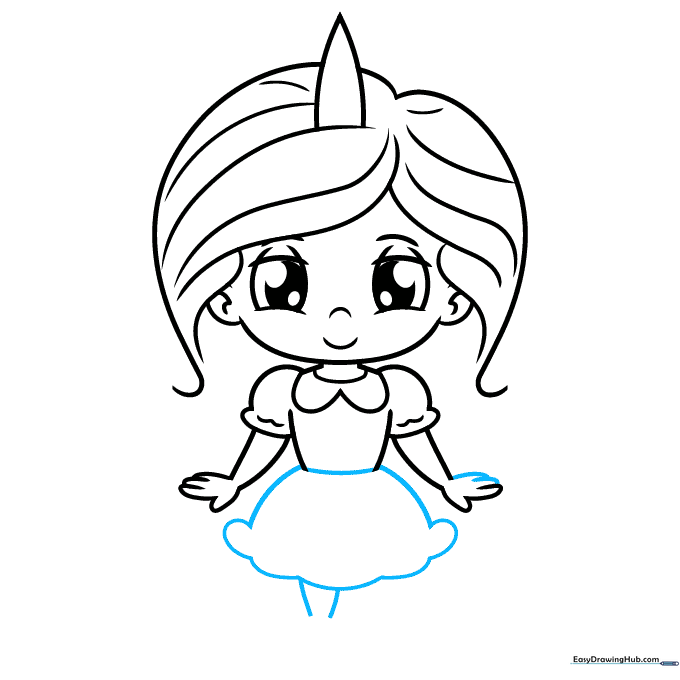
Draw the waistband and a flared skirt with a scalloped bottom edge. Add one leg extending downward. Teacher's Tip: Use a 'U' shape for the skirt to give it movement and bounce.
Step 8: Adding Legs and Shoes
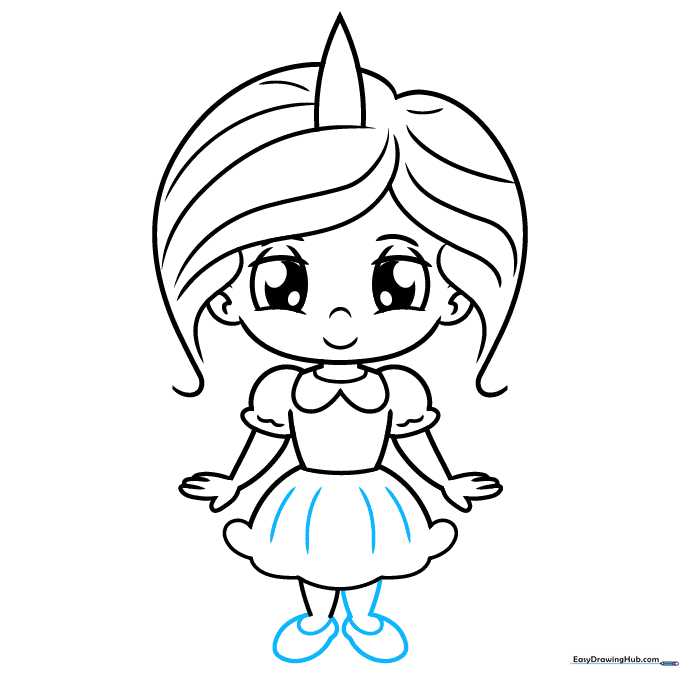
Complete the second leg and add rounded feet with a small curve on top to represent shoes. Teacher's Tip: Keep the legs parallel to make the character look like she is standing still.
Step 9: Final Details and Texture
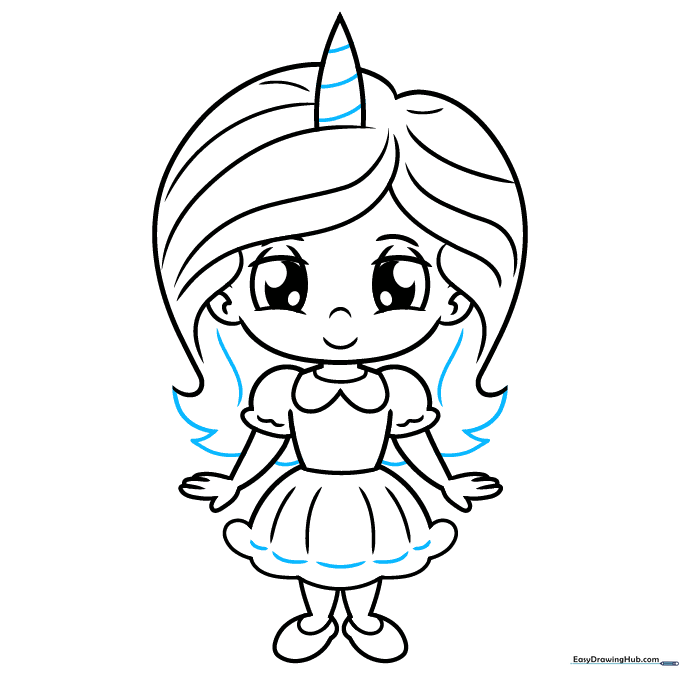
Add spiral lines to the horn, lengthen the hair, and add small details to the skirt. Teacher's Tip: Use a darker pencil or marker to trace your final lines and erase the stray guide marks.
Step 10: Bring Your Drawing to Life with Color
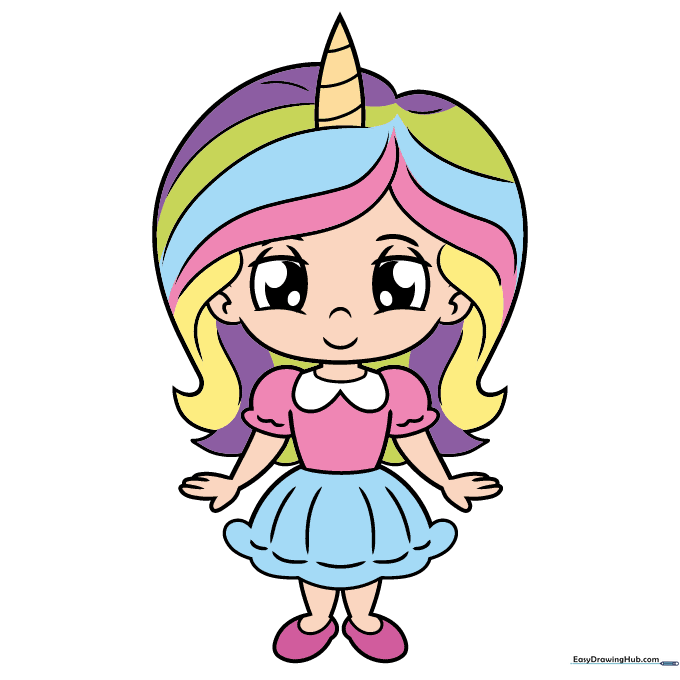
Time to color! Use bright rainbow colors for the hair and matching tones for the dress. Teacher's Tip: Try using colored pencils and layering light colors first to create a soft, magical glow.
More Tutorials


