How to Draw a TV: Simple 10-Step Guide for Kids
Perfect for young artists ages 5 and up, this tutorial teaches you how to construct a television using basic geometric shapes. All you need is a pencil, an eraser, and a piece of paper to get started. Follow along to master perspective and clean line work while creating your own media masterpiece.
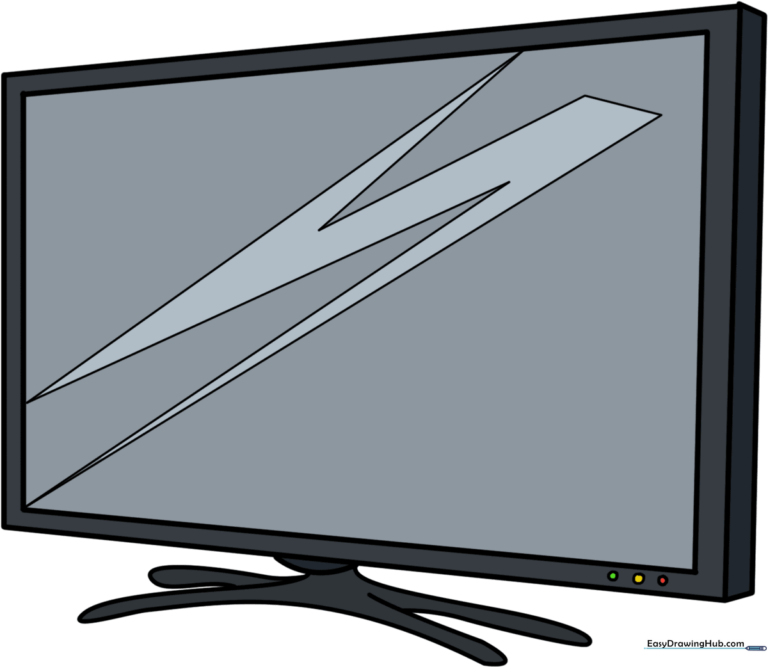
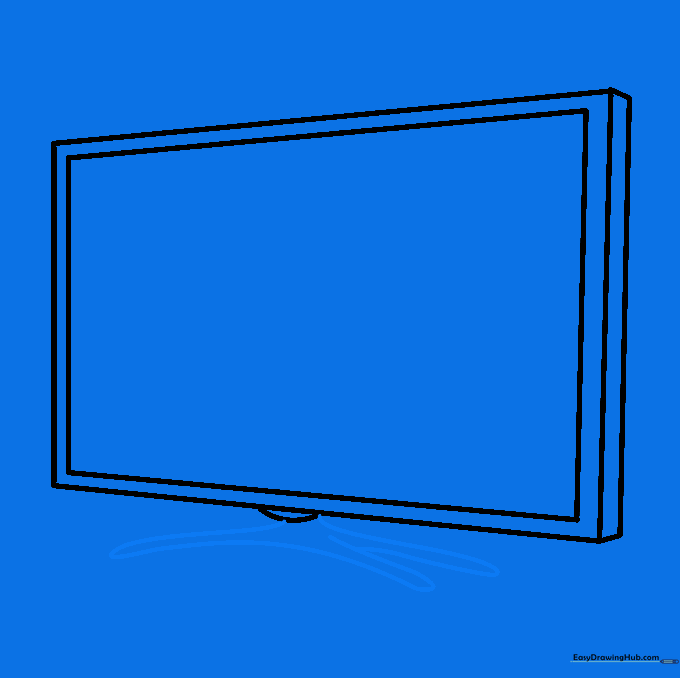
🎯 Final Result
Step-by-Step Instructions
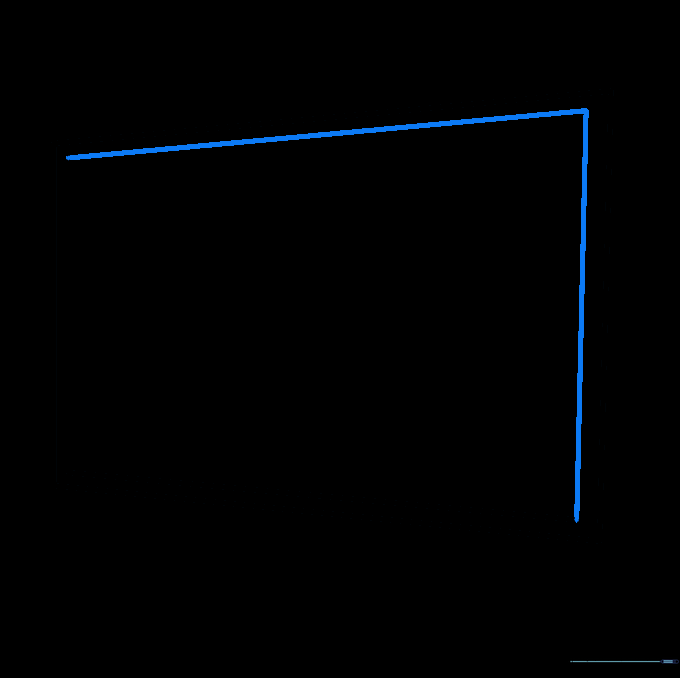
Step 1: Sketching the Top and Side

Begin by drawing two straight lines that meet to form an "L" shape. Teacher's Tip: Use a light touch with your pencil so you can easily adjust the proportions if the lines aren't perfectly straight.
Step 2: Closing the Frame
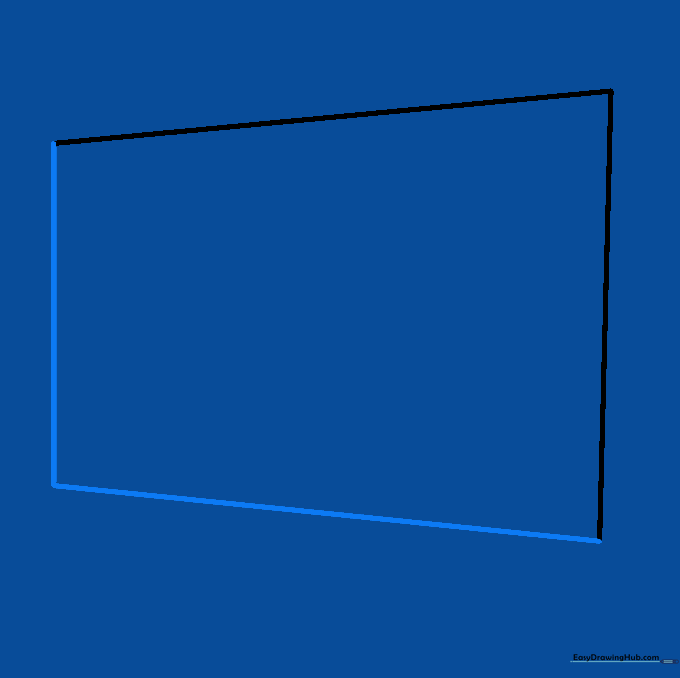
Draw two more straight lines to enclose the rectangle. Keep the side line slightly shorter to create a subtle trapezoid effect. Tip: Imagine you are drawing a box that is slightly tilted toward the viewer.
Step 3: Starting the Screen
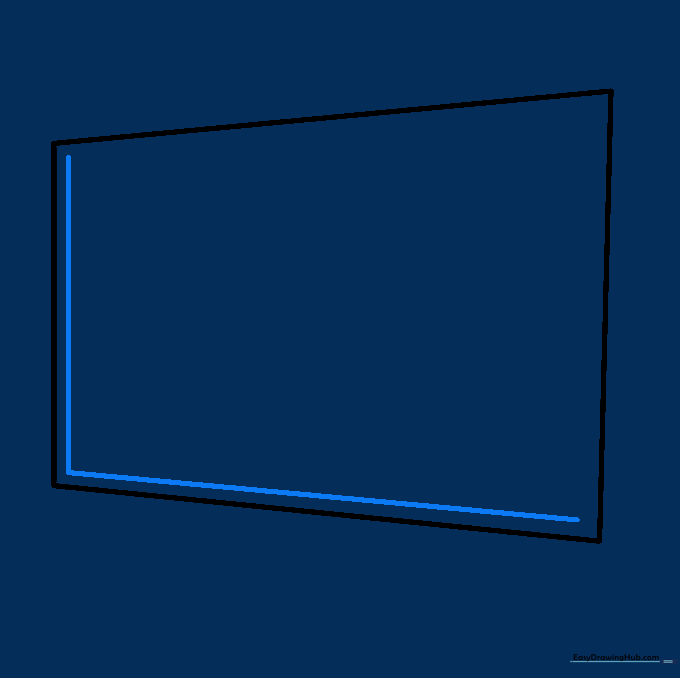
Draw an "L" shaped line inside the frame, parallel to the bottom and side edges. This creates the inner border of the screen. Tip: Keep your spacing consistent to make the frame look even.
Step 4: Completing the Screen Border
Add two more straight lines parallel to the top and remaining side to finish the screen border. Tip: If your lines are a bit wobbly, use a ruler to help build confidence in your straight-line technique.
Step 5: Adding Depth

Extend short lines from the corners and connect them to create a 3D side panel. Tip: This simple technique is the secret to making flat drawings look like real objects sitting in a room.
Step 6: Drawing the Base

Draw a semi-circular curve at the bottom center. Tip: Think of this as the 'foot' of the TV; keep it centered so the TV looks balanced and stable.
Step 7: Shaping the Stand
Extend curved lines outward from the base and connect them. Tip: Use smooth, fluid motions to make the stand look sleek and modern.
Step 8: Finalizing the Stand

Add a second leg by doubling back a curved line. Tip: Ensure the legs are symmetrical to keep your drawing looking professional.
Step 9: Adding Details
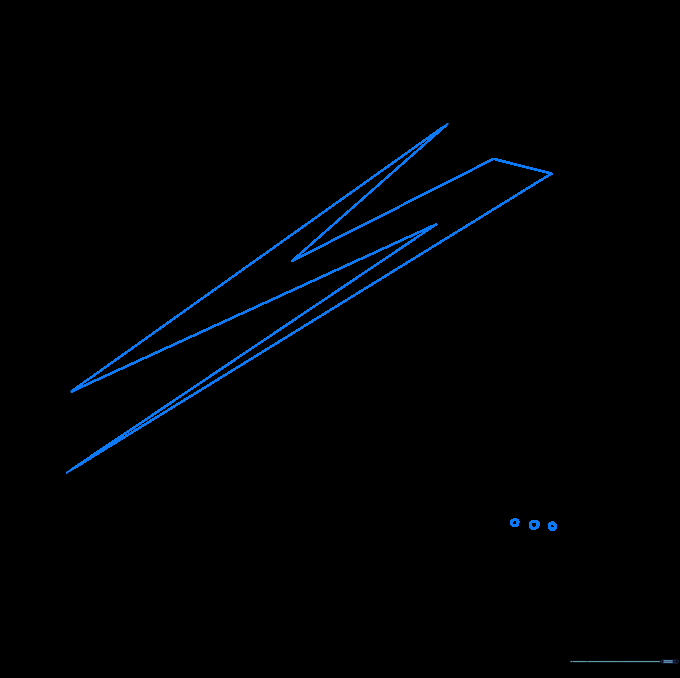
Draw a lightning bolt shape on the screen for glare and three small circles for buttons. Tip: The glare adds a 'shiny' effect that makes the screen look like glass.
Step 10: Adding Color
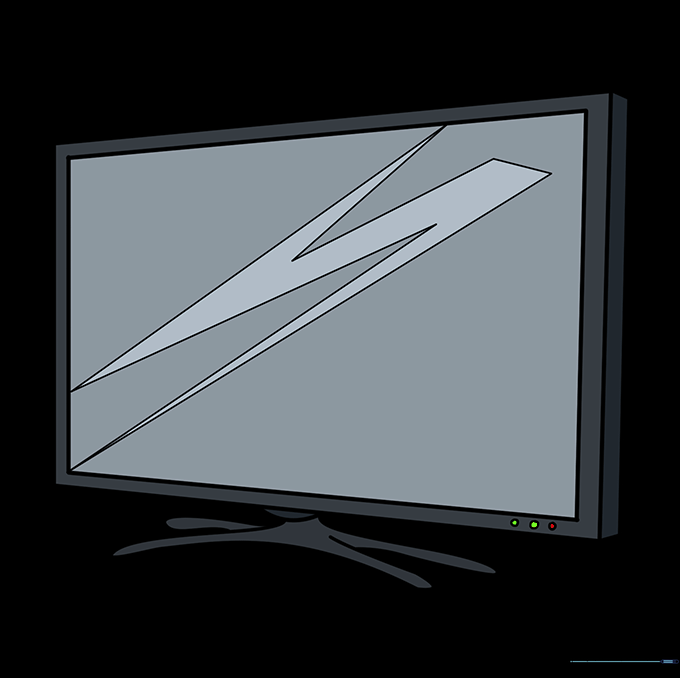
Bring your TV to life with color! Use dark greys or blacks for the frame, and try light blues for the screen glare. Tip: Use a light touch with your colored pencils to create a smooth, even finish.
More Tutorials


