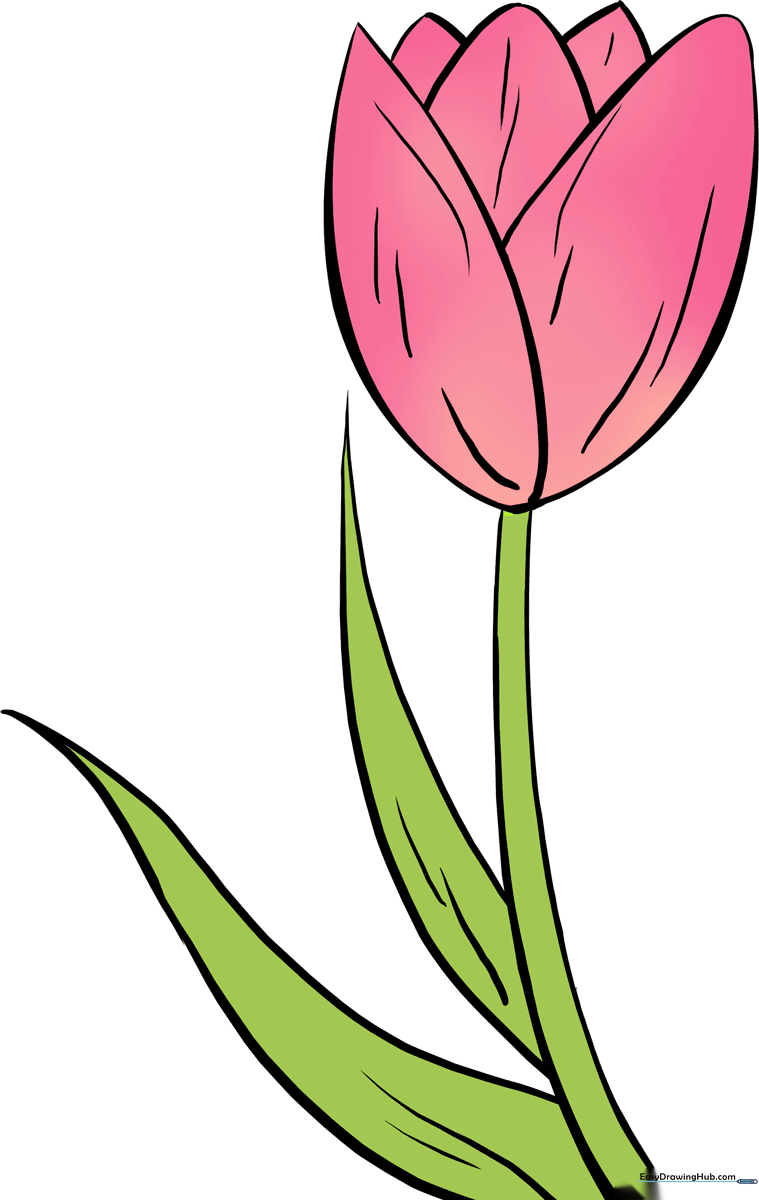
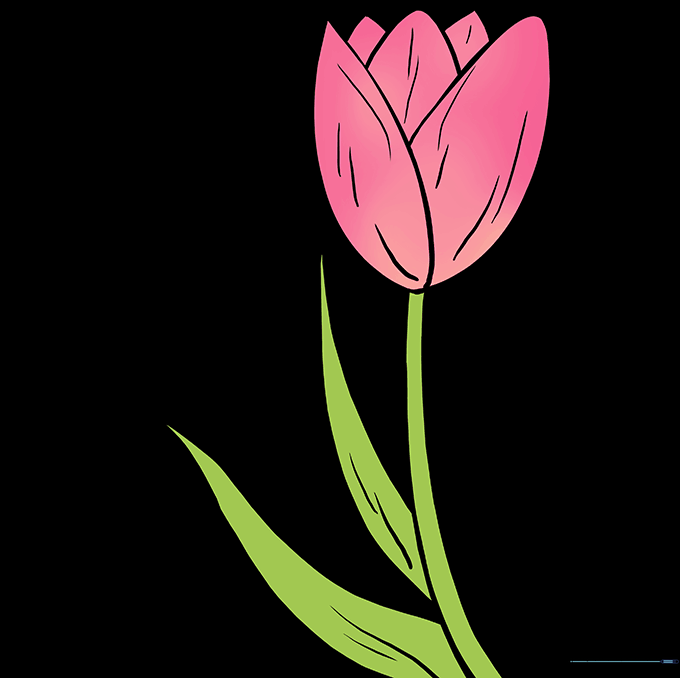
How to Draw a Tulip: Easy 10-Step Guide for Kids
This tulip drawing tutorial is perfect for young artists ages 5 and up. All you need is a pencil, an eraser, and your favorite coloring supplies to bring this spring flower to life. Follow along to practice basic shapes and build confidence in your drawing skills.
🎯 Final Result
Step-by-Step Instructions
Sketching the Stem

Draw two long, slightly curved parallel lines to create the stem. Teacher's Tip: Keep these lines close together to make the stem look sturdy and realistic.
Outlining the Flower Head

Draw a large, wide 'U' shape at the top of your stem. This creates the main cup of the tulip. Tip: Make sure the bottom of the 'U' connects smoothly to your stem lines.
Defining the First Petal

Draw a curved line inside the 'U' to create a teardrop-like petal shape. Tip: Imagine you are drawing a soft, rounded triangle.
Adding the Second Petal

Draw another curved line overlapping the first to form a second petal. Tip: Overlapping shapes is a great way to create the illusion of depth in your drawing.
Closing the Flower Top

Draw an upside-down 'U' shape at the top to finish the petal structure. Tip: Keep this line soft and rounded to make the flower look natural.
Drawing the First Leaf

Extend two curved lines from the stem that meet at a sharp point. Tip: Tulip leaves are long and pointy, so don't be afraid to make them nice and tall!
Adding the Second Leaf

Repeat the process on the other side of the stem to add a second leaf. Tip: Try to make this leaf curve in a different direction to add movement to your drawing.
Refining Petal Details

Add short, curved lines between the petals to show where they overlap. Tip: These small details make your drawing look much more professional.
Adding Texture

Add a few light, curved lines along the leaves and petals to suggest texture. Tip: Keep these lines very thin so they look like natural veins in the plant.
Coloring Your Tulip
Time to color! Tulips come in almost every color imaginable. Tip: Use bright reds, yellows, or purples for the flower and a vibrant green for the stem and leaves.
More Tutorials


