How to Draw a Truck: Easy 10-Step Guide for Kids
Ready to hit the road? This tutorial is perfect for young artists ages 5 and up who want to sketch their own sturdy pickup truck. All you need is a pencil, an eraser, and a piece of paper to get started. By the end, you'll have a custom vehicle ready for any adventure you can imagine.
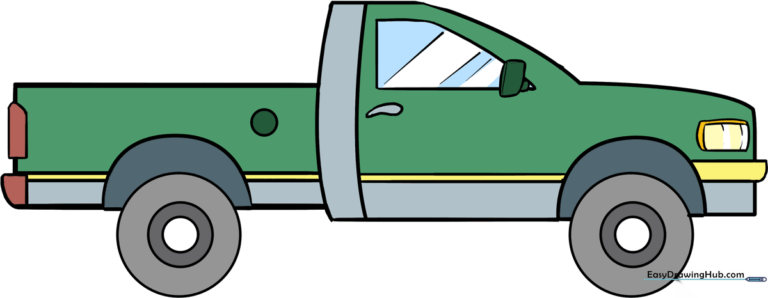
🎯 Final Result
Step-by-Step Instructions
Step 1: Sketching the Main Body

Draw a simple square to act as the main body of your truck. Teacher's Tip: Keep this light! It's just a guide to help you place the rest of the truck parts later.
Step 2: Adding the Cargo Bed

Draw a rectangle extending from one side of your square. This is where your truck carries its heavy loads! Tip: Make sure the bottom lines of the square and rectangle align to keep your truck level.
Step 3: Shaping the Cab

Create the front hood and windshield by drawing a diagonal line from the top of your square, then a horizontal line forward. Connect these with a small vertical line. Tip: Think of this as the 'nose' of the truck.
Step 4: Defining the Panels
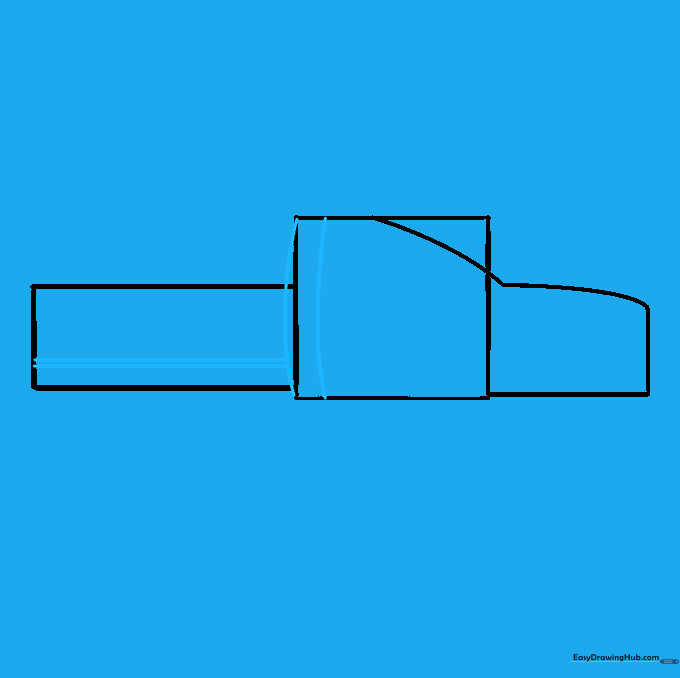
Add curved, parallel lines where the cab meets the bed. Draw two horizontal lines along the bottom of the rectangle. Tip: These lines add 'weight' to your drawing, making the truck look sturdy.
Step 5: Cleaning Your Lines

Carefully erase the extra guide lines inside the truck body. Tip: Use a soft eraser and gentle strokes so you don't wrinkle your paper.
Step 6: Adding Details

Draw the window, door handle, and wheel wells. Use a comma shape for the handle. Tip: Keep your lines smooth and steady for a clean, cartoon-style look.
Step 7: Refining the Wheel Wells

Erase the lines inside your wheel arches. Tip: This creates a clean space for your tires to sit, making the drawing look more realistic.
Step 8: Drawing the Tires
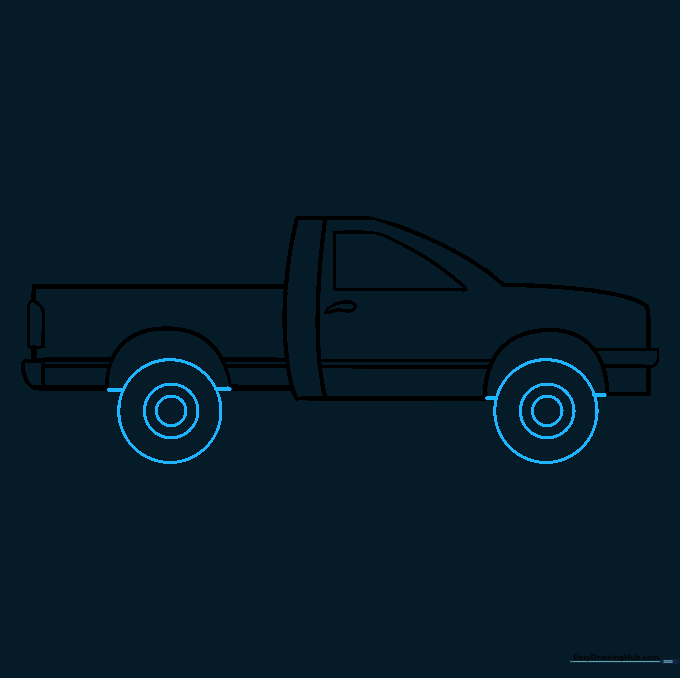
Draw three circles inside each other for the tires and hubcaps. Connect them to the body with short lines. Tip: Use a circular object like a coin if you need help making perfect circles!
Step 9: Final Touches
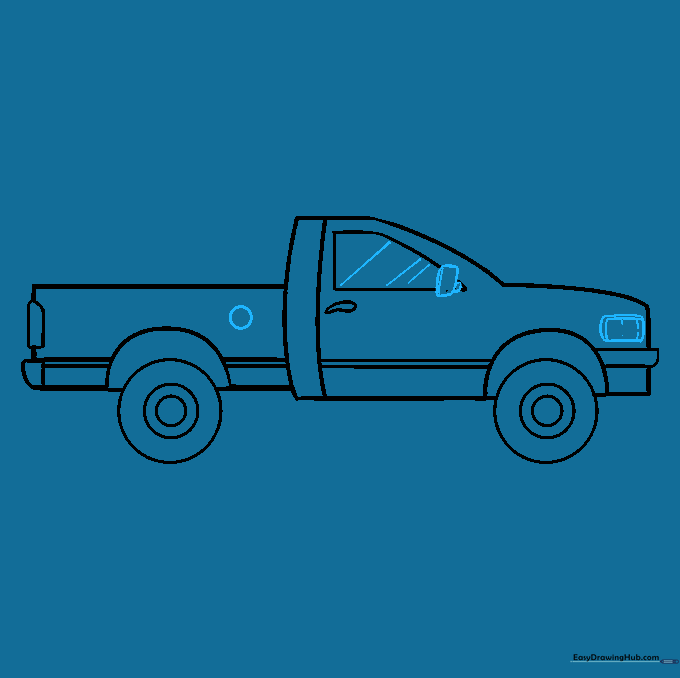
Add the headlight, rearview mirror, and gas cap. Sketch diagonal lines on the window to show glass. Tip: These small details really bring your vehicle to life.
Step 10: Coloring Your Truck

Bring your truck to life with color! Use bright reds, blues, or even metallic silvers. Tip: Add a background like a farm or a city street to tell a story with your art.
More Tutorials


