How to Draw a Tribal Wolf: Easy 10-Step Guide
Ready to create a bold, stylized piece of art? This tribal wolf tutorial is perfect for artists ages 8+ looking to practice clean line work and geometric patterns. Grab a pencil, a fine-liner pen, and some paper to get started on this striking design.
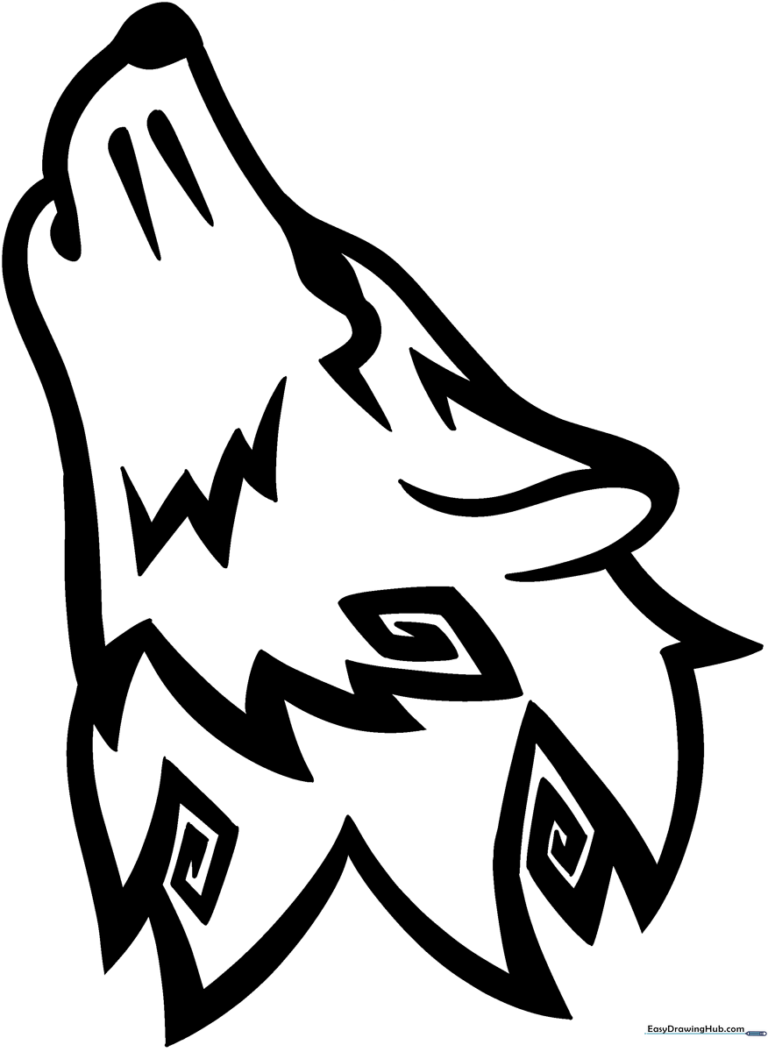
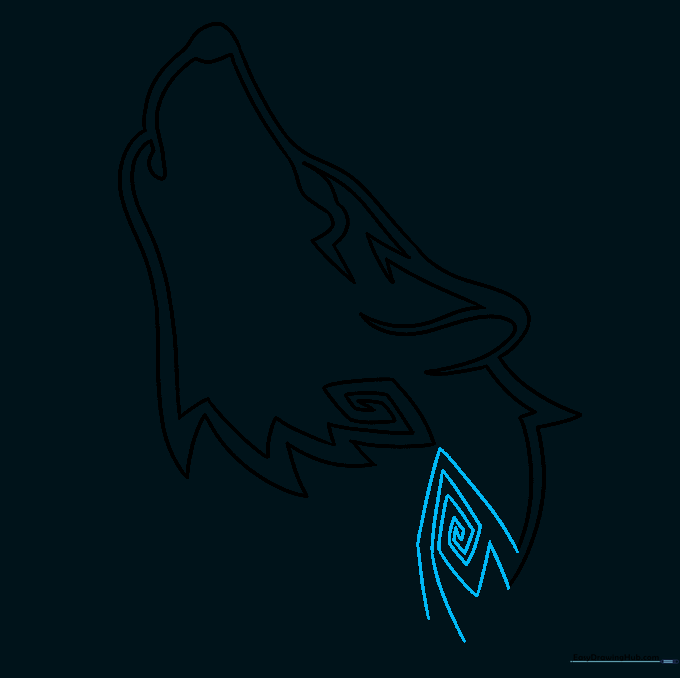
🎯 Final Result
Step-by-Step Instructions
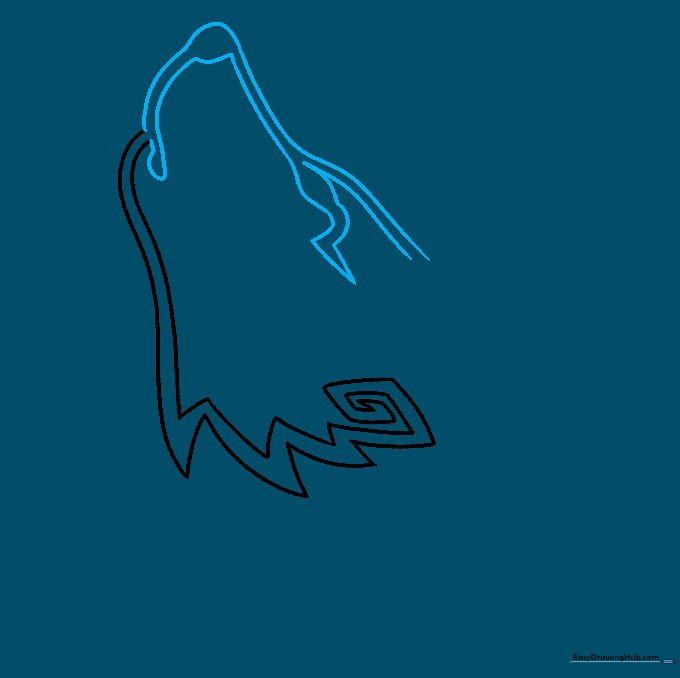
Step 1: Sketching the Neck Ruff

Start by drawing a curved line for the neck. Add a series of jagged, zigzag lines at the base to create the wolf's fur ruff. Tip: Keep your pencil pressure light here so you can easily adjust the fur's volume later.
Step 2: Defining the Profile
Draw a long, sweeping curve for the nose and brow. Create the mouth by doubling back a curved line, and sketch a simple almond shape for the eye. Tip: Ensure the eye is placed slightly above the snout line to give the wolf a focused expression.
Step 3: Adding the Ear
Sketch the outer edge of the ear with a long, graceful curve. Add inner details using sharp, triangular zigzags to give it that classic tribal aesthetic. Tip: Make the ear point slightly backward to give your wolf a alert, listening posture.
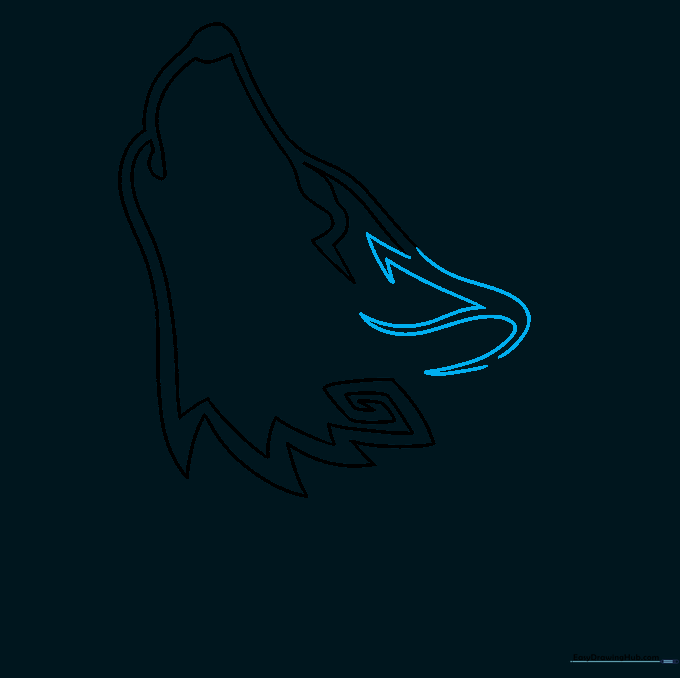
Step 4: Building the Tribal Patterns
Connect pairs of curved lines that taper to sharp points. These shapes will form the base of your tribal markings. Tip: Think of these as 'flame' shapes—keep them flowing in the same direction for a cohesive look.
Step 5: Creating the Spiral Detail
Draw a rough spiral shape on the cheek area. Connect the lines at the center to create a focal point. Tip: Use a steady hand; if you find spirals tricky, rotate your paper to make the curve more natural for your wrist.
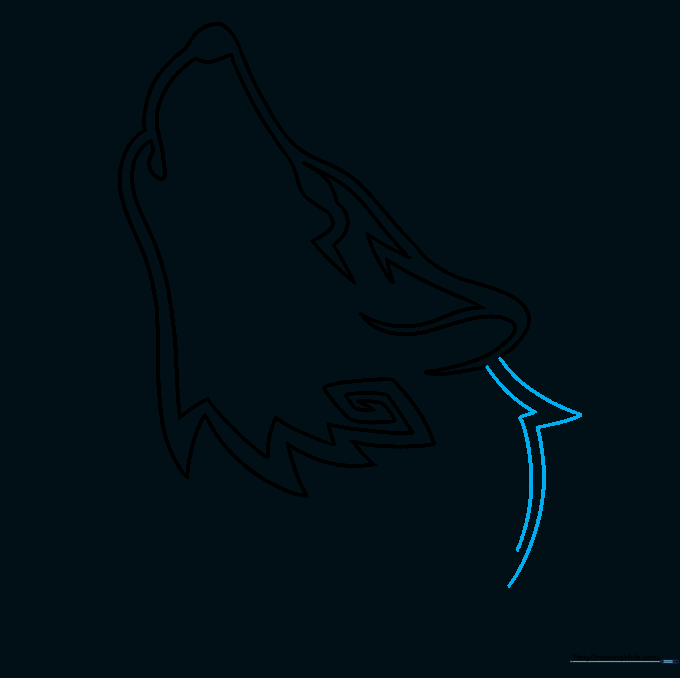
Step 6: Adding Fur Texture
Use long, sweeping curved lines that meet at sharp points to represent the fur. Add a small jagged spiral at the tip of the main fur cluster. Tip: Vary the length of these fur lines to make the wolf look more realistic and less like a static shape.
Step 7: The Lightning Bolt Mark
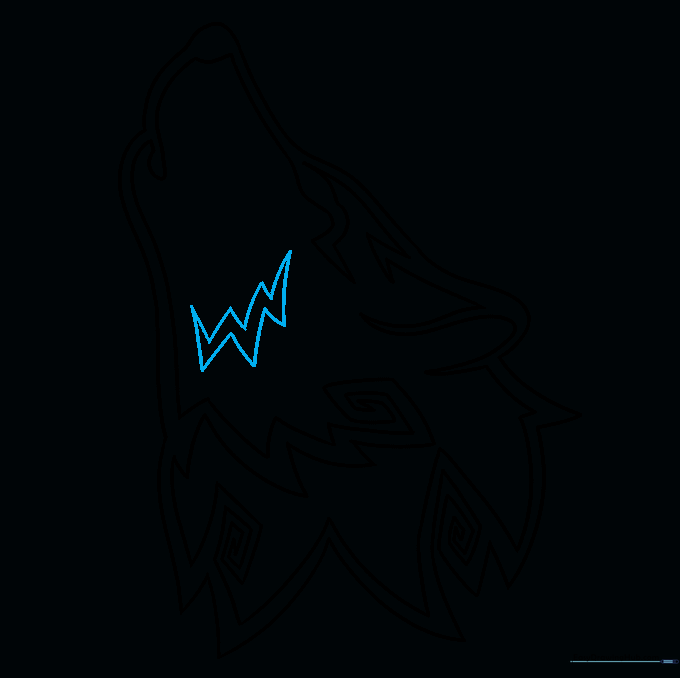
Draw a bold, zigzag 'lightning bolt' shape across the face. This adds a sense of movement and aggression to the design. Tip: Make the angles sharp—this is a key feature of tribal art.
Step 8: Refining the Snout
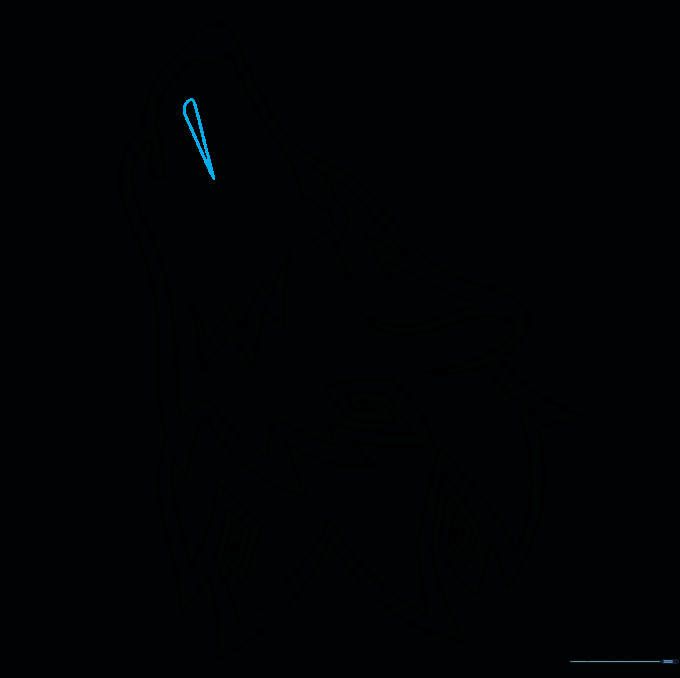
Draw an elongated teardrop shape along the snout. This helps balance the weight of the design. Tip: Ensure the teardrop follows the curve of the nose for a clean, professional finish.
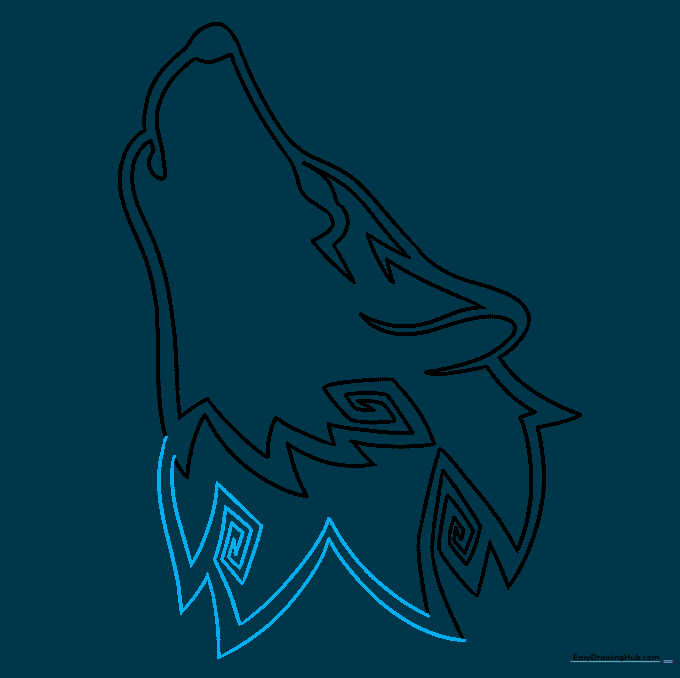
Step 9: Final Touches

Add a second teardrop shape near the first to complete the tribal pattern. Review your lines and erase any stray pencil marks. Tip: Now is the time to go over your sketch with a black pen to make the tribal design stand out.
Step 10: Coloring Your Masterpiece

Fill in your tribal shapes with black or a dark color to create a high-contrast effect. Tip: Use a felt-tip marker for solid, bold color, or colored pencils if you want to add subtle shading or gradients.
More Tutorials


