How to Draw a Thank You Card: Easy 10-Step Guide
Looking for a screen-free activity that combines art with kindness? This tutorial is perfect for children ages 5 and up to design their own personalized thank you card. All you need is a pencil, an eraser, and your favorite markers to bring this adorable bunny and floral design to life.
🎯 Final Result

Step-by-Step Instructions
Step 1: Sketching the Bunny's Face

Start by drawing two partial ovals for the eyes, placing two smaller ovals inside each to create a friendly gaze. Add a tiny rounded nose between them, then use soft, curved lines for the mouth and eyebrows. Teacher's Tip: Keep your pencil pressure light so you can easily adjust the expression if needed.
Step 2: Adding Ears and the First Flower
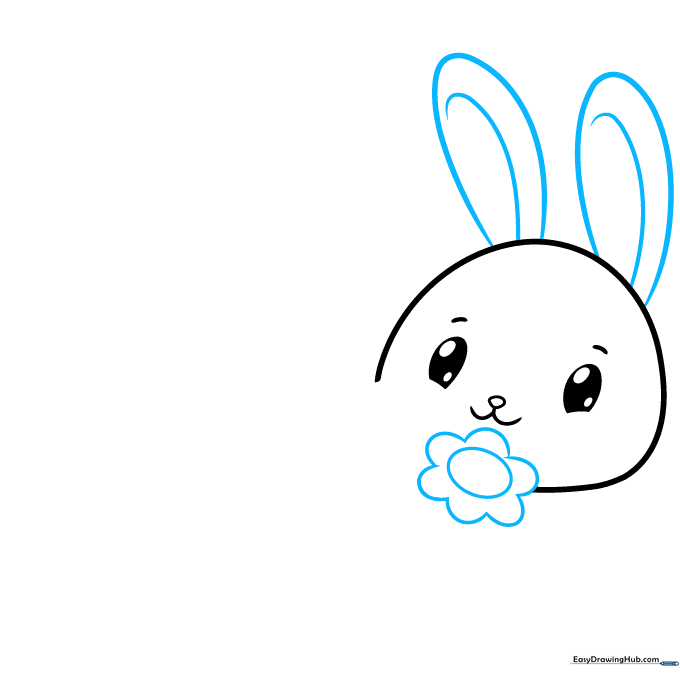
Extend long, curved lines from the head to form the bunny's ears, doubling them back to show depth. Below the chin, draw a simple flower using an oval center and connected, rounded petals. Teacher's Tip: Use a steady, fluid motion for the petals to keep them looking soft and organic.
Step 3: Expanding the Floral Bouquet
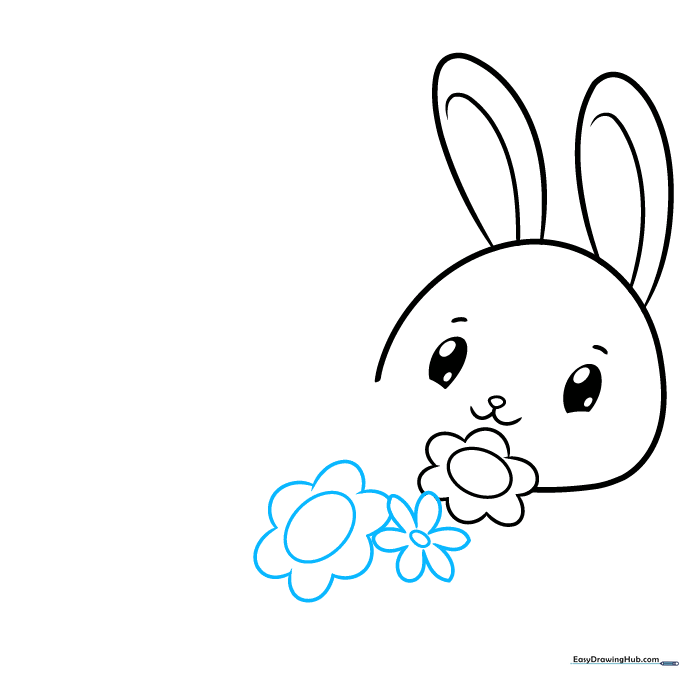
Add variety to your bouquet by drawing two more flowers. One should mirror your first daisy, while the second can feature longer, U-shaped petals. Teacher's Tip: Varying the petal shapes makes your drawing look more professional and visually interesting.
Step 4: Filling in the Flowers

Draw two more flowers to fill out the space. Give these six long, U-shaped petals each to create a balanced look. Teacher's Tip: Don't worry about making them perfect; flowers in nature are beautifully irregular!
Step 5: Adding Texture and Foliage
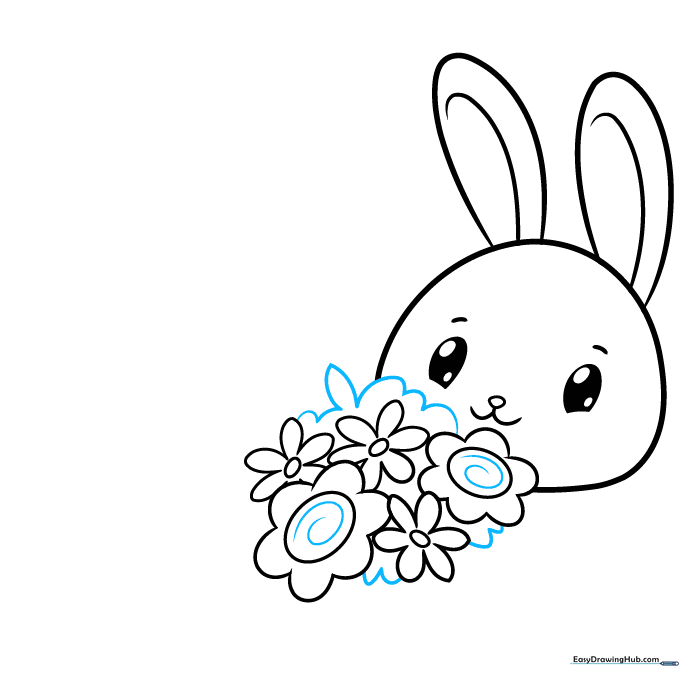
Add spiral details inside the larger flower centers to give them character. Then, use short, connected curved lines to draw leaves and foliage around the stems. Teacher's Tip: Spirals are great for practicing fine motor control—take your time with these!
Step 6: Drawing the Bunny's Body
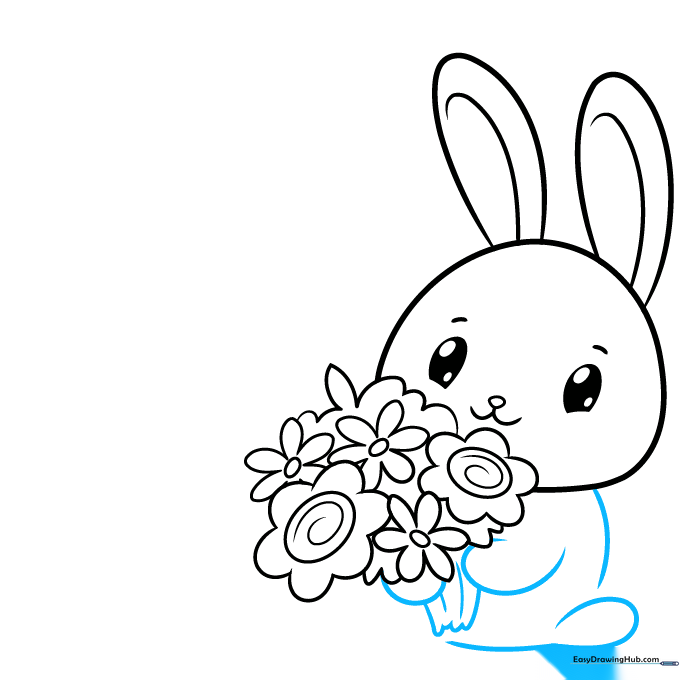
Sketch the bunny's back, front paws, and rear foot using soft, rounded lines. Enclose the flower stems with short, connecting lines to ground the bouquet. Teacher's Tip: Imagine the bunny is holding the flowers gently.
Step 7: Finalizing the Bunny and Adding Text

Complete the bunny's outline by adding the remaining foot and a fluffy tail. Add two small lines to each paw for toes. Finally, write "Thank You" in bold, cursive letters beside your bunny. Teacher's Tip: If cursive is tricky, print lettering works just as well!
Step 8: Adding Decorative Details

Write "very much" underneath your main text. Add partial daisy flowers to the corners of your card to frame the design. Teacher's Tip: Partial flowers make the card look like a complete, professional illustration.
Step 9: Filling the Background

Fill any empty space on your card with small circles and curved lines to create tiny daisies. Teacher's Tip: Use different sizes to create a sense of depth and make the card look festive.
Step 10: Bring Your Card to Life with Color

Your outline is complete! Now, add color. We suggest soft pastels like pink and yellow for a sweet look, but feel free to use your favorite colors to make it unique. Teacher's Tip: Use colored pencils for a soft blend or markers for bold, vibrant results.
More Tutorials


