How to Draw a Surprised Face: Easy 10-Step Guide
Capture big emotions on paper! This tutorial is perfect for young artists ages 6+ looking to add character to their drawings. You only need a pencil, eraser, and paper to follow along and learn how to illustrate a classic 'shocked' expression.
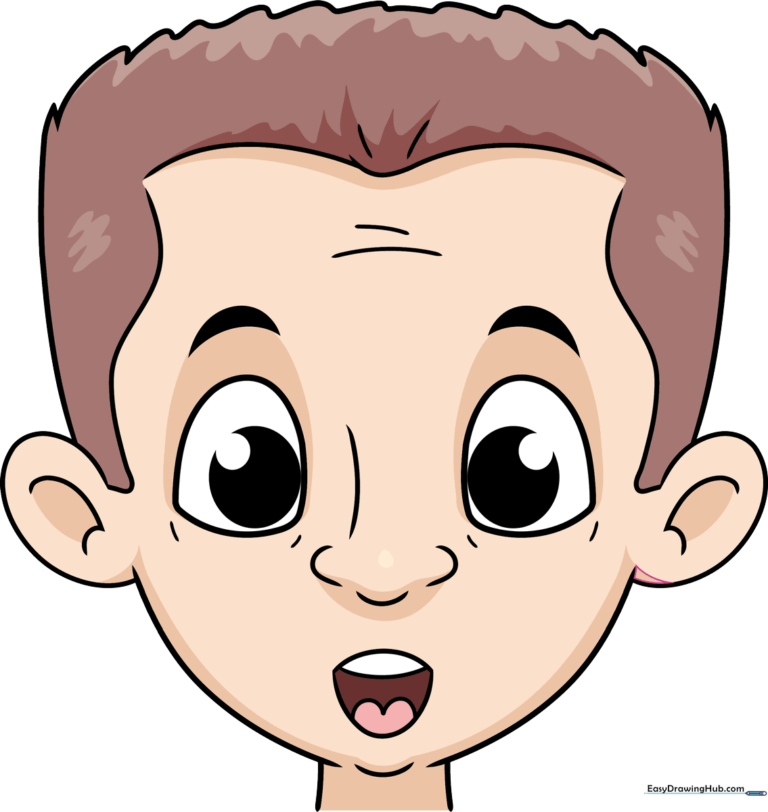
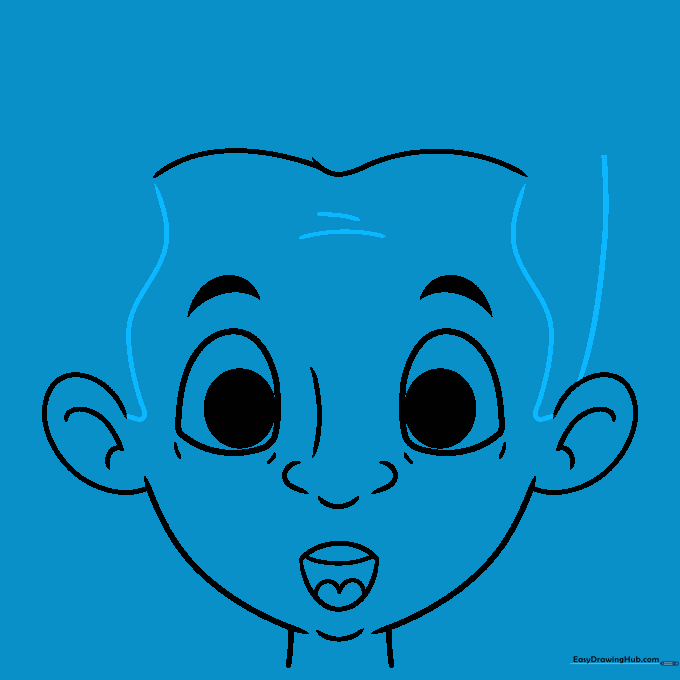
🎯 Final Result
Step-by-Step Instructions
Step 1: Sketching the Shocked Eyes

Draw two large, rounded shapes for the eyes. Teacher's Tip: Keep your pencil pressure light so you can easily adjust the size if they look a bit uneven. Fill in a dark circle inside each to create that wide-eyed, surprised look.
Step 2: Adding Brows and Nose

Sketch arched eyebrows high above the eyes to show intensity. Add a simple nose bridge using two gentle curves. Teacher's Tip: Use short, flicking motions for the lines under the eyes to suggest the skin bunching up in surprise.
Step 3: Shaping the Open Mouth

Draw a large, rounded shape for the mouth to show a gasp. Add a horizontal line inside for the teeth. Teacher's Tip: Make the mouth nice and big—the wider the mouth, the more surprised the character looks!
Step 4: Defining the Jawline
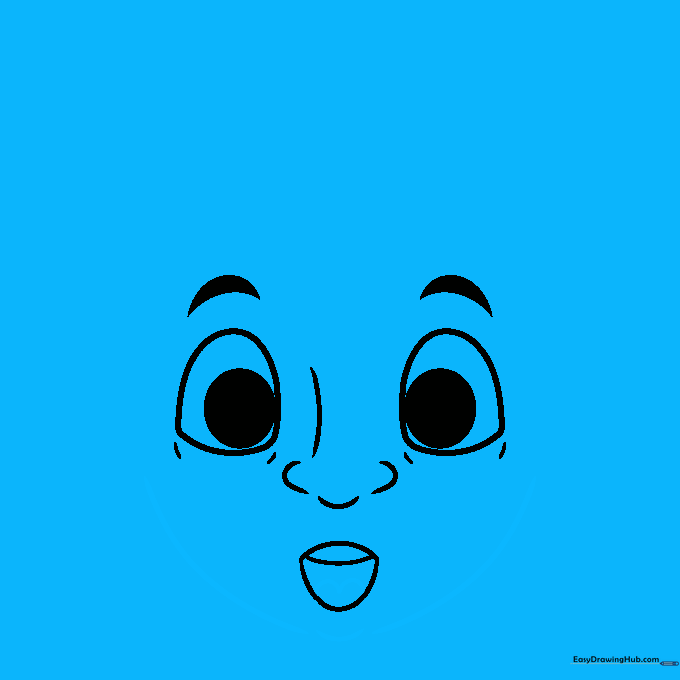
Add an 'M' shape inside the mouth for the tongue. Then, draw the sides of the face and a rounded chin. Teacher's Tip: Use long, smooth strokes for the jaw to keep the face looking clean and symmetrical.
Step 5: Drawing Ears and Neck
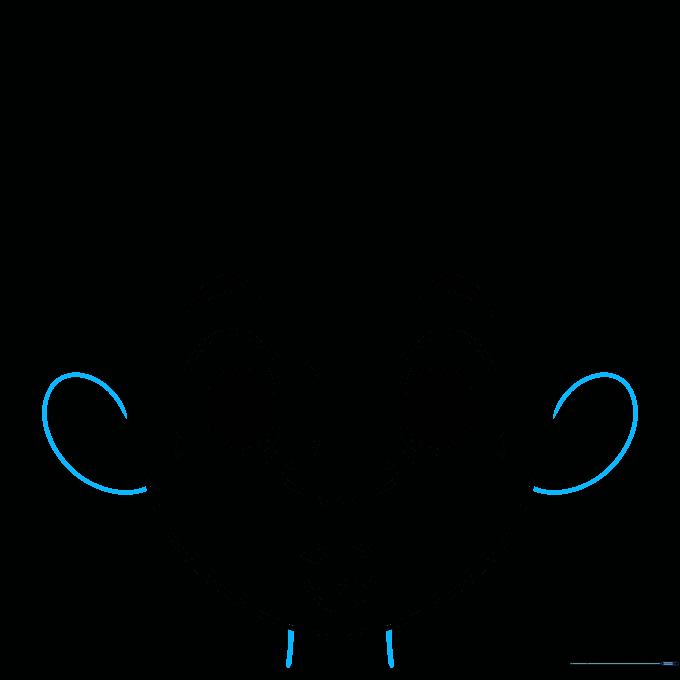
Add 'C' shaped ears on the sides of the head and two vertical lines for the neck. Teacher's Tip: Align the top of the ears with the eyes and the bottom with the nose for realistic proportions.
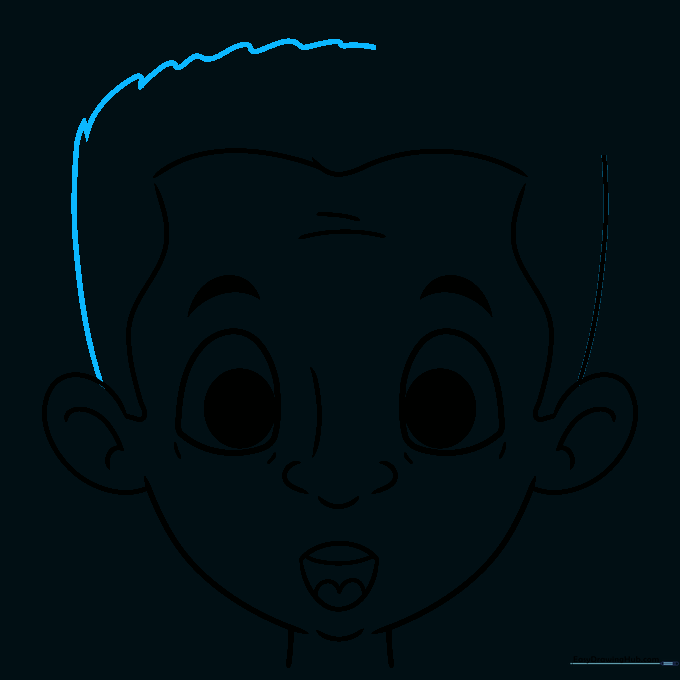
Step 6: Detailing Ears and Hairline
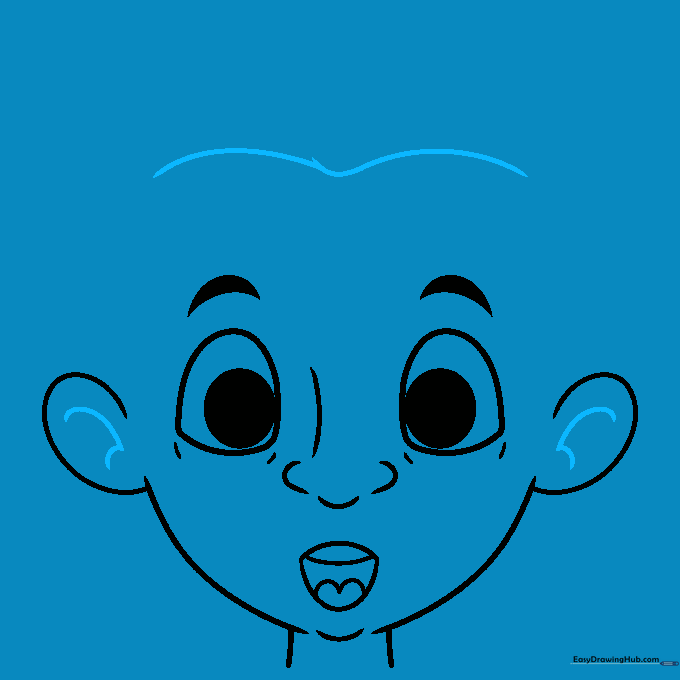
Add small 'L' shapes inside the ears for depth. Begin sketching the hairline with overlapping curves. Teacher's Tip: Don't worry about making the hair perfect; messy, overlapping lines actually look more natural.
Step 7: Adding Forehead Wrinkles
Draw horizontal, curved lines on the forehead to show surprise. Sketch the sideburns. Teacher's Tip: Keep these lines faint—they are just subtle hints of expression, not deep creases.
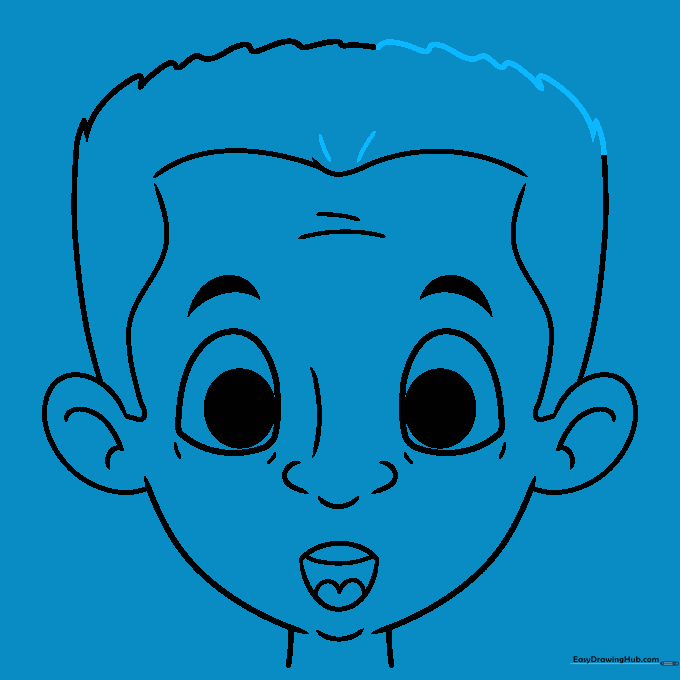
Step 8: Styling the Hair
Continue drawing the sides of the head and add more curved lines for the hair. Teacher's Tip: Vary the length of your strokes to make the hair look textured and fluffy.
Step 9: Finalizing the Outline
Close the top of the head with your hair lines. Add a few short strokes for extra detail. Teacher's Tip: Now is the time to go over your favorite lines with a darker pencil or pen to make them pop!
Step 10: Bringing it to Life with Color

Time to color! Use your favorite markers or crayons. Teacher's Tip: Try using bright, bold colors for the hair or skin to give your character a unique personality. Who does this person look like?
More Tutorials


