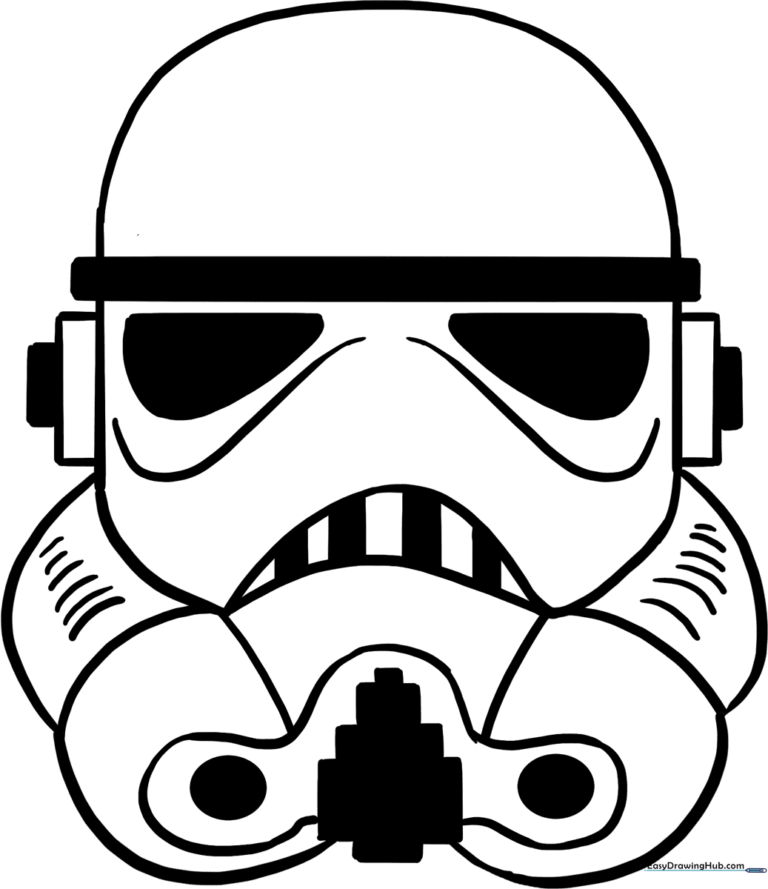
How to Draw a Stormtrooper Helmet: Easy 10-Step Guide
Ready to join the Galactic Empire? This tutorial is perfect for young Star Wars fans ages 6+ looking to master character design. You only need a pencil, an eraser, and a piece of paper to bring this iconic helmet to life. Follow along to build confidence in your sketching skills while creating a clean, professional-looking helmet.
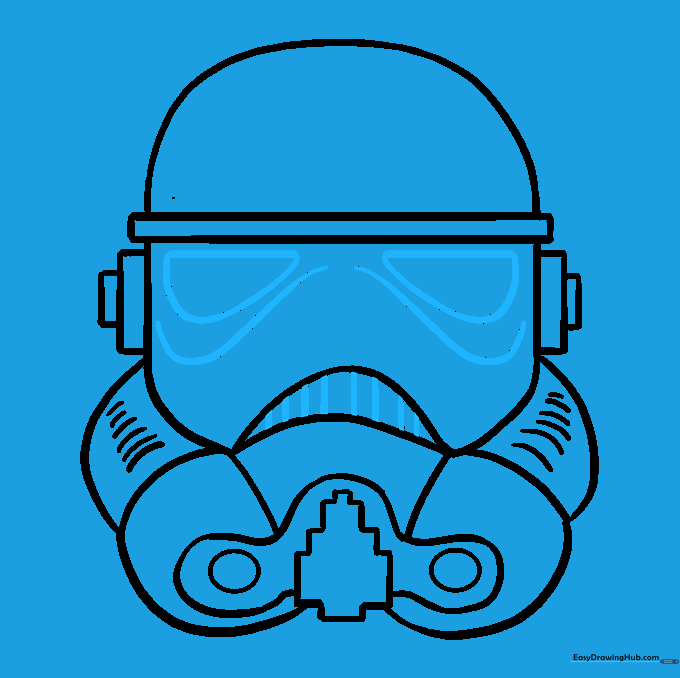
🎯 Final Result
Step-by-Step Instructions
Step 1: Sketching the Helmet Crown
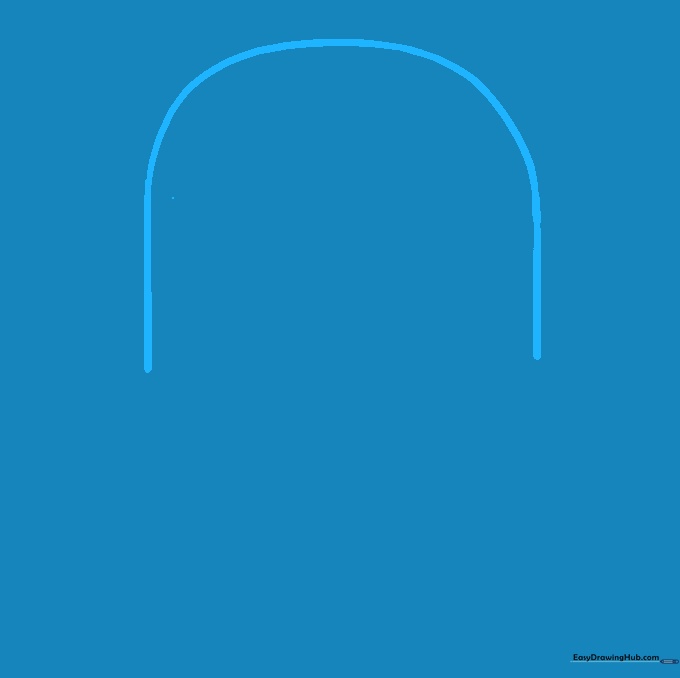
Draw a wide, gentle curve for the top of the helmet, then drop straight lines down from each side. Teacher's Tip: Keep this shape symmetrical by checking the distance from the center line to both sides.
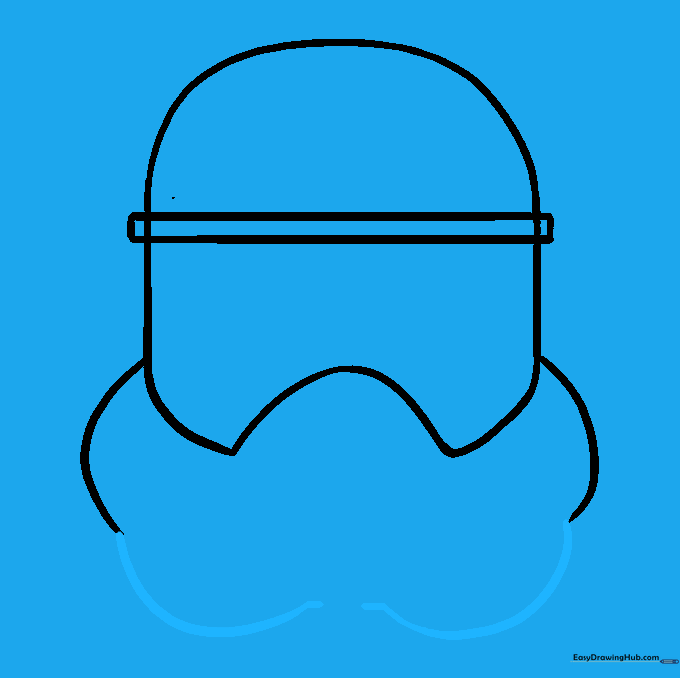
Step 2: Defining the Helmet Base
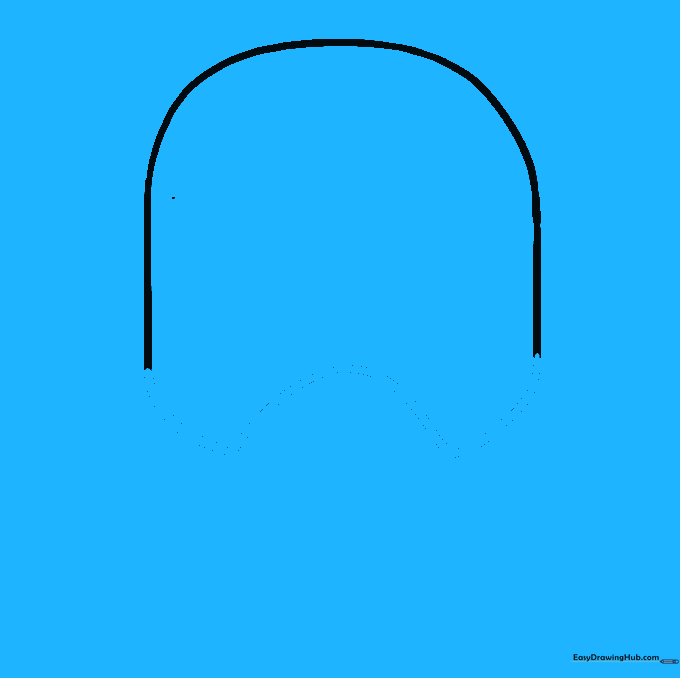
Connect the sides with a curved line that dips in the center, resembling a wide 'W'. Tip: Think of this as the jawline of the helmet; keep it smooth and rounded.
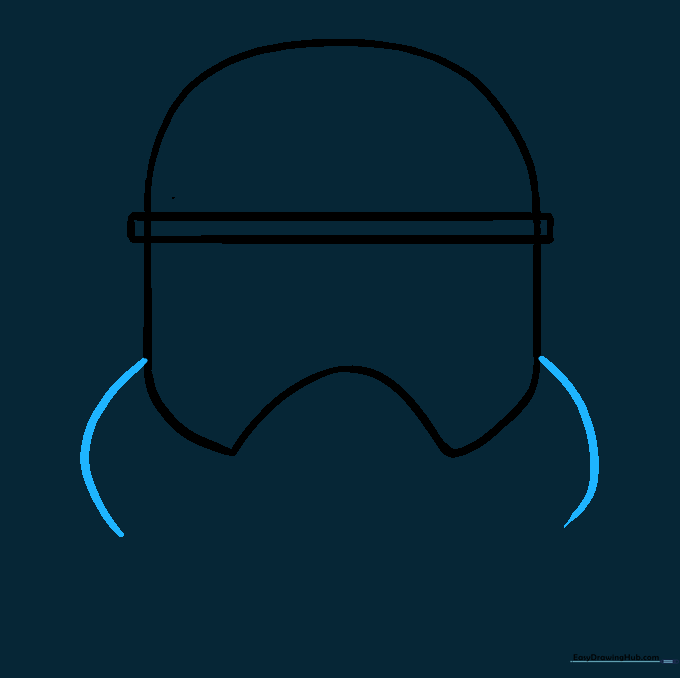
Step 3: Creating the Visor

Draw a narrow horizontal rectangle across the middle. This is the eye-slit. Tip: Use a ruler if you struggle with straight lines, but try freehand first to build muscle memory!
Step 4: Outlining the Respirator
Add curved lines extending down from the sides of the visor area. These define the respirator mask. Tip: Keep your pencil pressure light so you can adjust the curve if it looks uneven.
Step 5: Refining the Respirator
Draw another set of curved lines beneath the first set to build the depth of the mask. Tip: Imagine you are drawing the layers of a sandwich; keep the lines parallel for a clean look.
Step 6: Adding Geometric Detail
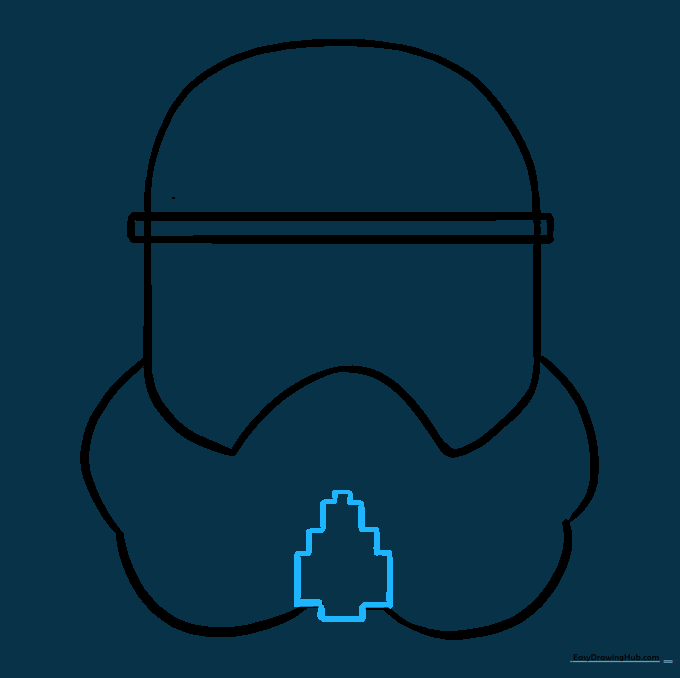
Connect the lines with short, straight segments to create a zigzag pattern. Tip: This looks like a Lego pyramid—take your time to make the angles sharp and consistent.
Step 7: Adding Side Lobes
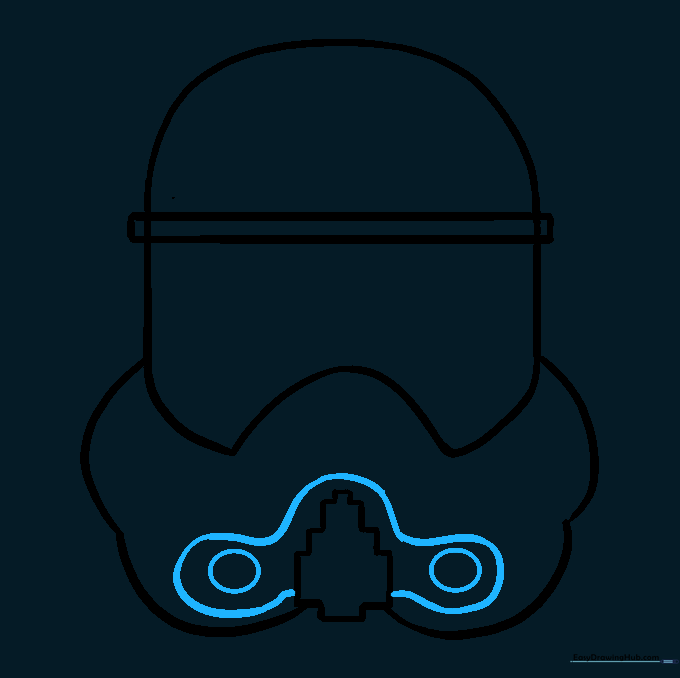
Draw a three-lobed shape on the side of the mask and add two small circles inside the lower lobes. Tip: These represent the air filters—keep them small and neat.
Step 8: Mask Contouring
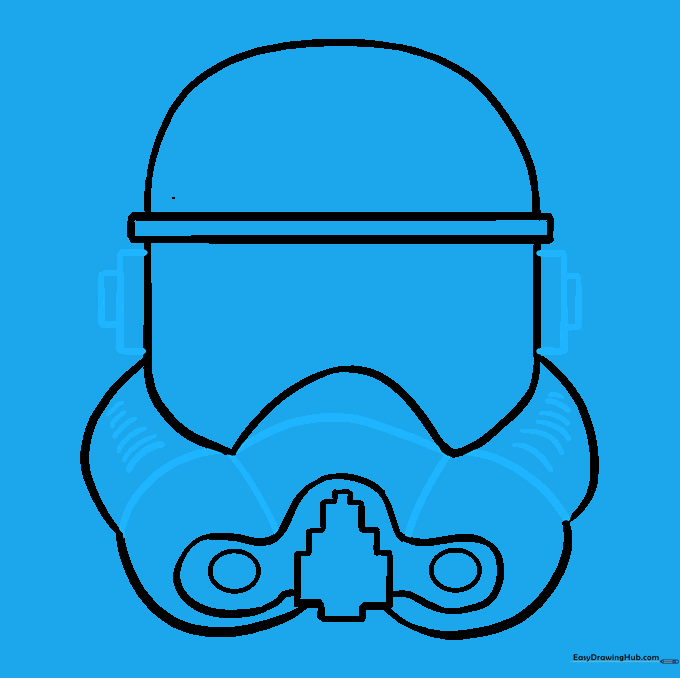
Add vertical rectangles and curved contour lines to the sides of the mask. Tip: Use hatching (short, thin lines) to add texture to the sides, making the helmet look 3D.
Step 9: Finalizing the Visor
Draw parallel lines in the center and shape the eye openings with straight and curved lines. Tip: The eyes are the most recognizable part—take your time to get the shape right.
Step 10: Coloring Your Helmet
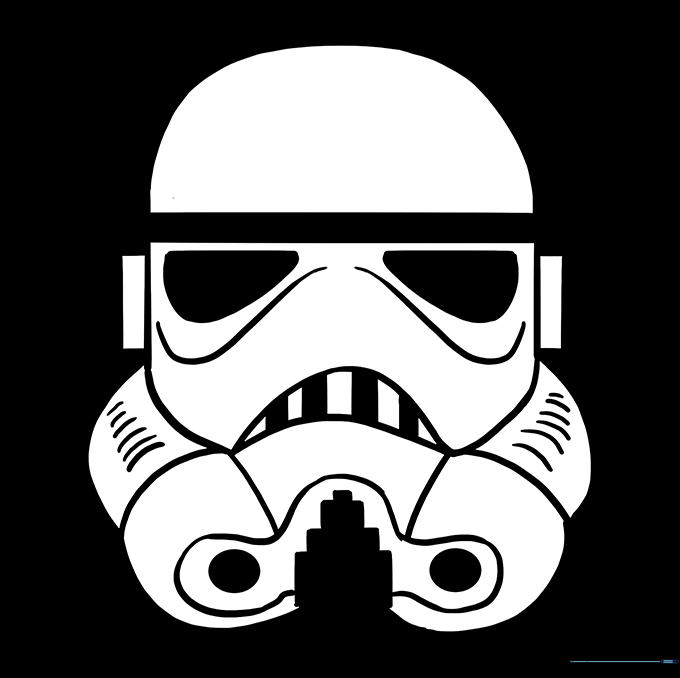
Time to color! Use white for the main helmet and black for the visor and details. Tip: Use a light grey pencil to add subtle shadows to the white areas to give it a realistic, metallic look.
More Tutorials


