How to Draw a Staircase: Easy 10-Step Perspective Guide
Ready to build your drawing skills? This tutorial is perfect for artists ages 7+ looking to master basic perspective. All you need is a pencil, eraser, and paper to create a realistic-looking staircase that adds depth to any architectural sketch.
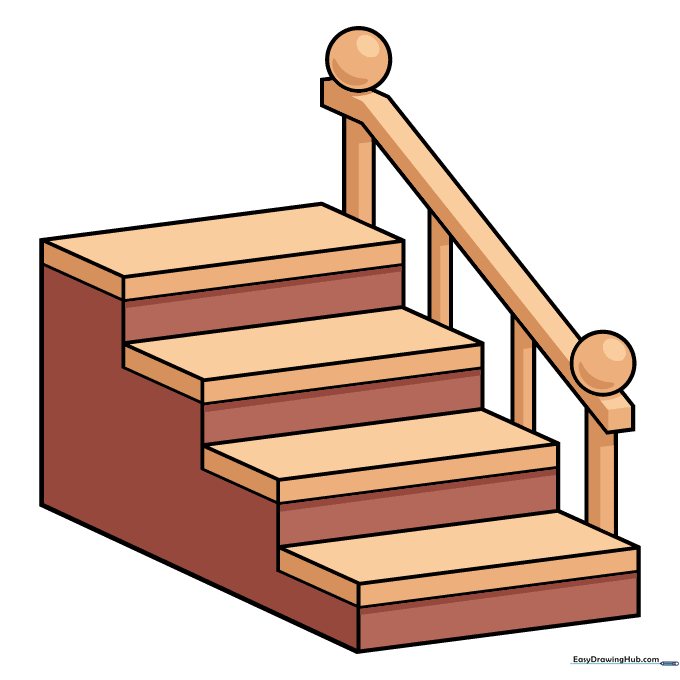
🎯 Final Result

Step-by-Step Instructions
Step 1: Sketching the Base Spiral
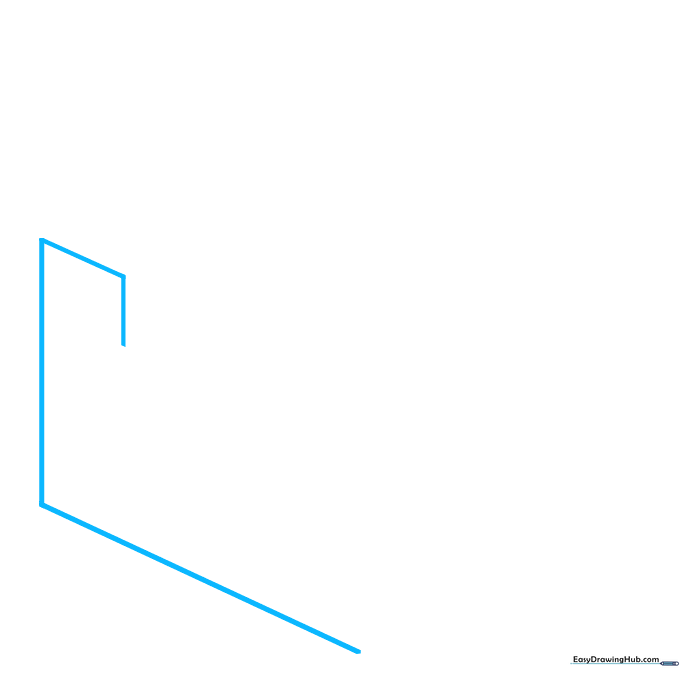
Start by drawing a series of straight lines in a spiral pattern. Use a long diagonal line, a shorter vertical line, a short diagonal parallel to the first, and a short vertical line. Teacher's Tip: Keep your pencil pressure light so you can easily adjust the angles if they don't look perfectly parallel.
Step 2: Creating the Zig-Zag Profile
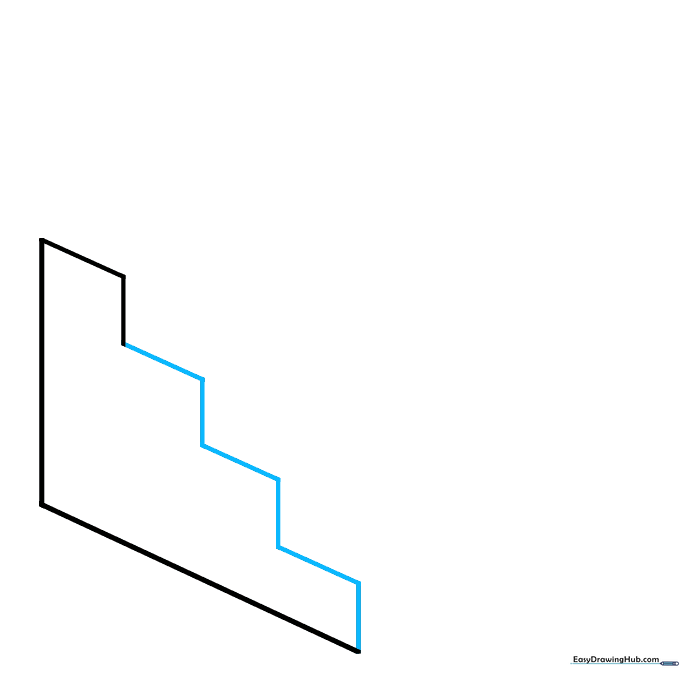
Use a series of short, straight diagonal and vertical lines in a zig-zag pattern to enclose the shape. Ensure the diagonal portions are parallel to your first line. Teacher's Tip: Think of this as drawing the 'side view' of the steps; consistency in the length of these lines makes the stairs look uniform.
Step 3: Defining the Opposite Side
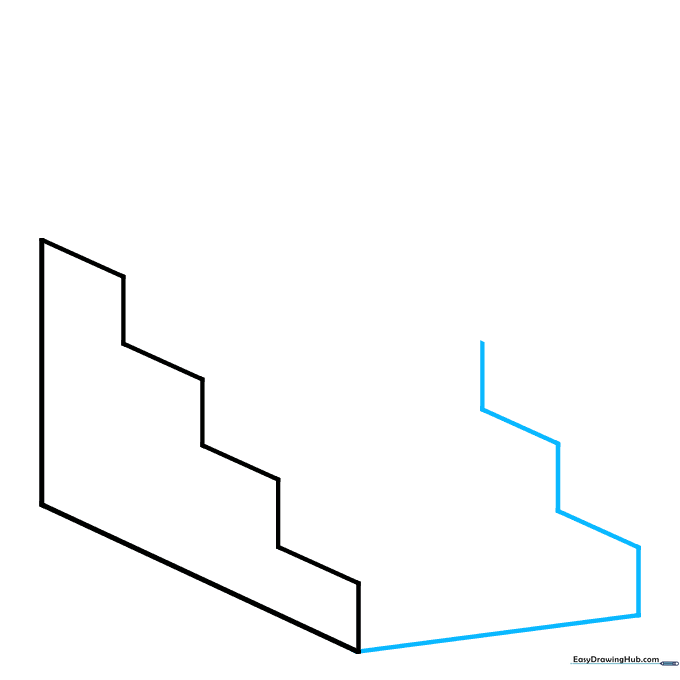
From the front corner, extend a straight line on an opposite diagonal. On the other side, mirror the zig-zag pattern. Teacher's Tip: Use a ruler if you are struggling to keep your lines straight—architects use tools all the time!
Step 4: Adding 3D Depth
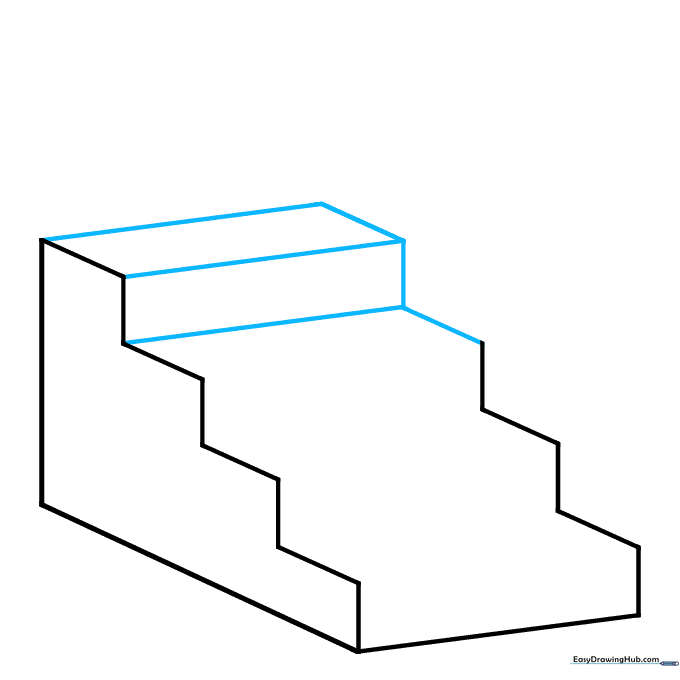
Draw a long diagonal line from the top corner and continue the parallel zig-zag. Connect the points on each side with straight lines to create a 3D, cubelike appearance. Teacher's Tip: This is where the 'magic' happens—connecting these points turns flat lines into a solid structure.
Step 5: Adding the Handrail Orb

Connect all remaining corners with straight lines. Then, draw a circle above the top step to serve as the decorative orb on the handrail. Teacher's Tip: Draw the circle lightly first; if it looks lopsided, erase and try again until it's perfectly round.
Step 6: Drawing the Handrail
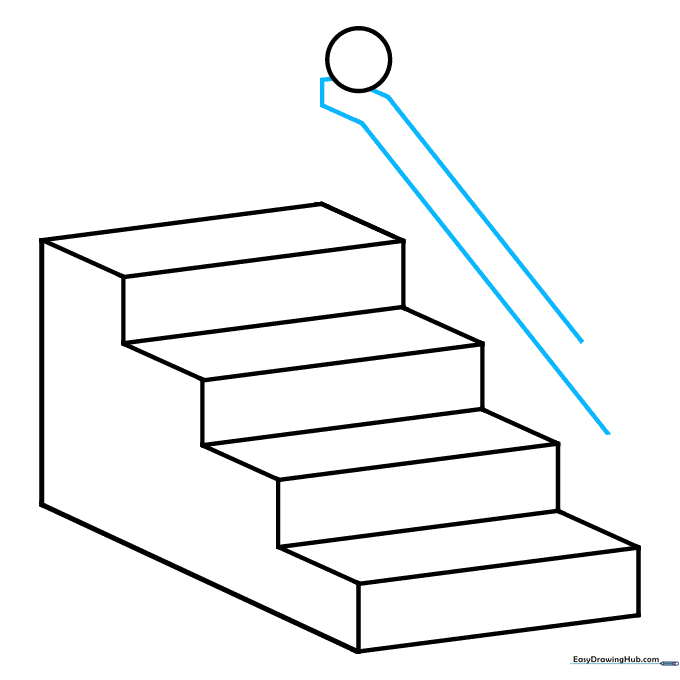
Draw two long, parallel diagonal lines for the main handrail, and add shorter lines to enclose the bent portion below the orb. Teacher's Tip: Ensure the handrail follows the same angle as your stairs to keep the drawing looking realistic.
Step 7: Adding Slats
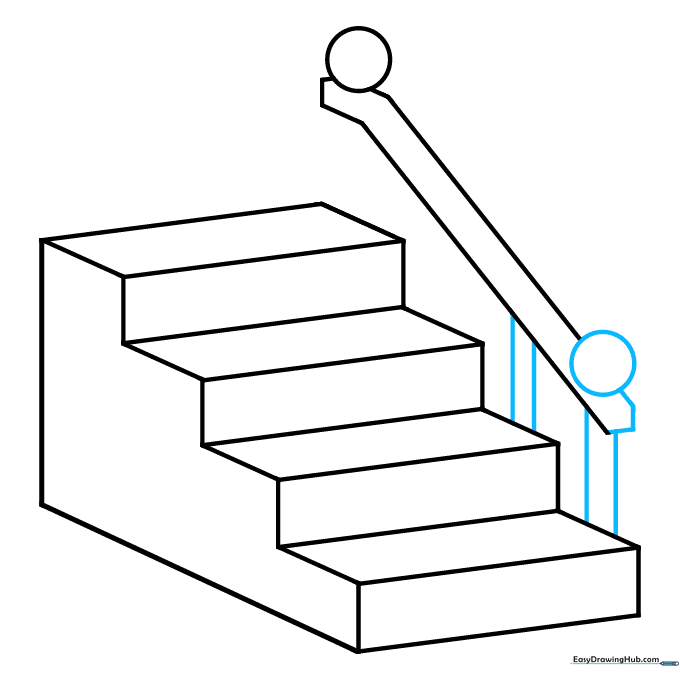
Draw a small circle at the bottom of the handrail and enclose the end with a rectangle. Then, draw pairs of vertical lines to create the slats connecting the rail to the steps. Teacher's Tip: Keep your vertical lines straight up and down—if they lean, the stairs will look like they are falling over!
Step 8: Refining the Steps
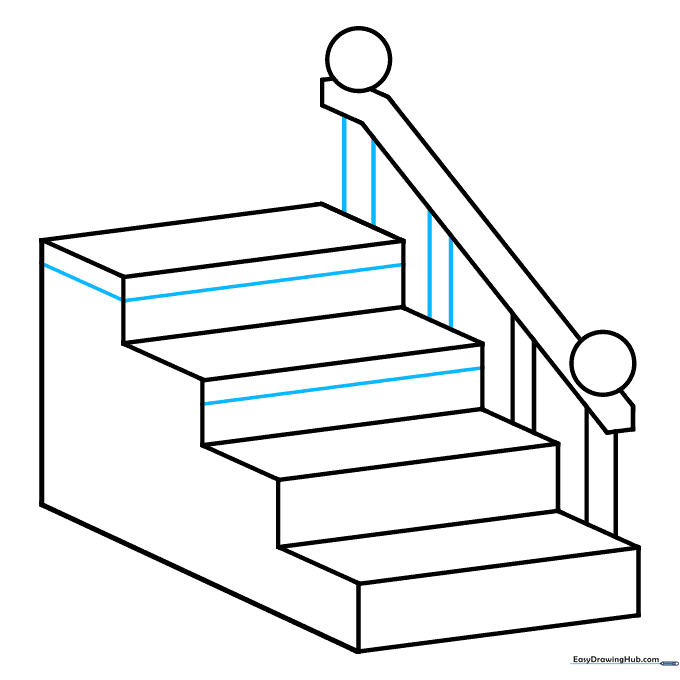
Continue drawing slats until one reaches each step. Add straight lines just below and parallel to the edge of each step to give them thickness. Teacher's Tip: Adding this 'thickness' line is a great way to make your drawing look professional and sturdy.
Step 9: Final Details
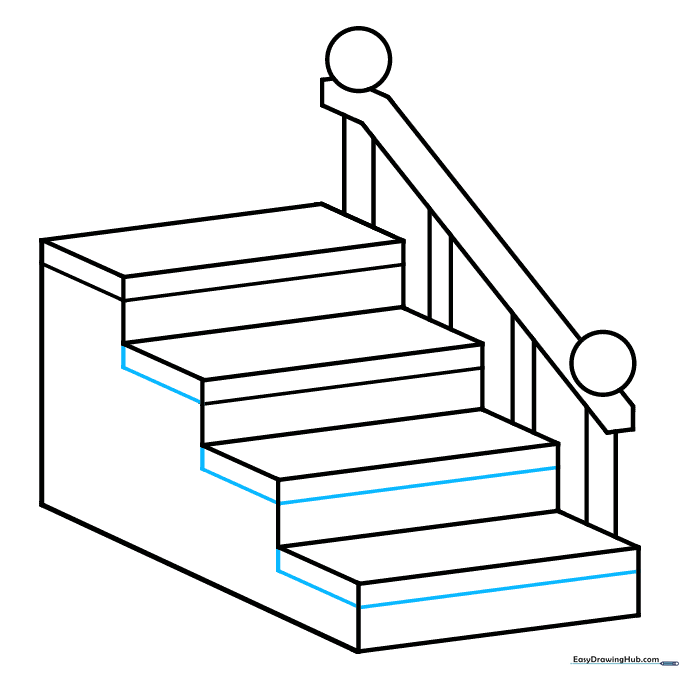
Continue drawing a straight line across each step and enclose small rectangles at the sides to finish the structure. Teacher's Tip: Take your time here; these small details are what make your staircase look realistic rather than just a cartoon shape.
Step 10: Color and Texture
Your outline is complete! Now, bring it to life with color. Use brown for a classic wooden look, gray for concrete, or get creative with patterns. Teacher's Tip: Try coloring the side of the stairs a slightly darker shade than the top to show where the shadows fall.
More Tutorials


