How to Draw a Sphynx Cat: Easy 10-Step Guide
This tutorial is perfect for young artists ages 6+ who want to capture the unique, elegant features of a Sphynx cat. You will only need a pencil, an eraser, and a piece of paper to get started. Follow these steps to build confidence in your sketching skills while creating a fun, hairless feline friend.
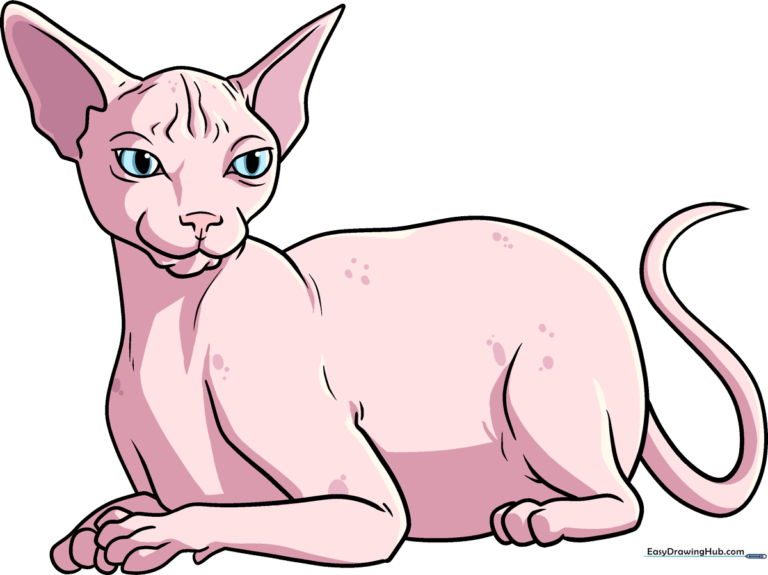
🎯 Final Result
Step-by-Step Instructions
Step 1: Sketching the Expressive Eyes

Start by drawing two double-pointed shapes for the eyes. Add a small oval inside each for the pupil. Teacher's Tip: Keep the eyes symmetrical to give your cat a friendly, alert expression.
Step 2: Shaping the Face and Ear
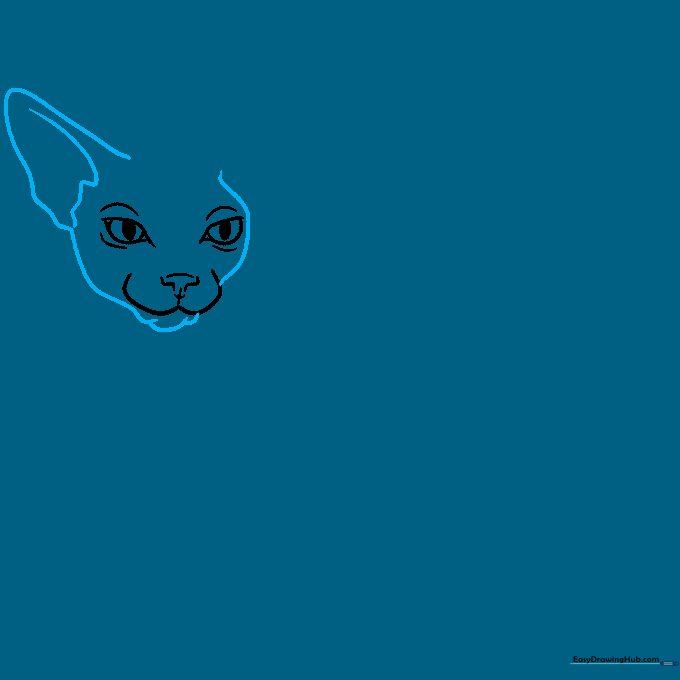
Outline the side of the face, the chin, and one large, triangular ear. Teacher's Tip: Use a long, sweeping curve for the inner ear to show depth.
Step 3: Completing the Head Outline

Draw the second ear and the top of the head. Add small, wavy lines to suggest the cat's unique skin folds. Teacher's Tip: Don't make the lines too perfect; Sphynx cats have loose, wrinkly skin!
Step 4: Sketching the Neck and Shoulders

Use smooth, curved lines to draw the neck and shoulders. Teacher's Tip: Keep the lines flowing naturally to give the cat a graceful, slender appearance.
Step 5: Drawing the First Foreleg

Sketch the front leg and paw using overlapping lines. Teacher's Tip: Notice the slight bend at the elbow; this makes the cat look like it's standing naturally.
Step 6: Adding the Second Foreleg
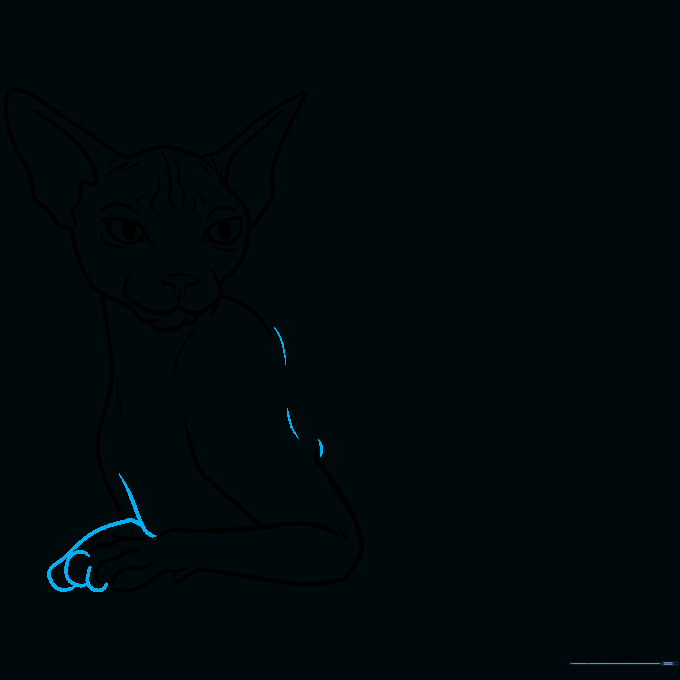
Draw the second foreleg slightly behind the first. Add short lines at the shoulder to suggest skin folds. Teacher's Tip: Use lighter pressure here to create a sense of distance.
Step 7: Outlining the Back and Hip
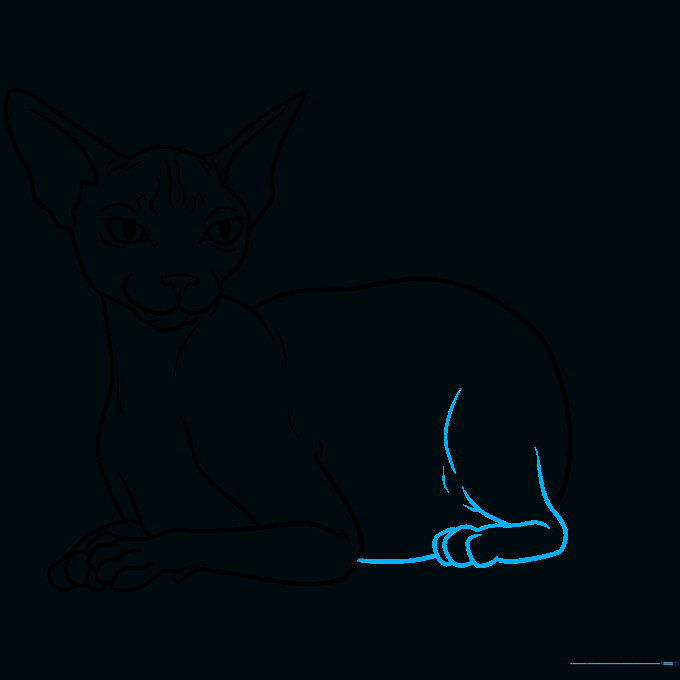
Extend a long, smooth curved line from the shoulder to form the back and hip. Teacher's Tip: Imagine the cat is stretching to get the curve just right.
Step 8: Drawing the Rear Leg

Sketch the rear leg, focusing on the hip and ankle. Teacher's Tip: Keep the paw shape simple and rounded.
Step 9: Adding the Tail
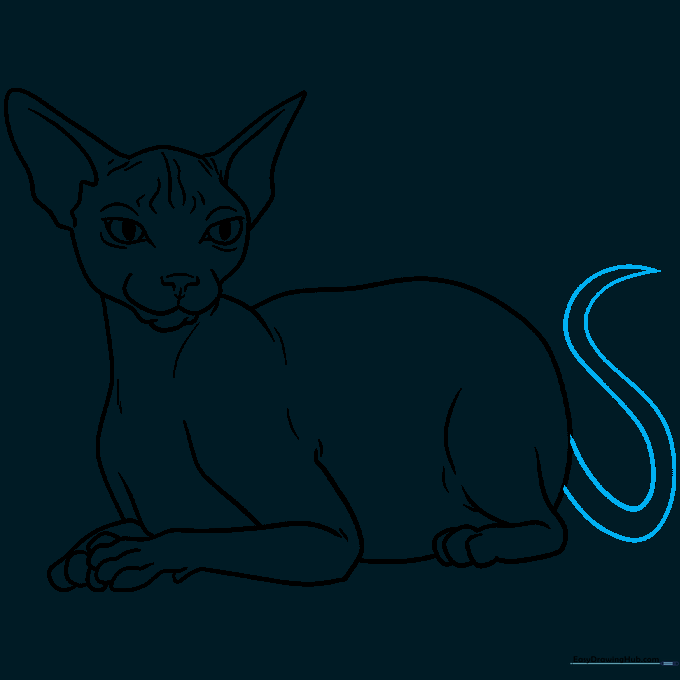
Draw a long, tapering tail extending from the hip. Teacher's Tip: Make the tail look thin and elegant to match the breed's hairless look.
Step 10: Bringing Your Cat to Life with Color
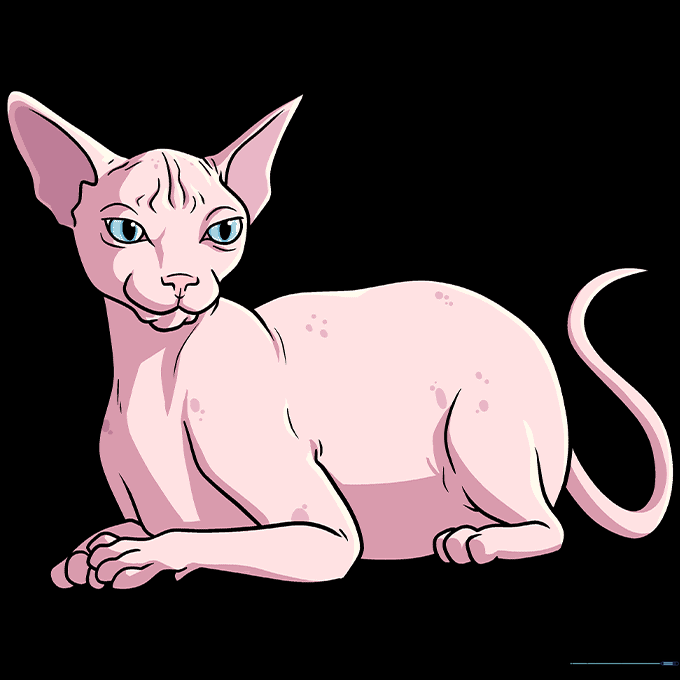
Add color to your drawing. We chose pink for the skin and blue for the eyes, but feel free to add spots or stripes! Teacher's Tip: Use light shading around the edges to give the skin a soft, realistic look.
More Tutorials


