How to Draw a Space Shuttle: Easy 10-Step Guide
Ready to blast off into creativity? This space shuttle drawing tutorial is perfect for young astronauts ages 5 and up. All you need is a pencil, paper, and an eraser to build your own orbital vehicle while practicing steady hand control.
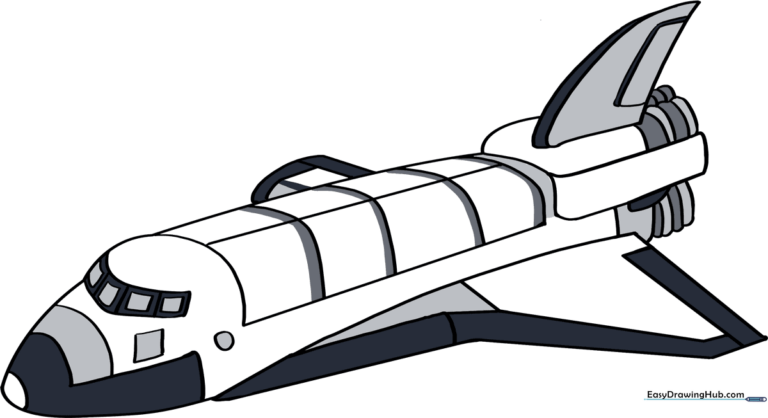
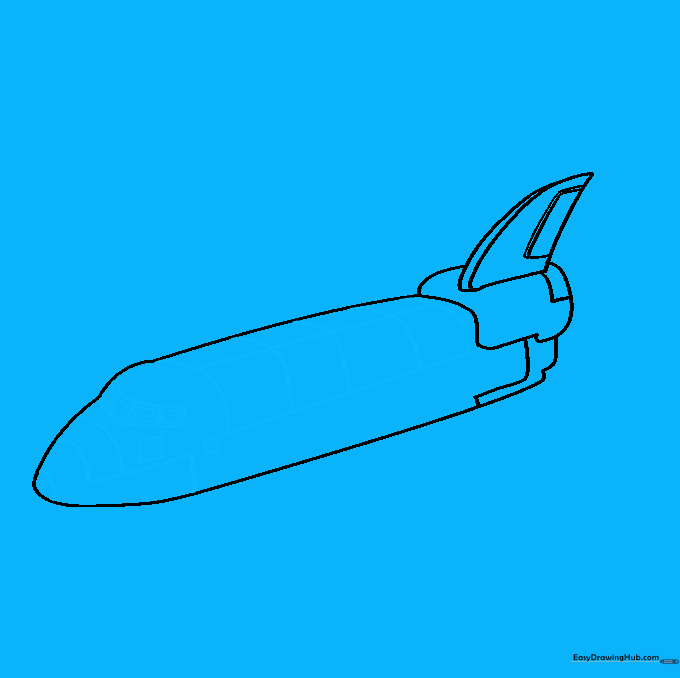
🎯 Final Result
Step-by-Step Instructions
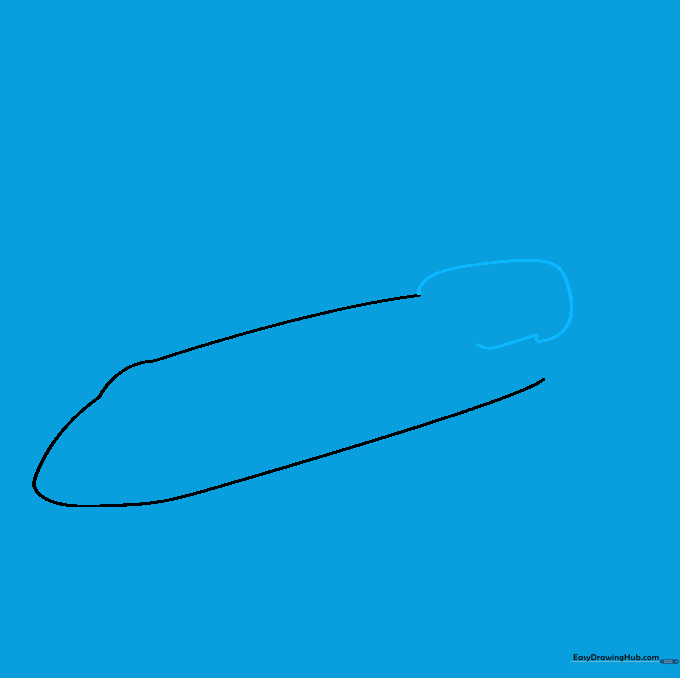
Step 1: Sketching the Cockpit

Start by drawing a curved line with a small bump for the cockpit. Teacher's Tip: Keep your pencil pressure light so you can easily erase any overlapping lines later.
Step 2: Defining the Nose Cone

Draw a matching curved line underneath to form the belly of the ship, meeting at a point to create the nose cone. Tip: Try to make the nose look sleek and aerodynamic.
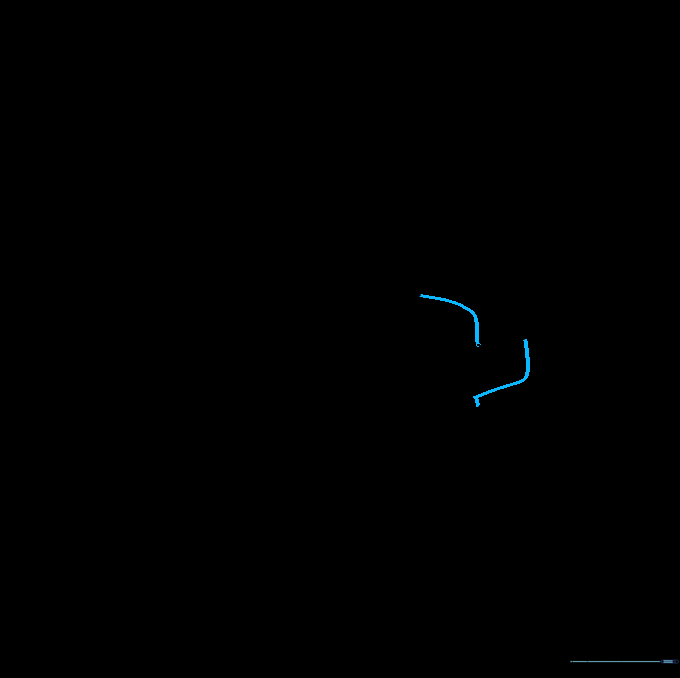
Step 3: Outlining the Fuel Tanks
Extend a long, curved line from the back of the fuselage to create the fuel tank area. Tip: Don't worry about closing the shape perfectly yet; we will refine it in the next step.
Step 4: Closing the Rear Section

Use a series of short, curved lines to enclose the back of the ship. Tip: Use quick, confident strokes to keep the lines looking smooth.
Step 5: Refining the Fuel Tank
Add a curved line to separate the fuel tank from the main body. Tip: This helps the viewer understand the different parts of the vehicle.
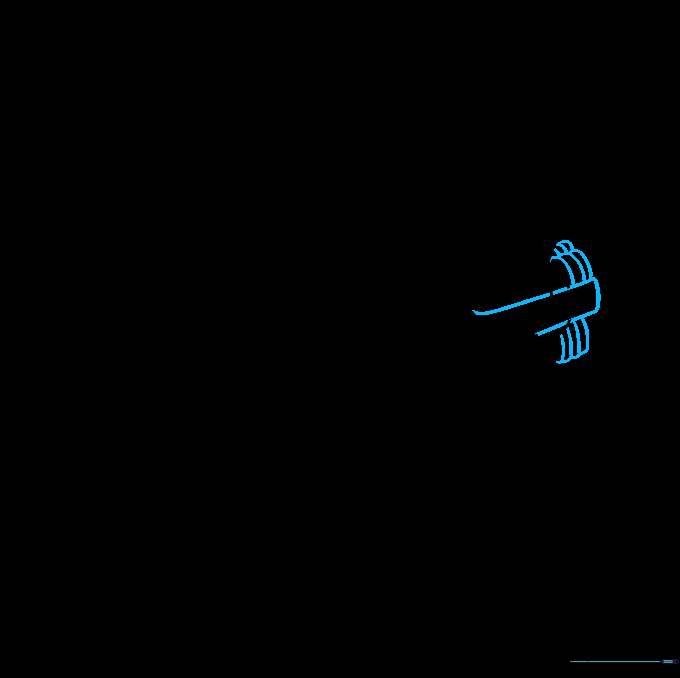
Step 6: Drawing the Stabilizer
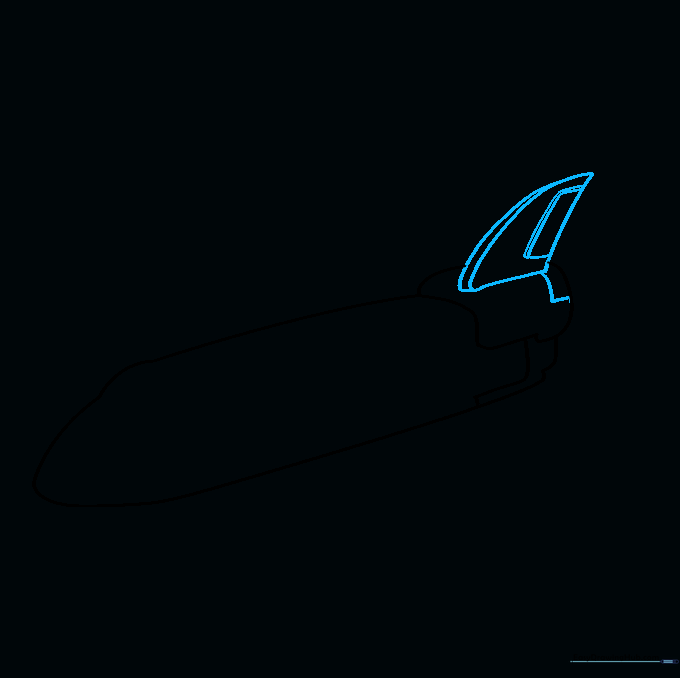
Draw a curved triangle on top of the tank for the vertical stabilizer, then add a small rectangle for the rudder. Tip: Keep the stabilizer upright to give the shuttle a balanced look.
Step 7: Adding Cockpit Windows
Draw the payload doors on top and a series of small squares for the cockpit windows. Tip: Make the windows uniform in size to keep the drawing looking professional.
Step 8: Sketching the Wings
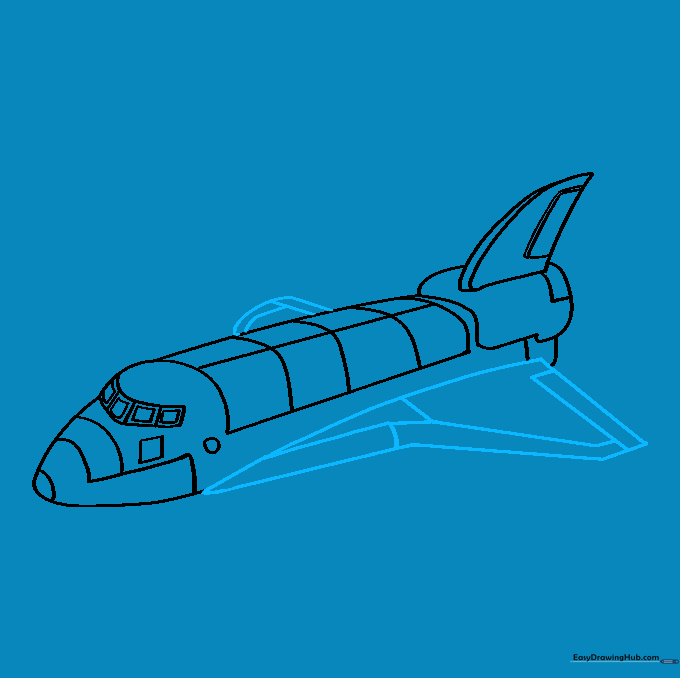
Draw the triangular wings on the side of the fuselage. Tip: Use a ruler if you want perfectly straight lines, or go freehand for a more organic, artistic feel.
Step 9: Adding Engine Nozzles
Finish the back with engine nozzles using layered curved lines. Tip: Think of these as small circles or ovals stacked together to show depth.
Step 10: Final Touches and Coloring
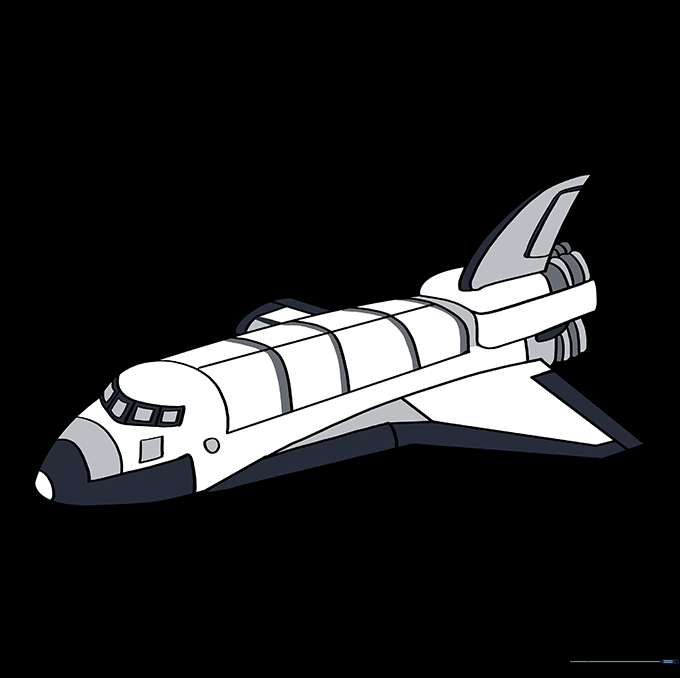
Erase any remaining guide lines and color your shuttle. Tip: Use white for the body and black for the heat tiles to make it look realistic!
More Tutorials


