How to Draw a Snowflake: Easy 10-Step Guide for Kids
Capture the magic of winter with this simple snowflake drawing tutorial, perfect for artists ages 5 and up. You only need a pencil, an eraser, and a piece of paper to get started. Follow these steps to master the symmetry of ice crystals and create your own unique winter masterpiece.
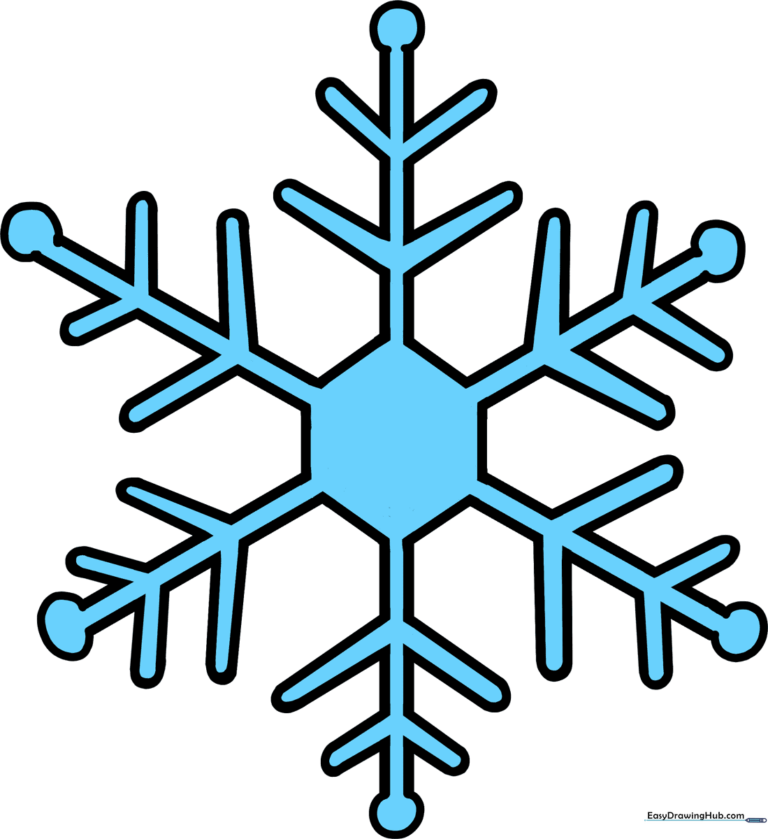
🎯 Final Result
Step-by-Step Instructions
Step 1: Establishing the Central Axis

Draw two long, parallel vertical lines to create the central shaft. Teacher's Tip: Use a ruler if you want perfect symmetry, but drawing freehand helps develop steady hand control!
Step 2: Adding Diagonal Guides

Draw another set of parallel lines crossing the first set at a diagonal angle. Tip: Imagine you are drawing a large 'X' over your vertical lines to keep the spacing even.
Step 3: Creating Six Arms
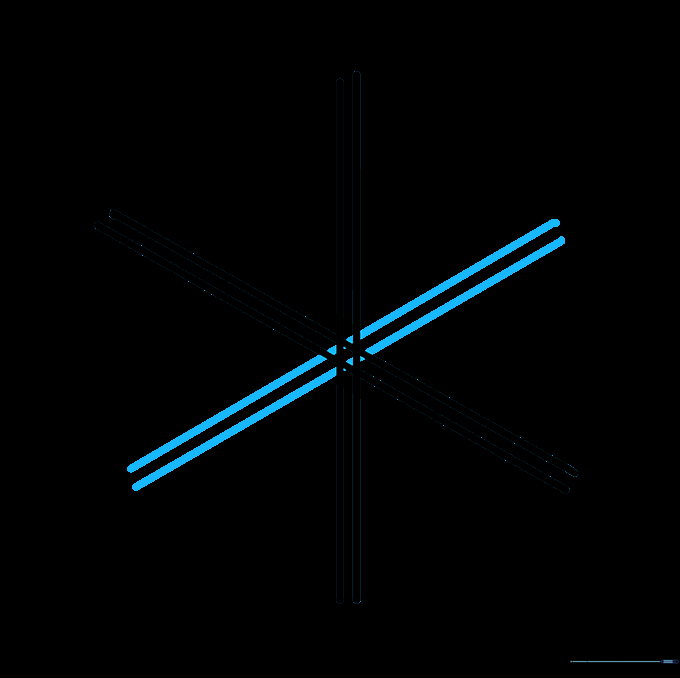
Add a third set of parallel lines crossing through the center point. Now you have six arms! Tip: Keep your pencil strokes light so you can easily erase the center later.
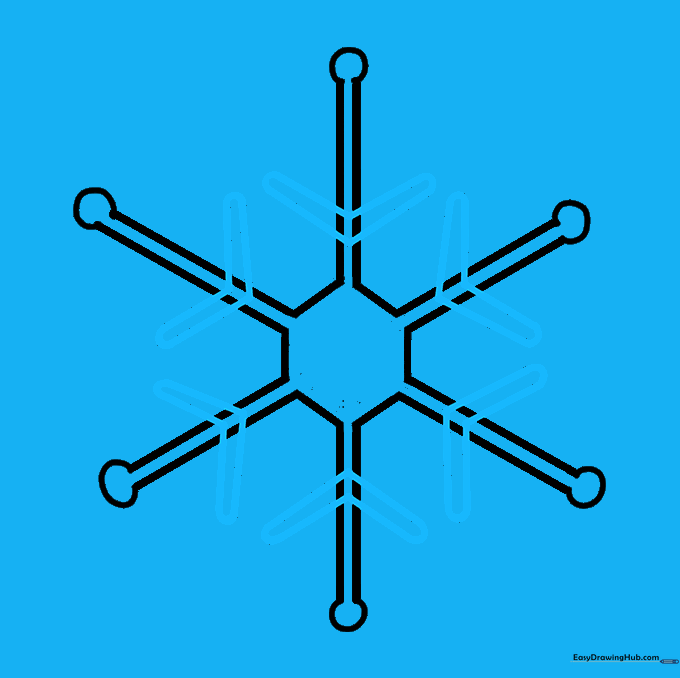
Step 4: Drawing the Hexagonal Core

Connect the lines near the center to form a small hexagon. Tip: Ensure the corners of the hexagon align with your snowflake arms for a balanced look.
Step 5: Cleaning the Center

Carefully erase the guide lines inside the hexagon. Tip: Use a clean eraser and gentle pressure to avoid smudging your paper.
Step 6: Adding End Caps

Draw a small circle at the end of each of the six arms. Tip: Try to make these circles the same size to keep your snowflake looking symmetrical.
Step 7: Creating Boomerang Details
Extend two sets of parallel lines from each arm at a diagonal, enclosing them with a curved line to create a boomerang shape. Tip: This is where your snowflake starts to look intricate!
Step 8: Adding Inner Details

Add a smaller boomerang shape between the first one and the circle at the tip of each arm. Tip: Focus on keeping the spacing consistent between the shapes.
Step 9: Final Cleanup
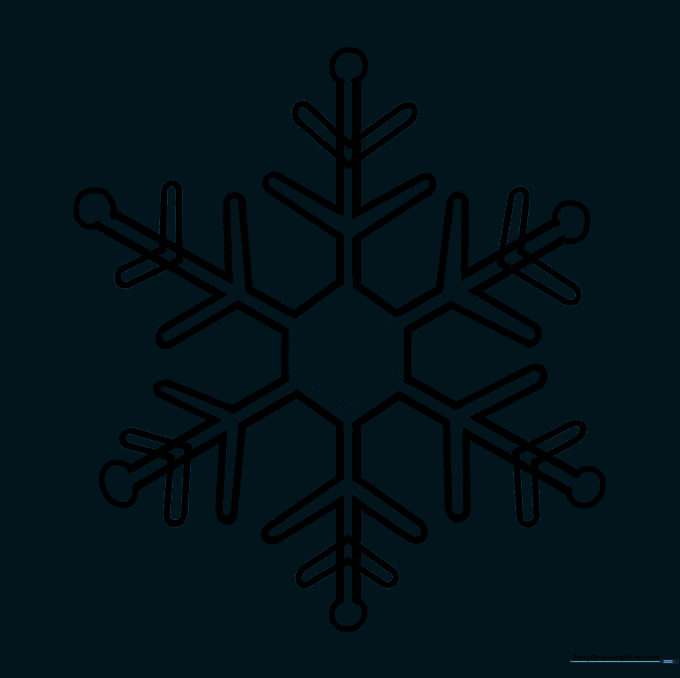
Erase any remaining guide lines to reveal your clean snowflake outline. Tip: Use a soft brush or your hand to gently sweep away eraser crumbs.
Step 10: Adding Color

Bring your snowflake to life with color! While snow is white, ice crystals often reflect cool blues and purples. Tip: Try using a light blue marker or colored pencil to give it a frosty glow.
More Tutorials


