How to Draw a Skunk: Easy 10-Step Cartoon Guide
Ready to bring a friendly forest friend to life? This tutorial is perfect for young artists ages 5 and up. You will only need a pencil, an eraser, and some paper to master this adorable character while building confidence in your sketching skills.
🎯 Final Result

Step-by-Step Instructions
Step 1: Sketching the Head Base

Draw a light circle to serve as the head. Teacher's Tip: Keep this circle roughly the size of a golf ball; drawing it lightly makes it much easier to clean up your sketch later.
Step 2: Defining the Facial Features

Use curved lines to outline the ears, cheeks, nose, and mouth. Teacher's Tip: Use short, quick strokes to keep the lines looking organic and soft rather than stiff.
Step 3: Cleaning the Guide Lines

Carefully erase the original circle guide lines. Teacher's Tip: Hold your eraser flat against the paper to avoid smudging your hard work.
Step 4: Drawing the Signature Stripe

Add the iconic skunk stripe using jagged, pointed lines across the face. Teacher's Tip: Vary the length of your jagged lines to make the fur look more natural and textured.
Step 5: Sketching the Arms
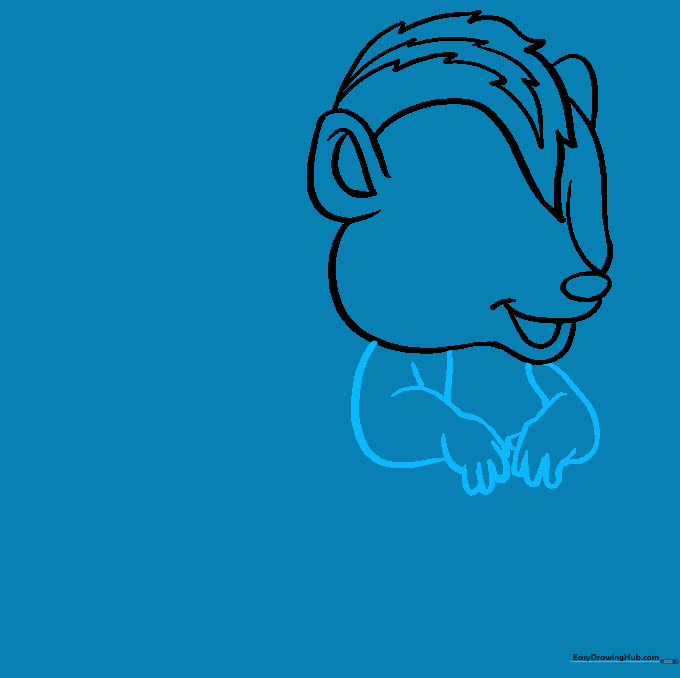
Draw the bent forearms and small 'U' shaped fingers. Teacher's Tip: Keep the arms close to the body to make the skunk look compact and cute.
Step 6: Forming the Underbelly

Extend curved lines downward to create the belly and hip. Teacher's Tip: Think of this as drawing a soft, rounded pear shape for the body.
Step 7: Adding Legs and Feet

Draw the back, legs, and feet using 'U' and 'C' shaped lines. Teacher's Tip: Use overlapping lines for the toes to give them a 3D, layered appearance.
Step 8: Drawing the Bushy Tail

Add a large, bushy tail with jagged lines and a central stripe. Teacher's Tip: Make the tail nice and big—it's the most recognizable part of a skunk!
Step 9: Final Facial Details

Add the eyes, pupils, and tongue. Teacher's Tip: When shading the pupils, leave a tiny white dot uncolored to create a 'sparkle' effect in the eyes.
Step 10: Bringing Your Skunk to Life with Color

Color your skunk using black and white. Teacher's Tip: Use a light grey pencil to shade the white areas, which adds depth and makes the drawing look professional.
More Tutorials


